How would you seal these wood blanks?!

UKworkshop.co.uk

Help Support UKworkshop.co.uk:

This site may earn a commission from merchant affiliate links, including eBay, Amazon, and others.

BigDougal

Member
Joined
5 Mar 2017
Messages
14
Reaction score
0
Location
Highlands
Hi folks

I'm still trying to get to grips with preparing blanks. I've turned these pieces of elm into manageable pieces but I'm not sure how to seal them. Any ideas?

I've been sealing the ones I cut up with the chain saw with a plasticy paint but I'm reluctant to do that with these as I don't want to ruin my tools.

Cheers!
 

Attachments

  • IMG_0302.JPG
    IMG_0302.JPG
    131.3 KB · Views: 1,090
  • IMG_0305.JPG
    IMG_0305.JPG
    144.4 KB · Views: 1,089
  • IMG_0306.JPG
    IMG_0306.JPG
    156.8 KB · Views: 1,089
  • IMG_0308.JPG
    IMG_0308.JPG
    157.7 KB · Views: 1,089
  • IMG_0309.JPG
    IMG_0309.JPG
    145.6 KB · Views: 1,089
Any blanks that I rough turn I will seal the outside only and store them undercover in stick I am not saying that I do not loose any but I do have a good success rate of drying without splitting. Some woods will split even if you do seal but that is the chance you take.
 
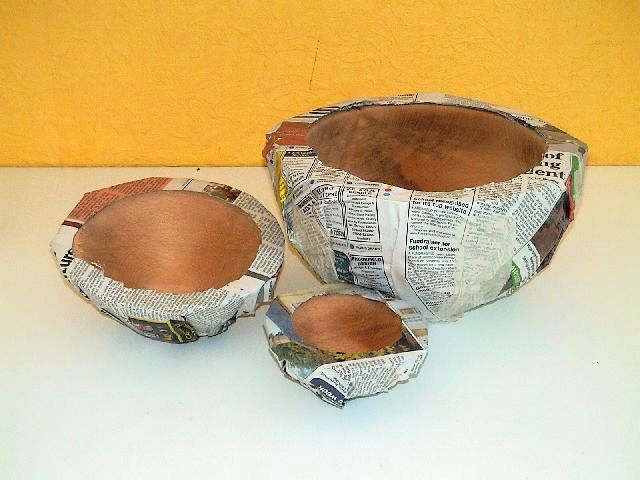
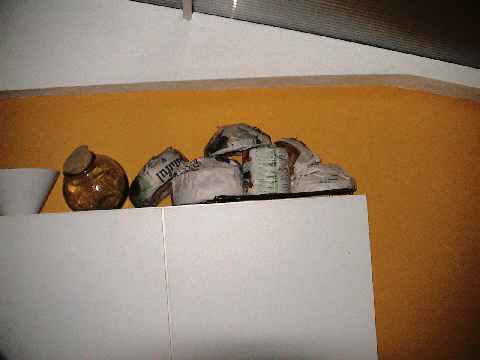
You look like you're half way through rough turning them to be honest. A frequently used technique for green bowl blanks is to rough turn the wood when still wet including the hollowing out of the middle. You turn the rough profile you want on the outside and create a chucking point and then pull most of the middle out. The idea is you leave the wall thickness with enough material still in place that later when it's dry (in about 6 months) you can re turn it and remove any of the movement that has happened in the interim. So leave the wall pretty thick, a good inch on smaller bowls and larger on bigger jobs. Your Elm there looks like it will be about 8-10 inches finished diameter so a wall thickness of about an inch or so is fine. You then seal the outside surface with pva/paint/wax whatever you have basically and many also wrap in news paper or sacking to keep a moist microclimate inside the packaging. The idea is to speed up the drying by making the whole blank thinner but at the same time, slow down the remaining moisture loss to avoid cracking. As Dalboy says, it doesn't always work but if you do enough, some will survive and then in about 6 months of dry storage on a garage shelf somewhere (out of the sun) you can remount and finish them. At this time the wood will have assumed an oval shape as it shrinks more across the grain than along it so be careful when you remount it as it will need to be re-trued and particularly the chucking point will need to be re-trued for safe work holding. Lastly, avoid polythene as a storage medium because the blanks will almost certainly rot in that environment. At the start, check them frequently for mildew etc
 
It's a long time since I did it, but I've had success by packing the rough turnings into a large cardboard carton, filled with shavings from the lathe and leaving it in a corner of the workshop for a few months.
 
I generally rough turn the outisde and inside to approx a wall thickness of 10% the diameter and then tightly wrap clingfilm or pallet wrap (by preference because it tends to be a bit thicker and stronger) around it.
Put enough layers of wrap so that you can make a hole in the middle to let moisture from inside the bowl escape. Then put some shavings inside the hole and throw on a pile under the lathe or in a corner where they usually get covered in shavings from turning.
Leave for some time, checking that the outside isn't getting mouldy under the wrap. After a while remove the shavings and don't replace them. Keep checking and when the moisture content is low enough I turn again.
 
BigDougal":2ommtx2v said:
.....I'm still trying to get to grips with preparing blanks. I've turned these pieces of elm into manageable pieces but I'm not sure how to seal them. Any ideas?

...

Sorry to be a Jonah but in my experience if they are anything above about 15% moisture and you leave them in that Turned state with solid form then the chances of you achieving anything usable at the end of the drying period are remote.


Either leave in split log form, over length and Ends sealed well.
Or if you must reduce the bulk and speed up the drying then rough turn as others have said to a wall thickness of about 10% of diameter or a little over, (they will go oval some woods move more) Keep the wall thickness as even as possible including the base area.

Give some though as to how you are going to re-mount them when holding spigot etc. is distorted.


I get best results by covering the outside with several layers of newspaper and storing inverted on a rack or spacing sticks but individual drying locations and conditions vary so you may find something else works better for you.

DSC02354.JPG

DSC01733.JPG
 
As all have said above, but key is achieving a consistent wall thickness since then the shrinkage will be more consistent and thus less likely to exert different 'pressures' on the wood to help avoid cracking.
Many also round over the top edge slightly, both inside and out, to avoid having a 'sharp' edge.
A sharp edge is thought to increase the chance of cracking.

Cheers

Keith
 

Latest posts

Back
Top