How would I mark out the shape of this frame?

UKworkshop.co.uk

Help Support UKworkshop.co.uk:

This site may earn a commission from merchant affiliate links, including eBay, Amazon, and others.

MarkAW

Established Member
Joined
21 Aug 2020
Messages
210
Reaction score
139
Location
Worcestershire
I found an idea I want to use on some playhouse window frames I have made.

I'm fine cutting the shape on the bandsaw, what I struggle with is marking out. Especially the top and bottom sections. It feels like there's a better way to do it than freehand which often looks completely off. I have a large compass etc. Is there some sort of trick I'm missing?

This is the frame I want to emulate (sans shutters)
chalet-in-legno-finestra-e97701.jpg

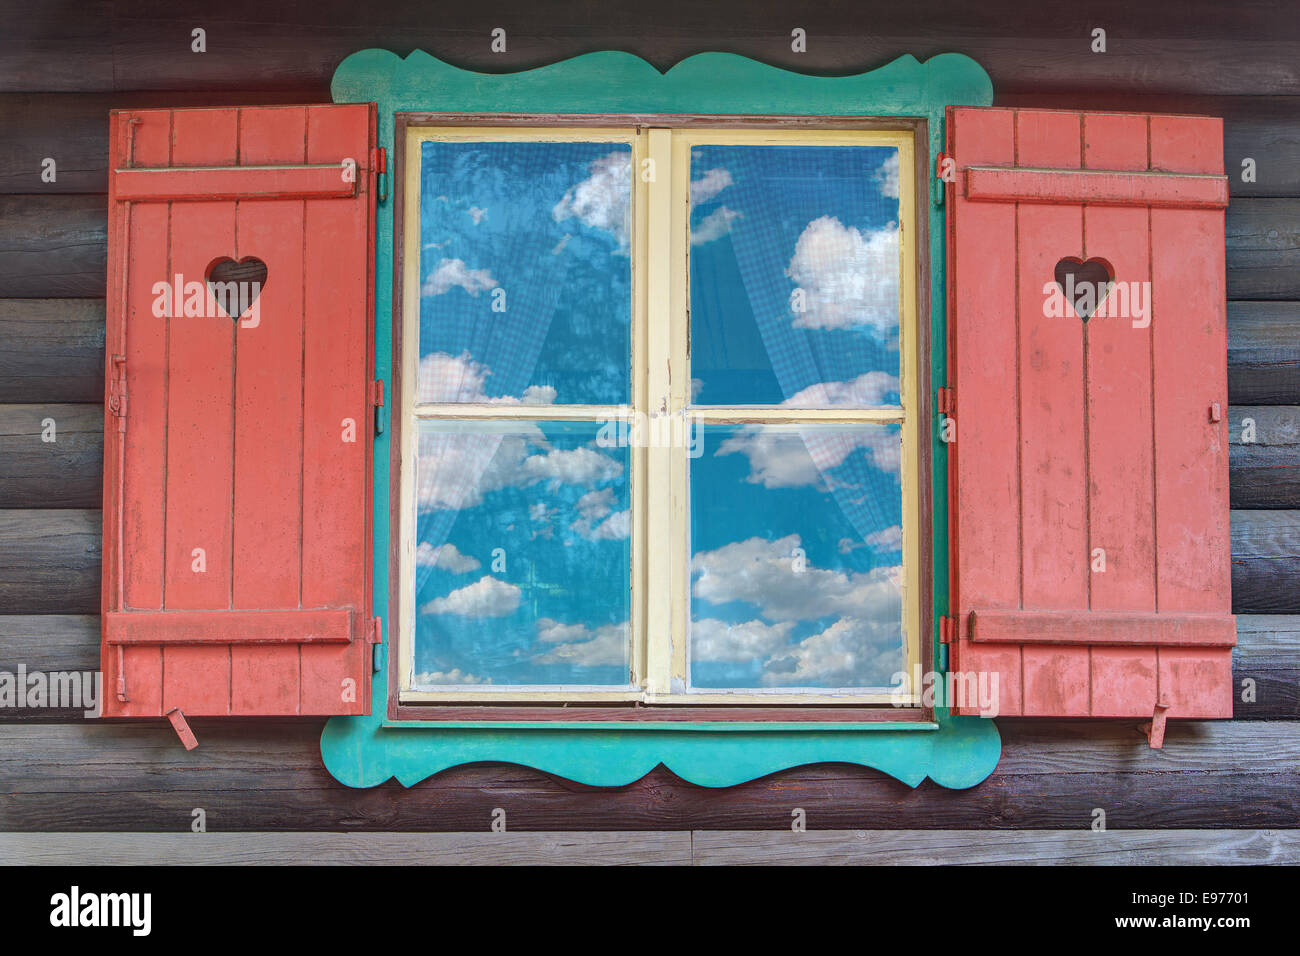
I have made my frame in 4 pieces (with half lap joints as it's poorly dimensioned timber to go for a bridle joint etc). It's not yet permanently assembled
PXL_20240403_142132895.jpg
 
As it's all symmetrical, make a stencil from some stiff card.
The stencil should only be one half of the overall form. Then, by the use
of a centre line you flip the stencil over to mirror the exact shape
on the other side. If that makes sense :unsure: :)
 
Yeah, that does, I thought of something similar for when cutting the wood, it's more the proportions and curves I struggle with, but that's given me an idea: Refining the shape on card with scissors could be easier.
 
It looks like the corners are filled with a circle which is only half cut out. I would start with marking this detail in each corner with a compass. A flattish ogee seems to be the other element, which is repeated in mirror image at the central point of the frame. It should be easy enough to draw this freehand and fabricate a template in hardboard or thin MDF to this profile.

You can either use this to mark out the profile directly on the frame, or use it to make a full sized template to use with a router to cut the majority of the shape on each side.
 
it's more the proportions and curves I struggle with,

If you like the one above, print it out and enlarge the print out on a photocopier until it is the same size as your own.

Overlay the unenlarged print out with 1mm squared graph paper. Transfer the shape to 5mm squared graph paper

Read up on a pantograph drawing tool.
 
When I do something like this, I make am A3 print and work out all the proportions with dividers.

Then it should just scale up to your frame size if the proportions are the same, although it looks as though the frame you have made does not share the same proportions as the one in the photograph, which is just off a square by a tad.
 
...it looks as though the frame you have made does not share the same proportions as the one in the photograph

Any image manipulation program (e.g. gimp, irfanview) should be able to scale in X and Y independently, so you could set the proportions as a first operation and then do an overall rescale to set the size.
 
Thanks for the advice all. I was able to do it with a cardboard template in the end.
All good suggestions though. I'll bear in mind for future projects.

I'll post a pic of the complete article when I get round to finishing it, so far only the first piece cut as a test. Looks good. I find it difficult to find enough time to get out to the workshop with little kids.
 
PXL_20240409_174845487.jpg

I finished them. I also applied the pattern to the fascia and porch. Replace rotten loglap at the bottom and a bit of paint and it should look good.

The play house was second hand. Seems to be 'home made' as all the timber is oversized and the windows were just placed onto the back of the cladding and some offcuts tacked in to hold them in place. The rotten roof was replaced too
 
Back
Top