Hand cut dovetail box

UKworkshop.co.uk

Help Support UKworkshop.co.uk:

This site may earn a commission from merchant affiliate links, including eBay, Amazon, and others.

Clockie

Established Member
Joined
14 Feb 2012
Messages
130
Reaction score
5
Location
Ammanford
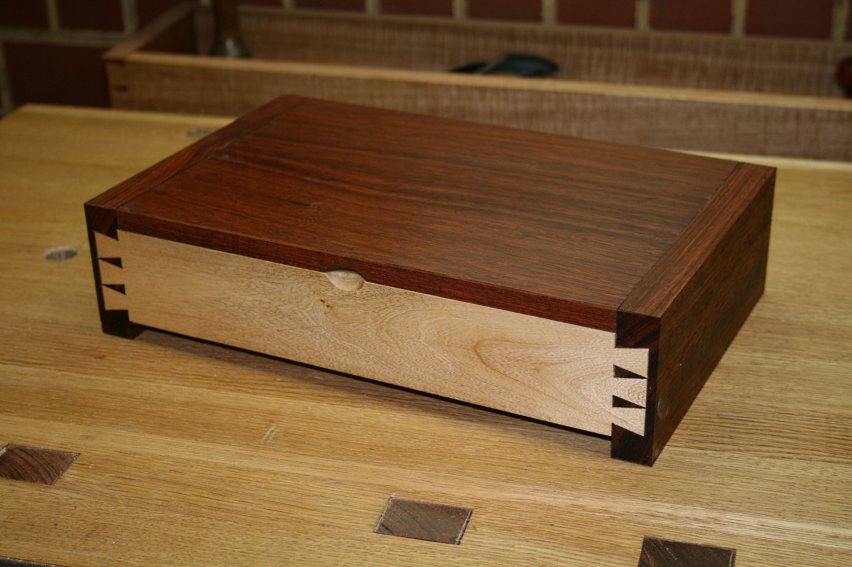
When making a dovetail box 200mm x 125mm x 100mm (lxwxh), which board should be to the front, tail or pin board. I have made both, they all look ok to me. So what would be the more traditional look.
thanks,
Jestyn
 
well, I don't cut dovetails, but I do use a rebated joint on boxes, which has a similar look in terms of boards. (well, sort of :))

I would put the tail board on the front and back, and the pin board on the sides. This is so that you have the continuous board front and back, rather than it being framed by end grain.
 
I just made a box about that size and I put the tails on the front. I will admit though that there was no particular reason for that; in fact I didn't even think about it, I just automatically did it that way.
 
I'd put the tails on the longer boards, unless there's a specific reason to do otherwise. (Eg if you were making a wide shallow drawer or hanging a box on the wall as a cupboard in 'landscape' orientation.)
 
the standard way seems to be cutting the tails on the long pieces, it really depends what aestetics you are going for, 90% of the time I prefer it that way.
 
If you are after a traditional look, there's another thing to bear in mind. It's trad/normal to have all the tails complete and symmetrical, with half pins at the top and bottom of the box sides. You may come across examples (eg on YouTube) with the pins complete and half tails at the edges of the boards. Sometimes this is because a jig has been used for a machine cut dovetail and the jig doesn't allow the proper spacing for the width of the board, but it can also be a beginner's mistake.
 
Clockie":1wmy4euk said:
When making a dovetail box, which board should be to the front, tail or pin board.
Pins are pointy, and should point in the direction you'll be pulling them.
You open a drawer by pulling on the front, so pins on the front board.

That's how I remember it. So far it's worked.
I now just need to get the hang of making them look tidy!!
 
AndyT":1v9ut9ab said:
....... It's trad/normal to have all the tails complete and symmetrical, with half pins at the top and bottom of the box sides. .....
Not really - traditionally you get every variation possible!
"Half pins" is misleading and many modern makers make the mistake of reading that literally and do very slender and fragile half pins, top and bottom.
Traditionally they are usually much bigger, but there isn't a rule.
You can do half tails instead. Depends on what you are making and the other details.
 
Direction of tails/pins is only important on a carcase handing on a wall, or a drawer. Do what looks best to you with a box.

You consider using a full blind (secret( dovetail, but sort of spoils the fun if you want to show off your dovetails. :D

Or you could do half blind dovetails as well. This is the look ...

Veritas-Chisel-Review-html-m17c99c48.jpg


Regards from Perth

Derek
 
Just a suggestion, why not have a go at hidden mitred dovetails? They aren’t that difficult to cut and in many ways are easier IMO to get good tight joints with than through dovetails on small projects. I’ve been meaning to put together a thread on how I do them as they always seem to be considered ‘difficult’.

You in essence cut both sides like a half blind dovetail, the actual fit of the dovetails is far less critical as they are never seen. The ‘difficult’ bit is making the mitres on the sides and outside lip. The sides are done with a 45 degree template and a chisel. You can buy old metal ones, or make one out of wood very simply.

The bottom lip is made by a plane running on a wooden jig that tilts it at 45 degrees (flat board thicker than the plane with a 45 degree chamfer) . I use a bull nose plane, large shoulder plane or any plane with the blade that can come to the edge of the plane. To allow the plane to sit on the jig and only plane the bottom lip and not the jig you stick on the bottom (I find it works perfectly) a couple of pieces of the flat thin hard plastic (Xmas card box lid for example) either side of the blade leaving just enough of the sole uncovered to plane the lip. Plastic is brilliant but a sliver of wood works just as well, or a few layers of insulation tape.
 
Jacob":wxavuu05 said:
"Half pins" is misleading and many modern makers make the mistake of reading that literally and do very slender and fragile half pins, top and bottom.
Traditionally they are usually much bigger, but there isn't a rule.
I was always taught to make the half pin at the top and bottom of a box/drawer half the thickness of the timber plus a smidge; so if say it was a box with 10mm thick sides the 'half-pin' would be 6 or even 7mm, but you're correct Jacob, there is no rule set in stone - Rob
 
I should like to thank everyone for their replies and information. Secret dovetail mitre will not be an option, it will be a race between them and the arrival of the grim ripper. I once saw them being done at a demonstration many moons ago. I didn't think anybody did them these days.
 
For a box where it doesn’t need to resist pulling or pushing in a particular way then I think aesthetics should be your guide - whatever looks best to you. For the toy box I did for my little girl I went with tails on the long edges, pins on the short. It worked ok although I do think that the final assembly is a bit trickier this way around. I also made the “half pins” at the top and bottom considerably beefier than the regular pins elsewhere in the joints:
bFhpLwX.jpg

C81OHgP.jpg
 
Back
Top