Drawer runners and bottoms

UKworkshop.co.uk

Help Support UKworkshop.co.uk:

This site may earn a commission from merchant affiliate links, including eBay, Amazon, and others.

Phlebas

Burbling Pixie
Joined
16 May 2019
Messages
144
Reaction score
6
Location
The debatable lands
Some questions.

I have this secrétaire à abattant. Or fall front desk, as you will.
Secrétaire à abattant.jpg

A runner for one of the internal drawers has been missing for some time. Luckily the solid wood trim part at the front has also been lurking about in one of the other drawers for a similar amount of time. It is at the bottom of the photo’.
Missing drawer runner.jpg

So, no problems in planing a suitable piece of wood as a replacement, after having replaced the trim piece. But…

Should it just be a push fit? Or should I glue it (front, say, 100mm only – obviously the housing is cross grain). I don’t suppose it really matters, but I would like to know what would have traditionally have been done. No trace of glue in the housing, which might imply it was just pushed in. But, then again, that is why it might have fallen out.

And onwards.

Looking at the drawer in question, the base is in grooves, nailed at the rear. The front has shrunk back. Quite a lot as you can see. So far so good. Remove the nails, push it forward, re-nail and the job is done.
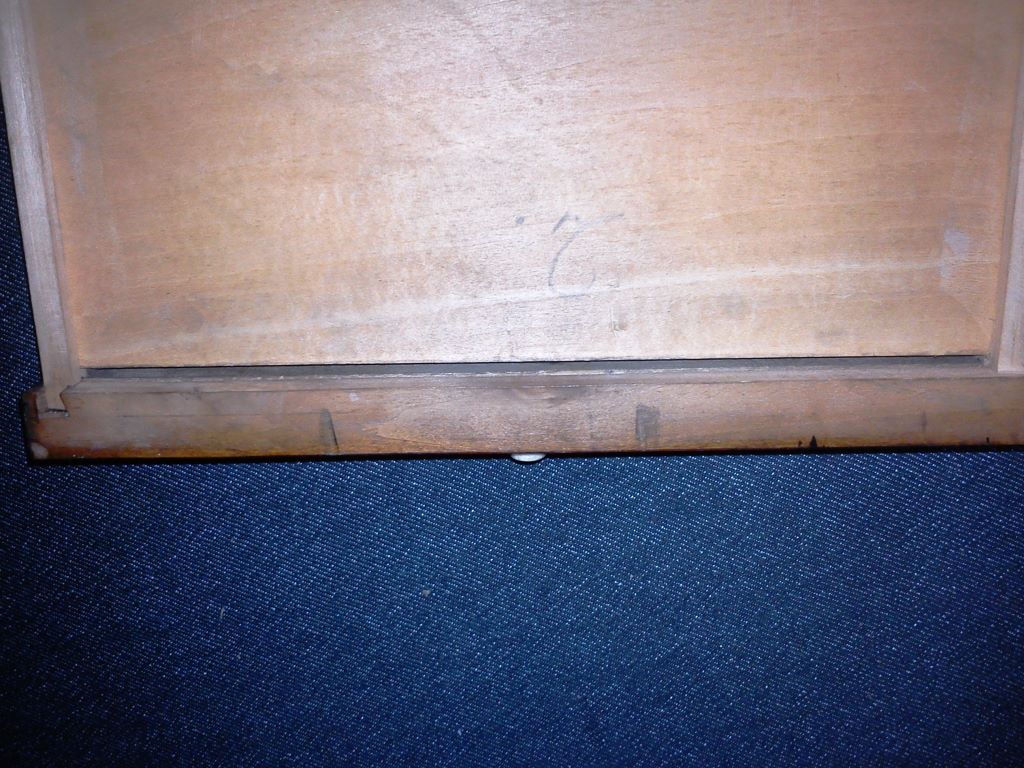
Drawer bottom shrinkage.jpg

But if you look at the back of the drawer bottom, it is cut practically flush with the rear wall of the drawer. As I measure it the bottom sheet needs to come forwards about 8mm. The rear wall of the drawer is about 9mm. So,the resulting overlap of 1mm cannot realistically be nailed into.
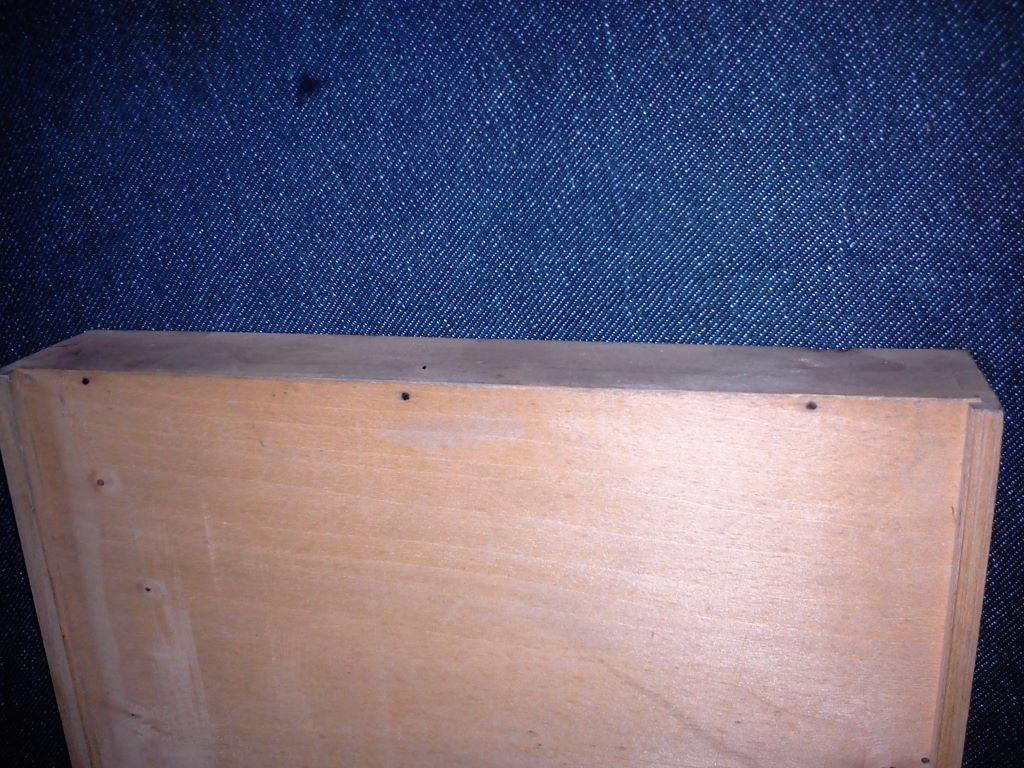
Drawer bottom rear.jpg

Two things occur to me –

Attach a fillet (quadrant or similar) to the interior back of the drawer to nail up into (too many prepositions there, I know) through the existing repositioned drawer bottom. Or,

Remove the existing base and edge joint on a narrow strip to make it deeper.

The latter seems more faff, but, curiously, more satisfactory.

Or should I not be messing around with it at all, albeit I am told the piece is of no particular intrinsic value these days.

Any views, chaps?
 

Attachments

  • Secrétaire à abattant.jpg
    Secrétaire à abattant.jpg
    104.7 KB · Views: 171
  • Missing drawer runner.jpg
    Missing drawer runner.jpg
    109 KB · Views: 213
  • Drawer bottom shrinkage.jpg
    Drawer bottom shrinkage.jpg
    173.7 KB · Views: 355
  • Drawer bottom rear.jpg
    Drawer bottom rear.jpg
    181 KB · Views: 173
Trad methods for the runner are designed to allow for the vertical grain of the side to expand or contract against the long grain of the runner. So you are right not to just glue it. A common design is to plough a groove across the back of the visible side to side part, and cut stub tenons on the ends of the runners. These are glued. To support the far ends of the runners, a single screw in an oversized hole or slot. Or in poorer work a soft wire nail which will bend if it needs to.

If there is a cross piece at the back, the far ends of the runners can be tenoned in but left dry. The joint can open up a bit but still hold.

As for the drawer I think it shows poor practice by the maker. They've fitted the bottom in the right way but trimmed too much off, maybe in a mistaken attempt to make it neater. I'd do what you describe and edge joint a bit more bottom on. It might be easier and stronger to do this on the front.

Nails at the back aren't a great idea, as your drawer shows. If the bottom is too flimsy without it, some screws in slots, not tightened all the way, could be better.
 
Thanks AndyT.

No signs of any stub tenons on the runners (they would have to be tiny). So I've replaced the runner with an aged piece of pine as a push fit, similar to the ones that are still in place. I suppose, if I think about it, a softer runner than the drawer sides that can easily be replaced might make some sort of sense.

You confirm what I was thinking about the drawer bottoms, although I will edge joint on at the rear as the front is (hand)bevelled to fit the slot.

Now all I need to do is the get the nails out without chewing up the existing base, and finding some wood that looks similar.

And, having looked at all the drawers now (all the same fault), repeat a dozen times.

Sigh.
 
If all the drawers need attention, might it be possible to sacrifice one original bottom as a donor of strips for the others? Leaving you one drawer needing a whole replacement, which could be plywood. That might be easier.

It's an "interesting" looking piece for sure - I guess it's lucky to have found an owner who likes it enough to care!
 
Hi Phlebas,
I worked for many years on Biedermeier furniture and the construction is largely the same as British pieces. While I have from time to time come across runners and other components that have or appear to have had no glue your runner should be glued in place using either hide or fish glue and possibly fixed with a couple of pins.
With continental cabinets they had a tendency to make the drawers a tight fit with no or little room at the back so the drawer base board would be flush with the outside edge of the back of the drawer. This causes big problems once the carcass has shrunk, sometimes pushing the drawer front forward by as much as a quarter of an inch! British cabinet makers tended to leave an extra 1/2" or so at the back to allow for this shrinkage also leaving the baseboard sticking out a 1/4" out the back and the best cabinet makers like Gillows of Lancaster screwed the drawer baseboard in rather than pinned and as AndyT said cut a slot and a small 'V' to allow the base board to be pulled forward with the shrinkage.
For your baseboard I would add a piece to the back edge with a rub joint then trim to fit. To remove the baseboard, there are a few methods and the one that I have found most succesful is to get a thin blade like a spatula or putty knife insert it inbetween the baseboard and back of the drawer. Prise the board up (it should have enough flex to be able to do this without breaking) This will now expose the pins, if you then get your pallet knife, place it next to the pin, grip the pin tightly with a pair of long nose pliers (resting on the pallet knife) with your third hand push the drawer bottom back down. This should then expose the pin head enough to be able to pull it out with pincers. and no damage done!
"I am told the piece is of no particular intrinsic value these days" Your piece may have no monetary value at auction these days but what you have is a very good Biedermeier bureau made probably in north Germany about 1830-1840. The Mahogany on the front is stunning with a beautiful colour and patina. It has plenty of 'value'
P.S. I think your baseboards may be sweet chestnut!
 
mrpercysnodgrass":3vgt06ib said:
Hi Phlebas,
I worked for many years on Biedermeier furniture and the construction is largely the same as British pieces. While I have from time to time come across runners and other components that have or appear to have had no glue your runner should be glued in place using either hide or fish glue and possibly fixed with a couple of pins.
With continental cabinets they had a tendency to make the drawers a tight fit with no or little room at the back so the drawer base board would be flush with the outside edge of the back of the drawer. This causes big problems once the carcass has shrunk, sometimes pushing the drawer front forward by as much as a quarter of an inch! British cabinet makers tended to leave an extra 1/2" or so at the back to allow for this shrinkage also leaving the baseboard sticking out a 1/4" out the back and the best cabinet makers like Gillows of Lancaster screwed the drawer baseboard in rather than pinned and as AndyT said cut a slot and a small 'V' to allow the base board to be pulled forward with the shrinkage.
For your baseboard I would add a piece to the back edge with a rub joint then trim to fit. To remove the baseboard, there are a few methods and the one that I have found most succesful is to get a thin blade like a spatula or putty knife insert it inbetween the baseboard and back of the drawer. Prise the board up (it should have enough flex to be able to do this without breaking) This will now expose the pins, if you then get your pallet knife, place it next to the pin, grip the pin tightly with a pair of long nose pliers (resting on the pallet knife) with your third hand push the drawer bottom back down. This should then expose the pin head enough to be able to pull it out with pincers. and no damage done!
"I am told the piece is of no particular intrinsic value these days" Your piece may have no monetary value at auction these days but what you have is a very good Biedermeier bureau made probably in north Germany about 1830-1840. The Mahogany on the front is stunning with a beautiful colour and patina. It has plenty of 'value'
P.S. I think your baseboards may be sweet chestnut!

Errm. Wow. Thank you very much. That really answers all my questions.

My comment about value was exactly what you said - not esteemed at auction just now. But we like it. We had it pinned as from Germany or Sweden, the latter more to do with details as to how it came to me rather than the item itself.

If you like this sort of stuff this is what the interior is like.

Interior.jpg


I will follow your advice, but funnily there is actually quite a large gap between the back of the drawers and the back of the case. Hmmm. As you will undoubtedly know the fall front is counter weighted by some large lumps of lead. I wonder if the mechanism for that is the actual reason for this gap, but they did the drawers in their usual fashion regardless.

Anyway, I am substantially in your debt.
 

Attachments

  • Interior.jpg
    Interior.jpg
    114.9 KB · Views: 77
Oh Yes, that's a corker - lovely grain on the front (flame mahogany veneers?), and the interior is also beautiful - "no value" ? Is the man blind?
 
Droogs, Its an impressive piece of furniture which was made during the Beidermeier period but Beidermeier it aint! In fact it is the opposite of Biedermeier !
"denoting or relating to a style of furniture and interior decoration current in Germany in the period 1815–48, characterized by restraint, conventionality, and utilitarianism."
 
Back
Top