tekno.mage
Established Member
Actually, I've briefly escaped from the world of spinny things! Since missing out on doing woodwork at school/college (clashed with physics) long ago, I've always had a vague feeling I should know how to use a handplane - and I'd quite like to make some square boxes as well as round ones. Doing some basic research on the interweb revealed that there are 4 basic kinds of handplanes for sale:
a) Beautiful tools with a price way out of my range, which are so good they probably teach the user how to use them!
b) Cheap chinese imports which are often not worth the £20 - £30 they cost and would need a lot of work to be anything like usable.
c) Tatty old nameless things with bits missing in junk shops claiming to be "antique" and priced according to size and amount of rust covering them (the bigger and the more rusty the higher the price.) Not worth the effort unless you are a handplane expert.
and
d) The occasional pre-war Stanley or Record that is worth salvaging and at a nice cheap price.
It would appear that all four types can be found on fleabay, but it may be hard for a noviice to tell b, c & d apart from the fuzzy photo. Also, as I'm a total novice with handplanes (and a girl), I had no idea what type I wanted - maybe a 4 or 5 or 5 1/2... But I did know I wouldn't be spending any dosh until I'd handled the thing - I didn't want something too big, too heavy or something made for people with huge hands like rugby players....
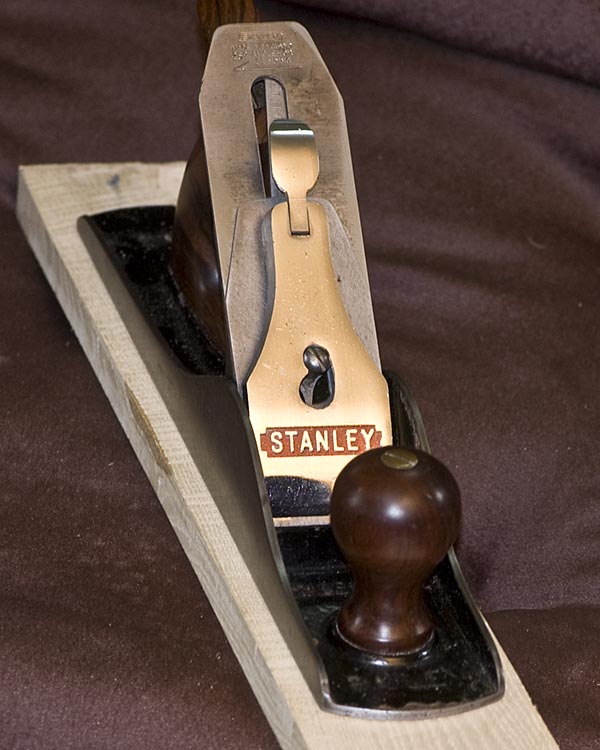
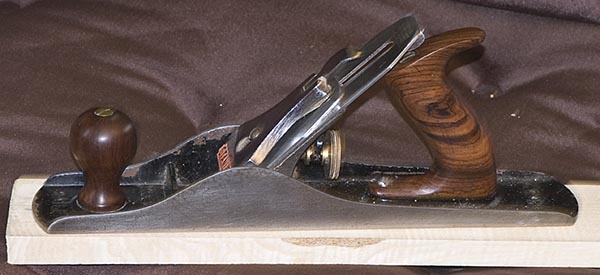
But yesterday I got lucky and a found the second-hand tool dealer at a local flea market had a few bench planes on display. There was a big long one, and two slightly smaller ones. I picked each up in turn and only really liked the feel one of them - it was marked Stanley Bailey No 5 Made in the USA. It was a bit grubby and scuffed, but had hardly any rust and all the bits seemed to be there. I gave him £15 for it and took it home.
Ever impatient, I removed the blade, cleaned it up and then sharpened it as per plane-fettling information found on the web. Then it was onto a piece of wood. A bit of split ash log that was waiting to be bandsawed into a turning blank. Into the workmate with it and give it a go - A couple of false starts, and I was away - and watched the top of a rough piece of ash become nice & smooth and level (well not quite as smooth as it should have been perhaps, as it was still a bit green.)
I was astonished. Firstly that I was able to use the thing and make progress so quickly and secondly that it the plane actually worked! I found it easier than using my partner's electric planer which is noisy and too heavy for me and likes to leave nasty grooves in the wood when I try and use it :-(
I actually enjoyed the process using the handplane and it didn't need as much strength as I'd assumed.
Today I discovered on the web that the plane is a 1933 model and the handles (under all the dirt and thick varnish) really are rosewood. I've now taken it apart to fettle properly - and am in the process of soaking the frog assy & all the screws in paraffin to remove what appears to be years of caked on grease.
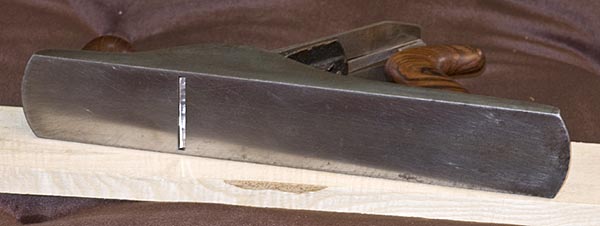
I'm also in the process of flattening the sole of the plane using a sheet of thick plate glass in a plastic tray (to catch the water & mess) and some wet & dry. This is taking a long time, is very messy and much harder work than using the plane on wood! However, progress is gradually being made and not only is the whole sole gradually becoming polished, but some of the worse nicks and scratches are beginning to disappear. When I remembered to add a splash of Honerite gold to the water, it became easier as I can now l wander off & leave the whole lot wet with no fear of rust and just keep on rubbing it on the wet & dry when the fancy takes me. But then I have the two sides to do as well.... And refinishing the handles, and maybe even touching up the black paint where it's chipped off...
I doubt my finished efforts will be as beautiful as some of the planes you people here have restored/built from scratch, but I'm way pleased with my purchase and am beginning to understand there may be a slippery slope here.....
tekno.mage
a) Beautiful tools with a price way out of my range, which are so good they probably teach the user how to use them!
b) Cheap chinese imports which are often not worth the £20 - £30 they cost and would need a lot of work to be anything like usable.
c) Tatty old nameless things with bits missing in junk shops claiming to be "antique" and priced according to size and amount of rust covering them (the bigger and the more rusty the higher the price.) Not worth the effort unless you are a handplane expert.
and
d) The occasional pre-war Stanley or Record that is worth salvaging and at a nice cheap price.
It would appear that all four types can be found on fleabay, but it may be hard for a noviice to tell b, c & d apart from the fuzzy photo. Also, as I'm a total novice with handplanes (and a girl), I had no idea what type I wanted - maybe a 4 or 5 or 5 1/2... But I did know I wouldn't be spending any dosh until I'd handled the thing - I didn't want something too big, too heavy or something made for people with huge hands like rugby players....
But yesterday I got lucky and a found the second-hand tool dealer at a local flea market had a few bench planes on display. There was a big long one, and two slightly smaller ones. I picked each up in turn and only really liked the feel one of them - it was marked Stanley Bailey No 5 Made in the USA. It was a bit grubby and scuffed, but had hardly any rust and all the bits seemed to be there. I gave him £15 for it and took it home.
Ever impatient, I removed the blade, cleaned it up and then sharpened it as per plane-fettling information found on the web. Then it was onto a piece of wood. A bit of split ash log that was waiting to be bandsawed into a turning blank. Into the workmate with it and give it a go - A couple of false starts, and I was away - and watched the top of a rough piece of ash become nice & smooth and level (well not quite as smooth as it should have been perhaps, as it was still a bit green.)
I was astonished. Firstly that I was able to use the thing and make progress so quickly and secondly that it the plane actually worked! I found it easier than using my partner's electric planer which is noisy and too heavy for me and likes to leave nasty grooves in the wood when I try and use it :-(
I actually enjoyed the process using the handplane and it didn't need as much strength as I'd assumed.
Today I discovered on the web that the plane is a 1933 model and the handles (under all the dirt and thick varnish) really are rosewood. I've now taken it apart to fettle properly - and am in the process of soaking the frog assy & all the screws in paraffin to remove what appears to be years of caked on grease.
I'm also in the process of flattening the sole of the plane using a sheet of thick plate glass in a plastic tray (to catch the water & mess) and some wet & dry. This is taking a long time, is very messy and much harder work than using the plane on wood! However, progress is gradually being made and not only is the whole sole gradually becoming polished, but some of the worse nicks and scratches are beginning to disappear. When I remembered to add a splash of Honerite gold to the water, it became easier as I can now l wander off & leave the whole lot wet with no fear of rust and just keep on rubbing it on the wet & dry when the fancy takes me. But then I have the two sides to do as well.... And refinishing the handles, and maybe even touching up the black paint where it's chipped off...
I doubt my finished efforts will be as beautiful as some of the planes you people here have restored/built from scratch, but I'm way pleased with my purchase and am beginning to understand there may be a slippery slope here.....
tekno.mage