Competition part 2 entry. WIP with pics.

UKworkshop.co.uk

Help Support UKworkshop.co.uk:

This site may earn a commission from merchant affiliate links, including eBay, Amazon, and others.
mr":ujr3wql7 said:
I need more gauges I think. I have three but it's nice to set them and leave them set for the duration of a project, I've had to reuse mine a couple of times,

Mike,

Have you tried making your own? Don't know whether you saw these pictures which I posted previously, but they are of a gauge I made based on some Rob (Woodbloke) made. In fact Rob let me have some of the wood already laminated.

e905054d.jpg


e90504fe.jpg


e90504bd.jpg


The Body of the gauge is laminated because chopping the hole for the stem and wedge would be quite difficult. The pin is a masonry nail ground to whatever shape you need. The saddle and wedge arrangement works really well - locks solidly but releases easily.

They are quickly made from off-cuts so cost nothing and work really well.

The project is looking really good.

Cheers :wink:

Paul
 
Hi Paul
I did make the panel gauge in one of the earlier pics but I haven't made any marking gauges - it's on my list (with a million other things). I saw your post a while back and saw Robs in the flesh at Yandles. One of the problems I had with the panel gauge was that I chopped the mortise out of the block which although usable was a bit of a mess so I think laminating is definitely the way to go. As I say I have three but I think I need at least another three judging by the number of times I'm resetting the ones Ive got.
Cheers Mike
 
mr":1k2l8z0d said:
Hi Paul
I did make the panel gauge in one of the earlier pics but I haven't made any marking gauges - it's on my list (with a million other things). I saw your post a while back and saw Robs in the flesh at Yandles. One of the problems I had with the panel gauge was that I chopped the mortise out of the block which although usable was a bit of a mess so I think laminating is definitely the way to go. As I say I have three but I think I need at least another three judging by the number of times I'm resetting the ones Ive got.
Cheers Mike

Mike - the beauty of making these gauges is that they're quick and easy...I now have 5 marking gauges (some modified bought gauges) and a large panel gauge. Chopping the narrow mortice for the wedge is doable but very hard going, laminating the whole thing makes life much simpler and I like to keep things simple :roll: - Rob
 
mike now i understand i have to work up the courage to cut all my 32 mortices, and ensure i get them in the right place. :roll:

think i will machine saw the tenons though, then plane up for the differences. :?

paul :wink:
 
engineer one":28jqh4hc said:
mike now i understand i have to work up the courage to cut all my 32 mortices, and ensure i get them in the right place. :roll:

think i will machine saw the tenons though, then plane up for the differences. :?

paul :wink:

Thats a lot of mortises but then once you get going it'll take no time at all. As long as you have them in the right place :) But then if they're in the wrong place it doesn't matter how you do them they're still wrong. Call me strange but I quite enjoy chopping them out. The right chisel and a bit of care and attention and the result is quite satisfying.

Cheers Mike
 
Some progress has been made but not as much as I would have liked.

After gluing up the back panel I have moved on to the frame. This is to be bridle joints all round and the panel itself will float in the frame.
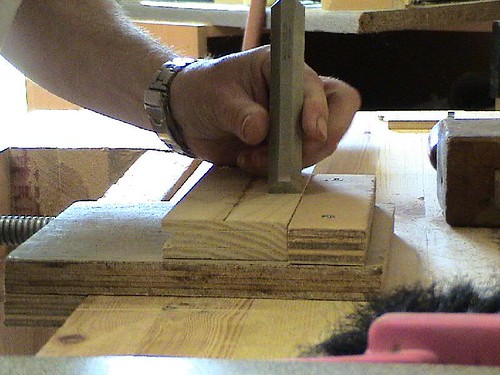
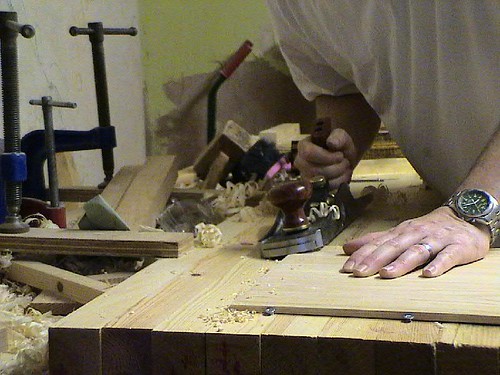
The frame pieces were marked up for the bridle joints and cut out. I marked out with a scratch awl and mortise gauge and then deepened the tenon shoulder lines with a chisel.

587460964_23fd1e92a3.jpg


The saw sat nicely in the deeper cut and gave me nice neat shoulders.

587073141_946feae6e9.jpg


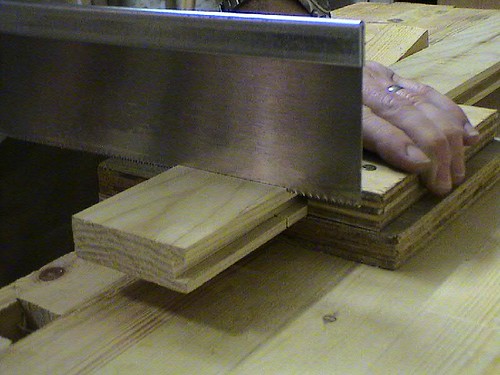
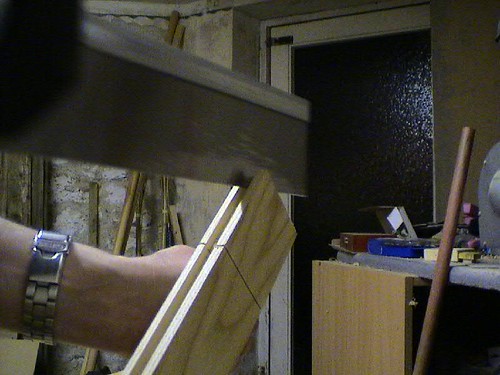
Sawing the cheeks was amusing. It all started well enough

587072185_a9db126604.jpg


Does this justify a new saw?

587444342_b10e5079f1.jpg


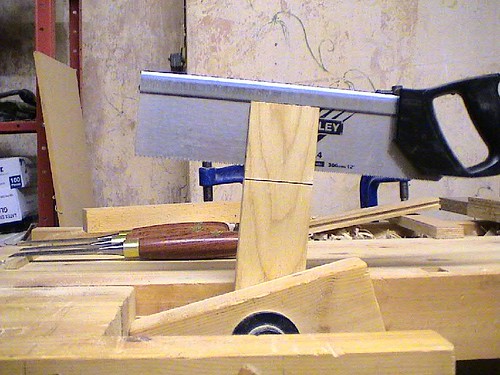
Back to the bench hook to cut off the waste and then I used a chisel to take out the rest of the cheek which as it had already been sawn at the shoulder came away cleanly.

The mortise part of the joint was a little more complex. First I drilled out the innermost end of the mortise on the bench drill (which is of course powered by hamsters) and then sawed out the waste in the same way as for the tenons. The only picture I have of this is one showing that the calibration ring of the drill table is inaccurate.

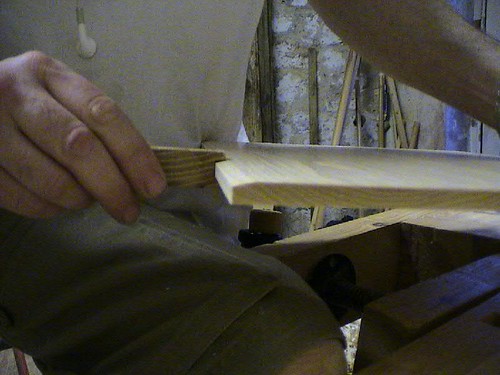
So with the frame all cut out I retrieved the panel from the clamps and gave it a final flattening with the jointer though I was pleased to see it wasn't too far off. Once it was all flat and smooth I beveled the edges slightly by eye.

587083559_fb2ec2bd28.jpg


I tested to make sure the beveled edge fittend the frame with an offcut of the frame.

587458930_9d98a0136f.jpg


The panel is lose enough to be moved in the frame by hand but there isnt enough slop for it to rattle about.

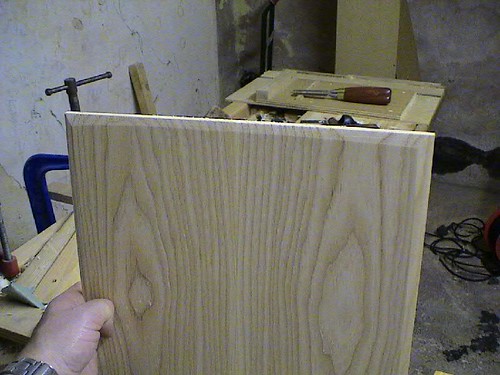
The end result was quite pleasing I thought.

587093125_4eb1a28edf.jpg


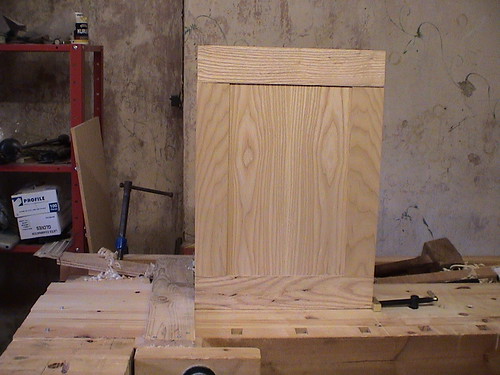
After all that the panel was slotted into the frame and the frame glued up. The finished assembly looks like this.

588431393_56b5bb2304.jpg


Next step is to join the carcass together drop the panel in the back and move on to the doors.

Cheers Mike
 
Mike - looking good so far. In answer to your question about the saw.....yes. I have a similar one and it's truly dreadful to use, I keep it just for rough stuff around the house now - Rob
 
Looking nice, Mike :wink: Is that Stanley saw one of the hardpoint ones? I had one and when it was getting blunt I bought a new one, only to find that it wasn't as sharp as my blunt one :? :? I know Stanley tools aren't what they used to be, but I thought that was taking the p**s :cry:

Cheers :wink:

Paul
 
It is a hardpoint stanley, I think the good lady bought it for desecrating the trees in the garden with originally. I'm not sure if it's getting a bit blunt or not but its very slow to cut. Having said that it does cut to the line - doesn't wander at all if only it were a bit more aggressive and a lot more comfy in the hand. I've got a couple of donor blades from some old S&J hand saws with cracked and broken handles which I keep meaning to have a go at re handling but then the blades themselves are blunt and I haven't ever tried sharpening. It's a bit intimidating really I mean to try it out on the big Diston rip saw Ive got first. At least I can see the teeth on that though I imagine some might quake at the potential havoc I could cause trying to sharpen it. The other route is to send that nice Mr W a mail and a fistful of $ s but then I'd still have to learn to sharpen. Looks inevitable really.
Cheers Mike
 
mr":3tajiqp1 said:
It's a bit intimidating really

I know what you mean. On a plane blade there's only one edge to worry about but a saw has so many teeth :shock: :lol: During our recent MiniBash, Newt let me try a couple of old saws that he had sharpened - wow, did they cut well. He's even experimented with different angles so one starts easy but cuts slowly, the other is more difficult to start but cuts really fast. Quite impressive stuff. It's convinced me that if you make the effort and do it methodically, you can get excellent results. Now, where are those files....... :)

Cheers :wink:

Paul
 
Paul (Engineer Paul) theres roughly 2 - 3 mm in the frame rebates on the sides (each side)for expansion, so somewhere round 5 mm total, and less at top at bottom though I'm not expecting the panel to move over it's height if you see what I mean. The panel itself is (from memory) 260 mm wide. Hopefully that will be enough - fingers crossed.

Paul C - those saw teeth, they're so small as well!

Cheers Mike
 

Latest posts

Back
Top