Competition 063/02 Dedee - Chisel Cabinet

UKworkshop.co.uk

Help Support UKworkshop.co.uk:

This site may earn a commission from merchant affiliate links, including eBay, Amazon, and others.
Status
Not open for further replies.

Newbie_Neil

Established Member
Joined
27 Jul 2003
Messages
6,538
Reaction score
4
Location
Nottingham, England
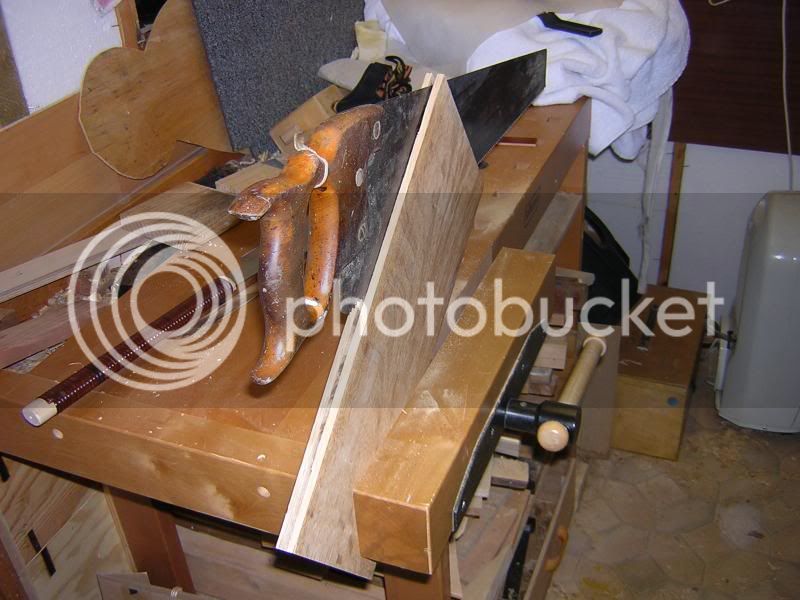
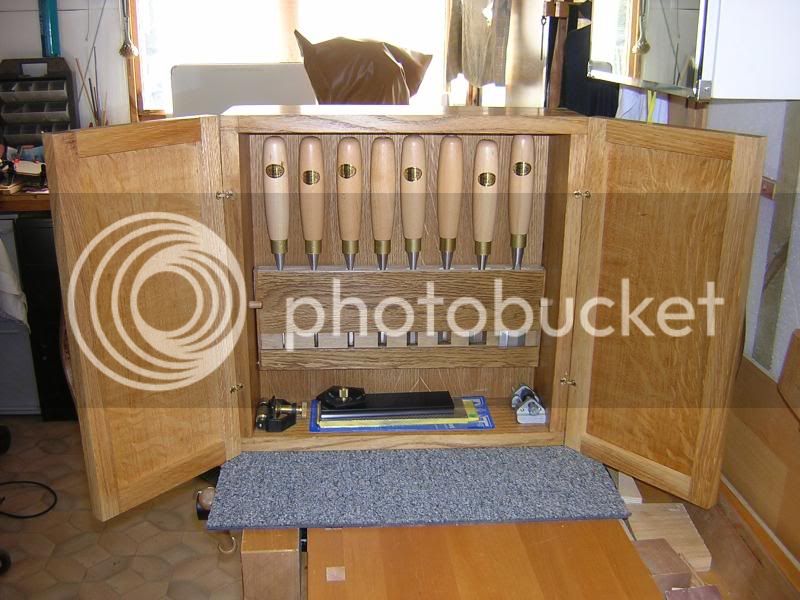
Plan (in my head only) is to make a cabinet to hold my (4 years to acquire) set of AI chisels. Original idea was just for a box with a drop down lid however this would have been impractical when hung on the wall so the plan is now for a cabinet with paneled doors making the most of the medullar rays in this piece of oak which will have to be resawn on the table saw - a process which scares me somewhat.

oakboard.jpg


Drawing plans is not one of my strong points so I had to start with sizing the chisel holding apparatus which I intend to hinge in place inside the cabinet so that it will fall forward far enough to remove the chisels.

The holder is just a sandwich of birch ply with oak faced ply on top.

chiselspacers.jpg


chiselholder.jpg


Final cabinet size will be about 14-16" high by 14" wide by about 6" deep. If things go well I might even incorporate a small drawer.

The wood for the cabinet will be reclaimed oak from some old wardrobes thrown out by a local college about 20 years ago that my father has been kindly storing for me. I had all but forgotten about them and was quite surprised to see how much was still there.

I have never made doors of any description before and am still undecided on how best to construct them. Some pointers from Steve Maskery last week has got be settled on the size of the frame etc but whether to dowel, M&T, perhaps even DT - I'll have to see after I get the cabinet finished.

It will be at least another week before I can prep the rest of the wood.

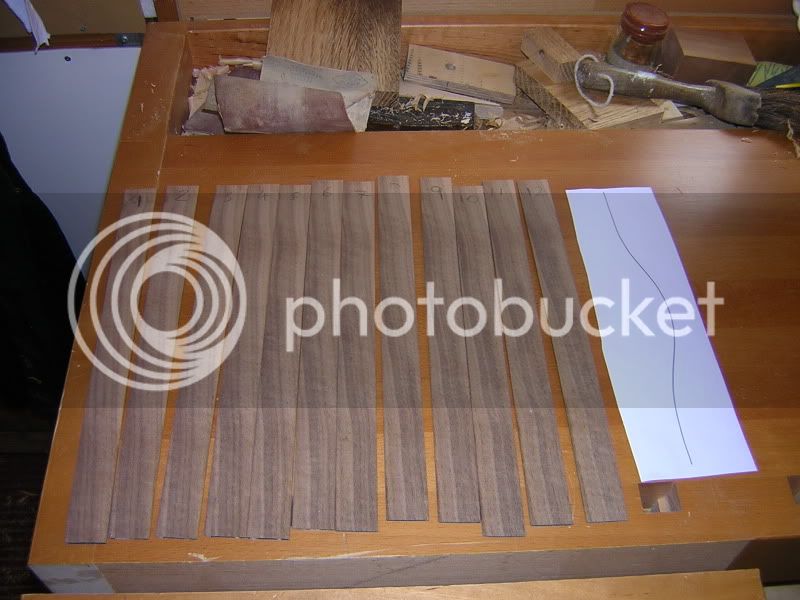
As for the that darn curve - well apart from the learning curves involved, I might borrow some of HID's tools and carve a handle, or motif, or inlay - can't decide yet.

I've started so I'll have to finish although probably not in time.
 
I managed about 4 hours in the workshop over the past two days. Having watched Mr Cosmans DVD at least a dozen times I was determined to give his methods a go. They work in my sleep....

Marking the tails
markingtails.jpg


Cutting the tails
cuttingtails.jpg

Only after cutting the end of my nose did I remember I had a dozuki - a lot safer and stiffer I should have used it from the start.
The other problem with both these saws was the thickness of the kerf. Too narrow to use my coping saw for waste removal.

Chopping the waste - tails
choppingtails.jpg


Carcase dry fit -
carcase.jpg


I tried my best to cut on the line aka Cosman and the results were pretty darn good. These are my first DTs in hardwood and the first done freehand. My earlier efforts were in birch ply and with the aid of the Veritas DT saw guide. I think the size/spacing is a little agricultural. The carcase is square and will probably get glued up in the next few days.
 
I have been somewhat apprehensive about resawing this board into door panels but after trimming the ends and cutting in half it was still long enough for two spares if I cocked it up so I thought I'd give it a go.
oakboard.jpg


With the blade at it's highest I was left without about 2" to cut by hand.

DSCN4679.jpg


I started with the ryoba but found it difficult to keep straight.

DSCN4680.jpg


So out came Bertha, I have never used this saw before and I am sure it could do with a sharpen but it cut through this oak without trouble and in a straight line.

DSCN4681.jpg


A quick smooth and this is the result. The medullar rays are as distinct on the left panel but do not show up in this photo.

DSCN4682.jpg


This took about 2 hours and I worked up quite sweat removing the inevitable ridges and wayward hand saw cuts but I am pleased with the result.

Just the door frames, chisel holder hinge support doodah and the curve to do and 24 days left. Oh and the finishing.
 
Nowhere near as dramatic as Tony's altercation with a router but the outcome is the same, ie no woodwork for a while.

It seems that I have tendonitis, or woodworkers elbow :lol:

Ever since I chopped out the DTs on my comp project my right forearm has been sore. At first I put this down to using muscles that I had not used for a while. Extensive sessions with a plane, smoothing the door panels, only made it worse. And every time that I have picked up a tool since leaves the arm feeling sore. It has now got to the stage where any
activity that requires a right handed grip (even taking the lid of a jam jar) causes discomfort. If I grip and flex the elbow simultaneously the pain increases.

Ibuprofen should sort it out with rest - I hope.

The comp project is nearly completed. The doors are made and the chisel holder fits the cabinet. Even using a screwdriver pulls the affected tendon so I will restrict my activities this week to finishing and I'll sort out the curve next week. I've cut some walnut strips to make some laminated handles and learnt how to draw a Bezier curve on the Mac - not CAD I know but a neat trick.
DSCN4690.jpg


DSCN4688.jpg


DSCN4689.jpg
 
Well here it is, finished. At last. I thought that I would never finish in time.
The postman did not bring the magnet cylinder catches from Woodfit so they will
have to be fitted later.
DSCN4719.jpg


There are a number of firsts contained within this project.
First hand cut hardwood dovetails, first frame and panel door (in fact first ever door)
first resaw and first attempt at laminating.
All the wood with the exception of the ply used in the chisel holder was recycled.

WIP photos, more and larger WIP photos can be seen here here

Arranging the chisels for the holder.
chiselspacers.jpg


Chisel holder.
chiselholder.jpg


Cutting the DTs
cuttingtails.jpg


The carcase.
carcase.jpg


Resawing the board. I was somewhat apprehensive about this I am not keen to do this again.
DSCN4679.jpg


Finished off the resaw with a proper saw!
DSCN4681.jpg


The resawn panels after a little work with the only plane used on this project.
DSCN4682.jpg


Cylindrical loose tenons used for the door frame.
DSCN4687.jpg


12 strips of walnut cut on the table saw and numbered
DSCN4689.jpg


6 strips per handle. The plastic prevent to much glue ending up all over the place.
DSCN4695.jpg


The finished handles
DSCN4726.jpg


The chisel holder is held upright with a roller catch
DSCN4722.jpg


The chisel holder in the forward position
DSCN4723.jpg


Hope you like it.
 
Status
Not open for further replies.

Latest posts

Back
Top