Casket WIP pics...Secret Mitred d/t's

UKworkshop.co.uk

Help Support UKworkshop.co.uk:

This site may earn a commission from merchant affiliate links, including eBay, Amazon, and others.
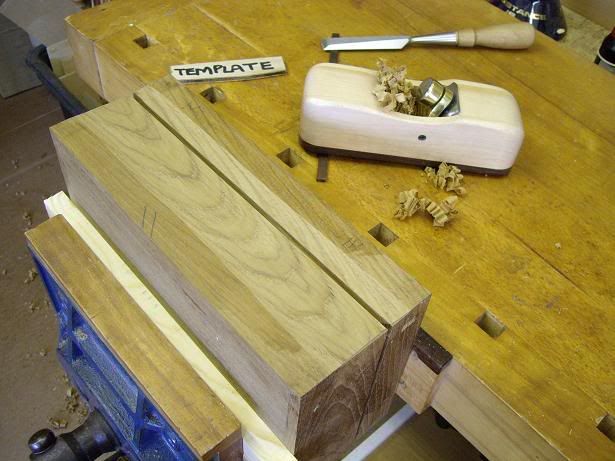
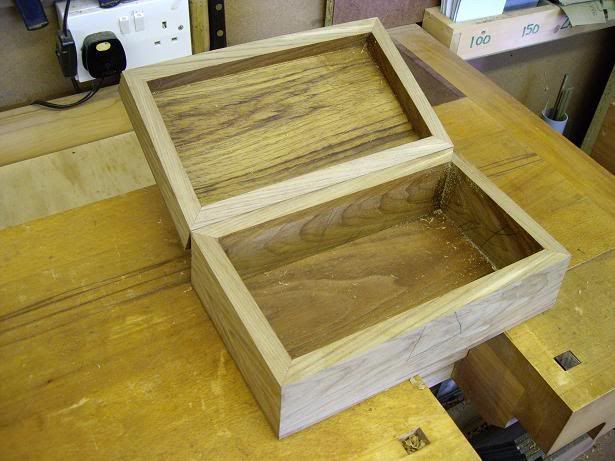
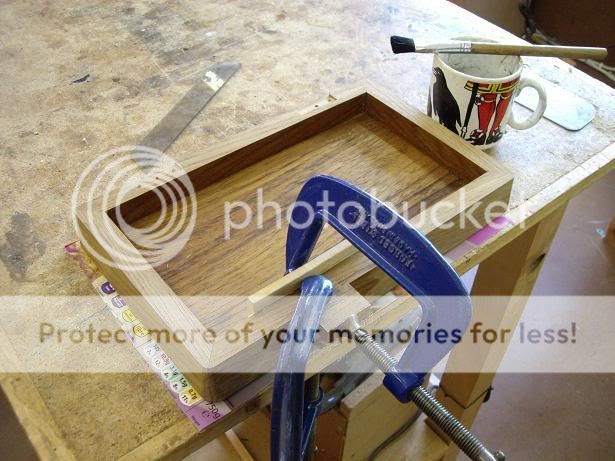
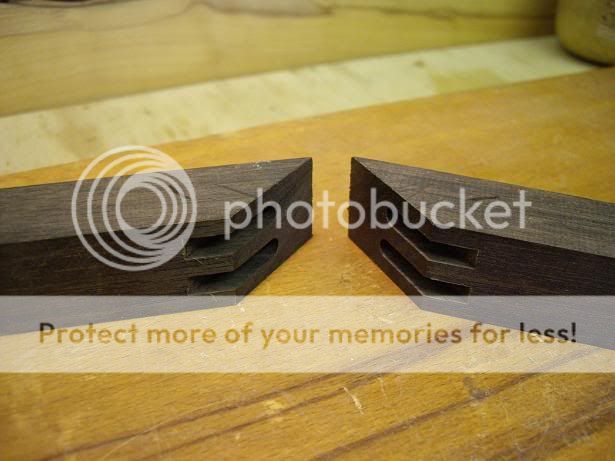
The casket was glued up on Monday and today is the first day I've had an opportunity to have a look at it once all the glue has been cleaned off. I decided to use a glue with a long open time in this warmish weather and I also wanted something that was gap filling.....just in case :D. I chose in the end to use proper Araldite, the slow setting stuff and I degreased the joints with some acetone just prior to the glue up, all show interior surfaces were given 3 coats of finishing oil and some Teak wax close to the joint to act as a resist. The cramps, 8 in all :shock: were left on for a full 24 hrs and removed on Tuesday night:

51f1s5.jpg


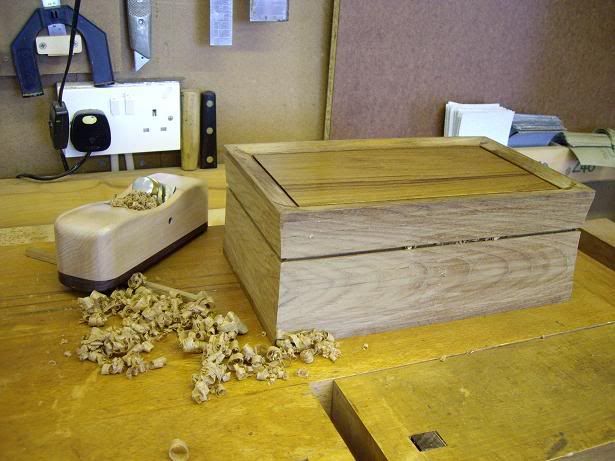
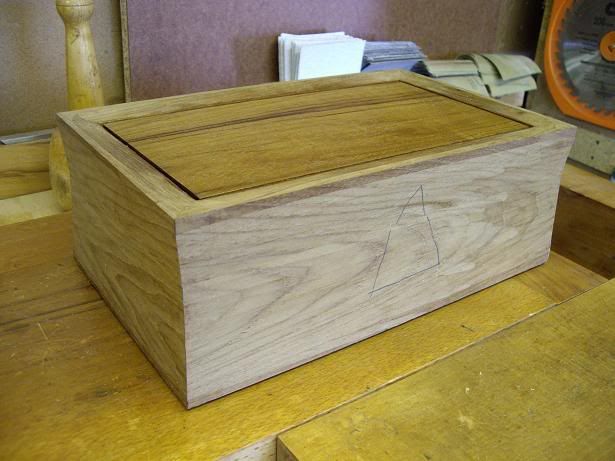
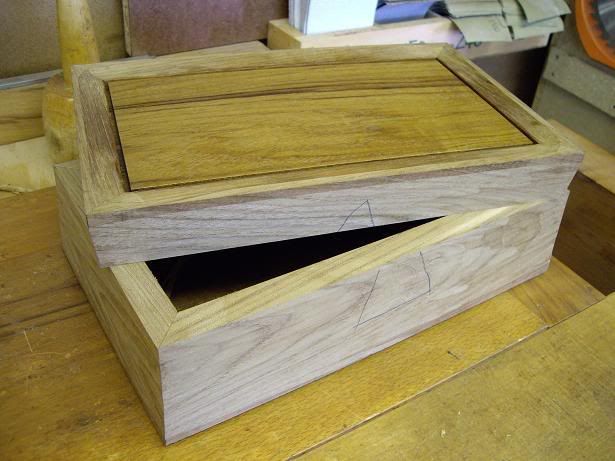
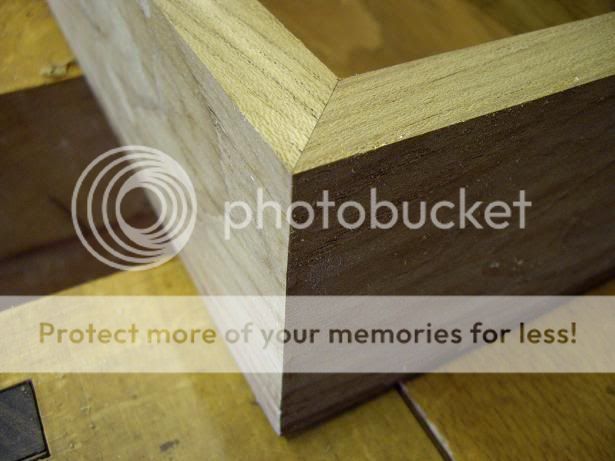
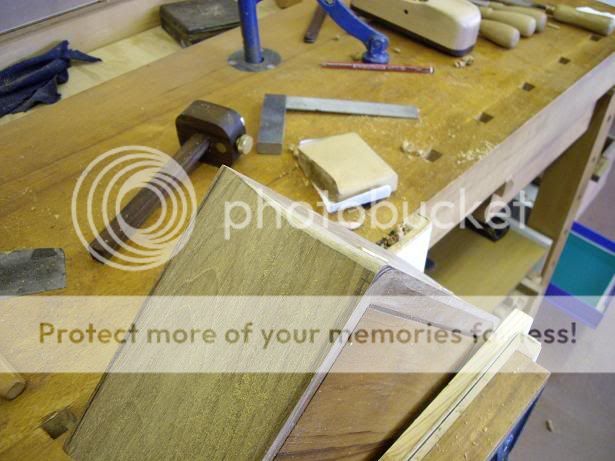
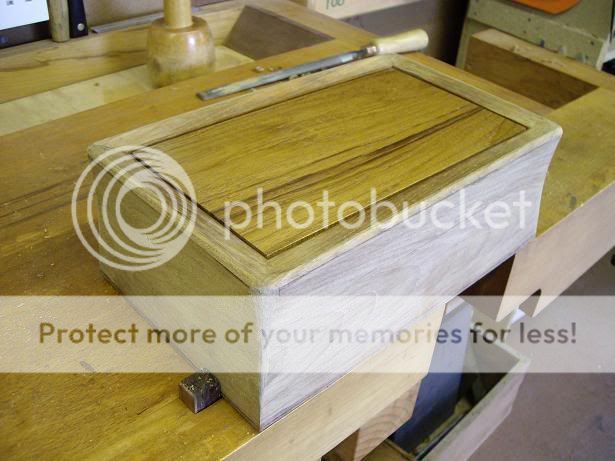
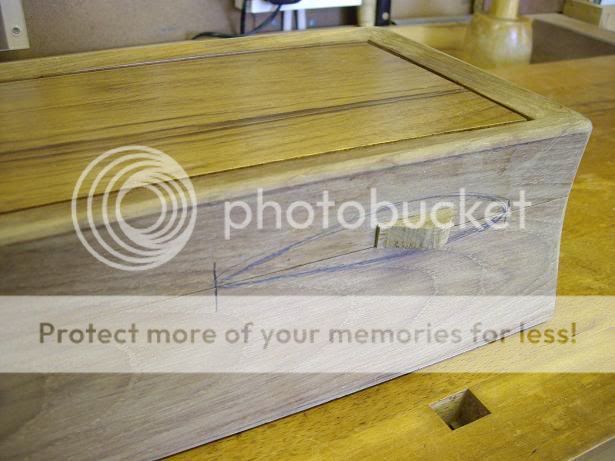
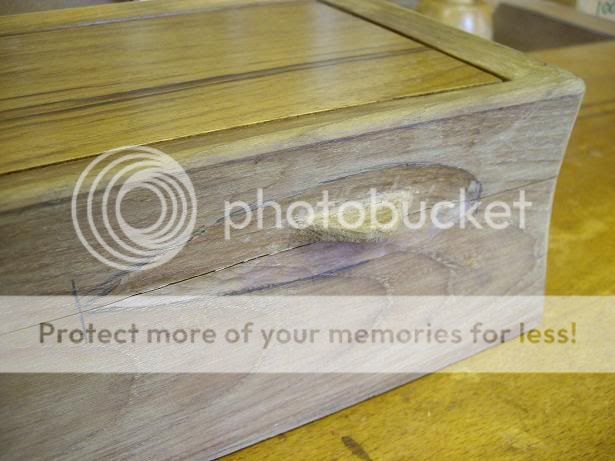
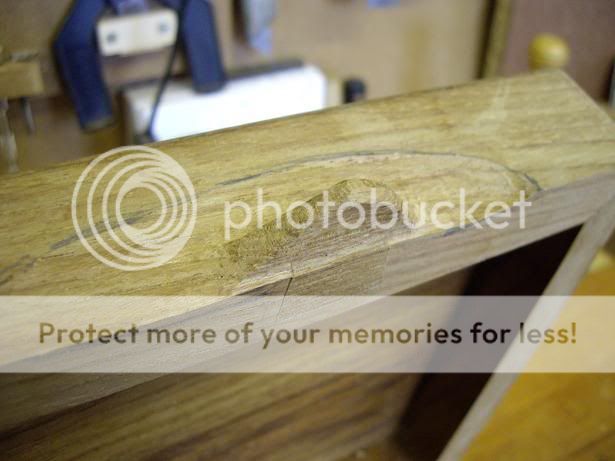
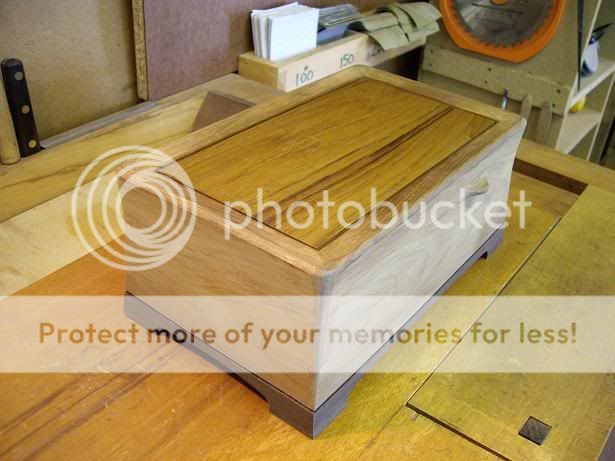
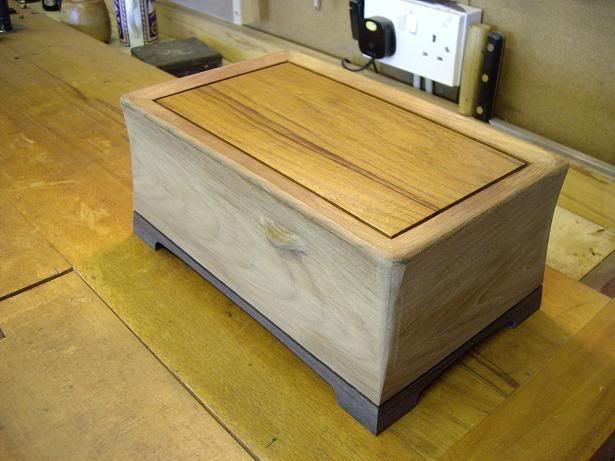
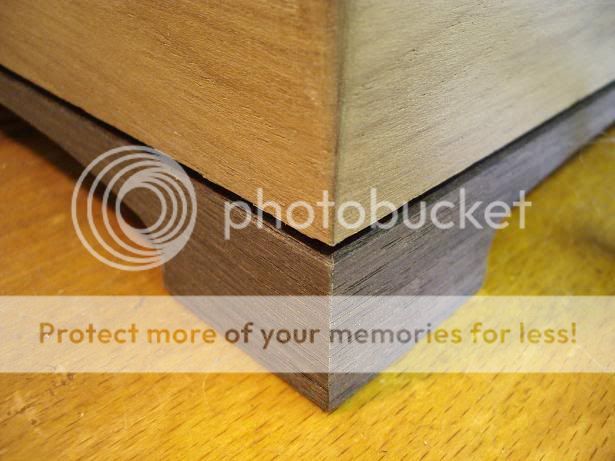
The corners have pulled up quite well, but there's some adhesive in one of the top mitres which is sitting in a knife line and will clean up later on...the actual joint can just be seen thru' the Araldite. Need to fit the base and then part cut off the lid with a router and very small cutter. After that I'll start to shape the sides with the special plane (maple and curved rosewood sole) made last week. After discussing this at some length with Paul and Pete (Newt) last week, I've decided that the plane should be judged as part of the making process (Part 2) as it's a specific tool designed and made for the next part of the project - Rob
 
Looking lovely, Rob. I feel quite privileged to be one of the few people to have seen those beautifully cut secret dovetails before they disappeared from view for ever :D

Cheers :wink:

Paul
 
Really very impressive, I find it really helpfull to see all the work in progress shots. Very inspiring for all those of lesser talents.
Owen
 
Rob, this is a great thread. I've found both the photos and your commentary really helpful but at the moment if I cut a half decent dovetail I'm really proud and want it showing! Great stuff.

Ted
 
Started work after I had finished the Ulmia on shaping the casket sides with the round sole special made last week, made a template to show how the shaping would progress. First pic is of the initial shavings made with the plane. The routed groove (12mm deep) goes all the way around the casket as my pencil lines showing the saw lid margin would be removed by the shaping process:

33d22g.jpg


This shows all the rough shaping with the plane completed. The plane was fabulous to use :lol: and is recommended if any such concave work is contemplated:

22s111.jpg


This shows the rough shaping with the lid removed and the joint trued:

33g3rr.jpg


and just to show that it has been removed:

epvlrot.jpg


with this pic showing the box and lid together:

65g2g.jpg


This final shot shows one of the corners of the box. I'm quite pleased with the way that the mitres pulled up.....not perfect, 'cos nothing ever is but not too shabby either:

1sd2g2g2.jpg


SWIMBO'll be in soon so I've got to get T on but may do a bit more before COP tonite :lol: - Rob
 
Looks great already Rob, really inspirational to see the process broken down into lots of understandable individual steps.

Can't wait to see it finished. Do you plan to oil it or french polish or something else ?

Cheers, Paul :D
 
Paul - finish will be 3 coats of Finishing Oil followed by a special teak wax (Alna Teak Wax) which I got when I was at college in the 70's when a lot of teak furniture was fashionable and the college shop was equipped with all sorts of stuff to finish teak - Rob
 
The plane was clearly a success :D Some terrific techniques on display here, Rob - many thanks for sharing them with us :wink:

Cheers :wink:

Paul
 
Thanks for all the encouraging words. The next thing I need to do is to scrape and sand (will have to make a specially shaped cork block) one long side to an almost finished state and then fit the hinges....the other three sides can then be shaped to the final profile, which is going to be interesting :wink: to get the mitres in the right place. Will then have to insert a small handle in ebony or teak....not sure at this stage and start to shape the front detailing and after that I need to start to think about how to make the plinth. A small rebate has also been worked onto the bottom of the casket which is shown in the design plan. This just acts as a break between the teak casket and ebony plinth - Rob
 
Have done a bit more on the casket today. Started by getting the hinges on which I hate :evil: as nothing ever seems to line up, however after a bit of fiddling about I got the corners to mate together tho' one is slightly out. Once the hinges were in place the other three sides were scraped and sanded to the profile and then I began to roughly shape the corners with a file:

d.gggg.jpg


I've decided to deviate slightly from the design in that the top half will be fully sculpted and smooth....... this will taper towards the plinth which will have crisp edges. This pic shows the casket very roughly shaped:

3d32fgg.jpg


I then dovetailed in a piece of teak for the handle (the design called for ebony but I decided on teak at the last mo'). This pic shows the largish piece of teak glued in place:

5d5f1s1fet.jpg


and this pic shows the handle roughly sawn to a sort of teardrop shape with the depression in the casket sided roughly marked out:

32s3d0g0f.jpg


and after carving with very small gouges the handle detail looks like this. The top and lower surface of the handle are concave, so it's got a bit of a Krenovian feel to it at the mo':

lwlrr.jpg


This last pic shows the box open and you can see the handle detail a little more clearly:

3g02yyyy.jpg


Everything has been carved very roughly at present...a lot more scraping and sanding to do to smooth things off. Ebony plinth next - Rob
 
I congratulate you on your skills and dedication also your courage (taking on wood carving at such a late stage of the project)

Can you tell me where I could get some small pieces of ebony? I would like to try some decorations with that stuff, or is it possible to stain wood black with a black marker pen :twisted:
 
woodbloke":9e3zde1c said:
DW - I believe Yandles at Martock have it in stock, not too far from your neck o'the woods - Rob

Thanks for information above, I could do with some exotics so perhaps another visit would be useful as long as I keep out of the tool department.
 
Fascinating stuff, Rob. This is proving to be a very demanding project in the number of different skills required. Eagerly looking forward to the next stage :D

Cheers :wink:

Paul
 
Have made the plinth over the last few days. It's in ebony 22mm square with a couple of 4mm internal keys (made from birch ply) in each corner so the whole joint is going to be quite strong:

311asdfddd.jpg


The plinth was then glued up in my picture frame cramp (Paul, available from Axminster) and you can see the wafers in place:

ssdfddd-1.jpg


After cleaning up, I made a jig to shape the plinth on the underside. This was mainly done with a router and the shape was bearing cut from the shape on the jig. The plinth was then screwed to the underside of the casket (one in each corner and one on each long side) .....had to have a little bit of care :wink: to ensure that the mitres on the plinth picked up on the casket corners. I then used my curved sole plane to plane in the lower half of the casket and plinth together, after which the profile was scraped and sanded in. The final few pics show the casket sanded to 80g, lots more detail shaping yet to be done:

3a311rrr.jpg


2a1r1r.jpg


The last pic shows one of the corners with the plinth mitres picking up on the casket mitres:

33we1r14wrv435.jpg


Next job is to get hold of some 3 skip bandsaw blades from Axminster so I can resaw a bit of English Walnut for the casket lining - Rob
 
Hi Rob, that's a classy piece of work and the plinth really set's it off nicely.

Can't wait to see it all finished.

Have a few days off work this week and by coincidence just fitted a new Dure-edge 3 tooth 3/4" blade to my Startrite yesterday so if you want to pop over and do your resawing and have a cuppa you are very welcome !

Cheers, Paul. :D
 
It's looking great, Rob. How you are able to do all that demanding work on the casket and produce a blog from scratch is beyond me - you obviously have a higher work rate than me :)

Looking forward to the next instalment (of the casket and the blog :wink: )

Cheers :wink:

Paul
 

Latest posts

Back
Top