woodbloke
Established Member
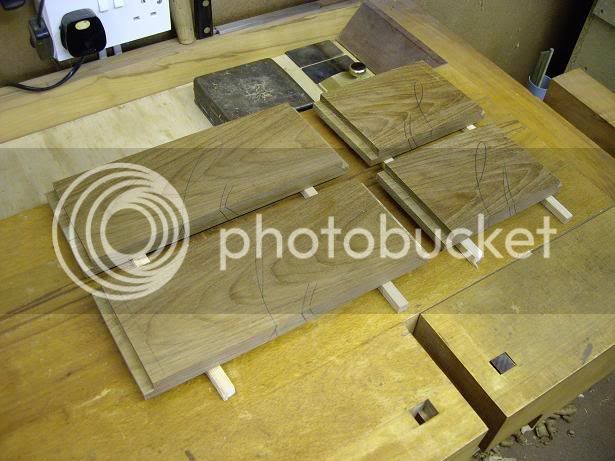
Have got the comp casket under way and thought you may be interested to see progress 'cos once the joints are all together they're won't (hopefully) be a lot to see. There's no easy way to do these joints, they're just plain hard and difficult :x . Pic below shows the timber (teak) planed up true, the ends have been shot dead square and each pair is again exactly the same length, shoulder lines have been struck and mitres marked with the mitre set, all lines deeply knife cut:
This pic shows the rebate taken out on the router table, the corner of the rebate needs to just kiss the 45deg mitre slope, some of them had to be taken down to the line with a shoulder plane:
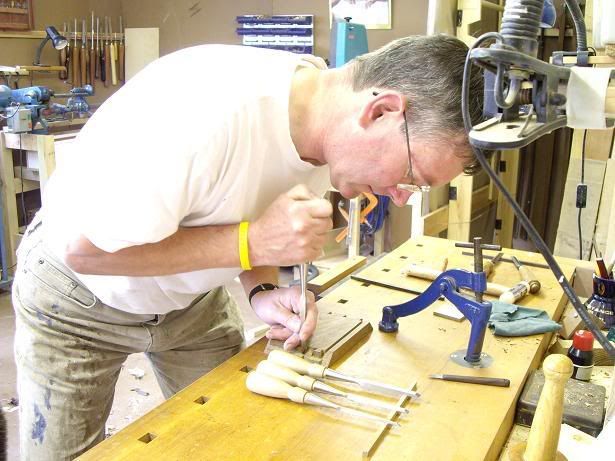
The joints are marked out, I use a black fine biro and the pins need to be cut first and then the tails marked out from them which is the opposite way round to normal thru' d/ts. Waste is chopped out with chisels except to saw in the mitres on the corners:
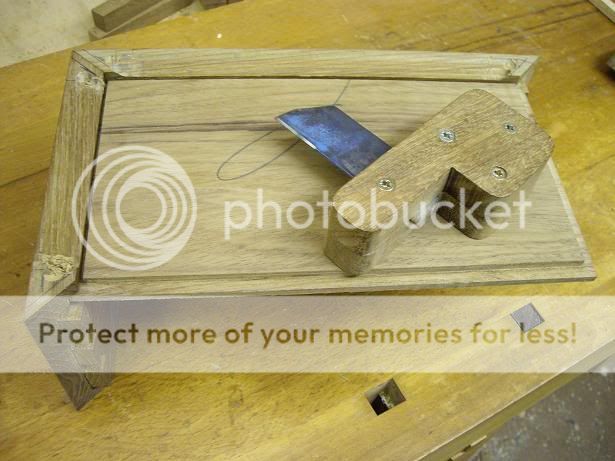
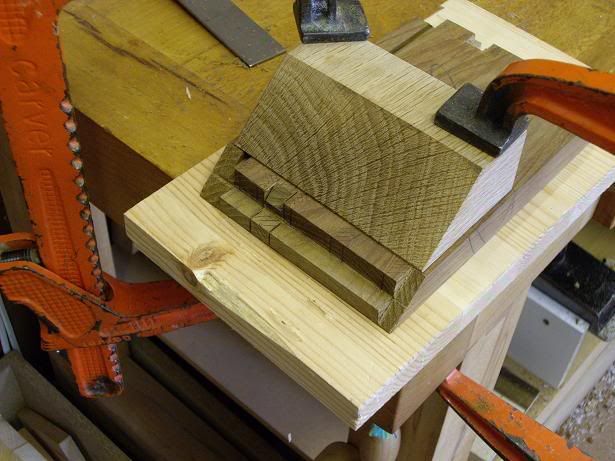
Once the pins and tails have been chopped out the mitres can be roughly cut, this pic shows an oak block planed to 45deg to cut in the mitres at the lid junction, top and bottom:
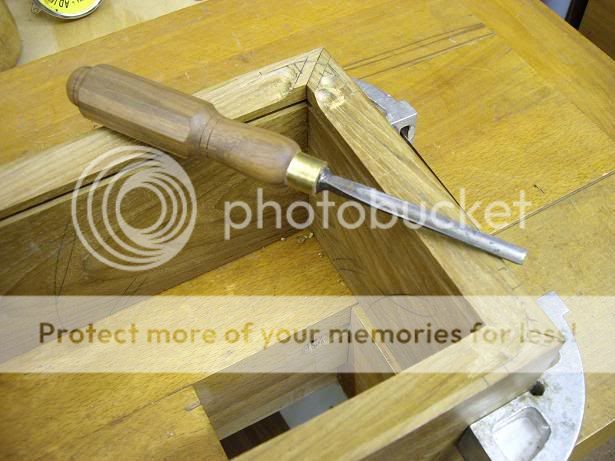
The remaining part of the mitre can then be removed to within about 1mm of the corner...I'm using here a pair of scew chisels to cut across the grain (slicing cut):
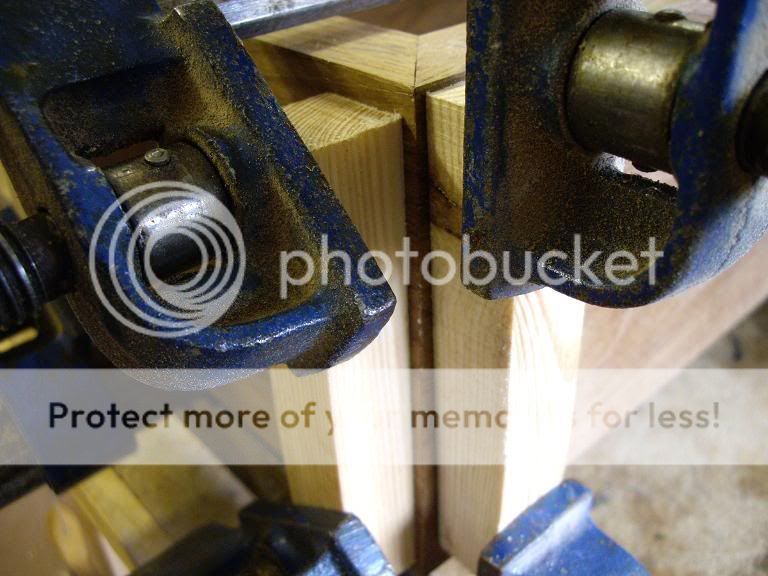
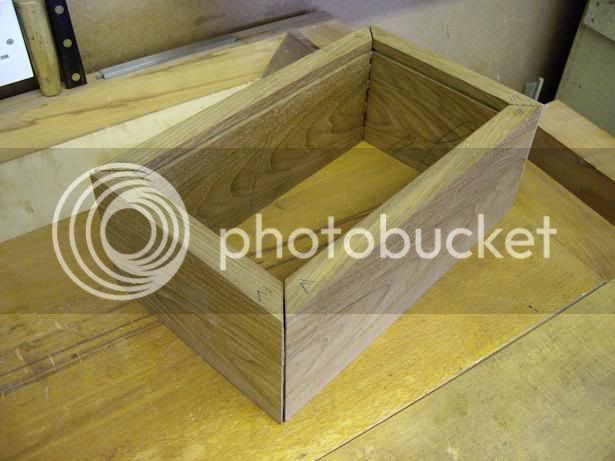
Once the mitres have been roughly cut the joints were tested to see if the whole thing would go together:
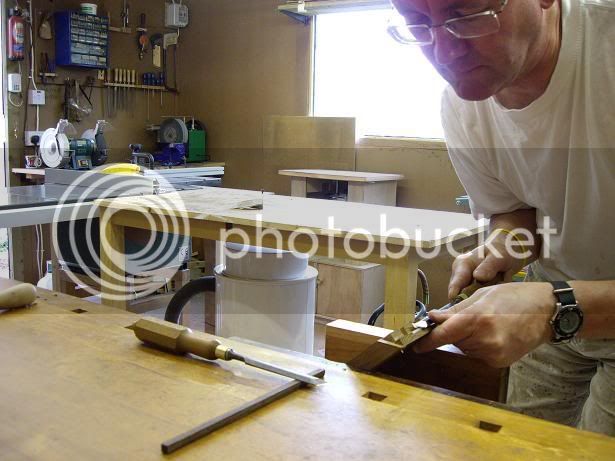
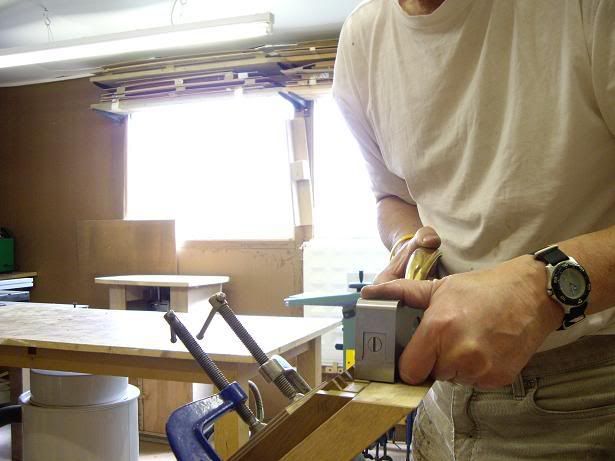
......and then it's time to do the really difficult bit, planing in the mitres. They have been cut accurately using a bigger oak block at the corners and lid, this pic shows the same block being used to steady the LN shoulder plane, and the large size as recommended by MrC gives excellent control.
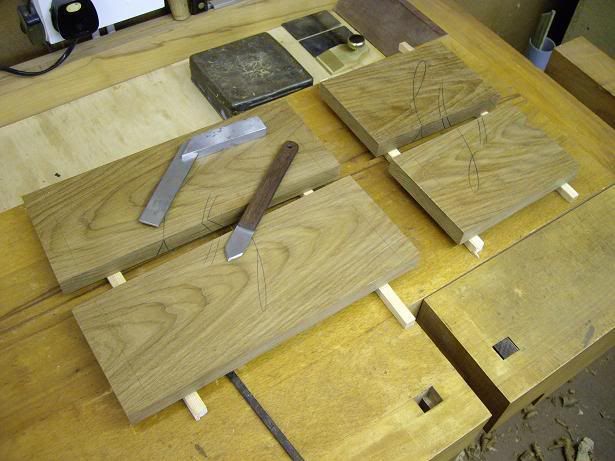
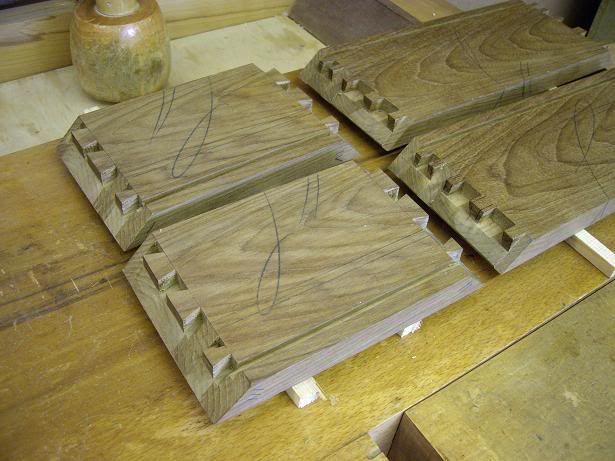
The last pic shows the two shorter sides with the mitres all done and the longer sides yet to be finished off......after some coffee :lol:
.
Will post more pics as the casket progresses - Rob
This pic shows the rebate taken out on the router table, the corner of the rebate needs to just kiss the 45deg mitre slope, some of them had to be taken down to the line with a shoulder plane:
The joints are marked out, I use a black fine biro and the pins need to be cut first and then the tails marked out from them which is the opposite way round to normal thru' d/ts. Waste is chopped out with chisels except to saw in the mitres on the corners:
Once the pins and tails have been chopped out the mitres can be roughly cut, this pic shows an oak block planed to 45deg to cut in the mitres at the lid junction, top and bottom:
The remaining part of the mitre can then be removed to within about 1mm of the corner...I'm using here a pair of scew chisels to cut across the grain (slicing cut):
Once the mitres have been roughly cut the joints were tested to see if the whole thing would go together:
......and then it's time to do the really difficult bit, planing in the mitres. They have been cut accurately using a bigger oak block at the corners and lid, this pic shows the same block being used to steady the LN shoulder plane, and the large size as recommended by MrC gives excellent control.
The last pic shows the two shorter sides with the mitres all done and the longer sides yet to be finished off......after some coffee :lol:
.
Will post more pics as the casket progresses - Rob