Building windows

UKworkshop.co.uk

Help Support UKworkshop.co.uk:

This site may earn a commission from merchant affiliate links, including eBay, Amazon, and others.
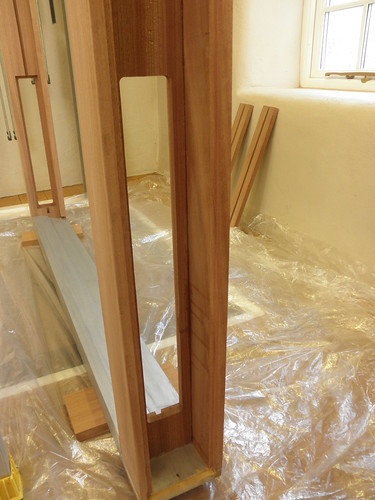
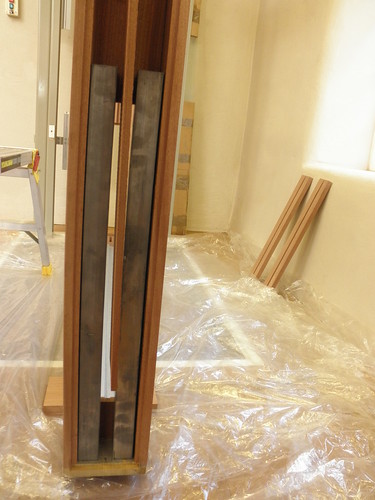
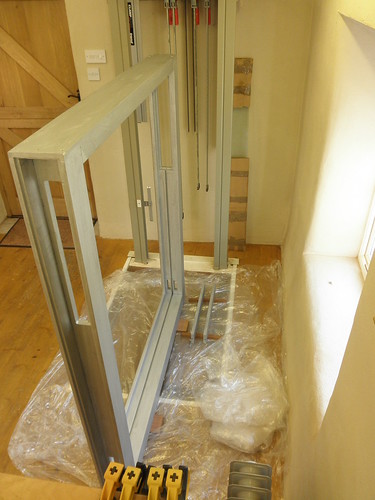
The wagtail, also known as a parting slip is a thin section of timber or ply which hangs suspended vertically between the counter balance weights from the box frame head. Its purpose is to stop the weights from clashing with eachother as they move when the sashes are opened and closed.

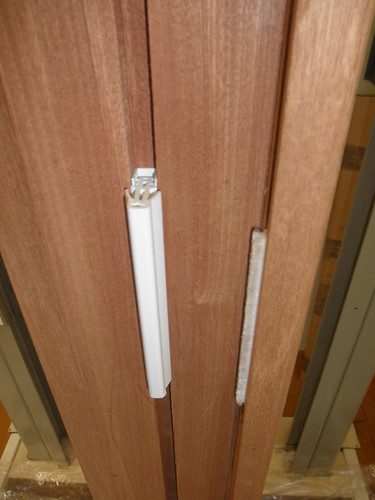
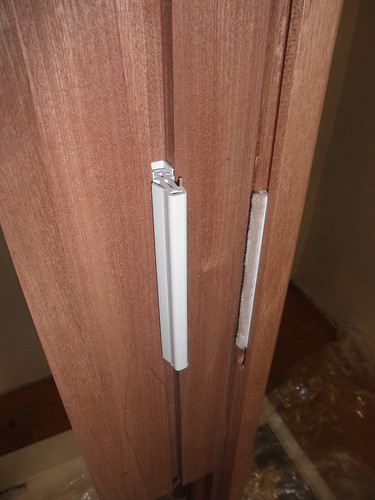
Draught proofing is acheived (I hope) with the use of the extruded parting bead (located between the sashes) that a have mentioned earlier in the thread and weather pile strips routed into both the inner face of the outer lining and the outside edge (closest to the inner sash) of the staff bead. The staff bead is the bead which holds the inner sash in place. Traditional box sash windows didnt have any of the draught proofing mentioned above.

I will do a sketchup drawing to try to explain it better.

John
 
Hi, windows look like there coming on now! As for fixing the frames, I do not have any practical knowledge on the subject, as I have only supplied these before, not fixed.
 
Thoughts on traditional fixing. The trad linings dont have the structural strength. So the fixing should be on the cill ends and the top rail. ie. the only strong bits near the bricks.

That's my starter for 10. Any advance?
 
I have fitted these with screws through the cill and screw the top inner lining to either the wooden lintel or blocks of wood fixed to the concrete lintel.
I hope this helps :)
 
Steve Maskery":oj4qs0e6 said:
Well I don't know what a wagtail is, for a start.
But also I don't understand how you make box sash windows draught-proof. We had them in our Victorian semi when we were kids and all I remember is them being blooming draughty and being sealed up with sellotape.
I suppose I just need to do some trad reading.

Cheers
Steve

To save me doing the sketchup drawing I thought I could try to explain with pictures

The outer sash (top) is located between the parting bead and the outer liner. The parting bead I am using has a "flipper" on either side which compresses against the sash and I have routed a grove on the inside face of the outer liner to take a weather pile strip, so the arrangement looks like this

4349301748_dde6ee864b.jpg


4348552739_a989cf1bb3.jpg


They are short sections of course but I hope you can see the idea.

The inner sash (bottom) is held in place by staff bead which also has a routed grove and weather pile strip.

The lead weights (counter balance weights) are located in the sides of the box frame

4348555585_ee7fd33793.jpg


4348556549_2fccaccddd.jpg


They will of course be attached via the pulleys to the sashes

The wag tail (parting slip) is suspended between the weights to stop them clashing with each other as the sashes move

4349305750_04af98e8d6.jpg


The actual wag tail will be thinner than the piece in the picture.

John
 
I finished the preparation and priming of the first sash box today

4348551597_1b7bf9000e.jpg


Rather than have a detailed profile on the outer lining inner edge I thought it would look better just rounded over

4348550557_442648ac50.jpg


Then I primed the frame

4348558517_4aea3582f5.jpg


I have three more to finish assembling and priming before I start the sashes

John
 
John

I've never used an aluminium primer before - is there a particular benefit over a regular 'paint' primer?

(windows looks good btw)

Ed
 
Hello Ed

I am following the advice of a painter friend of mine. He tells me, as do the instructions that come with the paint, that aluminium oxide primer is recommended for resinous or oily woods and is a good choice for any wood if you intend to use a gloss (oil based) paint system, which I do.

Cheers

John
 
For anyone following this thread the work will stop now for about five weeks as I have to return to my work which is on a ship at sea, so to be resumed later. Thanks for the interest and comments so far

John
 
I'm curious what that thing on the wall is behind the window. it has some clamps in it and has buttons and lights over head. I guess i'll have to wait a while for that one. You make a very nice sill. thanks for sharing your project.
 
Hello Woodsworth, I can still access the the site. Trouble is Im a long way away from the workshop :?

What you see on the wall is rails for an hydraulic lift down to the machine room. The clamps are hung off the back just for convinience.

John
 
There are three ways to fix the boxes in.

- If you put closers on the back of the boxes to cover the weights the box can be wedged in placed and expanding foam used all around it to secure. 1/4 or 1/8 ply can be used for this.

- If you don't want to close the box, then you can fix aluminium or steel straps into the reveal, leave them an inch or so sticking out into the room, put the box into place, then bend over the straps on to the face of the inner cheek and use screws to fix, these can be recessed in and then covered over with an architrave.

- On the old windows that I work on (100 years + old), the boxes are fixed into the reveal with a double wedge, at either side of the cill and at either side of the head of the box. Though due to the size of your boxes this may not be strong enough to hold.

Hope ths helps.
 
Thanks SNight and yes it does help. I will be closing the boxes so will opt for option 1 and I might add some steel or aluminium straps as well.

John
 

Latest posts

Back
Top