DuncanDesigns
Established Member
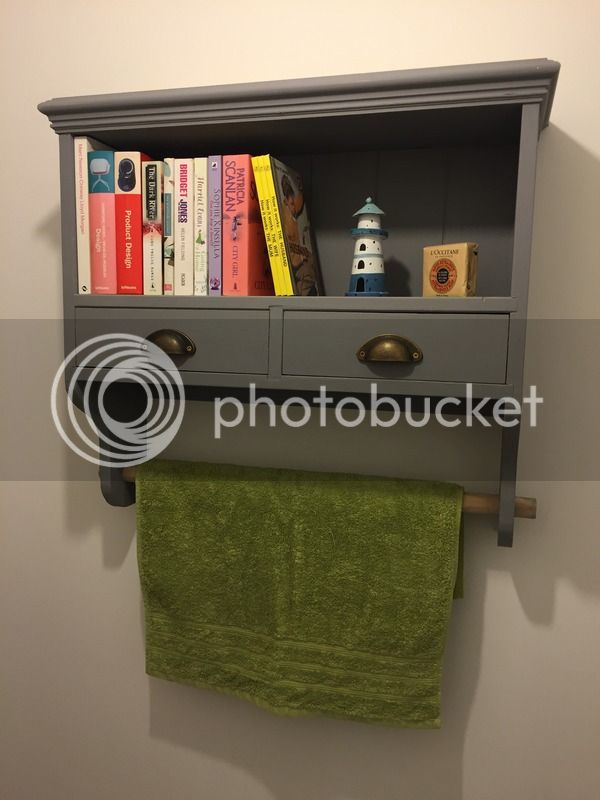
Just a quick one that I put together a couple of months ago for the good wife. In our back toilet the wife needed somewhere to hang the hand towel. And I needed somewhere to house my reading material when I spend time in deep thought in there. So I came up with a combination unit that would do both. Using 2 old shelves I got in Homebase, I cut them up and glued them together, and added a brush shaft. Total expenditure was about £24, including the paint. Heres what I managed to capture on camera!
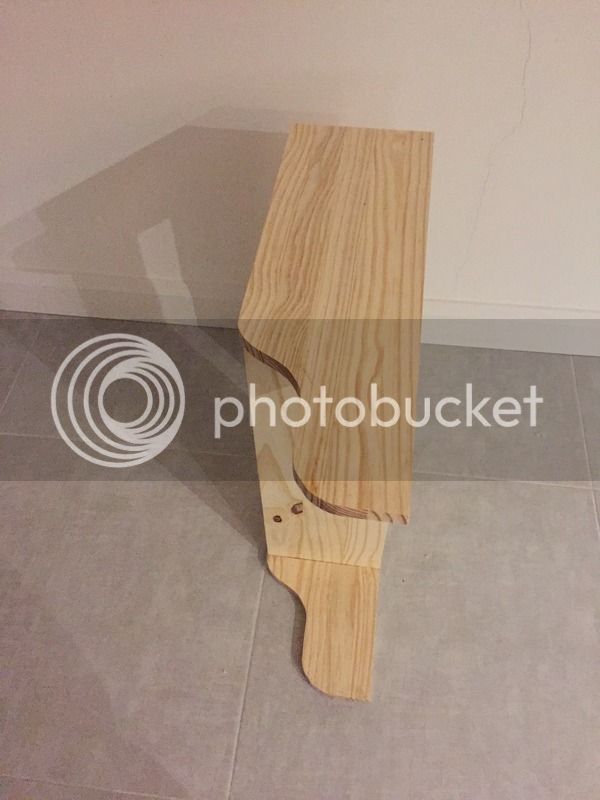
With the grooves routered out and edges curved with the jigsaw it looked like this

The first curve was cut freehand with the jigsaw, then the second was matched to it using a flush trim bit on the router
An old piece of 6mm MDF was used as a backing for the book shelf area. I cut small grooves in this on the mitre saw. (Apologies for the mess - this will be explained in a future thread!)

A 6mm groove was cut right round to hold the backing in place. This was done using the router
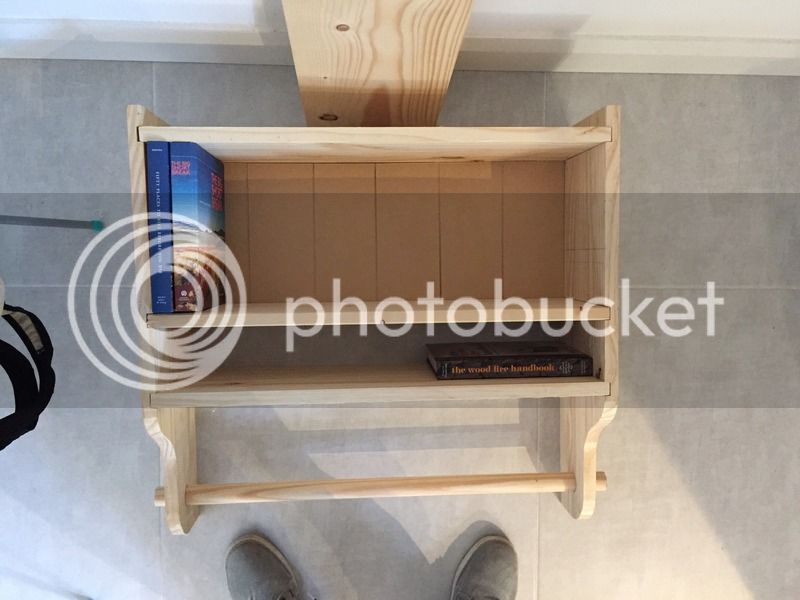
Dry assembled with the brush shaft in place which will hold the hand towel
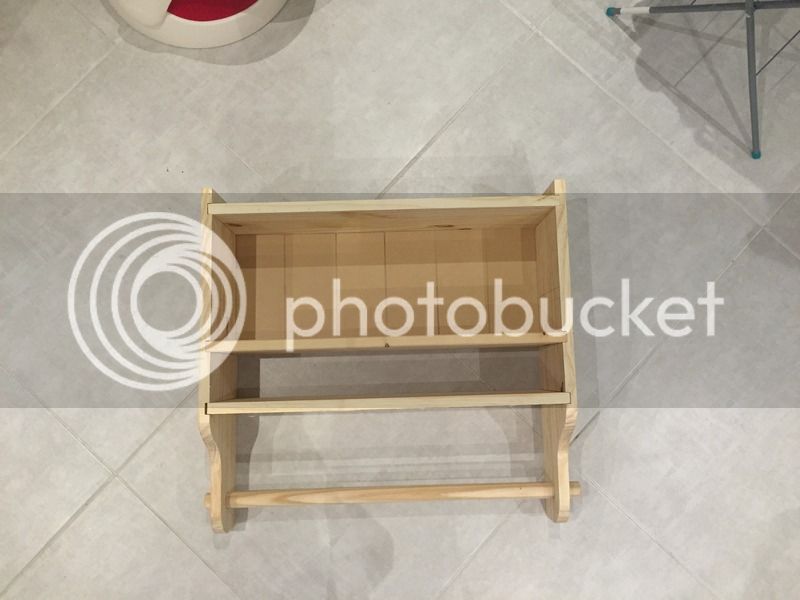
Test fitting a few publications for size
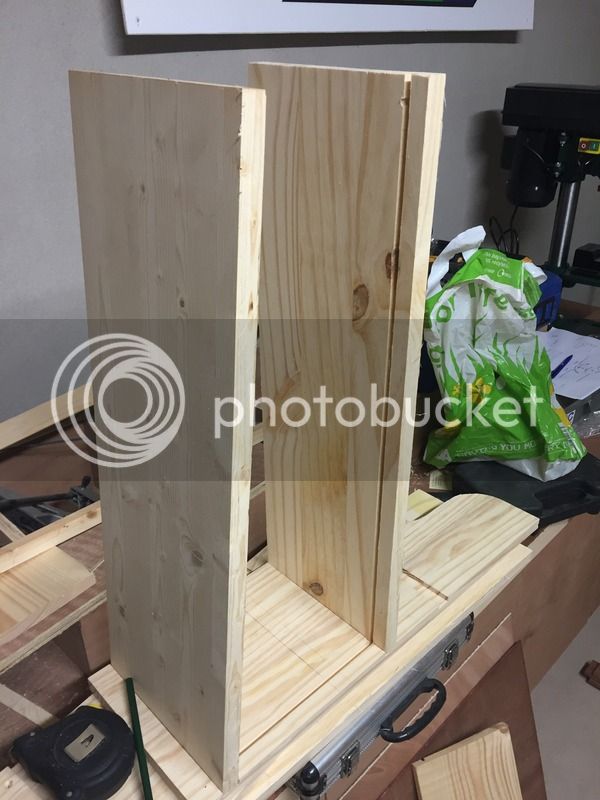
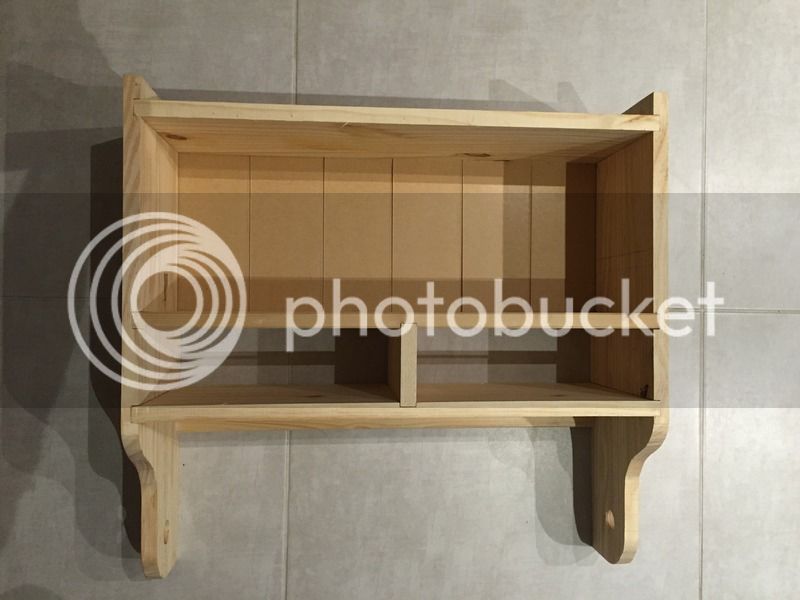
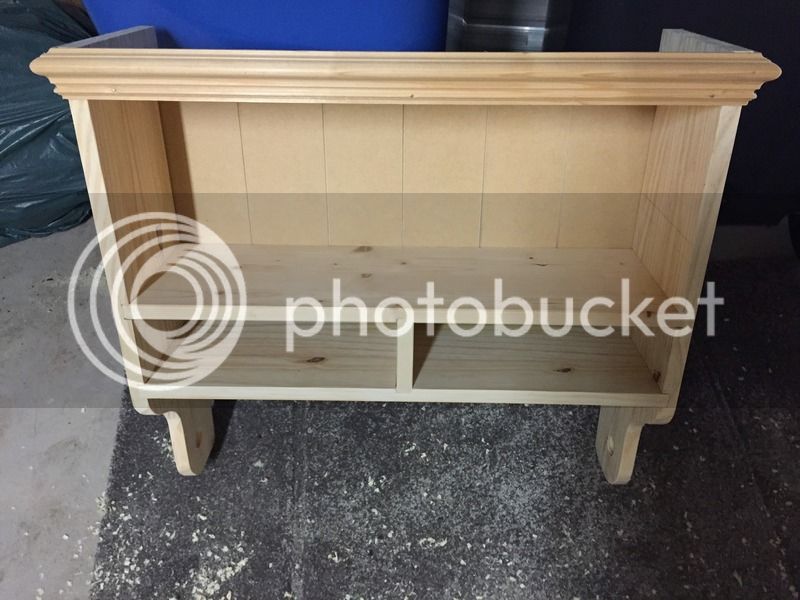
Centre division added to allow for 2 small drawers. Again this was done using the router
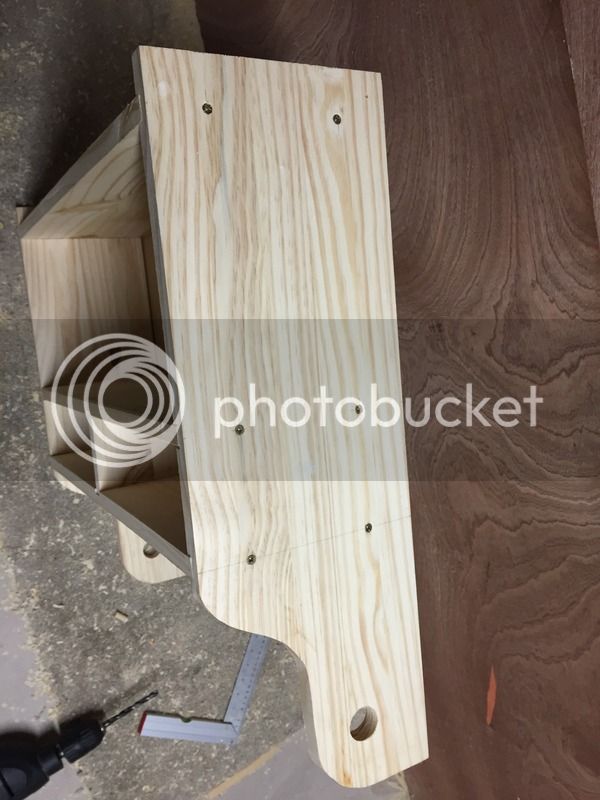
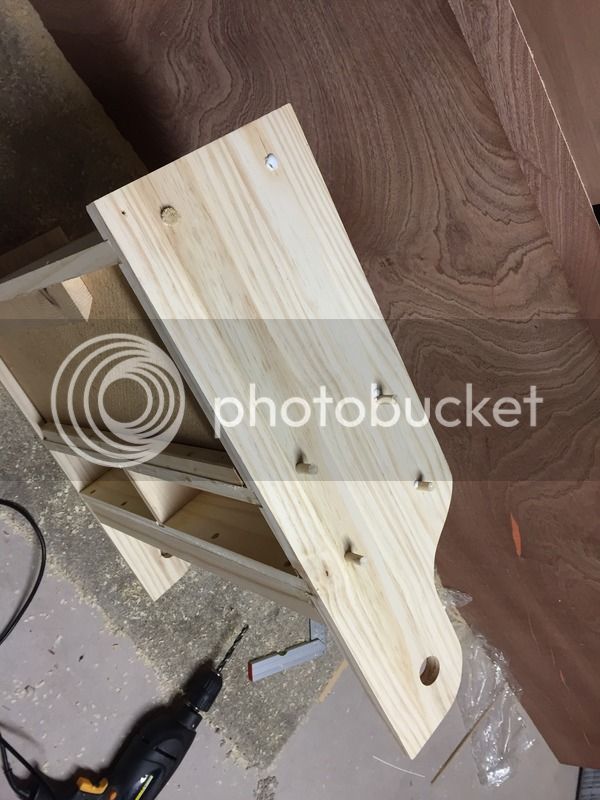
For final assembly I screwed everything together when it was glued. The following day I removed all the screws and replaced them with 8mm dowels, glued and then sanded.
A decorative top was added to finish the piece off (I had this left over from a previous project)
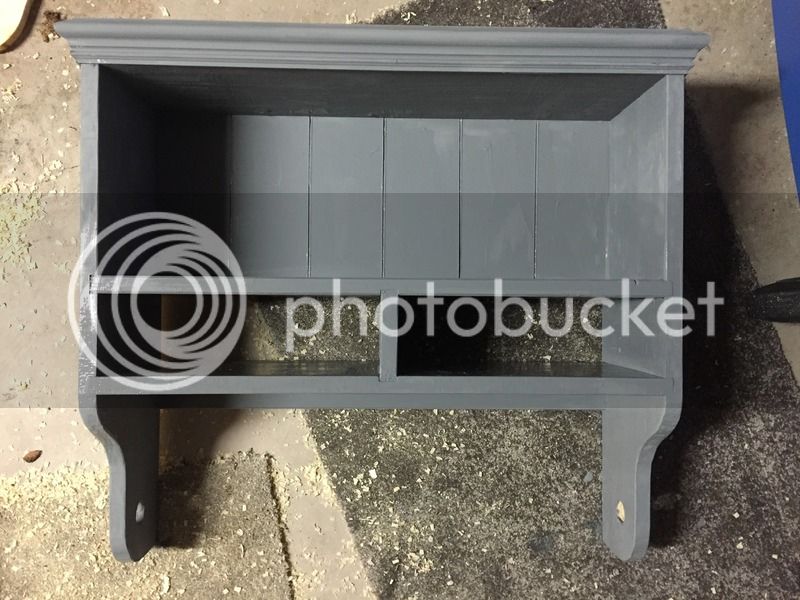
A couple of layers of paint was added to cover up any evidence of mistakes / rough bits.
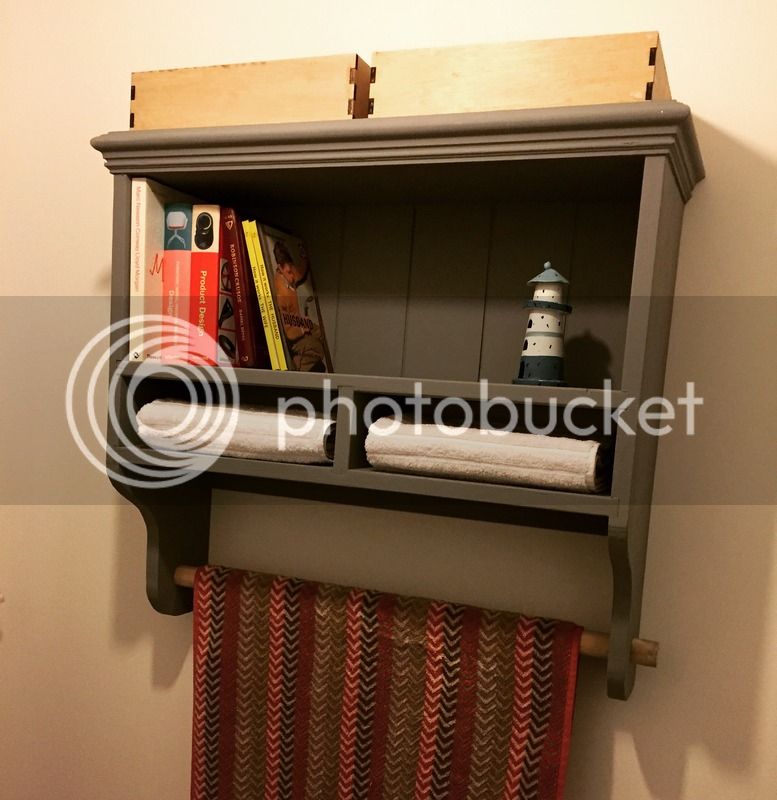
Here it is on its maiden hanging without the drawers. It took me a bit longer to get those together so in the mean time I used some folded towels to fill the space.
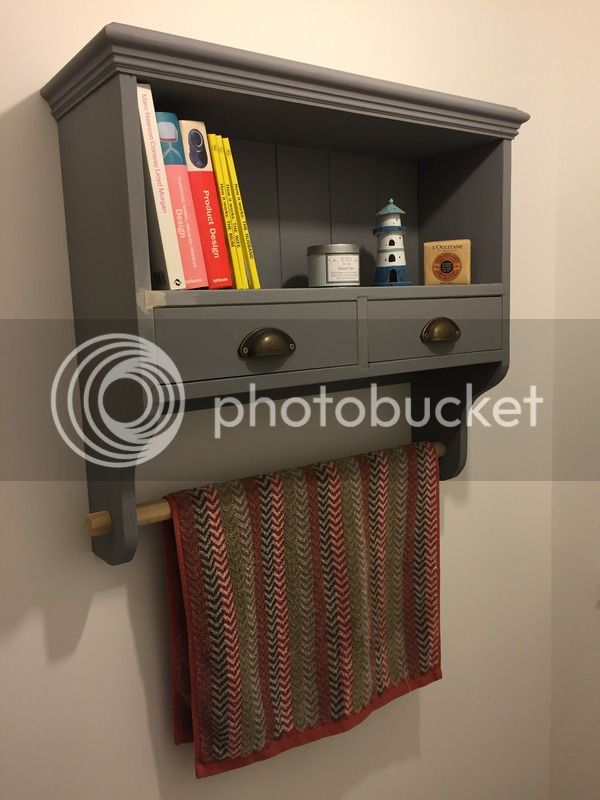
Perhaps not the best of a picture but the drawers are included here. I had to do a little patch job at the lower corner but that is now painted in and covered up.
Many thanks for reading through. Hopefully i inspired someone to do something similar. Any questions, let me know!
With the grooves routered out and edges curved with the jigsaw it looked like this
The first curve was cut freehand with the jigsaw, then the second was matched to it using a flush trim bit on the router
An old piece of 6mm MDF was used as a backing for the book shelf area. I cut small grooves in this on the mitre saw. (Apologies for the mess - this will be explained in a future thread!)
A 6mm groove was cut right round to hold the backing in place. This was done using the router
Dry assembled with the brush shaft in place which will hold the hand towel
Test fitting a few publications for size
Centre division added to allow for 2 small drawers. Again this was done using the router
For final assembly I screwed everything together when it was glued. The following day I removed all the screws and replaced them with 8mm dowels, glued and then sanded.
A decorative top was added to finish the piece off (I had this left over from a previous project)
A couple of layers of paint was added to cover up any evidence of mistakes / rough bits.
Here it is on its maiden hanging without the drawers. It took me a bit longer to get those together so in the mean time I used some folded towels to fill the space.
Perhaps not the best of a picture but the drawers are included here. I had to do a little patch job at the lower corner but that is now painted in and covered up.
Many thanks for reading through. Hopefully i inspired someone to do something similar. Any questions, let me know!