Another new workshop

UKworkshop.co.uk

Help Support UKworkshop.co.uk:

This site may earn a commission from merchant affiliate links, including eBay, Amazon, and others.

gav

Established Member
Joined
1 Apr 2005
Messages
107
Reaction score
2
Location
Ipswich
Not been on the forum for a while as in the last few weeks we have moved house to Ipswich which means I no longer have a workshop at all.

I have plenty of space to build in and this time I plan to build a timber structure but have a few questions on the design to take loading which I hope other workshop builders and pros might be able to advise on.

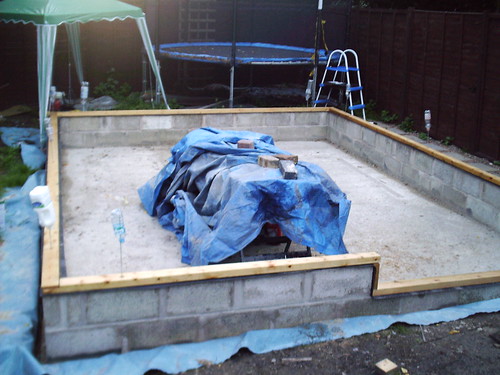
The proposed size is 6m x 5m with an apex roof.

I would like a wooden floor and was going to use the same sort of construction as the carlsberg build of pillars for support. I have some fairly heavy kit like a wadkin AGS tablesaw and am unsure what specs I would need for timber sizes and centres, would something like 150x50 at 400centres with a 18mm plywood deck be sufficient.

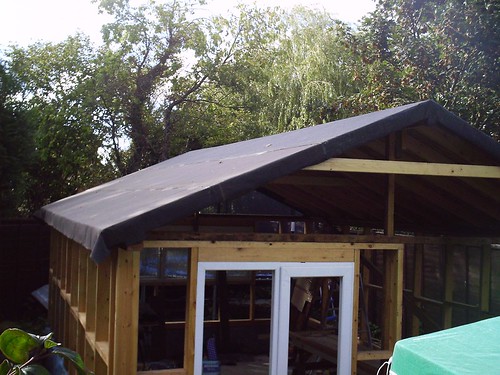
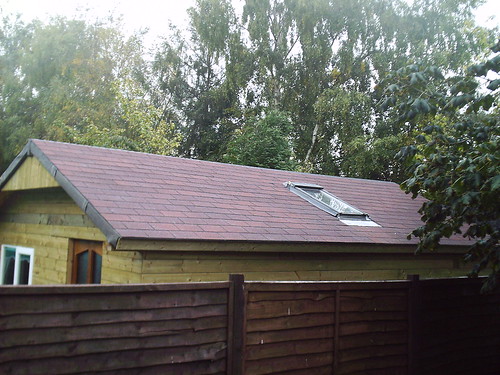
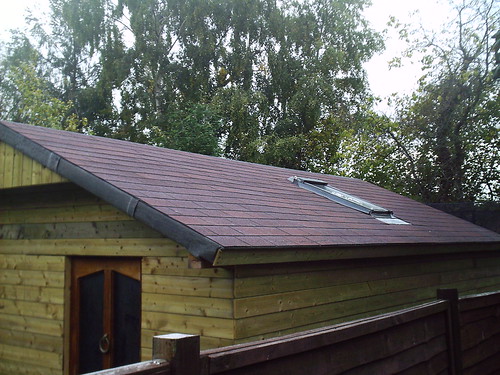
For the roof structure I would like to use something that is very durable my experiences of felt is that it doesn't last long so I was thinking of using roof tiles. I did think of cedar shingles but they work out quite expensive.

If I were to use tiles what sort of wall and roof timber sizes and spacings might I need?
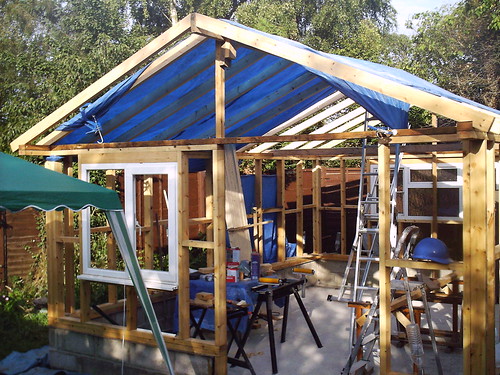
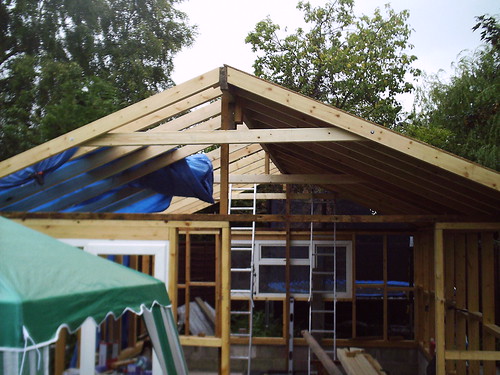
I was thinking for the walls of 100x50 clad internally with 12mm plywood and externally either shiplap or featheredge. Then 150X50 for the roof with the A frame brace set slightly above top of wall to give extra head height inside.

If I could master sketchup I would draw a rough plan which might be better than my text description.

I promise some photos of the build when I get underway if you can all stand another workshop build series.

Gav
 
I'm in the final stages of building mine with a similar footprint.

I used a concrete base with a couple of courses of blockwork before I started the timber framing.

809977555_69ed190f62.jpg


993633831_3bb946945b.jpg


I started off with a few A-frame cross supports but have been putting more in as I go along :) This photo still shows the temporary ridge-beam supports in place.

1009777519_73207f16e3.jpg


1350760603_08257d89fe.jpg


For the initial weatherproofing, I've covered it in underfelt. The final covering will be Wickes felt roof shingles (in red)

1094456850_f6e164de73.jpg


I've clad it in treated 12mm t&g and added a reclaimed front door (so it looks like a glorified wendy-house). Next to the door there's a half-door section that opens for wider loads.

1331986098_278687f1e7.jpg


The last couple of weekends have been spent digging the 40m service trench. The next batch of good weather will hopefully see me on the roof fixing the shingles - either that or painting the thing (and the door).

After that it's the finishing off of the internal insulation. The good thing about having a concrete pad as a sub floor is that I can take my time fitting the materials for the main floor, but still use the shed.
 
ianmelb":17gp391e said:
I'm in the final stages of building mine with a similar footprint.

I used a concrete base with a couple of courses of blockwork before I started the timber framing.

809977555_69ed190f62.jpg


993633831_3bb946945b.jpg


I started off with a few A-frame cross supports but have been putting more in as I go along :) This photo still shows the temporary ridge-beam supports in place.

1009777519_73207f16e3.jpg


1350760603_08257d89fe.jpg


For the initial weatherproofing, I've covered it in underfelt. The final covering will be Wickes felt roof shingles (in red)

1094456850_f6e164de73.jpg


I've clad it in treated 12mm t&g and added a reclaimed front door (so it looks like a glorified wendy-house). Next to the door there's a half-door section that opens for wider loads.

1331986098_278687f1e7.jpg


The last couple of weekends have been spent digging the 40m service trench. The next batch of good weather will hopefully see me on the roof fixing the shingles - either that or painting the thing (and the door).

After that it's the finishing off of the internal insulation. The good thing about having a concrete pad as a sub floor is that I can take my time fitting the materials for the main floor, but still use the shed.

Ian,

Welcome to the forum. :D

Byron is correct, you links have been caught by our spam trap, once you have a few more post it will stop happening. :)

You have been busy, looks a good usable size but I can guarantee that you will fill it. :roll:
 
motownmartin":1gjm1w3y said:
Calling the moderator, please fix, I want to see the pics ](*,)

Try again tomorrow :D

It was already fixed, you just need to take another look. :roll:
 
DaveL":130cuczp said:
[Welcome to the forum. :D

Byron is correct, you links have been caught by our spam trap, once you have a few more post it will stop happening. :)

Thanks Dave, I was a little bemused at first - I'd followed all the instructions on the 'How to show images from flickr' thread

You have been busy, looks a good usable size but I can guarantee that you will fill it.

I managed to fill it as soon as the roof went on! Mind you, that was mostly with tools and materials for the walls :)

Very little of the build has been purchased from new or full price:
- The blocks were salvaged from a B&Q that was undergoing a remodel (they were part of the store),
- The DPC/DPM and reinforcing grid in the concrete were leftovers from one of my brother-in-law's projects
- the 2x4s were from a wood auction,
- the roof OSB was off ebay from someone's "never finished",
- the windows were also from ebay (for a penny),
- the velux (and most of the flashing kit) was being chucked out by someone having their house remodeled
- the T&G was salvaged from a timber yard that had left it outside for a few months (it hadn't been treated at that point) so I got it for a knock down price and had it pressure treated
- the front door was from my parents' house (when they had it replaced :))
- the wall insultation is Rockwool from a local firm that uses it to make loft hatch fittings and they have loads of offcuts whichj they sell on quite cheaply

I suppose the only new bits are the permeable and non permeable membranes and felt I've used on the roof and walls. Oh, and the services, 40m of alkathene 20mm pipe, 40m of 10mm-sq 3-core SWA and 40m of 50mm twinwall duct. Still, managed to get the SWA for a reasonable price, about £3.35/m

I've also done most of the work single-handed (which is why it's taken 3-4 times longer than with a mate) - the only time I've called in the reinforcements were for tamping down the pad and for locating the wall frames onto their studding 'bolt-downs'

Ian
 
Ian,

Great build and good pics. A couple of questions?

Have you put a damproof course in the slab, if so how as I can't quite work it out?

Whats the expected lifespan of those felt shingles as they certainly look nicer than plain felt?

Gav
 
Brilliant Ian keep up the good work. It really is looking the part. keep posting the pictures. I love workshop builds. :D
 
gav":f68s1hqd said:
I promise some photos of the build when I get underway if you can all stand another workshop build series.

Gav

I don't think you need to worry about people standing another workshop build thread - they seem to be the most popular topics and it's always good to see it from start to finish like you are doing.

Cheers
Mike
 
gav":mdkhho0j said:
A couple of questions?

Have you put a damproof course in the slab, if so how as I can't quite work it out?

It went over the hardcore (type1) and under the concrete. I also used a roll of brickies DPM along the top of the blocks:

Type1 Sub-base, wacked in:

519840311_77c1d38c5c.jpg


Grid and DPM (I've left a section without re-inforcement in case I want to build an inspection pit or summat later):

519840325_fdd91c38e7.jpg


Pad poured:

519840333_7b6afd4306.jpg


Whats the expected lifespan of those felt shingles as they certainly look nicer than plain felt?

I think Wickes quote 10 Years, although laying them on top of underfelt should make the water-proofing last a bit longer than that. I think they were also reasonably economical - about £185 for the whole roof (including a roll of the same stuff for the ridge)

164022-ab0-00co_full.jpg
 
gav":2aldjk9l said:
Then 150X50 for the roof with the A frame brace set slightly above top of wall to give extra head height inside.

The width of my shed was determined by the fact that I was being a bit lazy with the roof.

I wanted a 1000mm apex above wall plate and I wanted to use 2440mm sheets without having to cut them down. That gave me the short side and the hypotenuse of the roof triangle. Therefore half the width of the building was to be:

Code:
sqr-root((hyp x hyp) - (ht x ht)) => sqr-root((2440 x 2440) - (1000 x 1000))

= sqr-root(5953600 - 1000000)
= sqr-root(4953600)
= 2226 mm

Take off 100mm for an overhang and the width of the shed is 2 x 2126 = 4252mm.

It's actually a little bit wider than that because the ridge beam adds another 50mm to the equation...

This also gives a pitch of roughly 22 - 22.5 degrees which is aesthetically pleasing.

It also means that I could use the 4.8m (ish) lengths of 2x4 for the rafters, after I halved them, they came out just over 2.3m long ...
 
Shingles fixed to one side of the roof. Still needs the other side, ridge piece and fascia boards to complete the effect:

1498734644_a558859075.jpg


1497879117_906b200937.jpg
 
Back
Top