


Corneel
Established Member
Mechanics of chipbreakers and high cutting angles in woodworking planes.
Kees van der Heiden, The Netherlands, 2014.
Abstract.
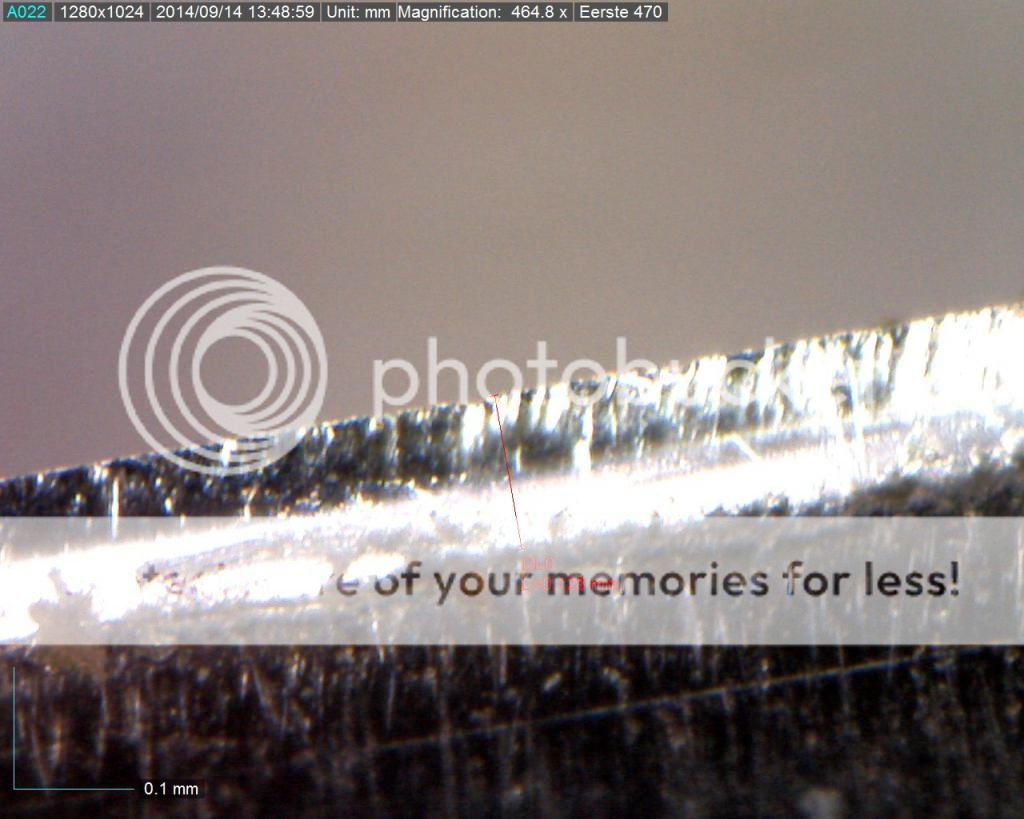
When using handplanes, tearout is a typical problem. Two methods to prevent tearout are high cutting angles and chipbreakers set very close to the cutting edge. In previous work it was found that a cutting angle of 60° is equivalent to a chipbreaker setting of 0.1 mm behind the edge when the chipbreaker edge is beveled at 45°. Likewise an angle of 55° is equal to a 0.2 mm setting of the chipbreaker. To compare the two methods a planing machine is used with force transducers to measure the cutting force Fc and the force perpendicular to the wood surface, the normal force Fn. Fc proved to be 30% higher for the plane setups with a high cutting angle, compared to the equivalent chipbreaker settings. Fn is normally negative, pulling the edge into the wood in a standard 45° plane without the chipbreaker. When setting the chipbreaker close to the edge this negative force is slightly reduced, but in high angle planes this is reduced much more and tends towards 0 around a 60° cutting angle, under the circumstances of this experiment. A second experiment has been conducted to measure the forces after a planing distance of 100 meters. The rate of change of Fc is about equal for both methods. The rate of change of Fn is twice as fast for the high cutting angles. The conclusion is that the plane with a chipbreaker is technically more advanced then the plane with a high cutting angle. A hypothesis about how the two methods prevent tearout is proposed in this article too.
The complete article will be published on Steve Elliott's website http://planetuning.infillplane.com/, hopefully this weekend. As soon as I have a link I will post it here.
Kees van der Heiden, The Netherlands, 2014.
Abstract.
When using handplanes, tearout is a typical problem. Two methods to prevent tearout are high cutting angles and chipbreakers set very close to the cutting edge. In previous work it was found that a cutting angle of 60° is equivalent to a chipbreaker setting of 0.1 mm behind the edge when the chipbreaker edge is beveled at 45°. Likewise an angle of 55° is equal to a 0.2 mm setting of the chipbreaker. To compare the two methods a planing machine is used with force transducers to measure the cutting force Fc and the force perpendicular to the wood surface, the normal force Fn. Fc proved to be 30% higher for the plane setups with a high cutting angle, compared to the equivalent chipbreaker settings. Fn is normally negative, pulling the edge into the wood in a standard 45° plane without the chipbreaker. When setting the chipbreaker close to the edge this negative force is slightly reduced, but in high angle planes this is reduced much more and tends towards 0 around a 60° cutting angle, under the circumstances of this experiment. A second experiment has been conducted to measure the forces after a planing distance of 100 meters. The rate of change of Fc is about equal for both methods. The rate of change of Fn is twice as fast for the high cutting angles. The conclusion is that the plane with a chipbreaker is technically more advanced then the plane with a high cutting angle. A hypothesis about how the two methods prevent tearout is proposed in this article too.
The complete article will be published on Steve Elliott's website http://planetuning.infillplane.com/, hopefully this weekend. As soon as I have a link I will post it here.


")