About thick cap-irons

UKworkshop.co.uk

Help Support UKworkshop.co.uk:

This site may earn a commission from merchant affiliate links, including eBay, Amazon, and others.

GLFaria

Established Member
Joined
21 Mar 2014
Messages
380
Reaction score
3
Location
Portugal
How does one deal with thick cap-irons?
I mean, with thin, curved cap-irons, the normal practice, or at least my normal practice (which I readily admit may be wrong), is to build the front edge as a sort of knife-edge, by flattening and sharpening the underside, and polishing the curved surface of the upper side. I never worried much about the angle of the upper edge – it was just what would result from the curved shape of the cap-iron.
Cap-iron_thin.png


With thick cap-irons, at least the one I have seen, there is no such a curved surface. There is a flat surface on the underside, another flat surface on the upper side, resulting in a sort of a wedge, and possibly a very small flat at the edge.
Cap-iron_thick_01.png


So, how should one sharpen a thick cap-iron? The angle of the “wedge” seems too low for it to work as a normal cap-iron does in shaping the chip, so I assume there must actually be another (highly polished) small surface at the front, between the upper and the lower surfaces of the “wedge”.
Cap-iron_thick_02.png


Is my reasoning right? If it is, should this small surface be flat or curved? How high should it be? If flat, what would a good range for its angle?
(yes, I’ve read the article on Kato’s et al. experiments, but he seemed more interested in the effects on iron wear than on proper chip formation, so I don’t know if the conclusions apply in real, everyday planning life)

Thanks for any suggestions
 

Attachments

  • Cap-iron_thin.png
    Cap-iron_thin.png
    6 KB · Views: 1,575
  • Cap-iron_thick_01.png
    Cap-iron_thick_01.png
    3.1 KB · Views: 1,575
  • Cap-iron_thick_02.png
    Cap-iron_thick_02.png
    3.1 KB · Views: 1,575
I think you are completely correct. For the angle alpha I choose something like 45 to 50 degrees. Set at 0.1 to 0.2 mm from the edge it is hard to find a timber that still wants to tearout. Very important is the close fit between capiron and blade face. Absolutely no gaps alowed here.

I did a short investigation to the several methods to avoid tearout and you can see the results overhere:
http://planetuning.infillplane.com/html/cap_iron_study_by_kees_van_der.html
 
I don't personally worry too much about angles on cap irons, I just make sure that the mating surface sits snugly against the blade so nothing gets trapped between them. I don't see the point of making a sharp (ish) edge. If you have a sharp edge as opposed to a flat strip on the cap iron, clamping down will add even more pressure to the blade which could cause it to warp. IMO, the bigger the footprint of the cap onto the cutting blade, the better. As long as the mating joint is tight.
 
You shouldn't have to do anything to a cap iron unless it was faulty from the start - in which case send it back.
It needs to sit tight on the face of the iron and have an angle of well under 90º so that shavings will rise over it.

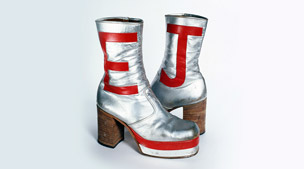
Don't want to be a party pooper but it has to be said - these modern planes with fat irons, thick caps and general over engineering are very much fashion victims*. Reminds me of Elton John.

thumb8.jpg


Nothing wrong with the old designs - and much easier to set up/sharpen and lighter.

*PS could think of them collectively as "Eltons". e.g. "Yawn here comes another Elton from a trendy modern tool maker!"
 
Corneel":12gxqpec said:
I think you are completely correct. For the angle alpha I choose something like 45 to 50 degrees. Set at 0.1 to 0.2 mm from the edge it is hard to find a timber that still wants to tearout. Very important is the close fit between capiron and blade face. Absolutely no gaps alowed here.

I did a short investigation to the several methods to avoid tearout and you can see the results overhere:
http://planetuning.infillplane.com/html/cap_iron_study_by_kees_van_der.html

Thank you very much indeed. I already read, and filed for further reading (thanks for the PDF), that study of yours. It helps understand why I had so many problems planing wood I intend to use for making my new plane handle. It is a very difficult wood, and I was planing it with my "common" setting, which is about 0.5mm cap-iron distance to the edge and somewhere between that and 1mm for the mouth width.
I must say I was a bit astonished with that 0.1mm you suggest. I can't see how one can reliably set a cap-iron that close - I would even say too close for feeling comfortable while setting it!
 
Jacob":384mcpsp said:
.....these modern planes with fat irons, thick caps and general over engineering are very much fashion victims......

Yeah. Those 18th and 19th century wooden-bodied planes with fat irons and thick caps were an utter disaster. Couldn't plane wood for toffee. Nobody managed to remove wood shavings until Leonard Bailey came along. :roll:

For what it's worth, my experience is that thicker irons (don't need to be that much thicker) and better cap-irons (the Record Stay-set/Clifton two-piece is good) do help to stiffen things up when planing harder woods. If all you work with is softwood or mild hardwoods, thinner irons will do.
 
Why should it matter how thick the chipbreaker is as long as the leading edge is at least 45 degrees, and it is stiff enough to move reliably and easily into position close to the edge of the blade when used on a smoother?

Well, there is a lot to ask in that one sentence. My experience is that the thin chipbreakers from Stanley are terribly flexible, and this flex makes it harder to set. Just yesterday I was using a Type 11 #4 1/2 and had a frustrating time with the chipbreaker "creeping" and then popping over the edge of the blade as the screw was tightened. Other Stanley chipbreakers are better in this regard. Is this just my experience?

By comparison, the thick chipbreakers from LV and LN are predictable. They do not flex. They do benefit from a micro secondary bevel to increase the angle at the leading edge from 25 degrees to about 45-50 degrees, but then they are ready and reliable. I dislike the two-part Clifton because the front moves. I have epoxied mine together, and now it works as desired.

Regards from Perth

Derek
 
I set them with the screw half tight. I turn the iron around so I catch the light in the narrow line in front of the capiron. Then I push it forward as close as I can. You can also lightly tap with a hammer. You shouldn't measure the distance. Set it as close as you can, and when you still get tearout, set it closer :mrgreen: If you feel the plane bucking and the shavings look like fried bacon, set it a little further away from the edge. It takes a bit of practice, but no fear. If you push it accidentally over the edge it is not the end of the world, I just pull it back and try again.
Here you can find a video demonstrating how I do it: http://seekelot.blogspot.nl/2012/06/capiron-or-chipbreaker.html

Personally I have no problem setting the capirons on my Stanley planes. They all have the original ones. It was a bit frustrating to fit them to the cutting iron without gaps, but now that is mended, they are fine. My wooden planes are more troublesome. Some of them want to "swim" around when tightening the screw. Especially the Ulmia is bad. But I think I found the culprit on that one, it has a large burr on the upper end.

The exact angle of the capiron isn't important. The Stanley ones come around 45 to 50 degrees, which is fine. The LN, LV and QS ones have a leading edge angle of 25 degrees. That is really too shallow, so you'd better add a small microbevel. I do that freehand on a coarse stone, then lap it a bit on a finer one. Adding a bit of convexity is nice too. Hock is close to 40 degrees which is fine too, but a little low.
 
phil.p":382g4ayb said:
:) MM - That logic must surely dictate that you would be heavier standing on one foot?

Hello,

No, standing on one foot obviously does not increase weight, but it does increase pressure, in this case double that of standing on two feet. However, though a finer edged cap iron will generate a higher pressure than a thick edged one, it will NOT make any difference to the bending force on the blade assembly. For the same force generated on the cap iron screw, the blade will be deflected the same, regardless of the pressure on the leading edge, all else being equal. The thicker cap irons from LN, Hock etc. etc. do not bend the blade assy, simply because they are flatter, it has nothing to do with their wider leading edges.

Mike.
 
Hello,

Undoubtedly, the thicker, modern cap irons are much, much better than the bits of old bent tin, that were offered before. Of course they too can be improved, but still will bend the plane iron, even if the leading edge is improved, so I still like the thicker ones.

Mike.

Just to be clear, it is the flatness of the cap iron plate I am talking about, which prevents the blade assembly from bending, NOT the flatness of the front mating edge.
 
I'm fairly certain I have a number of very old woodies with pretty substantial cap irons, as previously mentioned by CC.
I know that you are probably referring to the newer manufacturers but I suggest that we give credit where it really belongs. That most certainly isn't with Clifton, LN or Veritas.
 
MIGNAL":14ypdyuw said:
I'm fairly certain I have a number of very old woodies with pretty substantial cap irons, as previously mentioned by CC.
I know that you are probably referring to the newer manufacturers but I suggest that we give credit where it really belongs. That most certainly isn't with Clifton, LN or Veritas.

Hello,

You'll get no argument from me, the old cap irons were superb. I suspect that the new, thick cap irons were introduced as a return to the old values, not something new. I had only been talking in the context of the newly introduced ones as an improvement to Bailey type planes. Sorry if my omission did not give due reverence to the older plane makers, who got it right before we were around. It is those modern, new fangled Leonard Bailey type things, that eschewed the traditional, well tried and tested methods of old, that we sadly had to deal with, until someone with some sense, re introduced elements of the old. Now we can enjoy these American house joiners' tools, made to perform somewhere approaching the performance of proper cabinet makers tools of old. :lol:

Mike.
 
. I dislike the two-part Clifton because the front moves. I have epoxied mine together, and now it works as desired.

OK - now that someone else (of superior standing) to me has raised this I am going to jump on board and profess a total lack of understanding how the Clifton and StaySet cap-irons can possibly work as well as a one piece. Unless I am missing a fundamental aspect of the purpose of the cap-iron it surely doesn't support as well as a standard version.

Without someone copying and pasting 'Unless I am missing a fundamental aspect of the purpose of the cap-iron' with the addition of "You are" and not intending to totally derail the thread, can someone please explain this to me?

Thanks


Caz
 
Hello,

I guess there is enough flexibility in the epoxy joint to allow the toe piece to flex a bit, whilst holding both pieces together without play. I like them as standard, myself and can set them close enough to the edge with out any issue. But I suppose that will not suit everyone.

Mike.
 
caroleb":rv5060eh said:
. I dislike the two-part Clifton because the front moves. I have epoxied mine together, and now it works as desired.

OK - now that someone else (of superior standing)
We are all equal here!! Nobody has superior standing.
to me has raised this I am going to jump on board and profess a total lack of understanding how the Clifton and StaySet cap-irons can possibly work as well as a one piece. Unless I am missing a fundamental aspect of the purpose of the cap-iron it surely doesn't support as well as a standard version.

Without someone copying and pasting 'Unless I am missing a fundamental aspect of the purpose of the cap-iron' with the addition of "You are" and not intending to totally derail the thread, can someone please explain this to me?

Thanks


Caz
The function of the cap iron is to transfer pressure from the lever cap cam to the blade face as near to the edge as possible, to hold it tight where it most matters. Ditto with cap irons on woodies with wedges - transfers the wedge pressure via the cap to close to the edge.
I don't know what Derek's problem is - the cap can't move once the cam lever is down tight.
The stayset design has a clever detail which gets overlooked. This is that the front part sits in the slot of the rear part but loosely - it isn't flat. This means that when the lever cap pressure is on the cap iron bears tight on the face of the blade but may just touch at one point in the slot. A form of 3 point loading, but it's one point and a straight edge instead.
o
 
Jacob":2ki0qsek said:
caroleb":2ki0qsek said:
. I dislike the two-part Clifton because the front moves. I have epoxied mine together, and now it works as desired.

OK - now that someone else (of superior standing)
We are all equal here!! Nobody has superior standing.
to me has raised this I am going to jump on board and profess a total lack of understanding how the Clifton and StaySet cap-irons can possibly work as well as a one piece. Unless I am missing a fundamental aspect of the purpose of the cap-iron it surely doesn't support as well as a standard version.

Without someone copying and pasting 'Unless I am missing a fundamental aspect of the purpose of the cap-iron' with the addition of "You are" and not intending to totally derail the thread, can someone please explain this to me?

Thanks


Caz
The function of the cap iron is to transfer pressure from the lever cap cam to the blade face as near to the edge as possible, to hold it tight where it most matters. Ditto with cap irons on woodies with wedges - transfers the wedge pressure via the cap to close to the edge.
I don't know what Derek's problem is - the cap can't move once the cam lever is down tight.
The stayset design has a clever detail which gets overlooked. This is that the front part sits in the slot of the rear part but loosely - it isn't flat. This means that when the lever cap pressure is on the cap iron bears tight on the face of the blade but may just touch at one point in the slot. A form of 3 point loading, but it's one point and a straight edge instead.
o


Good post. Some might remember this thread: 3rd-party-chipbreakers-t76382.html in which it was claimed that the Clifton cap iron design was defective (Cohen, Charlesworth, et al.), when in fact it is not. Far from it, actually. I believe Derek recounted in that thread his efforts to file the slot in the Clifton chipbreaker which most likely ruined an intentional design feature (as another poster in the thread pointed out) and which you have reminded us of in your post above.

Clifton's version/design/take on the old Record StaySet is fantastic. The design is not defective in any way, shape, or form. It is as good or better than any on the market. It can be set closely. In the photo below, mine is set a bare hair's breadth behind the cutting edge. When the lever cap is snapped the whole unit is rock solid and the cap iron will not budge at all.

Here is what one can do when paired with a Hock iron in a 1980s era Record plane:

 
I do understand the concept and purpose of the cap-iron - I just have some trouble appreciating the idea (nearly put fact there) that the two piece design can work as well as the stanley version. Doubtless it works - I do have a few of the Stay-sets and one Clifton version, and I know it works but still cannot quite appreciate why. As I understand it the initial purpose of the two piece, or double, iron was to allow the benefits of a thick blade without the drawbacks. That is to say it stiffens the whole blade assembly but using a thinner blade to allow easy sharpening, and presumably to cut back on materials, thus cost, used.
And yet most, not all, folk seem to think that a thicker blade is a good thing. I have a Hock iron, as well as countless tapered and parallel irons from older planes that all perform very well. Could I say they perform better than one of the Tungsten steel record blades, or the Samurai blade in one of the no4's, which are thin blades coupled with a stanley style cap iron? No, I don't think I could. They inspire a degree of confidence but their overall performance is no better than a fettled, well set up Stanley or such. This may well be due to my own shortcomings in some respect, yet I am able to plane a curly, transparent shaving that floats nicely to the ground when airborne.
I am no engineer, I am reminded of that in the company I keep, but neither am I green or daft. I live to learn, so appreciate the forum greatly.
I am not under the illusion that the Stay-set is defective - of course it is not. I just don't quite grasp the whole idea. I am probably over-simplifying the concept. I do also understand the need to apply pressure to the cutting edge, but it just doesn't quite add up to me. I know it works - just don't get why! And I am not sure it works any better than the one piece! (duck and cover!)

Jacob - I thank you for your explanation. Woodbrains - why is the flexibility in the Stay-set a good thing? Mr Stanford - I am a little wary of setting the cap-iron that close to the edge for fear of adverse effect. I will edge mine forward and see if it makes a discernable difference. To the OP - thankyou for raising what is an interesting topic to me. Thankyou all.
 
caroleb":1d1z8n06 said:
I do understand the concept and purpose of the cap-iron - I just have some trouble appreciating the idea (nearly put fact there) that the two piece design can work as well as the stanley version. Doubtless it works - I do have a few of the Stay-sets and one Clifton version, and I know it works but still cannot quite appreciate why. As I understand it the initial purpose of the two piece, or double, iron was to allow the benefits of a thick blade without the drawbacks. That is to say it stiffens the whole blade assembly but using a thinner blade to allow easy sharpening, and presumably to cut back on materials, thus cost, used.
And yet most, not all, folk seem to think that a thicker blade is a good thing. I have a Hock iron, as well as countless tapered and parallel irons from older planes that all perform very well. Could I say they perform better than one of the Tungsten steel record blades, or the Samurai blade in one of the no4's, which are thin blades coupled with a stanley style cap iron? No, I don't think I could. They inspire a degree of confidence but their overall performance is no better than a fettled, well set up Stanley or such. This may well be due to my own shortcomings in some respect, yet I am able to plane a curly, transparent shaving that floats nicely to the ground when airborne.
I am no engineer, I am reminded of that in the company I keep, but neither am I green or daft. I live to learn, so appreciate the forum greatly.
I am not under the illusion that the Stay-set is defective - of course it is not. I just don't quite grasp the whole idea. I am probably over-simplifying the concept. I do also understand the need to apply pressure to the cutting edge, but it just doesn't quite add up to me. I know it works - just don't get why! And I am not sure it works any better than the one piece! (duck and cover!)

Jacob - I thank you for your explanation. Woodbrains - why is the flexibility in the Stay-set a good thing? Mr Stanford - I am a little wary of setting the cap-iron that close to the edge for fear of adverse effect. I will edge mine forward and see if it makes a discernable difference. To the OP - thankyou for raising what is an interesting topic to me. Thankyou all.

You are welcome. I am happy for having raised this topic, it has become much more interesting than I ever thought it would...
 

Latest posts

Back
Top