April Challenge - PLEASE POST YOUR ENTRIES HERE

UKworkshop.co.uk

Help Support UKworkshop.co.uk:

This site may earn a commission from merchant affiliate links, including eBay, Amazon, and others.
Status
Not open for further replies.

henton49er

Established Member
Joined
16 Sep 2010
Messages
1,241
Reaction score
1
Location
Beautiful, but wet, Mid-Wales
Please post your entries on this thread

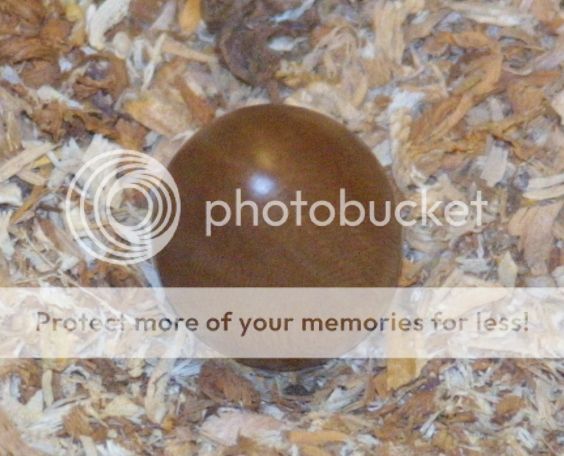
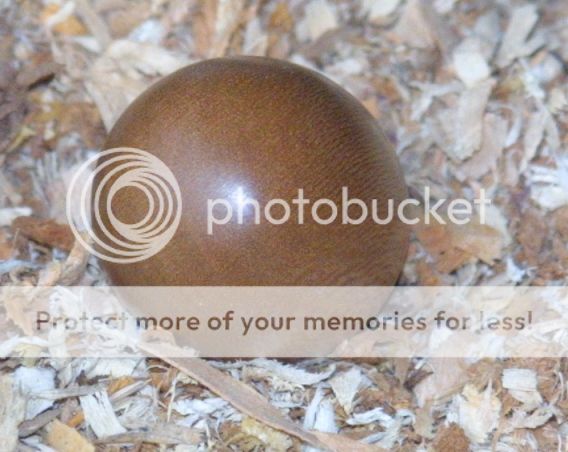
Challenge Requirements: An Easter Egg (singular, no clutches!)

This month’s rules are:-

The Challenge is open to anyone and everyone
Your entry must be new and made specifically for the Challenge
Entries must be made of wood and turned on a lathe using woodturning tools.
There are no maximum or minimum size restrictions, but entries must be oviform.


Segmented turning, decoration, colouring, piercing, hollowing, pyrography and texturing are all allowed, but the principal requirement is for your entry to be egg-shaped (obviously!) and to show off your turning skills.

Please post 3 images of your work along with a brief note about how you made it, what tools and finishes you used, what wood you used and the egg’s dimensions etc.

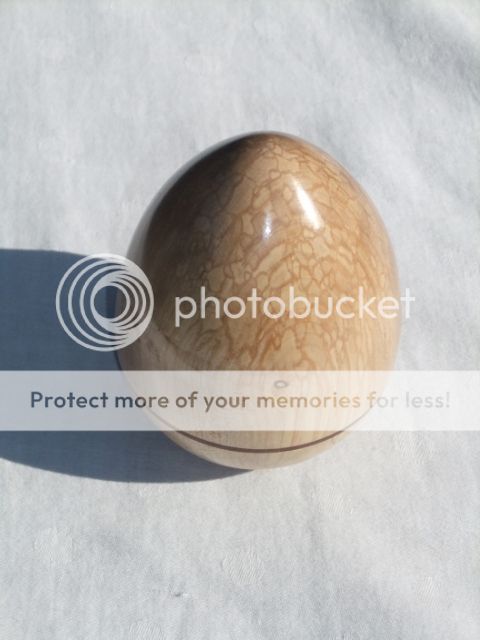
1 showing a general view
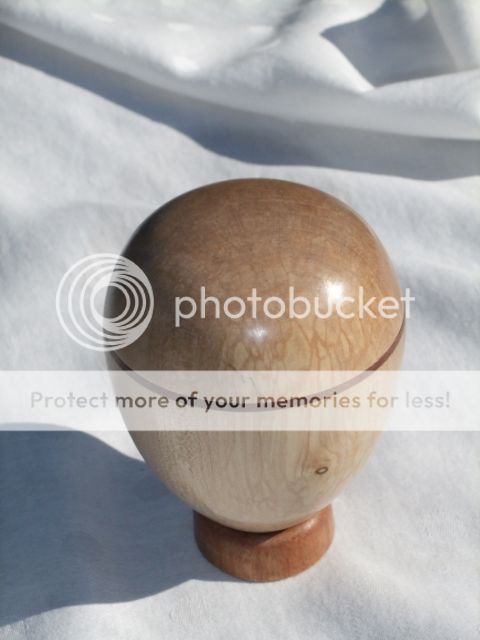
1 showing a top view
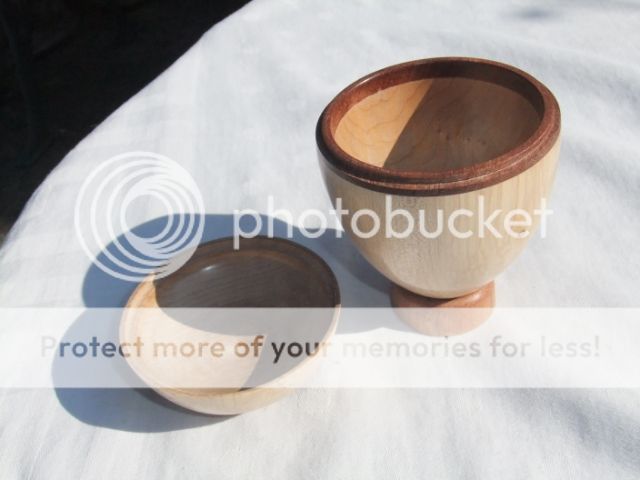
1 showing a bottom view

Image size - please use image size 640 x 480 0.3 mp, as in previous challenges

Please upload your pictures and description between 10pm on the 26th April and 10pm on the 28th April.

Please also send me a PM giving me your own opinions of 1st, 2nd and 3rd places amongst the entries (other than your own) between 10pm on 28th April and 10pm on 30th April (for me to compile the entrants’ scoring).


ROUNDUP
 
OK, I am getting mine in before everybody else's puts me off :) It looks better in reality than it does in the pictures.
Elm, approx 100mm
Tools used. Roughing gouge, spindle gouge and parting tool.
Sanded doen to 400. Two coats of cellulose sanding sealer, denibbed after each coat. then microcrystaline wax.
IMG_0052.jpg


IMG_0053.jpg


IMG_0056.jpg
 

Attachments

  • IMG_0052.jpg
    IMG_0052.jpg
    50.1 KB · Views: 1,851
  • IMG_0056.jpg
    IMG_0056.jpg
    46.5 KB · Views: 1,851
  • IMG_0053.jpg
    IMG_0053.jpg
    38.9 KB · Views: 1,851
This one is Olive Ash with a bit of a plinth to hold the egg up. About 6 inch tall and 3 inch round at the base. Mostly skew, bit of spindle gouge and parting. Cracks on the top filled with dark wax stick. 2 coats cellulose SS denibbed, 2 coats chestnut woodwax and then a right good buffing to really bring on the shine. Sanded to 400 and then that 3m stuff, is it Nyweb?? pads, through to 1200 grit.


Olive Ash Easter egg3.jpg
Olive Ash Easter egg1.jpg
Olive Ash Easter egg2.jpg
 

Attachments

  • Olive Ash Easter egg3.jpg
    Olive Ash Easter egg3.jpg
    69.6 KB · Views: 1,835
  • Olive Ash Easter egg1.jpg
    Olive Ash Easter egg1.jpg
    185.1 KB · Views: 1,834
  • Olive Ash Easter egg2.jpg
    Olive Ash Easter egg2.jpg
    224.6 KB · Views: 1,834
The egg is done in Yew it is 4" in height and 2.5" diam. I used a roughing gouge and spindle gouge. Sanded to 400 grit and finished with cellulose sanding sealer, carnauba wax stick and microcrystalline wax. The support for the egg is a piece of Mountain Ash Branch wood.

Vic


Egg in ebony,holly, bloodwood, and pernambuco.I had a tiny scrap of ebony that someone had given me so that was the start. I ripped it to 3/4" square and then glued a piece of spruce to the end of that. Then i made up the small pieces of holly and bloodwood and glued them together, in 2 strips of 3 pieces and 2 strips of 5 pieces.Then carefully glued the 3 piece ones to the ebony with hand pressure only to keep them lined up. Luckily the Titebond grabs fast and I only had to hold them for a couple minutes and then into the vice to clamp over night. A light sanding and then the same process with the 5 piece strips. Sand that flush and then apply the caramel, so to speak. I have a friend who makes and repairs instrument bows and he had given me a couple small pieces and this went on the outside. Into the spigot jaws and turned an egg, parted it off, and remounted it into a Fernco coupling mounted onto a piece of 1 1/2" dowel to clean it up. Turned the bit left over into a stand, if you look close you will see the spruce in the base. Like I said a very small piece of ebony.Used a spindle gouge, sanded to 320 and waxed and buffed.Its about 2 1/4" by 1 3/4" which is pretty close to what we buy off the local farmers. Thanks to all involved and please support this!
 

Attachments

  • P1020218.JPG
    P1020218.JPG
    161.2 KB · Views: 1,800
  • P1020217.JPG
    P1020217.JPG
    159.8 KB · Views: 1,800
  • P1020221.JPG
    P1020221.JPG
    157.9 KB · Views: 1,800
Hi my egg.
Not sure about 'tops and bottoms' so decided to post 3 general side views - two of which show the top and bottom in 'profile' rather than straight on.

Made from Yew, and used a skew, finished with Sanding Sealer / Friction Polish and a buff using the Chestnut 3 mop system (only light buffing needed)
The challenges - made 3 acorns before I made the egg - :cry:

Getting the proportions just right was a fantastic learning curve, especially as i am currently practicing / developing my curves; then the Yew had a lovely surprise (in a big split) that was not at all evident on the outside - I do wonder how that can be! Never mind as I filled it with CA glue and was very pleased with the results; especially as in natural light the split adds some character and there is a faint tinge of blue!

Anyway enjoy.

Sammo
 

Attachments

  • Egg-View 1.jpg
    Egg-View 1.jpg
    77.6 KB · Views: 1,741
  • Egg-View 2.jpg
    Egg-View 2.jpg
    79.3 KB · Views: 1,741
  • Egg-View 3.jpg
    Egg-View 3.jpg
    78.9 KB · Views: 1,741
I'll post mine up, although I am not happy with it at all. Timber is ash-leaf maple. This was my third attempt, I went too thin in the wall of the top and it sheared off. I glued in a bit of beech, but somehow managed to get the dimension completely wrong.
Tools used were bowl gouge, skew and parting tool. Sanded to 400 grit and finished in melamine lacquer.
The little pegs are silver steel, allowing the "egg" to float.

Side view
Middle.jpg

Top & bottom
Tops.jpg

Inside view
Bottoms.jpg


Not eggsactly a triumph.
 

Attachments

  • Bottoms.jpg
    Bottoms.jpg
    38.3 KB · Views: 1,723
  • Tops.jpg
    Tops.jpg
    46.6 KB · Views: 1,723
  • Middle.jpg
    Middle.jpg
    35.5 KB · Views: 1,723
This is my Egg Box, Made from (I believe) Sycamore and Sapele. The egg itself is 4 1/8" tall and has a diameter of 3", turned using the spindle gauge and skew.
Once turned I sanded through the grits to 600g using the simon hope sander, sander sealer was then applied and final finish was canuba wax.
The stand is Sapele the egg can free stand on the broader end with a little rock so can be used either way.

Top and side veiw all in one
DSCF3139_zpsbf73814a.jpg


Bottom view(sorry forgot to align grain in this shot)
DSCF3142_zpsb93b661e.jpg


General view of box open
DSCF3144_zps4dabe0da.jpg


I think I prefer the box with the narrow end up
 
For my entry I thought I would tackle a material I have been avoiding since purchase, a Banksia nut.

It certainly made for interesting turning, the mess was amazing. Good extraction and face protection is a must with these beasties.

It lent itself to a decent sized egg, 75mm high by 55mm diameter at the widest point. Finish was to 600 grit and sealed with a MC wax final coat. Tools used were 3/8 spindle gouge and 1/8 inch parting tool.

1.jpg


2b.jpg


3.jpg
 

Attachments

  • 1.jpg
    1.jpg
    113 KB · Views: 1,657
  • 2b.jpg
    2b.jpg
    69.8 KB · Views: 1,657
  • 3.jpg
    3.jpg
    151.4 KB · Views: 1,657
My egg - made from Oak & Sapele. It is pretty much the same size as a class ''A'' egg.

Tools used were the roughing gouge and skew. Sanded to 600 and MC wax applied. I found the transition from the Oak to the Sapele quite a challenge when turning with the skew as it kept wanting to dig in!.


Tony
 

Attachments

  • Eg01.jpg
    Eg01.jpg
    118.5 KB · Views: 1,647
  • Eg02.jpg
    Eg02.jpg
    103.3 KB · Views: 1,647
  • Eg03.jpg
    Eg03.jpg
    100.8 KB · Views: 1,647
Had a disaster with my 1st attempt when the skew caught just as it was parting off:(
So this is the second attempt. It is made from a piece of sycamore my son cut off a tree at the end of my garden some years back.
It was turned between centres using 1/2" spindle gouge and 1" skew. Sanded to 400 the sealed with 2 coats of sealer. I then further sanded to 600 and gave it a final coat of sealer. I then finished it with speed n eze friction polish. The final step was a buffing using a buffing wheel in the lathe. It measures about50mm long by 40mm at widest diameter.
Aegg4.jpg

Aegg3.jpg

Aegg6.jpg
 

Attachments

  • Aegg6.jpg
    Aegg6.jpg
    205.8 KB · Views: 1,617
  • Aegg3.jpg
    Aegg3.jpg
    221 KB · Views: 1,617
  • Aegg4.jpg
    Aegg4.jpg
    234.9 KB · Views: 1,617
Ok, I've gone to the trouble of making it, gone to even more trouble to photograph it so I may as well post it up!

This is from a Lacewood blank that I started doing something with ages ago. This was going to be a small tester, the proper one was going to be bigger, this one is 1.75" long and 1.25" max diameter. But this turned out to be reasonably egg shaped so I quit while I was ahead.

The blank was cylindrical before I started so I just used a skew, sanded to 400 then finished with ordinary wax polish.

IMG_0365.jpg


IMG_0386.jpg


IMG_0379.jpg
 
Here's my effort. Oak, 5cm long, 3cm wide. After roughing down, I put tenon on each end and parted approx 1/3 : 2/3.
Hollowed with spindle gouge and used parting tool then skew to put a tenon and mortice on the open ends. Kept it a tight fit until one end completed with skew, then sanded and finished.
With A LOT of difficulty and a few trial and error efforts, just managed a jam chuck with tailstock support, then final bit done very gingerly. Teak oil to finish.

Side:


Top and Bottom:


Insides:


That was DEFINITELY the hardest thing I've ever attempted, but I did enjoy the challenge.
 
After enough failures to make a decent omelette I decided to keep it simple and within my capabilities - so a straight forward egg shape.

Not particularly exciting to photograph, but somehow reassuring to hold ....

The dimensions are :

Height : 80 mm
Diameter : 55 mm
Weight : 80 grams

The wood is sycamore and the finish is two coats of sanding sealer followed by one of friction polish.

Tools used were roughing gouge, spindle gouges, skews and parting tool (plus Sorby Sandmaster !). After roughing down and making a spigot for my chuck I marked approx 1/3 up the egg as the wide part then made an over sized cone from there to to the thin end with a small diameter of about a third of the large diameter. The shape was then created with the spindle gouges and after sanding & polishing the process repeated for the thick end with the thin parting tool assisting the skews. The bottom half was sanded and polished as much as possible before leaving the lathe and then hand finished. Finally it was placed in a egg box for the photos ;-)
 

Attachments

  • Plain_egg_bottom.jpg
    Plain_egg_bottom.jpg
    41.3 KB · Views: 1,582
  • Plain_egg_side.jpg
    Plain_egg_side.jpg
    48 KB · Views: 1,582
  • Plain_egg_top.jpg
    Plain_egg_top.jpg
    63.7 KB · Views: 1,582
This is some Mahogany I had left over.
Tool used Roughing Gouge, Spindle Gouge and Skew Chisel, Sanded down to 400, two coats of sanding sealer finish with wax. (Pictures not very good only have cheap camera)
DSC_0011.jpg
DSC_0014.jpg
DSC_0015.jpg
 

Attachments

  • DSC_0011.jpg
    DSC_0011.jpg
    125.9 KB · Views: 1,518
  • DSC_0014.jpg
    DSC_0014.jpg
    103.7 KB · Views: 1,518
  • DSC_0015.jpg
    DSC_0015.jpg
    102.5 KB · Views: 1,518
This is my ostrich egg in Yew. Turned between centres with gouges then sanded to 400, shellac & wax. It's about 140mm long.


egg side.jpg


egg top.jpg


egg bottom.jpg
 

Attachments

  • egg side.jpg
    egg side.jpg
    243.8 KB · Views: 480
  • egg top.jpg
    egg top.jpg
    193.6 KB · Views: 480
  • egg bottom.jpg
    egg bottom.jpg
    155.5 KB · Views: 480
Status
Not open for further replies.
Back
Top