PLEASE POST YOUR AUTUMN WOODTURNING CHALLENGE ENTRY HERE

UKworkshop.co.uk

Help Support UKworkshop.co.uk:

This site may earn a commission from merchant affiliate links, including eBay, Amazon, and others.

Grahamshed

Established Member
Joined
14 Apr 2012
Messages
3,066
Reaction score
3
Location
Oxfordish
Its that time again folks.

The Autumn Challenge is being judged by Paul Hannaby and my thanks go to him for that. The challenge was open to anyone and everyone and was for a drinking vessel of any type, size or shape so long as, if waterproofed, it would be fit for purpose.

Entries must be new and made specifically for the Challenge.

Entries must be made of wood which must be turned on a lathe using woodturning tools.

Carving, colouring, pyrography , texturing, segmented turning and piercing are allowed ( probably not all at once ☺) but the judge must be able to see your turning skills! That is what is most important.

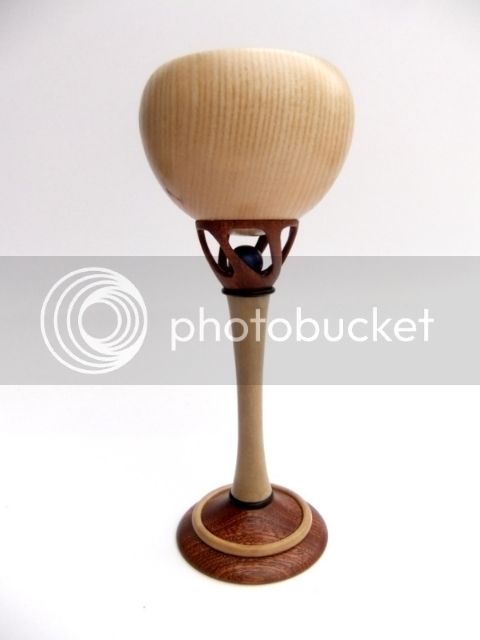
Please post three images of your work together with details of the wood used, the tools and methods used to make it and any key dimensions.
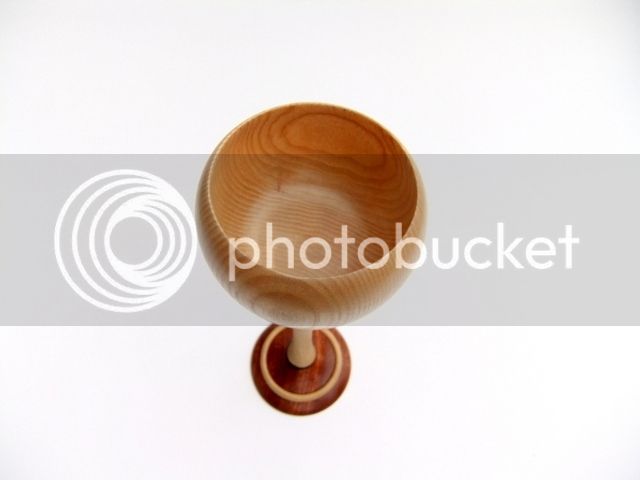
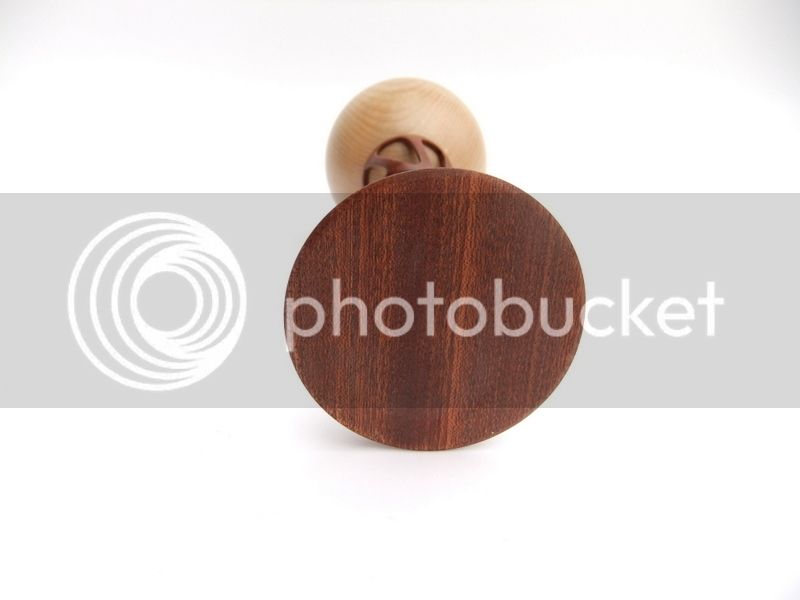
Images needed:-

1 showing a general view of your entry.
1 top view showing the inside of your entry.
1 view of the bottom of your entry.
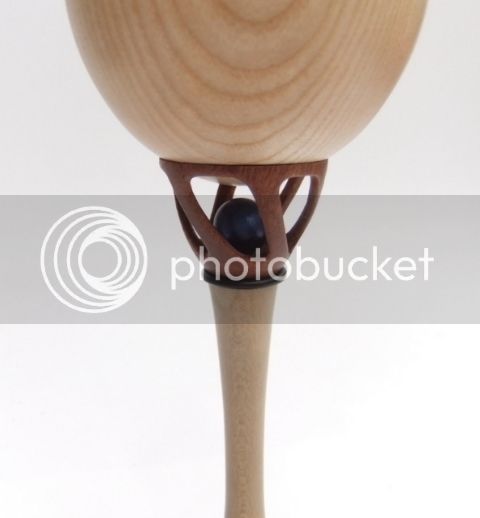
A fourth picture may be added (but is not compulsory) if needed to show any other interesting details of your entry.

Image size - please use image size 640 x 480 0.3mp, as in previous challenges

Please upload your pictures and description between 10pm on the 26th September and 10pm on the 28th of September.

Please also send me a PM giving me your own opinions of 1st, 2nd and 3rd places amongst the entries (other than your own) between 10pm on 28th September and 10pm on the 30th of September. (for me to compile the entrants’ placeings).

Good luck everybody.
 
MONKEYBITER'S ENTRY
Mike is away this weekend so forwarded his entry to mr in advance.

...........
My entry is turned from Cherry. Mostly formed with a 3/8" spindle gouge, cup outer curve smoothed with a skew at 90', the inner curve with a heavy bowl scraper.
The outer form of the rings was done with the spindle gouge again, then relieved with a home made parting tool and subsequently undercut with a captive ring tool, also home made.
The finishing was applied to the cup first, then the rings and finally the base and stem, only turning each section after the previous was mostly finished. Sanding was through the grades to 400, then nyweb.
Hard wax oil was applied all over.
The base was heavily undercut then parted while still on the chuck, and then sanded smooth before finishing.

The larger ring is convex in profile, the smaller concave [male and female]. The smaller will fit within the larger. This
is to be given as a wedding gift.

overview.jpg


top.jpg


base.jpg


ring closeup.jpg

...........................................................

That's all,
Thanks,

Mike [monkeybiter]
 

Attachments

  • overview.jpg
    overview.jpg
    245.4 KB · Views: 1,513
  • top.jpg
    top.jpg
    242.1 KB · Views: 1,513
  • base.jpg
    base.jpg
    244.8 KB · Views: 1,513
  • ring closeup.jpg
    ring closeup.jpg
    248.4 KB · Views: 1,513
My entry is a Goblet turned from local English Oak

Total height 152mm, Width of cup 49mm, Depth of inside of cup 40mm, Stem diameter 8mm

Tools used - 10mm Spindle gouge, 6mm Spindle gouge, 2mm Parting tool, 18mm Curved scraper, 19mm Skew

It is finished with acrylic sanding sealer (one coat on the outside, three on the inside) followed by a couple of light coats of acrylic lacquer. It is waterproof, holds liquid nicely and is a pleasure to drink from but I’m not planning on putting it in the dishwasher :)

Cheers

Ian

Goblet-2s.jpg


Goblet-1s.jpg


Goblet-3s.jpg


Goblet-4s.jpg
 

Attachments

  • Goblet-1s.jpg
    Goblet-1s.jpg
    59.6 KB · Views: 1,500
  • Goblet-2s.jpg
    Goblet-2s.jpg
    184.2 KB · Views: 1,500
  • Goblet-3s.jpg
    Goblet-3s.jpg
    69 KB · Views: 1,500
  • Goblet-4s.jpg
    Goblet-4s.jpg
    39 KB · Views: 1,500
My entry is an ash goblet, 7.5" high, diam 2". Stem 3/8ths
At least I think it is ash, here is the is the log.

Roughing gouge to start, bowl gouge and scraper used to hollow out the bowl. Spindle gouge and skew used to shape the bowl stem and foot. Sanded to 420 grit and finished with sanding sealer and carnauba wax.
I followed Keith Rowley's instruction on a couple of test goblets in pine. This is the first one I have done in hardwood and I am very pleased that it came out exactly as planned.


General View


Inside


Bottom


I find taking pictures that truly show the grain pattern and finish almost as hard as the turning. Thanks to Dereck (Dalboy) for a few tips that I think have helped.
 
Completed in plenty of time for a change.

The goblet stands 7 1/2" tall and 3" at its widest made from three different woods, Ash for the main goblet the stem, two black rings the foot ring and the ball are all holly the rest is Sapele. There are 8 separate parts on this goblet
The rings are stained black and the ball is also stained black and then given a coat of Jo-Sonja blue paint.
Tools used 3/4" roughing gauge, bowl gauge spindle gauge and skew. Sanded down to 600grit and sealed and top coat Acrylic spray varnish.

DSCF5415-001_zpstwax8poc.jpg


DSCF5424-002_zps6sdvaw34.jpg


DSCF5425-001_zpsxsamrsxb.jpg


DSCF5427-001_zpswyvazk5f.jpg
 
20150927_182257.jpg

20150927_182500.jpg

20150927_182518.jpg


Small goblet in Ash.160mm tall x 55mm dia (top) & 50mm dia (base). Turned to cylider & then hollowed out using 10mm spindle gouge & Sorby end / side scraper. Outside then shaped with 10mm spindle gouge & skew chisel. Finished with 2 coats of Hard Wax Oil then buffed with burnishing cream.

Dave
 

Attachments

  • 20150927_182257.jpg
    20150927_182257.jpg
    196.1 KB · Views: 1,415
  • 20150927_182500.jpg
    20150927_182500.jpg
    201.7 KB · Views: 1,415
  • 20150927_182518.jpg
    20150927_182518.jpg
    98.4 KB · Views: 1,415
Wine glass in spalted birch, wenge, and quilted cherry. I roughed out the pieces into cylinders first, with center points . I drilled the birch piece on the bottom end with a 5/16" bit and then put that end in the chuck and turned and sanded and finished the cup part, nearly to completion. Parted it off. Then i turned the wenge in between centers to nearly done, turning a 5/16" stub about 3/4" long on each end. Then I mounted the cherry and turned and sanded and finished the bottom, reversed it and got it nearly to finished and drilled a 5/16" hole in it on the lathe. Then I glued the 3 pieces and clamped them together on the lathe. Turned the top of the base and spindle and spindle to cup part to finished and then finished what I could there on the lathe. The base was in the chuck, so took it out and reversed it between 2 sets of live centers, the cup end now being at the headstock end, inserted a pin in this live center and put a small piece of wood over the pointy end with a bit of soft cloth for grip, and finished turning the base.Mainly this was to get the jaw marks off and to do the detail work at the bottom. Finished with the lathe spinning using a latex based turners finish, happy with the result for the first time. Used spindle gouges, scraper and a Hunter tool. Its about 9 3/4" high , the rim is 3 11/16" and the base is 2 3/4".
 

Attachments

  • P1020441.JPG
    P1020441.JPG
    171.7 KB · Views: 1,368
  • P1020442.JPG
    P1020442.JPG
    172.3 KB · Views: 1,368
  • P1020444.JPG
    P1020444.JPG
    167.8 KB · Views: 1,368
  • P1020440.JPG
    P1020440.JPG
    165.9 KB · Views: 1,368
Back
Top