What did you do in your workshop today ?

UKworkshop.co.uk

Help Support UKworkshop.co.uk:

This site may earn a commission from merchant affiliate links, including eBay, Amazon, and others.
Status
Not open for further replies.
MikeJhn":2ra8e1gf said:
Unfortunately Arthritis has taken its toll and fly tying is now a thing of the few and far between, but I still enjoy my fly fishing, especially in the French rivers for Brown's, still have a rod on the Avon, but don't get down there that often now days.

Mike

Have to admit that starting to tie again was a shock for me as well Mike. Need reading specs and a magnifier to see what I'm doing and fingers definitely not as nimble as I remember! That applies to tying the flies on to the tippet as well.

I'm only fishing day ticket on a private fishery at the minute with 3 small 4 - 5 acre lakes but the owners are great and it's stocked with hard fighting browns, tiger, blues and rainbows. The fishing isn't easy but I've had some very nice fish up to 8 1/2 lb so far.

I prefer rivers and will definitely be taking my rods when we take the van into Scotland. Where do you go in France Mike? We're considering going touring into Europe next year rather than long haul.

Bob
 
Having used Osmo 3044 to finish my table top I found the strip of oak and painted red band turned milky/ pink, so I made a couple of thin sanding blocks and removed it from the offending areas and repainted the band and used an oil-based gloss varnish on the oak strip.
_MG_6038.jpeg

Very happy with the contrast, hopefully the osmo and the varnish won't fall out.
 

Attachments

  • _MG_6038.jpeg
    _MG_6038.jpeg
    35.5 KB · Views: 160
Another one for all you pallet haters. :-D

Fed up with kneeling on the floor, I made myself an anvil stand from 48 lengths of pallet wood, all glued together. :-D

anvil_stand.jpg


Got to practice with the arc welder too, for the top band.
 
got my first drawer inserts done
needs refining and lining

tray.jpg


Steve
 

Attachments

  • tray.jpg
    tray.jpg
    110 KB · Views: 96
Over the years I’ve asked many questions and been very grateful for the help of forum members. One of my only attempt at proper furniture making has finally come to fruition after two or three years of planning, cutting and assembling. It’s a wardrobe that I have made for the grandparents’ annexe that we have at our daughter’s place in France. The design is based on a project by Anthony Bailey in an old copy of Woodworking Plan and Projects. Construction is in oak and oak faced MDF and it’s finished with two coats of Osmo Polyx, although I shall probably give it a couple of coats of wax when I am next in France. Anthony’s version used dominos but I don’t have a Festool Domino machine so I used loose tenons instead. In addition, I took a short cut with the drawer construction and used pocket screws for the ply construction.

Wardrobe.jpg


The result is far from perfect. Along the way I discovered that Titebond III is far from ideal when doing glue ups this size due to the lack of open time; as a result, the side panels are some 5 mm out of square in opposite directions. As a result, the front alignment varies by about 1 cm. and I have had to put the doors at a slight angle to compensate as well as having to make adjustments to the drawer fronts.

Although the following are not the last things I made, I’ll post them anyway. The first is a bedside cabinet. Fairly straightforward and made using timber panels and biscuits. The drawers are plywood assembled using dowels and with pine fronts.

Bedside cabinet.jpg


The second is a radiator cabinet made for my son and daughter-in-law. Mostly MDF with redwood slats. I delivered it with two coats of water based primer/undercoat and my son applied the topcoat.

Radiator cover.jpg


The third is a sewing table for my daughter-in-law. Not much woodwork. The table was rusting away in the attic at my daughter’s place in France. The frame was dis-assembled followed by lots of wire brushing with rotary brushes in a power drill and then sprayed with black Hammerite. The old top was useless, very tatty with a hole in it for the old sewing machine, so I made a new top from oak and made a new drawer.

Sewing table.jpg


Finally, I had a commission to make a sand table for my twin grandsons. Very straightforward and made out of pressure treated timber with pocket-hole joinery. It’s painted with Cuprinol Garden Shades – Seagrass. As you can see, the users are very happy with it.

Sand table 1.jpg


Sand table 2.jpg


I'm not sure why the pictures take up the whole width of the screen, at least they do in preview mode.
 

Attachments

  • Wardrobe.jpg
    Wardrobe.jpg
    225.6 KB · Views: 566
  • Bedside cabinet.jpg
    Bedside cabinet.jpg
    189.7 KB · Views: 566
  • Radiator cover.jpg
    Radiator cover.jpg
    250.9 KB · Views: 566
  • Sewing table.jpg
    Sewing table.jpg
    198.7 KB · Views: 566
  • Sand table 1.jpg
    Sand table 1.jpg
    248 KB · Views: 566
  • Sand table 2.jpg
    Sand table 2.jpg
    239.7 KB · Views: 566
NazNomad":jlqkitlf said:
That appeals to my cutlery OCD, Steve. Love it.
thanks Naz

I also must have OCD as I confined them to the fire store :oops:
I had cut them on the short grain so over time the fingers would have just snapped off
another lesson learnt

Steve
 
Built a new worktop and reclaimed the 'family room' for glueing and finishing pieces.
IMG_1204 (1).jpg

I bought the hardwood ply at b&q, the surface is amazing - any ideas what wood it is (I put a little boiled linseed oil on to see what happened)? It's that pattern across the entire 8x4 surface with no obvious breaks.
IMG_1206 (1).jpg
 

Attachments

  • IMG_1204 (1).jpg
    IMG_1204 (1).jpg
    81.1 KB · Views: 438
  • IMG_1206 (1).jpg
    IMG_1206 (1).jpg
    87.5 KB · Views: 438
Chris152":v3jptkfk said:
I bought the hardwood ply at b&q, the surface is amazing - any ideas what wood it is

looks like american white ash to me, it could be silver birch though....not certain.
 
Doubt it - that ply is usually a Chinese 'hardwood' ply over a poplar core. I use quotes, because it's soft and flaky. Often looks nice though, if a little too red for my taste
 
I completed the joinery on a folding screen for The Boss before she started on the finishing.

Then, whilst she was getting high on the Danish oil fumes I started my thein separator build this weekend.
I dismantled the blower, removed all the bits surplus to my design and then made a 110mm circular to 195mm x 40mm rectangular ducting transition out of 1/8" plywood.

I was quite impressed with myself so decided to fabricate a circle cutting jig for my small router and started on the base plate for the separator proper.
 
It was yesterday not today, Axminster clamp stands were on offer at £30 or there about, I wouldn't touch them at full price but at that price they just about justify their existence. Assembling them is like wrestling a tazzered octopus but once built they are OK for the price. I had intended to weld some up out of 20mm box but I would never have got around to it and I was sick of hunting for clamps.

The eldest daughter searched the workshop for stray clamps while I cut a couple of bits of ply for the top and bottom shelves and gave them a quick coat or two of Bona Mega.

P1060703.jpg


Here you go, my luxuriant clamp collection in all its glory, I didn't know I had so many

P1060704.jpg


Some of the clamps I can't remember seeing before. I have one monster sash clamp that lurks downstairs and my pipe clamps aren't on it yet, they may state where they are as they are a bit long.

P1060706.jpg


Cheers
Andy
 

Attachments

  • P1060703.jpg
    P1060703.jpg
    83.3 KB · Views: 307
  • P1060704.jpg
    P1060704.jpg
    82.9 KB · Views: 307
  • P1060706.jpg
    P1060706.jpg
    87.3 KB · Views: 307
_MG_6120 (1).jpg

A Rietveld joint, I want to make a larger version for my front garden. Maybe oak, more likely tanalised pine as it's cheaper, joined with dowels.
 

Attachments

  • _MG_6120 (1).jpg
    _MG_6120 (1).jpg
    25.9 KB · Views: 260
Chris152":3urimb2a said:
It's that pattern across the entire 8x4 surface with no obvious breaks.

It's rotary peeled veneer, like a giant pencil sharpener that peels off an almost endlessly wide veneer with a repeating pattern. It only works on fairly soft timbers and even then the logs have to be boiled in giant vats to soften them up even more so that the knife can peel away the surface.
 
custard":18y0gxd2 said:
Chris152":18y0gxd2 said:
It's that pattern across the entire 8x4 surface with no obvious breaks.

It's rotary peeled veneer, like a giant pencil sharpener that peels off an almost endlessly wide veneer with a repeating pattern. It only works on fairly soft timbers and even then the logs have to be boiled in giant vats to soften them up even more so that the knife can peel away the surface.
Amazing, but makes perfect sense of the surface of the ply I have. I found this short video of a machine peeling:
https://www.youtube.com/watch?v=ppEpkPktHtQ
 
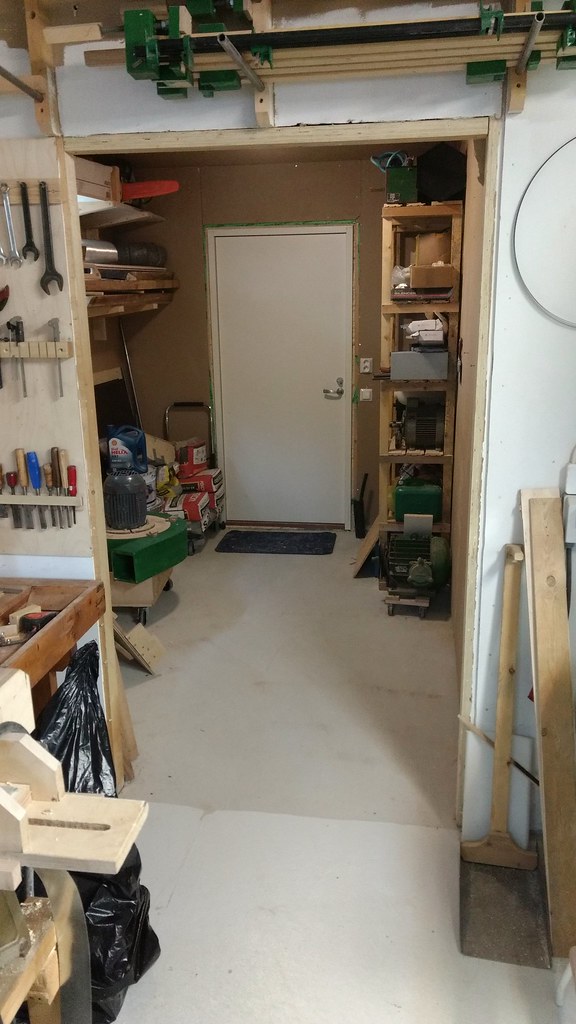
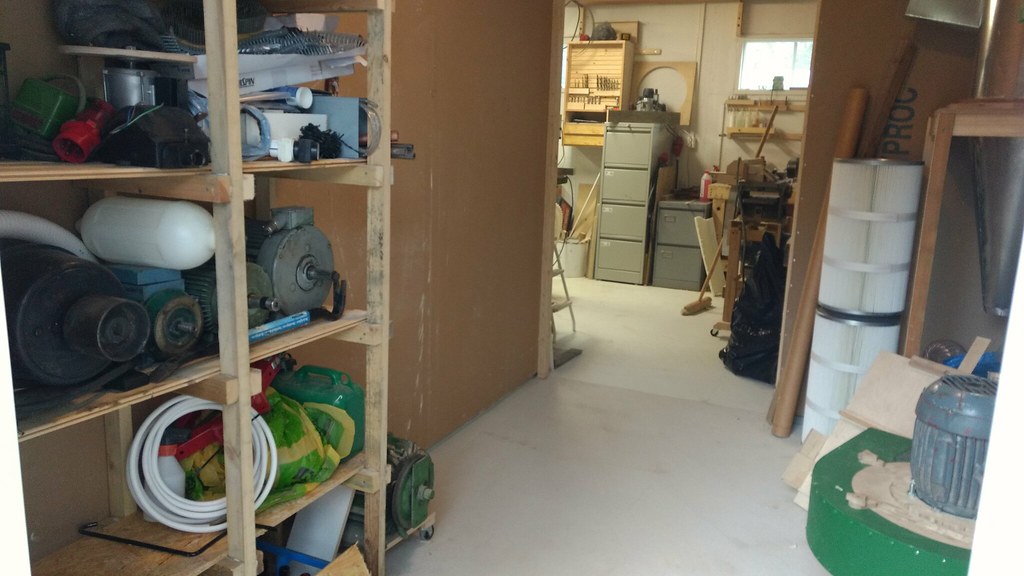
Opened upp a wall and made an opening a while ago. Reorganized to make space for my incoming metal lathe:

37817441552_3a0566878f_b.jpg


37800706626_86062a4c7f_b.jpg
 
Status
Not open for further replies.
Back
Top