Workshop Revamp - WIP

UKworkshop.co.uk

Help Support UKworkshop.co.uk:

This site may earn a commission from merchant affiliate links, including eBay, Amazon, and others.

OPJ

Established Member
Joined
31 Jul 2005
Messages
5,566
Reaction score
1
Location
North Somerset
It's a new year, I've got a little bit of money to spare and I'm going to try and make several improvements to my workshop that I've been planning for the last three-years now. Namely, this involves fitting a suspended floor overheard, insulating the roof and then replacing the up-and-over garage doors with a pair of FLB timber doors. I owe many thanks to Mike Garnham in particular, among many others members who contributed with ideas and solutions in my posts on several UK forums.

Basically, this is a record of everything I should've done before buying any tools!!! ](*,)

On Tuesday, I officially made a start on the suspended floor. A week earlier, I ordered over £200-worth (free delivery! :cool:) of treated sawn timber from BuildBase - I'd never used them before but, they have an online ordering system and I found several personal recommendations on this forum. I was amazed when they phoned me, five minutes after placing my order, with the offer of delivery for the very next-day! :shock: Are all builder's merchants like this?! I presume they just stockpile it at their yards and don't have any machining facilities, etc.

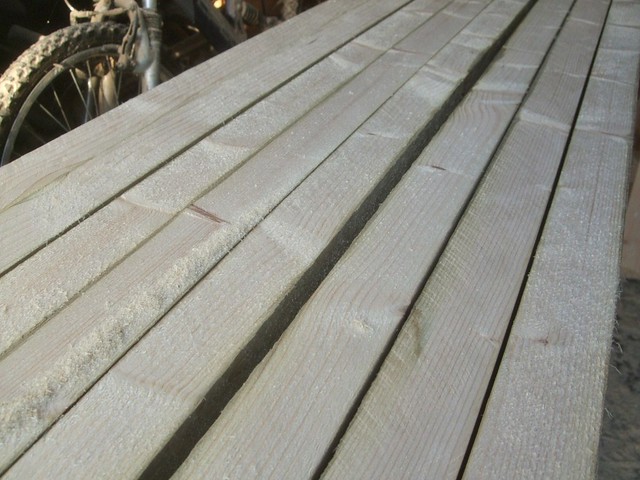
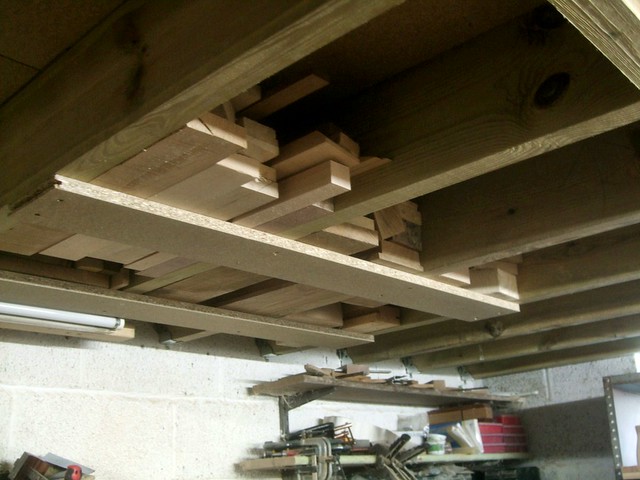
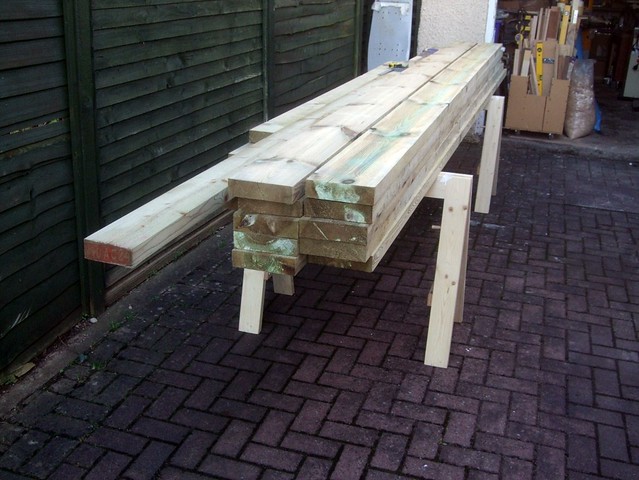
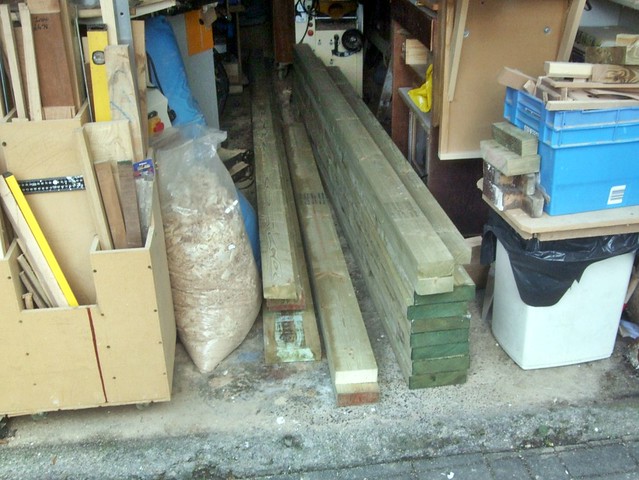
This is what arrived, conveniently loaded direct from the lorry by one of those mechanical arm/grab-things:

5429164676_5f12da8823_z.jpg


Those 7x2ins will be the joists. Where they didn't have the one 2.4m or nine 3.6m lengths that I'd ordered, they've given me ten lengths at 4.2m, with no extra charge! :cool: Those 5x2ins will be used on the roof along with the 4x2ins - they couldn't offer any 2x2in so, I'll have to rip those down myself (just bought a brand-new saw blade, too! ;-)).

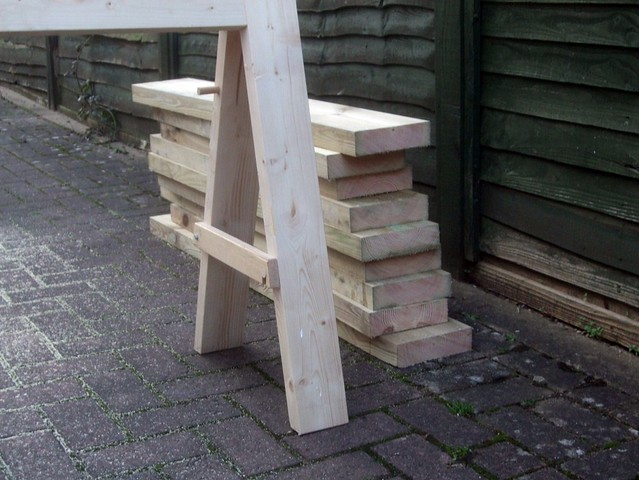
I was pleased to see that the folding sawhorses I made last year were capable of withholding all this weight:

5428562841_3253fd1ea9_z.jpg


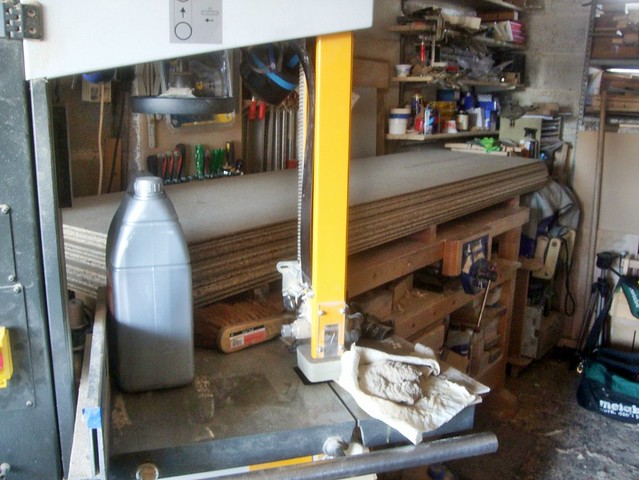
A lot of the timber still feels quite damp and, for stress-graded wood (C24), there are some ruddy great knots - though, they are all live, rather than dead! What I haven't shown you yet are the seven sheets of 2400x600mm chipboard flooring on my workbench, which had to hand-balled off the lorry:

5428562673_dc0e1040c7_z.jpg


[Exotic turning blanks make for good bearers!! :twisted:]

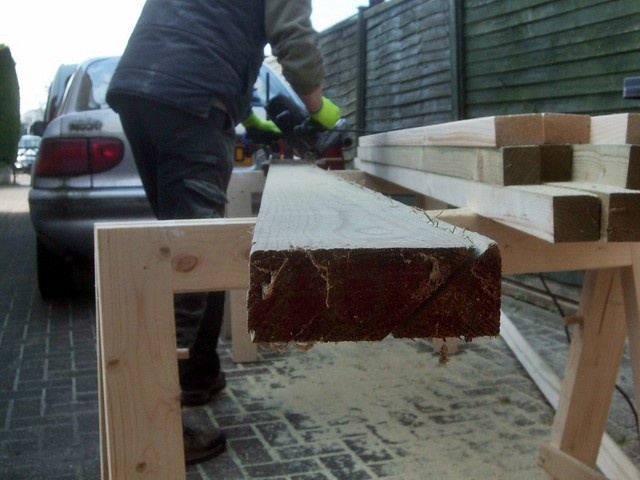
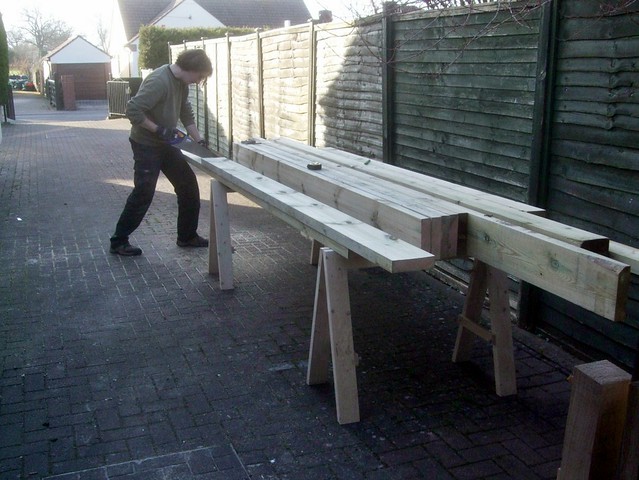
As my order didn't arrive until just after 14.00, on day one, I only really had time to double-check my measurements and to start cutting the joists to length:

5428563161_13529c5866_z.jpg


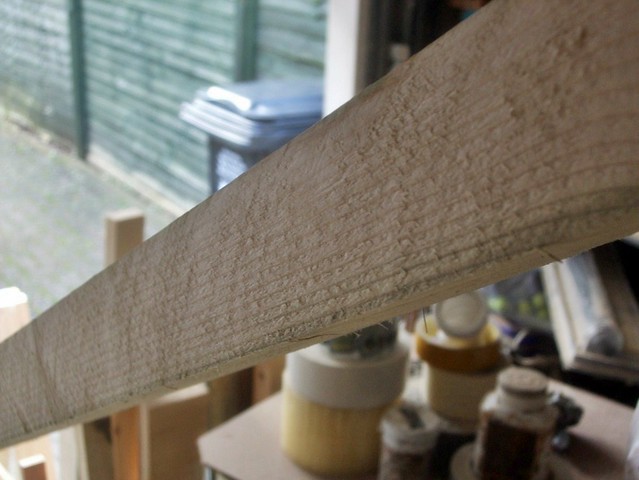
Of course; re-treating any cut ends is very important when working with tanalised timber:

5428563369_c16049011f_z.jpg


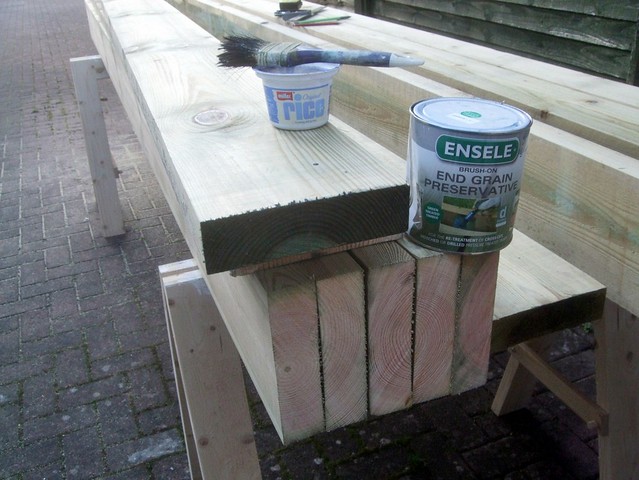
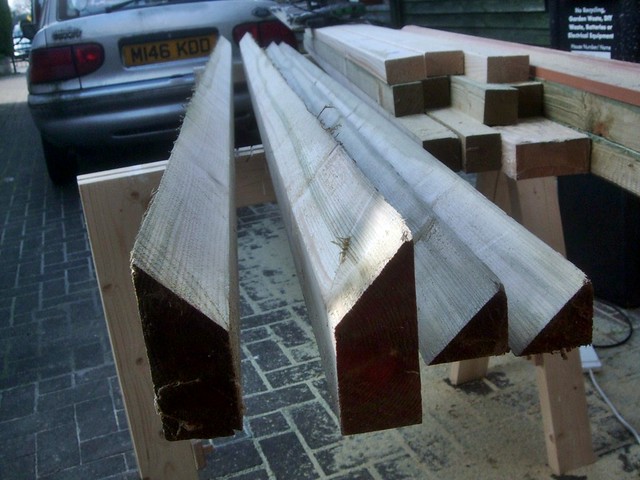
Here are the offcuts I have so far, much of which will be used for noggings:

5428563525_f85ff74c45_z.jpg


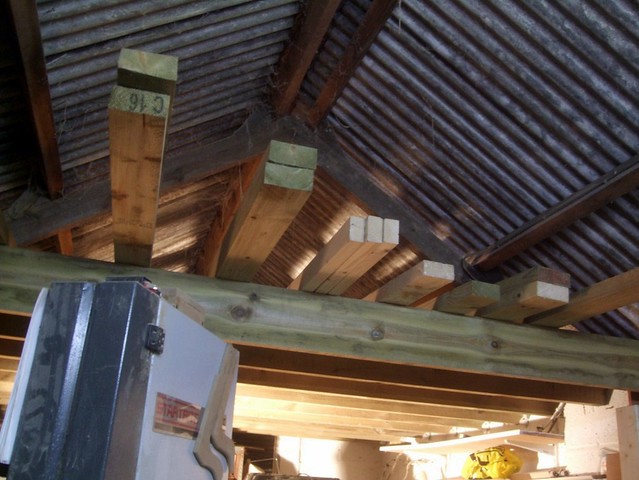
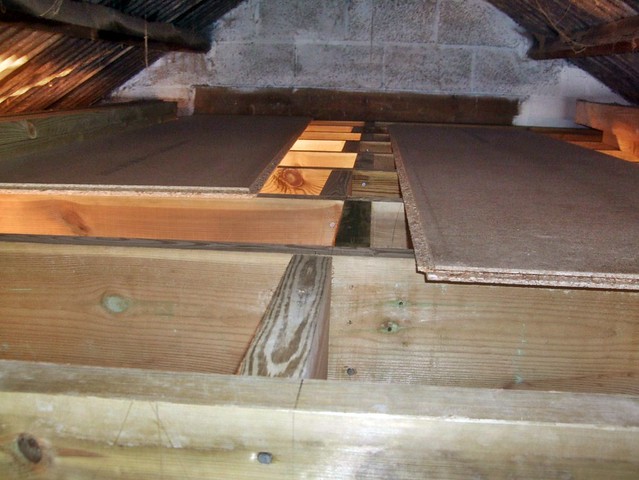
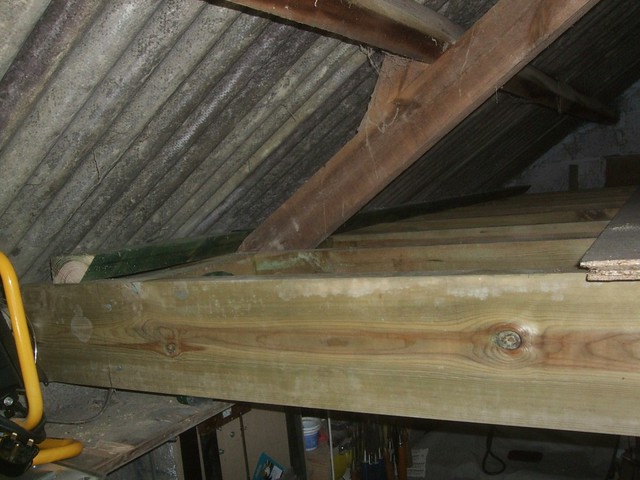
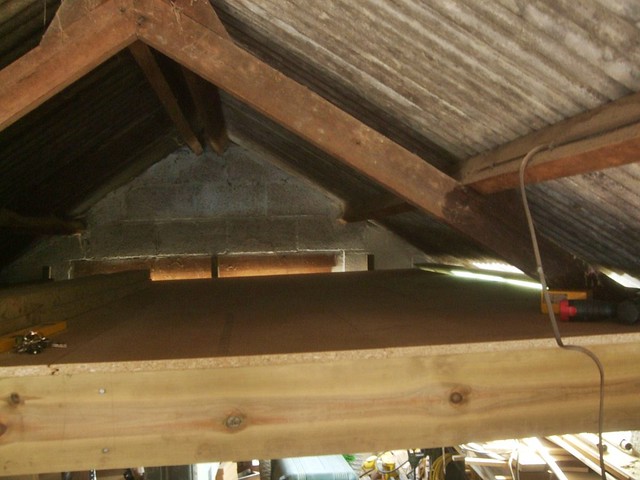
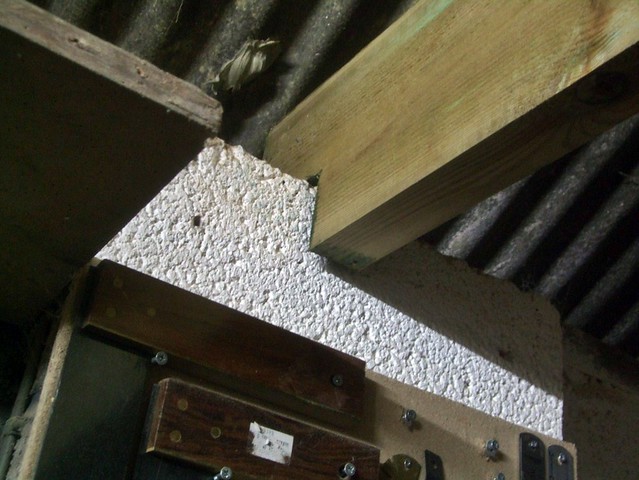
Had I known they were going to supply me with all this extra wood, I would never have ordered that extra 2.4m length, which was purely for blocking and additional noggings around the existing truss. Speaking of that lone truss in the centre of the roof, I've taken Mike's advice by fixing an extra 7x2in to one face. This new joist also had to be notched to fit over the pillars at either end. What you can't see is that I've managed to cut them about 10mm short but, once they're bolted in place, it shouldn't matter. I didn't appreciate how badly bowed the old 4x2in joist was until I sat this new one next to it... So, I've increased the floor level by about 5mm, to remove any further strain on that old bit of wood, which has already been riddled with woodworm in a past life.

5428564169_586926fc42_z.jpg


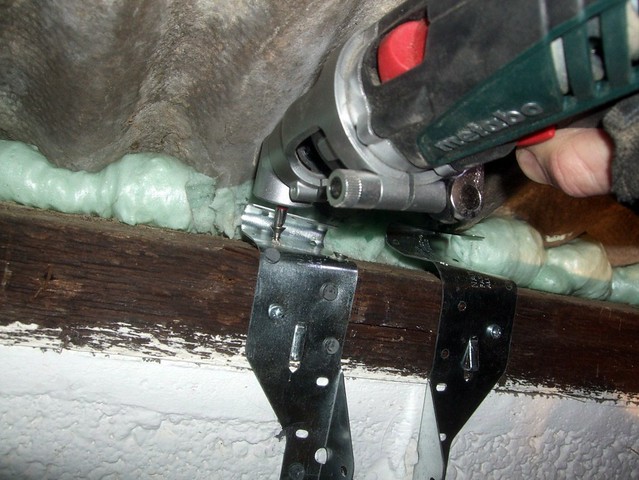
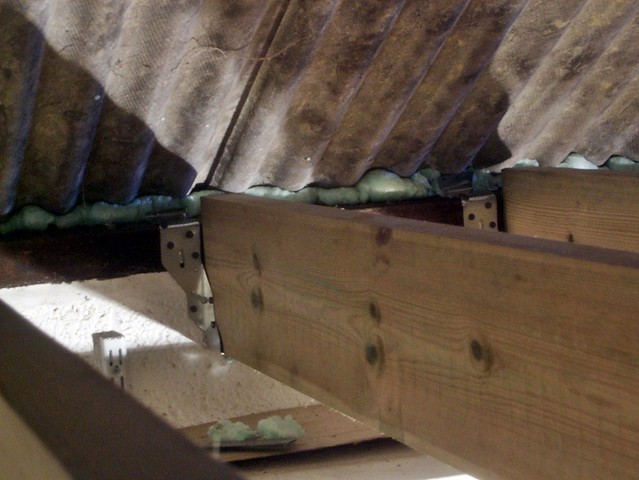
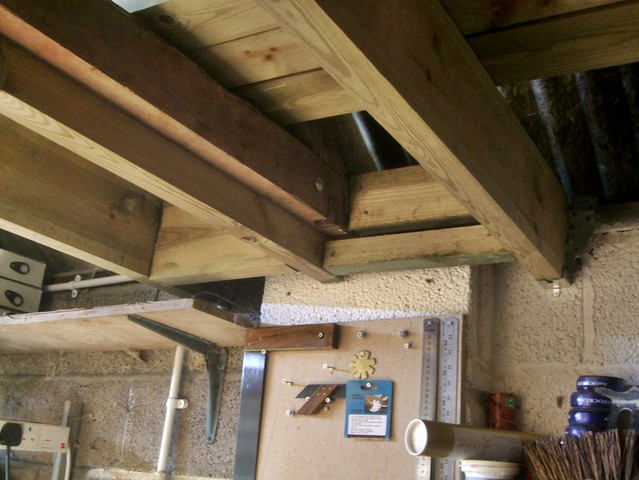
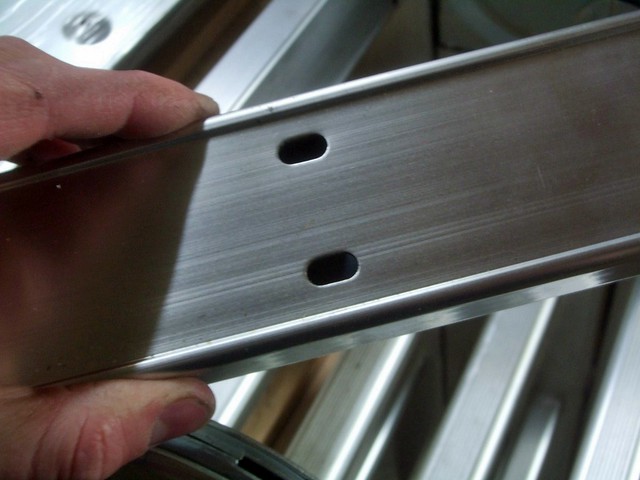
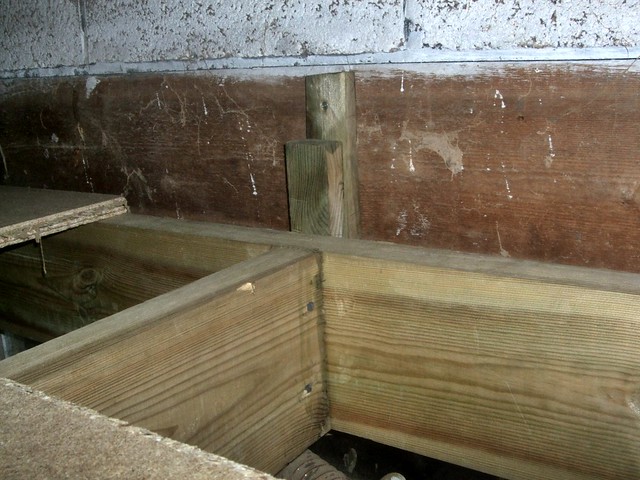
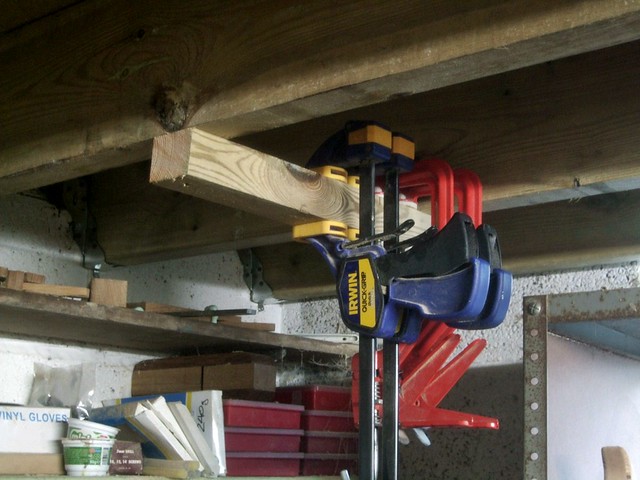
Now, for the joist hangers (Simpson Strong-Tie JHA270). Here's a mock-up of what I wanted to achieve:

5428563955_ab28f99f6f_z.jpg


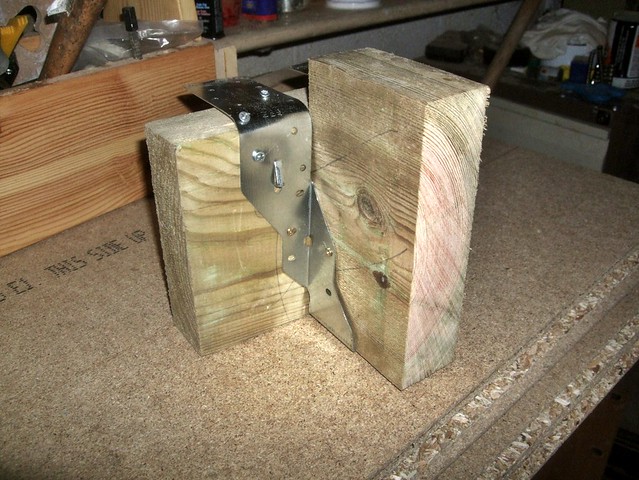
Basically, the new joists need to sit 32mm (1¼in) above the timber wall plates, so they're at the same level as the joist bolted to the truss. My problem was that the 'wraps' are about 20-25mm too long - rather than cutting them off, which would break the galvanising seal, I've bent them all back, as they won't tuck in behind the wall plates with the roof still on. I also had to bend the location tabs back as well, since I can't see them fitting in to a block wall with any ease! :p

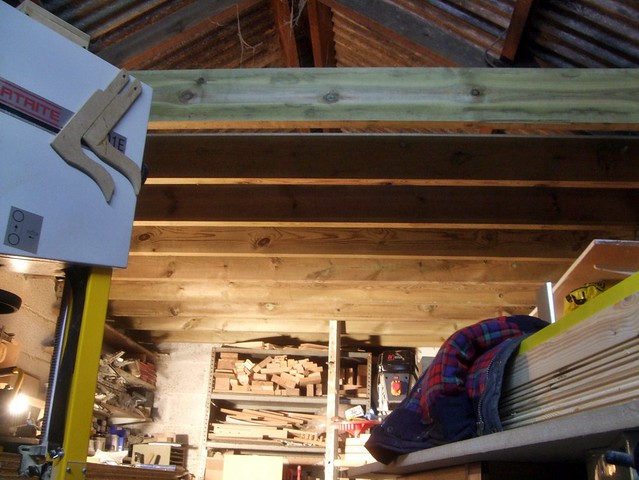
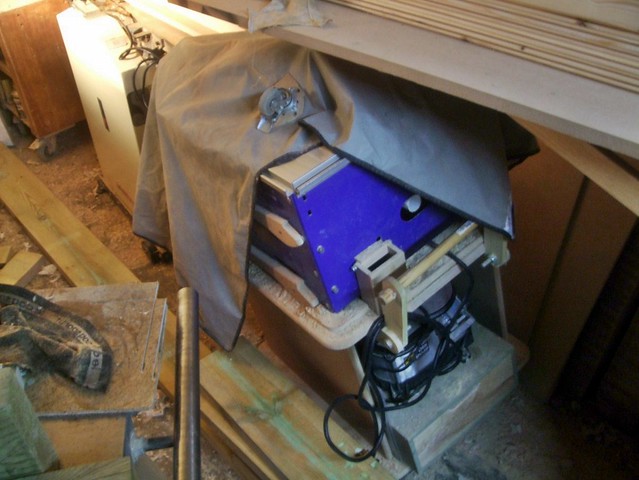
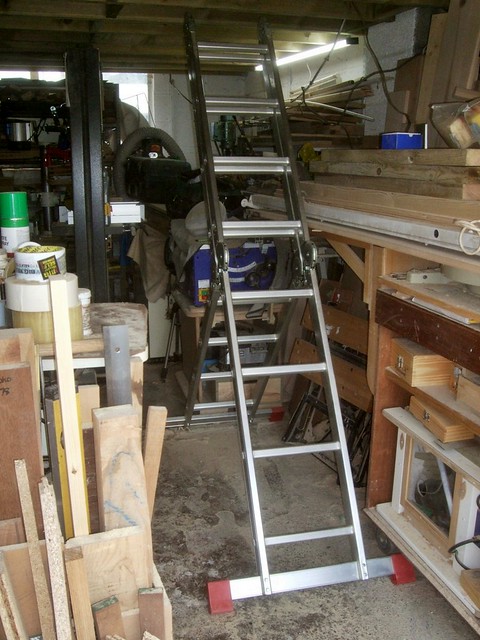
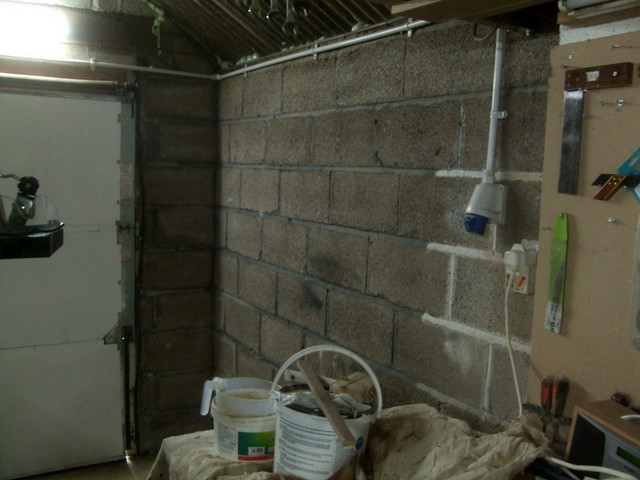
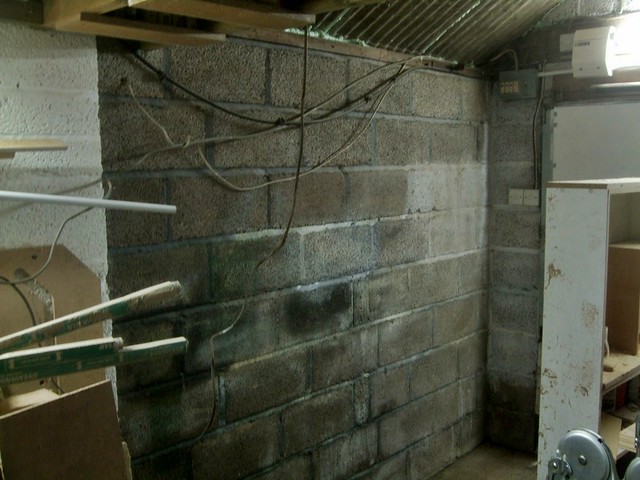
What's worse than this though, was the state of my workshop at the end of the first day (an early finish, as well):

5429165966_5f8ccf8506_z.jpg


:oops:

I still need to rip all these 4x2ins down to 2x2in. I was going hoping to do this today but, it's been raining all morning.

Thanks for looking so far. Coming up shortly is an update on yesterday's (Wednesday's) progress. :)
 
Spent a good six-hours on this, yesterday, but did manage to get all the joists in place before it got too dark. It did take a long time to set out all the joist locations and then, to fix each of the hangers in advance. But, I couldn't have done it without this drill and its angle driver attachment:

5431746988_0acb6379b0_z.jpg


Just about managed to get the required eight nails in to the face of each hanger. I used a scrap of wood from the mock-up I showed you earlier to bend each hanger to approximate shape before fitting. I also found it easier to position all the hangers down one wall. With the pitched roof in place, I wasn't able to simply drop the joists in to hangers at each end. So, by fixing only one-half of the hangers on the opposite side, I was just about able to swing them round and in to position (with the use of a "persuader" - I didn't take full advantage of the 6mm tolerance usually allowed for this kind of work! :-D).

5431139005_6232993f3f_z.jpg


You can see that I've also begun filling in all the gaps around the eaves with expanding foam. Turns out that the cans should only be used once and then thrown away... Went to use it only twenty-four hours after the initial application and it's dribbling, more than anything else! :roll: Will have to try the gun-grade type of cartridges, next time, which are supposed to last longer once they've been opened.

5431138845_4affe0b3a0_z.jpg


I've still got a good 1.1m between the top of my workbench and the underside of the joists, which should leave plenty of room for most projects. It' is less than 3ft at the highest point in the roof space.

5431139219_3408a586af_z.jpg


Although I've still got to fit the noggings and blocking today, it was nice to have somewhere convenient to store all the other long lengths last night! :-D For anything over 3m long, I need to close the door behind myself, or else I'll end up putting a hole in the roof! That leftover 7x2in, at 4.2m long, is far too long to fit up there with the current up-and-over door in place... I'm tempted to cut it down but, I'm not sure what I'll want to do with it. I'd like to build one of those knock-down frames for cutting sheet materials but then, it seems almost wasteful, when I could just go out and buy a load of 3-and 4x2ins.

Any thoughts for another project using lengths of 7x2in treated softwood?

The only casualty was one of the wheels on my table saw cabinet, which broke off (the MDF 'failed') as I dragged it back in to the workshop. :X Well, at least I'm not tempted to use it now!! Will have to replace those 2in wheels with 3in ones, I reckon. 4in might make the unit too tall.

5431139387_c74e784818_z.jpg


When I ordered this timber, I was expecting 'regularised' boards - which these are, as you can see the marks from a thicknesser or four-sider. However, if I was doing this again, I'd take some time to round off all the arrises with a router. I've had a fair few splinters from this stuff and, as they're being left 'exposed' in my workshop, it would've made them that little bit safer.

So, I'm fitting noggings today and will hopefully get a couple of sheets down as well. Don't want to cover the whole floor just yet as I still haven't tried to fix the leaks in the roof. :roll:
 
Olly

Looking good m8. Waiting with interest to see how you tackle the door replacement - something I'm going to do as soon as the workshop is clear of mdf bedroom furniture.
Question what is FLB ? I've spent 5 mins googling for the definition and havn't come up with an answer.

How are you going to insulate the corrugated roof ?

If the 7 x 2 gets in your way...................I have a use for it on my door replacement

Vinny
 
Interesting WIP. I also have an asbestos roof and have soon got to change the joists etc.

It will be very interesting to see your finished result.

Keep up the good work.

Mark
 
I'm planning something similar for next weekend. I could do with a bit of advise so instead of hijacking your thread I'll go start my own.

cheers
 
Thank you for the comments so far. :)

Vinny - it is indeed "framed, ledged and braced". To insulate the roof, I'm first proposing to fix battens (that's where all the 2x2in comes in!) between the horizontal 4x2in purlins. Then, I would fill these voids with a foil-backed insulation board (Kingspan, Celotex, etc.) 75mm thick; leaving a 25mm gap behind for ventilation, which is all you need for a corrugated roof. These would then be covered with a lightweight sheet material - I was thinking of hardboard but, I'm now leaning towards ply, as it's probably easier to paint. White-faced hardboard would be too expensive, I think.

At the pitch or ridge, I may just stuff it with Rockwool insulation and cover that with 'L-shaped' lengths of timber (two boards joined edge-to-face, if you get what I mean). That's all on hold for the moment. In fact, I may even try to replace the door before I go anywhere near the roof.

Lee - best of luck with it. Hope we get to see plenty of photos!! ;-)
 
Below, you can see the noggings all in position. Simple enough:

5436623184_71bc55ea88_z.jpg


Rather than trying to notch the blockings around the joists bolted to the truss frame, I ripped down a wider nogging on my bandsaw and fixed one below and beside the old 4x2in.

5436623454_1c37a17116_z.jpg


Granted, I could've cut the lower ones a bit thicker than 2in but, I don't know; I wanted to play it safe to ensure that they all fitted in to place...

Got home this afternoon and decided I would try to rip down all this 4x2 down but, my Hitachi C9U2 circular saw "died" on me before I could cut the second length! :x

I'd just fitted a brand-new Atkinson Walker blade as well... :-(

5436624124_178c95f80a_z.jpg


Am I wrong to expect a better finish than this on a hand-held circular saw? With a 16t Freud blade fitted in my table saw, the finish is surprisingly excellent - very smooth to the touch, even in pine.

Oh, and before I can start fixing those sheets of chipboard down, I'll need to get hold of a stepladder... I'm also now wondering whether it's worth putting in some kind of loft ladder - you know, they type that would slide down over the front edge. Any thoughts on that?
 
Finally managed to get back on this today and get the last few sheets of chipboard fixed down. Would have done this a few days ago but, that sore throat I had developed in to a cold that'd kept me out of the workshop until today.

5510038330_f290d9edc8_z.jpg


With a new pair of brushes fitted in my circular saw, I finished ripping all the 4x2in lengths in to 2x2ins, even though I no longer see any point in spending £200-300 insulating the roof in this workshop. Finish was much better, to say the least! No need to worry about sawdust or dust extraction on a job like this - that acts like a 'dust sheet' to catch any drips from the end-seal treatment! ;-)

5509442199_f18ca91b2b_z.jpg


Ended up buying one of these multi-purpose ladders. It was slightly dearer than Screwfix and co. but, this deal include two of the aluminium platforms, which was enough to sway me.

5509442415_c808b5fe98_z.jpg


They've produced a YouTube video to support its reliability and the lifetime guarantee. It folds up to a reasonably convenient size, even though I ended up going for the 4x4 ladder, as they were out of stock on the 4x3 size. Might still make a wooden step ladder before I go and leave that for the future occupiers.

5509439677_be98d663dc_z.jpg


Only downside was where these two holes hadn't been drilled right through - but, aluminium is easy to work with woodworking tools.

5510039452_5e29b83069_z.jpg


Forgot to mention this before but, I added these folding wedges between the last joist and the wall, to provide resistance while fixing the last nogging in position.

5510040104_038bae8737_z.jpg


Before fitting any of the floorboards I wanted to fix one length of 5x2in down each side. With a bevelled-edge, it would, in theory, line up with the lower edges of the 4x2in purlins; providing me with a surface to fix covering sheets of hardboard or thin ply... Even though I've now decided against insulating, I (for some reason!) felt it was worth doing. 5x2in is an awkward size that I know I'll never otherwise get around to using plus, it might give future occupants some ideas and inspiration...

5510040304_2b3aca253e_z.jpg


Again, that blade from Atkinson-Walker did a very good job.

5510040888_7d62049e2d_z.jpg


5509441725_303c761e7c_z.jpg


It's looking good, provided you don't look too closely at some of the "joins" between boards :shock: - they seemed to get worse as I went on!! I blame my state of mind and a lack of cramps, rather than the fact that these sheets had been in my workshop for a few weeks prior... Despite cutting a load of narrow strips from 4mm hardboard to shim the low spots, I think I only had to use three of them in the entire floor. Each sheet was secret-fixed through the tongue with Tongue-Tite screws - not entirely necessary here but, I wanted to try it.

5510042052_92a91c37d7_z.jpg


As I begin to clear off the steel shelving units, I've already begun making good use of the space between each joist:

5510042268_8f78dbd179_z.jpg


Thanks for looking. :)
 
Hi Olly

Your shop overhaul is looking great, keep up the good work!

In response to your quest for a ladder, I thought I would show you the one I've got. It is a wooden folding ladder which when the loft hatch is closed sits entirely (folded up) on the inside of the loft hatch door. When needed you just push the loft door and it pops down and then you can unfold it. It is fantastic for gaining access in a tight workshop (I have a single car width garage, double length).

I hope that a photo is attached... let's see!

cheers
Steve
 

Attachments

  • Image385_50%.jpg
    Image385_50%.jpg
    166.5 KB · Views: 2,275
Thanks, Steve - that looks like a great solution.

How does it fold and, most importantly, what prevents it from folding up again while it's in use? I am struggling a bit with the 4x4 ladder as I don't have a lot of room in which to configure it, unless I open the door and take it outside first, which kind of defeats the object, here...

For anyone interested to see what my workshop was like immediately after finishing the floor then, I've uploaded a brief, silent video to YouTube:

Click Here to Watch

Once I've had a chance to finishing reorganising everything in a few weeks, I'll look at doing a follow-up film.
 
OPJ":1y0agnkk said:
Thanks, Steve - that looks like a great solution.

How does it fold and, most importantly, what prevents it from folding up again while it's in use? I am struggling a bit with the 4x4 ladder as I don't have a lot of room in which to configure it, unless I open the door and take it outside first, which kind of defeats the object, here...

For anyone interested to see what my workshop was like immediately after finishing the floor then, I've uploaded a brief, silent video to YouTube:

Click Here to Watch

Once I've had a chance to finishing reorganising everything in a few weeks, I'll look at doing a follow-up film.


The ladder is hinged in two places so that the ladder folds up into a stack on top of the loft door. When deployed, the ladder remains unfolded and gravity does the rest (+my heavy body standing on it!). The foot print on the floor when deployed is very small, but obviously some clearance is needed to unfold the ladder as you open it up. I have taken some more up to date photos this weekend of the ladder in various stages, as below. Hopefully the photos will explain better than me! Hope this helps?

My builder sourced it for me when he built the garage and I cant recall where he got it from, but I can ask if you are interested... just let me know.

cheers
Steve
 

Attachments

  • 13032011798_50%.jpg
    13032011798_50%.jpg
    185.9 KB · Views: 2,016
  • 13032011801_50%.jpg
    13032011801_50%.jpg
    216 KB · Views: 2,016
  • 13032011803_50%.jpg
    13032011803_50%.jpg
    235.8 KB · Views: 2,016
  • 13032011804_45%.jpg
    13032011804_45%.jpg
    211.6 KB · Views: 2,016
Steve, I'd also be interested in where the ladder was sourced from, if you can find out give us a heads up pls :). Looks like the perfect solution for a hatch that I need access to.

Cheers _Dan.
 
Google Fakro loft ladders, we fit them all the time at work, not cheap but very good. I think Jewsons do them, we get them from a local builders merchant.
Chipboard never goes together properly anymore, the sheets are not the same size, like plasterboard they can be + or - 5mm in size.
 
Still haven't decided what to do with the ladder situation as I still fear that a permanently-fixed solution would consume too much space in the centre. It may well be that I buy or build a simple stepladder and leave that for the future occupants...

After offloading the 6ft-long shelving unit to someone via. Freecycle (I got a surprisingly high response to that advert!), I've continued my redevelopments by painting the two walls that I could get to back in 2009, due to a lack of space, etc.

5529346770_e1286c78d6_z.jpg


Even with that unit gone, the workshop was beginning to feel quite 'open'.

5543207807_f7864506e6_z.jpg


Same as last time; I'm using Crown's Brilliant White Emulsion from B&Q. It was only £10 when I popped in last week, while it was over £12 when I purchased the same stuff two years ago! :cool: I always thin the first couple of coats about 50/50 with water. Otherwise, the 10lt bucket will soon run out on such a 'porous' surface. A block brush is still my preferred way of applying the paint... Well, I say preferred but, what I actually mean is that it seems to be the most effective...

5543208147_8edf964f72_z.jpg


That was after the first thin coat. I did a second one like that and then, a third one with only about one-third water:

5543787112_ce689bc23d_z.jpg


I could've added a fourth coat but, with time running out and everything, I decided this would do. It' certainly makes a difference!

5543208927_cf1e31801f_z.jpg


I've also sorted out a space for the garden tools and, spur shelving should be all I need alongside that, just behind my bandsaw.

5543209179_8b929a59db_z.jpg


I'm about ready to start painting the final wall over the coming evenings, which was hidden behind my sliding mitre saw:

5543209429_0e66d56fab_z.jpg


Yes, I still need to reorganise all those wires... :oops:
 

Latest posts

Back
Top