


I am a relative newcomer to the world of Woodworking, although I've been playing around with DIY for a while and a partial motorhome conversion. I am a proud possessor of a shed (renamed The Workshop when the better half is around) and while it's got a bench I though I ought to build a more impressive version that makes me look as though I know what I'm doing. At the same time I could use it as an apprentice piece to try out techniques. At somepoint I had acquired a Record 52 1/2 from the local recycling centre and it needed somewhere to go.
So I eagerly devoured the Landis book.
Somewhere I've got a design. I'm not going to post it though as it's a roughly drawn idea on a scrap of paper in biro with various dimension incomprehensibly marked on and crossed out. No wonder I seem to have lost some space. I should know better, I studied engineering at university, but the 'organic' approach always seems to be a better idea at the time. Particularly when I'm standing looking at a piece of wood and have a great idea; pity I never write any of them down.
The only critical dimensions were that it was going to be built in between two small brick pillars 142 cm apart.
The shed is 5m x 2m and is at the back of the yard built onto the garden wall behind. It's also the store for garden bits and pieces and the collection of power tools that I seem to have built up.
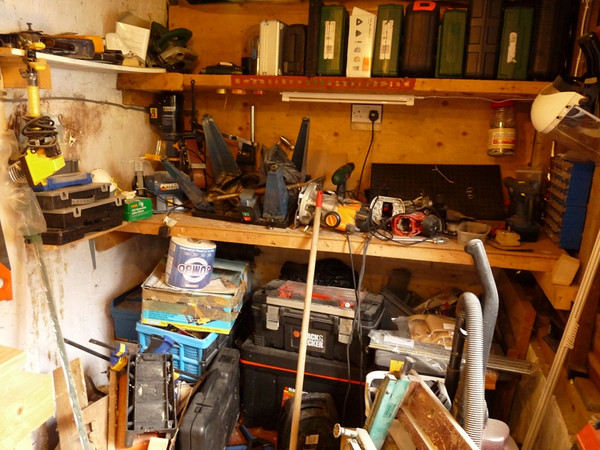
The right wall with original bench. One triton router which was in the Aldi table but now isn't because the smaller Black and Decker is in parts while I try and work out how to replace the bearing which gave out after not much use.
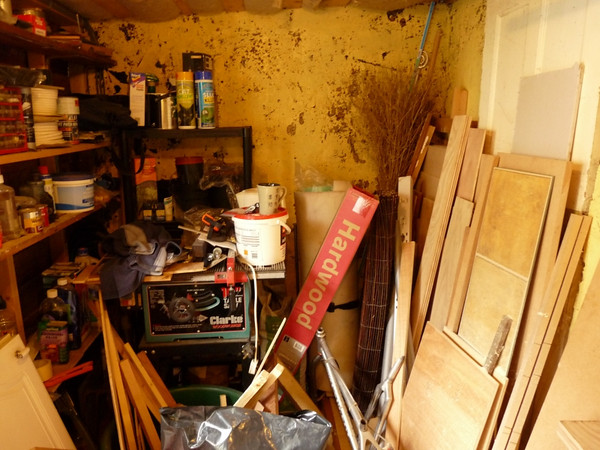
The left wall, with timber store, flaky paint on slightly damp walls and a frankly scary Clarke table saw which I got for free and has never really been used except as a junk table.
It's only 195cm high, which is alright for me as a shorty but doesn't leave much room for overhead storage or diagonal sheets of ply. Big stuff gets done out in the yard.
So out I went I bought some shed pine. Yes I know that workbenches should be in hardwood but I knew I was going to get it wrong. I made some decisions about thickness and size while contemplating the timber. I can't remember why I made these but ended up with some 5cmx10cm for the front section of the bench and 5cmx7.5cm for the back part. Legs from 5x7.5.
Initial planing of the timber was done in the yard using some highly technical support methods.
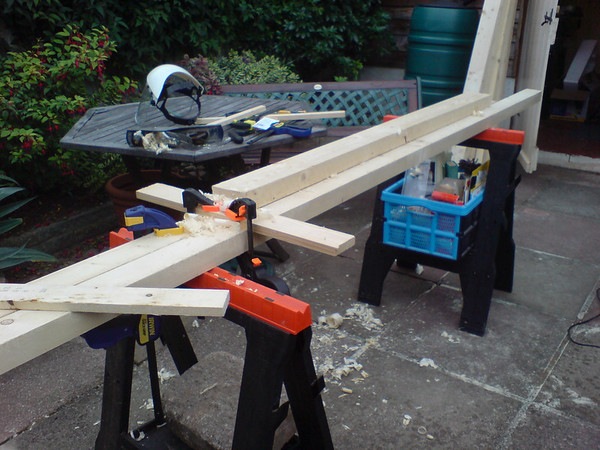
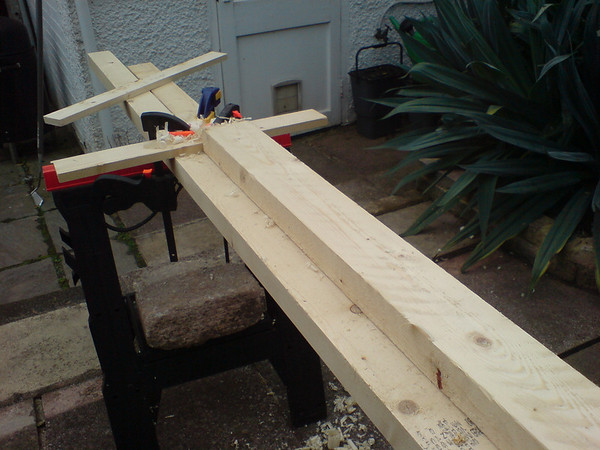
I planed the 2.4m lengths and then cut them down. Despite making lots of shavings I still ended up with slightly twisted pieces, although less so than when I started.
Knowing I was going to put the legs together with mortice and tenon joints I got seduced by a morticer from Aldi. I know. Actually it's a pretty heavy piece of kit if rather rough around the edges. Unfortunately it needs a lot of fettling to get it to work properly - rather more than I put in. Some decent chisels would have helped. All in it would have been quicker to rout or drill and then hand finish (as I had to tidy up by hand anyway).
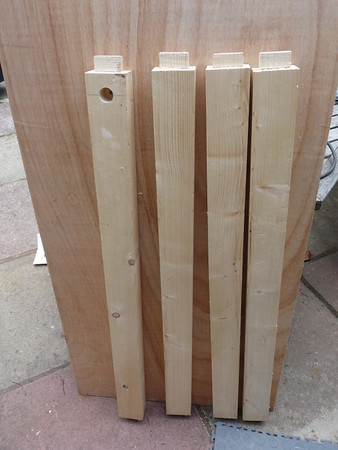
I thought I had more photos but all I seem to have is some of the rails.
And an assembled leg frame.
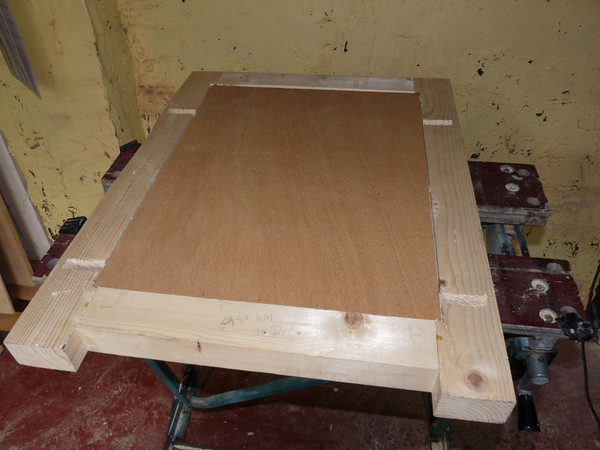 I've routed a 9mm deep by 10mm wide channel in the frame (after I'd glued it together - would have been easier before but I didn't think of that) and dropped in a sheet of 9mm ply. 5mm expansion gap all round and panel pinned into the bottom channel. The rails will hold it in when assembled.
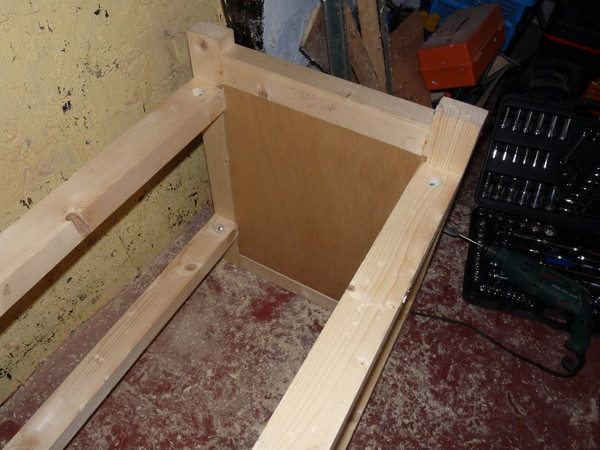
Upside down and showing the knockdown joints I used. Not sure why I put them I think had some vague idea originally that I was going to take it with me if we moved. I decided quite early on that it probably wasn't worth it but seemed to have stuck with the joints.
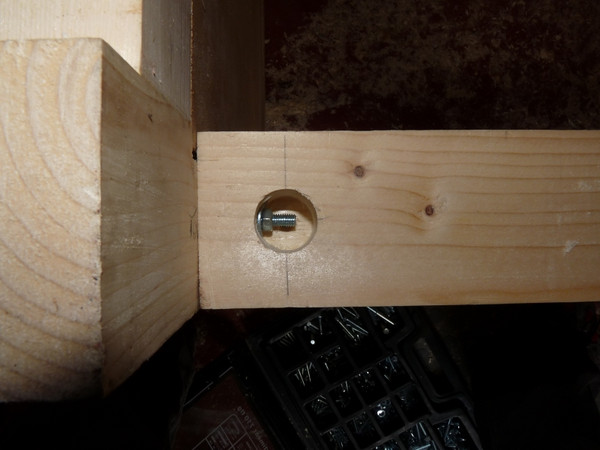
Closeup on the joint. Essentially an M6 bolt through a MT joint and held in place with a normal washer. I probably should have put some form of lock nut or threadlock on and I do expect it to loosen with time; but call it an experiment in finding out info for future use...
And a final two pictures of how it is now and in rough place. Bench is going to be held by 2 coach screws at the front (fitted) and 2 bolts in slots towards the back which will allow some movement (yet to be done).
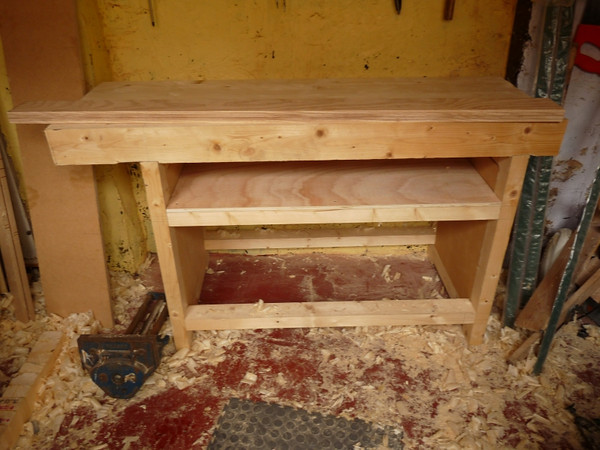
The vice sits on the ground. I need to re-assemble it after taking it apart to clean out the rust (job not complete).
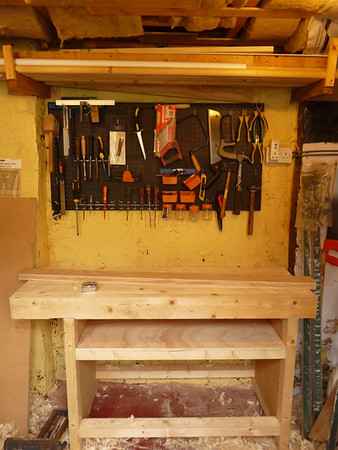
I'm going to fit a timber along the wall and join it to the main bench with breadboard ends. A gap of about 5cm will sit between the main bench and the back, allowing for some expansion and to drop some clamps through if I need. The back wall is by no means straigt or vertical and the floor is also fairly rough so I can't bolt the whole thing straight to the wall.
Timber on the bench is a piece of ash for my next project which is a canoe paddle. I'll probably get something similar (excess hardwood timber floor board with machined joint that will need planing off) from the same source as the hardwood edging for front and sides. The vice is going to be set into the current bench and the front edging will act as the jaw cover for the back. The original idea was that I would work of the planed surface as is, but I've now decided to put a piece of hardboard on top to protect it. Dogholes need to be drilled.
Finally I want to fit some drawers into the space in the legs. I've got a topic open about this in the General forum as I'm trying to work out sizes and materials.
So I eagerly devoured the Landis book.
Somewhere I've got a design. I'm not going to post it though as it's a roughly drawn idea on a scrap of paper in biro with various dimension incomprehensibly marked on and crossed out. No wonder I seem to have lost some space. I should know better, I studied engineering at university, but the 'organic' approach always seems to be a better idea at the time. Particularly when I'm standing looking at a piece of wood and have a great idea; pity I never write any of them down.
The only critical dimensions were that it was going to be built in between two small brick pillars 142 cm apart.
The shed is 5m x 2m and is at the back of the yard built onto the garden wall behind. It's also the store for garden bits and pieces and the collection of power tools that I seem to have built up.
The right wall with original bench. One triton router which was in the Aldi table but now isn't because the smaller Black and Decker is in parts while I try and work out how to replace the bearing which gave out after not much use.
The left wall, with timber store, flaky paint on slightly damp walls and a frankly scary Clarke table saw which I got for free and has never really been used except as a junk table.
It's only 195cm high, which is alright for me as a shorty but doesn't leave much room for overhead storage or diagonal sheets of ply. Big stuff gets done out in the yard.
So out I went I bought some shed pine. Yes I know that workbenches should be in hardwood but I knew I was going to get it wrong. I made some decisions about thickness and size while contemplating the timber. I can't remember why I made these but ended up with some 5cmx10cm for the front section of the bench and 5cmx7.5cm for the back part. Legs from 5x7.5.
Initial planing of the timber was done in the yard using some highly technical support methods.
I planed the 2.4m lengths and then cut them down. Despite making lots of shavings I still ended up with slightly twisted pieces, although less so than when I started.
Knowing I was going to put the legs together with mortice and tenon joints I got seduced by a morticer from Aldi. I know. Actually it's a pretty heavy piece of kit if rather rough around the edges. Unfortunately it needs a lot of fettling to get it to work properly - rather more than I put in. Some decent chisels would have helped. All in it would have been quicker to rout or drill and then hand finish (as I had to tidy up by hand anyway).
I thought I had more photos but all I seem to have is some of the rails.
And an assembled leg frame.
Upside down and showing the knockdown joints I used. Not sure why I put them I think had some vague idea originally that I was going to take it with me if we moved. I decided quite early on that it probably wasn't worth it but seemed to have stuck with the joints.
Closeup on the joint. Essentially an M6 bolt through a MT joint and held in place with a normal washer. I probably should have put some form of lock nut or threadlock on and I do expect it to loosen with time; but call it an experiment in finding out info for future use...
And a final two pictures of how it is now and in rough place. Bench is going to be held by 2 coach screws at the front (fitted) and 2 bolts in slots towards the back which will allow some movement (yet to be done).
The vice sits on the ground. I need to re-assemble it after taking it apart to clean out the rust (job not complete).
I'm going to fit a timber along the wall and join it to the main bench with breadboard ends. A gap of about 5cm will sit between the main bench and the back, allowing for some expansion and to drop some clamps through if I need. The back wall is by no means straigt or vertical and the floor is also fairly rough so I can't bolt the whole thing straight to the wall.
Timber on the bench is a piece of ash for my next project which is a canoe paddle. I'll probably get something similar (excess hardwood timber floor board with machined joint that will need planing off) from the same source as the hardwood edging for front and sides. The vice is going to be set into the current bench and the front edging will act as the jaw cover for the back. The original idea was that I would work of the planed surface as is, but I've now decided to put a piece of hardboard on top to protect it. Dogholes need to be drilled.
Finally I want to fit some drawers into the space in the legs. I've got a topic open about this in the General forum as I'm trying to work out sizes and materials.
