WIP - Round Bottomed Plane

UKworkshop.co.uk

Help Support UKworkshop.co.uk:

This site may earn a commission from merchant affiliate links, including eBay, Amazon, and others.

Kalimna

Established Member
Joined
18 Nov 2009
Messages
1,275
Reaction score
1
Location
Deanston, a stones throw from the Distillery
Greetings folks,
Just thought I'd post up a few piccies of a plane I'm in the middle of making to (hopefully!) help out with the headrest of a Hal Taylor chair I foolished promised my wife I would make. Before July. 2010. pipper.
Anyhoo, there's a few photo's but should be fairly small and not take too long to load.
As usual, I welcome any comments, good or bad, and might ask a few questions along the way as well.

Initially I decided to use a few leftover bits of wood, in this case some padauk and a piece of nicely rippled maple, with a approx 1 1/2 blade.

IMG_6080.jpg


These were then planed/thickness sanded to dimension, roughly according to the method in Mr Fincks book on the subject...

IMG_6083.jpg


Marking out the blade bed (at 60 degrees, similar to HNT Gordon planes) and throat...

IMG_6085.jpg


Throat wedge cutout, including bandsaw 'hiccup'.....

IMG_6086.jpg


Skipping a couple of steps, the blade bed having been trued up, the padauk dowel made for the cross pin, the cross pin holes drilled and the locating dowel holes drilled out, to be cut away later...

IMG_6792.jpg


The padauk dowel cut into three bits, the two shorter to be glued into the holes in the cheeks, set approx 3mm beneath the inside surface. The cross pin is inserted at glue-up and is free to rotate and form the mating surface for the wedge (cross pin has a flat on it).

IMG_6797.jpg


Glue up on the kitchen floor...

IMG_6801.jpg


Glued up blank tidied up a little, and a 30cm radius template created in CorelDRAW gued to the cheek, to act as bandsaw guide. I tried a 25cm radius but it dodn't 'look right' to me.

IMG_6805.jpg


The front-back curvature bandsawn off....

IMG_6811.jpg


More curvature guidelines, this time a 25cm radius, the curvature slightly forward of the mouth. You can just about see it on the pic...

IMG_6821.jpg


About to start work on the rest of the curvature... But how to clamp a curved object to enable rasping and sanding? DS sticky tape to the rescue! (the left-right curvature taken from a smallish cake plate....)

IMG_6824.jpg


IMG_6826.jpg


Work starts on the rasping courtesy of a WH purchase and a microplane...

IMG_6827.jpg


Shaping up...

IMG_6828.jpg


Showing how the mouth has started opening up like a cross section of a red blood cell... An effect I wasn't quite expecting, but makes sense, when you think of the geometry...

IMG_6829.jpg


And two final (phew!) shots giving an idea of the curvature ino both drections...

IMG_6833.jpg


IMG_6834.jpg


And that is where I am at right now. Hopefully I will get this finished tomorrow/friday and get some shavings from it.... Things still to do...
Grind the curved edge onto the blade
Fashion a wedge
Open up the mouth, if needed
Soften the edges of the upper surfaces
Possibly a coat of oil to finish, may leave it bare.

A couple of questions for anyone who has got this far through the post...
Firstly, would you bother with any finish on a woody? I quite like (particularly in rippled maple) the deep sheen from oil, but I know it's not to everyones' taste.
Secondly, padauk is a fairly brittle wood (so probably a rather poor choice on my part) and Im concerned that the area around the mouth may split/crumble a little. Might it be worth soaking a little thin CA to try and harden it a little in this area?
Thirdly, any general comments?

Ta for looking, I look forward to, and appreciate any comments...
Adam
 
Hi Adam

That is a nice looking plane mate!

I love these threads as it gives me ideas and inspiration for future projects that I might need.

The combination of woods works well...very nice looking. I think the paduk might chip out...Philly would know more about that than me. I have only used it on necks.

I have used two part resin to harden wood areas on some projects so all I can say is that it might be an idea...again...plane makers would give you a better clue. As for finish...try Tru-Oil....I like that stuff!

Jim
 
Cheers Jim - I have a feeling if it works, it might just get a little use on the next archtop 'project'........
I think the padauk will chip too, unfortunately. Had I thought a little more about it a little earlier, then epoxy might indeed have worked, but I am less inclined to introduce a gloopy rock hard glue to an area where it might contaminate the blade bed!
I've never seen Tru-oil, though it gets talked about on MIMF often enough - can you get it in the UK? I was planning on using tung oil.....

Adam
 
Kalimna":3140phur said:
Cheers Jim - I have a feeling if it works, it might just get a little use on the next archtop 'project'........
I think the padauk will chip too, unfortunately. Had I thought a little more about it a little earlier, then epoxy might indeed have worked, but I am less inclined to introduce a gloopy rock hard glue to an area where it might contaminate the blade bed!
I've never seen Tru-oil, though it gets talked about on MIMF often enough - can you get it in the UK? I was planning on using tung oil.....

Adam

Yes...you can get Tru-Oil in the UK at gun shops...there is one in my nearest village. It's not cheap but it goes a LONG way.

You are probably best getting it on FleaBay...

HERE YA GO

It is absolutely the ONLY finish I use on necks and sometimes on fretboards (when someone wants a finished board).

You will never regret it. It is so very tactile, not sticky at all and is used in all fine gunstocks like on Purdeys.

HOW TO USE TRU-OIL

I get the pads from Boots that ladies use to take of makeup. They have lint free cotton either side of cotton wool in a round pad. They come in stacks of a hundred. Hold the pad on the bottle top and pour on the pad by turning over quickly and back again.

Then use this to wipe with the grain starting at one edge. Then go back to the start and overlap 50% and wipe the same way. Continue like this until you get to the other side NEVER go back over where you have wiped before. Quickly wipe drips off the edges.

Leave to set for 20 minutes then do the next surface.

Repeat for three coats and then leave for a few days to harden.

I then use either wire wool or 3M Micromesh. If you use the former it leaves it satin finish and if you want to make a deeper finish use wire wool and repeat from this stage. If you want a high gloss finish then use MicroMesh to 4000 mesh and then repeat the finish coats 3 times again...wait again for a few days and repeat as many times as you want.

It is really great stuff!

This is 30 coats to high gloss...lot of work but you get the idea

44small.jpg


Use cellulose sanding sealer before you start for porous woods and grain filler then sanding sealer if the pores are open.

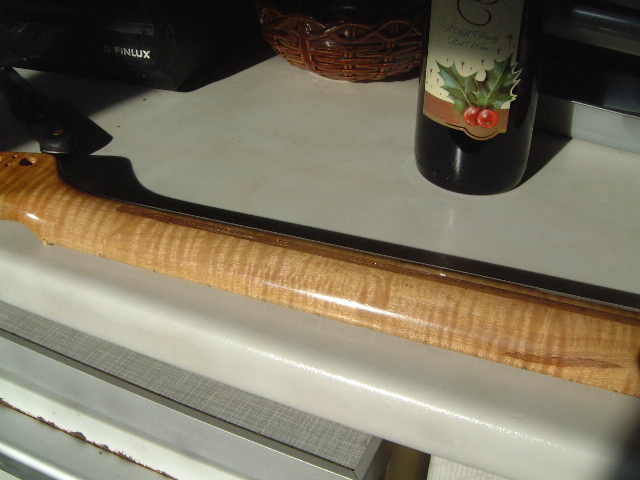
This is a maple neck with less gloss...very nice to play as it does not get sticky with perspiration and is easily recoated as it wears...

necktru9.JPG


Hope this helps

Jim
 
Adam
Looking good! The mouth - you see what I was trying to explain in the other thread now.
As for the Paduak chipping, I'd try your plane out first before you start second-guessing it. If you do find it a problem then thin superglue wicked into the timber can help, but I'd wait until you've tried it out to see if this will be necessary.
As for a finish, oil is a great finish for planes. But I notice it makes Paduak go dark much quicker, so maybe a Shellac finish would be better if you want to keep the colour longer?

Hope this helps,
Philly :D
 
Cheers fort the comments.
Jim - I shall certainly look out for some tru-oil, I hadnt realised quite how high a gloss can be achieved!
Philly - yep. I sort of understand a little better what you meant, but I'm not sure how to have the rear edge of the mouth equidistant to the front edge, and not as it has appeared. Short of making the plane from a single block of wood, and chopping out the throat rather than gluing up a central section a la Krenov.
As far as the darkening of the padauk goes, thats not an issue for me, so long as I see some reddish brownness and the nice ripple in the maple!

When this is finished, I think another jack-type woodie might be the order of the day, or another roundbottomed one, but only in one dimension, so a straight blade would still work (like a rounded spokeshave)....

Adam
 
Adam
Put the iron in the plane and open the mouth to match it - its all the reference you need.
Cheers
Philly :D
 
Oryxdesign":274a38fu said:
Jim, that is an amazing finish.

Simon

Sure is Simon...that was a test of both laminating burr veneer on an archtop...amazingly with a sand bag! Just ordinary PVA. Then a few weeks of Tru-Oil laying down to test how far it would go...and I was astounded too...

But the delicacy of Tru-Oil has to be felt to be believed. It is a very expensive addition to boutique quality handmade guitars and it is totally different to poly or even nitro in that it feels beautiful. This is the reason it is used on expensive gunstocks. It is polymerized linseed oil.

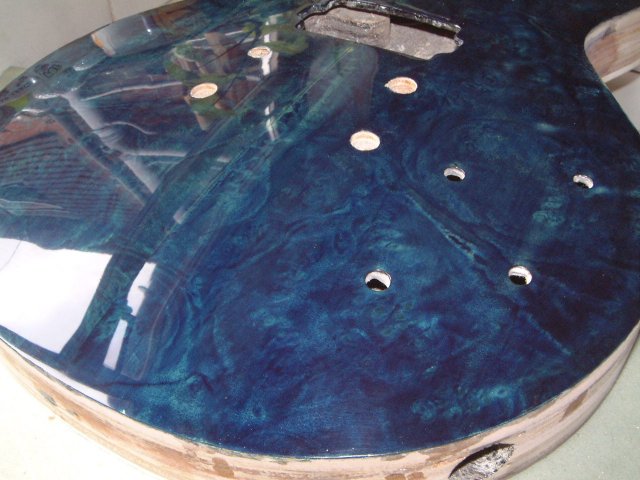
One downside on colour finishes...it goes quite yellow quite quickly. The Les Paul copy on which that finish was wasted really...went a blue green after a month or two and that was not what I intended. But the buyer loved the new colour...go figure!

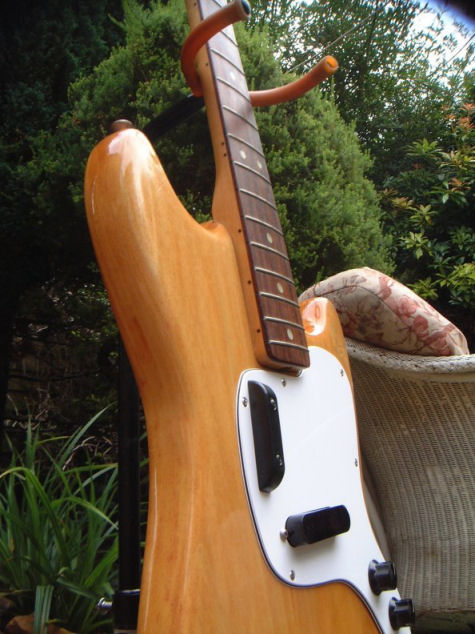
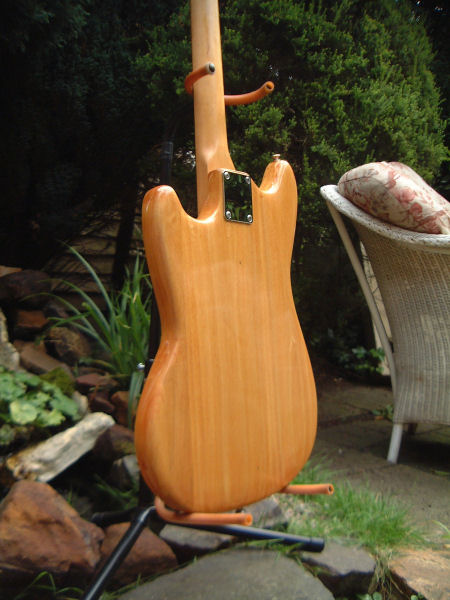
However...that downside is a major upside on putting new parts on vintage guitars...it goes "aged" as if it were an old guitar and matches the rest. Here is an old original Fender Bass I did it on for my son...

fender_frontside_body_finished_web.jpg


fender_back_full_finished_side_web.jpg


As you can see this is between matt and high gloss...and this is after it yellowed...brought the vintage look back to a guitar that had been sprayed with...wait for it....RED car cellulose!!!

Sorry for hijacking your thread a bit there Adam...I wanted to show you how truly beautiful that finish can be...and versatile.

Jim
 
jimi43":rouhitol said:
Oryxdesign":rouhitol said:
Jim, that is an amazing finish.

Simon

Sure is Simon...that was a test of both laminating burr veneer on an archtop...amazingly with a sand bag! Just ordinary PVA. Then a few weeks of Tru-Oil laying down to test how far it would go...and I was astounded too...

But the delicacy of Tru-Oil has to be felt to be believed. It is a very expensive addition to boutique quality handmade guitars and it is totally different to poly or even nitro in that it feels beautiful. This is the reason it is used on expensive gunstocks. It is polymerized linseed oil.

How does it compare the Aussie organoil products? These were being dem'd at an Axminster show (hmm - that must have been a while ago), and were applied using fine sandpaper, similar to the traditional wet sanding oil finish on gunstocks.

The process gave a high finish, and was quite rapid.

http://www.organoil.com.au/

BugBear
 
How does it compare the Aussie organoil products? These were being dem'd at an Axminster show (hmm - that must have been a while ago), and were applied using fine sandpaper, similar to the traditional wet sanding oil finish on gunstocks.

The process gave a high finish, and was quite rapid.

Hi BB

I think there is a misunderstanding with Tru-Oil for which they are totally to blame, in that it is an oil. It is not. It starts out from an oil product but the polymerisation turns it into more of a shellac finish. It is quite different in property to the other traditional oils.

Organoil (don'tcha just love the Ozzies).....produces a number of finishing oils from what I can see...and they are the traditional oils. The "Hot Burnishing" Oil seems to be Tung Oil....which is also used sometimes in finer finishes.

I haven't tried it...I will give it a go. Perhaps Derek could tell us if it is another "secret" oil or just wonderful Australian entrepreneurial spirit! :wink: Kinda....TUNG in CHEEK! :shock: :oops:

Jim
 
Adam, that is gorgeous! And curved on 3 axes!

I have two copies of Finck's book, since I liked it so much when I was browsing at the bookstore I bought it again (I really need to start carrying a booklist in my wallet). Making one using his instructions has been on my to-do list for several years.

Can't wait to see it in use. I haven't done any curved work like that (the chair that is).
 
Adam,
That is looking great - you will definitely find it useful on the headrest, I used a compass plane on the two I did but it would have been more satisfying to have made a special tool like yours for it.
 
Ok, so I havent *quite* got around to finishing the plane yet... I made one wedge, then cut it too short. Made another and it just about fits, but it's now a bit too late (after 9pm) to be regrinding the blade. It'll have to wait till monday, given work over t'weekend. Boo Hiss!

sdbranam - thanks :) Hopefully I'll post up some shavings next week... Following Fincks instructions hasnt been too tricky - he really explains it well. I did a few things differently on this (and the first plane I made from his book, a sortof-jack in purpleheart, hornbeam and yew....), for instance not using a cap iron, which takes a fair bit of work out, using a different bed angle, and the cross pin which is explained above. Oh, and as for the curved work (headrest), I havent done anything like that before either!

Chris - thanks also :) I was actually going to pick your brains a little if that's ok, with respect to the Taylor chair, as I am having a few concerns! Primarily that the timber I have (some lovely scottish walnut) is neither thick enough (rough sawn boards were a smidge over 1" thick, so when trued up and glued together, I am getting about 1 3/4") nor did I purchase enough, so there is a mix of scottish cherry too! So even if it comes together ok in the end, then it will be a sort of walnut and cherry patchwork!

Time for a cuppa methinks!

Adam
 
Plane is looking good...I'd think very carefully about a 'walnut and cherry' patchwork on something of this quality. I'd go for one timber only, with accents in the other - Rob
 
Back
Top