


Hi everyone, I have not had much time lately to make anything of any note, but the arrival of my new Felder CF741 Pro universal machine has filled me full of enthusiasm and made me put aside some time as often as possible to crack on make this project, which I have been planning for some while. Its going to be a little bit of a cheat, in that when I made the cabinet for my swords, I made a set of doors the wrong size, so this project will use them and save me time making. It does however mean that superficially they will look quite similar, although this project will much more complex in terms of the joinery, as you will be able to see all of it and it will be free hanging on the wall. Also, it will be pretty darn heavy and will need all the internal storage cubby holes etc, something the other cabinet did not have. I have been scouring this forum for previous projects threads, for ideas and solutions, and was pretty impressed by some of them, like Wakas's....
I wanted to make some drawers for the bottom of the cupboard, current plan is to use some pillow maple I have as a bit of contrast for the frontals...what do you think?
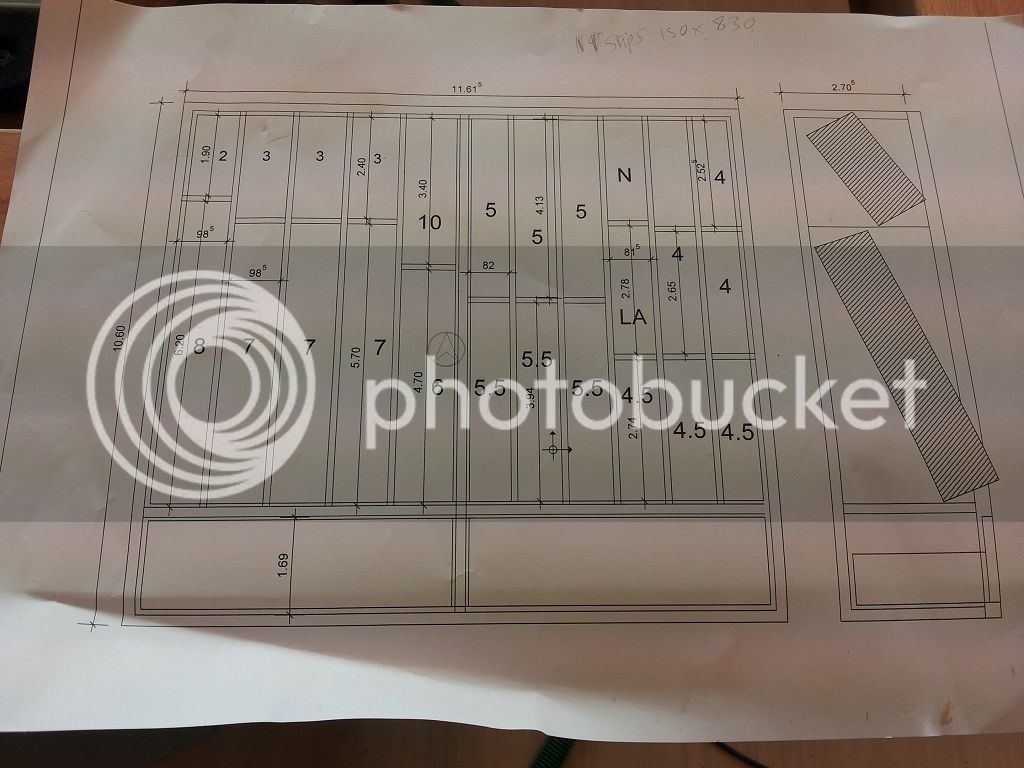
So, I made up a plan using CAD software to help me visualize how it would work and all fit together. It was not a complete design and cutting list, but it was enough to get started.
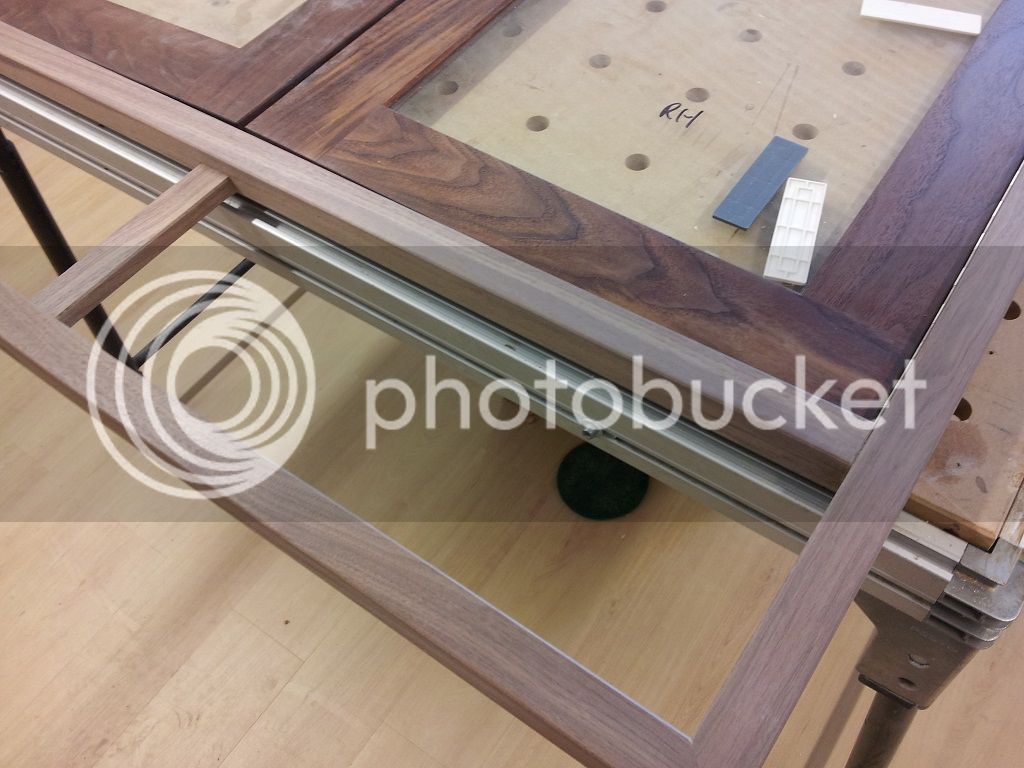
So, my first step was to make the face frame from solid walnut that would mount on top of the cabinet carcass and the doors would hang from. Then I could make the carcass to suit. I ran down the stock on the new saw..awesome to use and so much easier with a sliding carriage...it would be slightly bigger all round than the carcass and I decided to have a recessed vertical bar between the doors, for them to shut on to, rather than between them. Here is the frame being sized around the doors before glueing up:
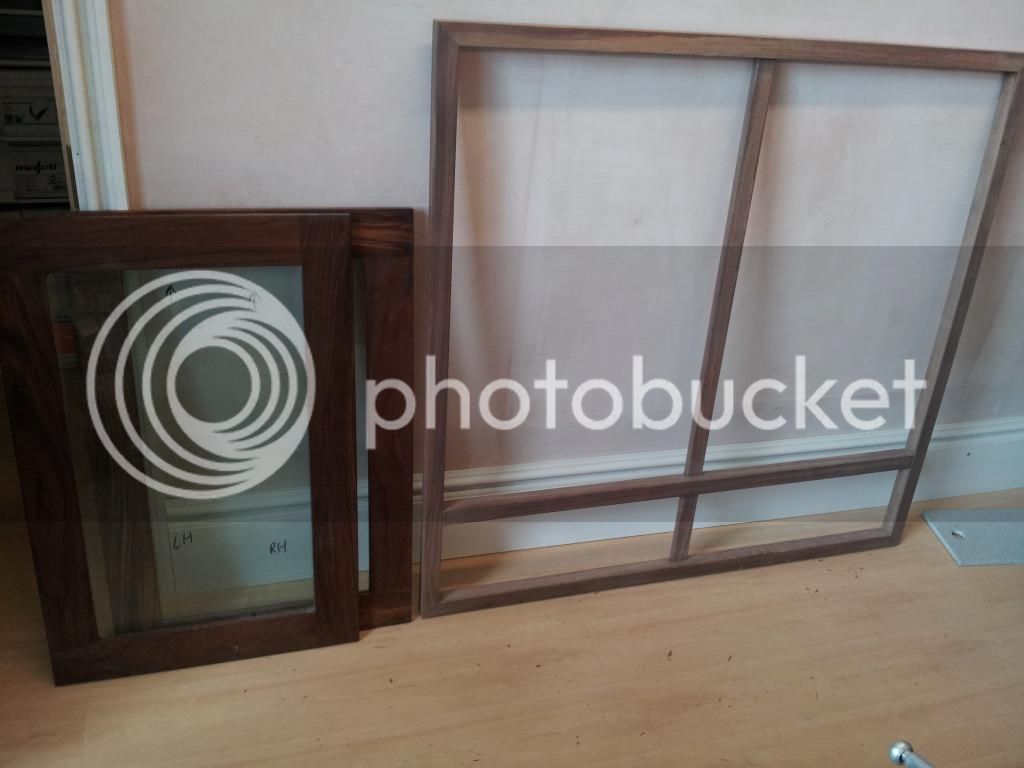
I dominoed the mitred corners together then went over the joints with a low angle block plane before some sanding. Here is the completed frame next to the doors I made last year....the wrong size..
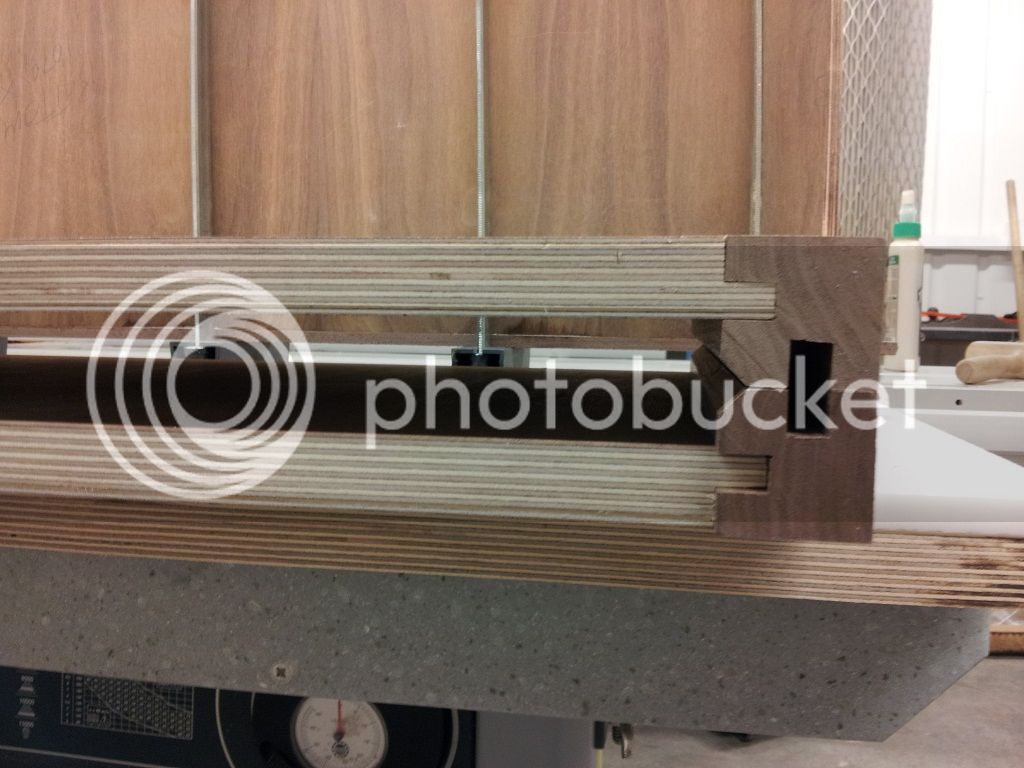
Frame complete, I could now start thinking about the cabinet itself. I realized that hanging on the wall, the sides would be visible, so screwing together would not be good.....despite the strength advantage Instead, I chose to use an idea from F&C magazine of dadoed solid corner pieces, which would mean no visible fixings and also give me chance to see what the new saw could do...!
And here they are dry fitted to the rebated cabinet sides:
I wanted the whole cabinet to look nice, even the back, which would normally be against the wall, so I lipped all the rear edges of the plywood making up the sides, here being glued on:

Then I had to sit down and think long and hard about how I would glue it together and how the back and dividers would all attach. I decided to use french cleats to hold it to the wall, so the back had to be substantial, so I used beech veneer 18mm MDF. The centre divider which would be seen in the finished article was of course from walnut veneered material. In the end, I decided it would have to be glued up in stages, from the bottom up, with the back panels sliding done in dado's in the cheeks and the top going on last. So I glued the two bottom corners to the bottom, then the next day, was able to carry on dry fitting and trimming all the components to fit perfectly in advance of the final glue up.
I also had to consider how the french cleats would attach, so came up with the plan to fix through from both sides of the back panel, which would not be seen in the completed project and to also make them wider than the back so I could recess them partly into the side panels, thus letting them carry a lot of the weight.
To be continued.......
I wanted to make some drawers for the bottom of the cupboard, current plan is to use some pillow maple I have as a bit of contrast for the frontals...what do you think?
So, I made up a plan using CAD software to help me visualize how it would work and all fit together. It was not a complete design and cutting list, but it was enough to get started.

So, my first step was to make the face frame from solid walnut that would mount on top of the cabinet carcass and the doors would hang from. Then I could make the carcass to suit. I ran down the stock on the new saw..awesome to use and so much easier with a sliding carriage...it would be slightly bigger all round than the carcass and I decided to have a recessed vertical bar between the doors, for them to shut on to, rather than between them. Here is the frame being sized around the doors before glueing up:

I dominoed the mitred corners together then went over the joints with a low angle block plane before some sanding. Here is the completed frame next to the doors I made last year....the wrong size..

Frame complete, I could now start thinking about the cabinet itself. I realized that hanging on the wall, the sides would be visible, so screwing together would not be good.....despite the strength advantage Instead, I chose to use an idea from F&C magazine of dadoed solid corner pieces, which would mean no visible fixings and also give me chance to see what the new saw could do...!

And here they are dry fitted to the rebated cabinet sides:

I wanted the whole cabinet to look nice, even the back, which would normally be against the wall, so I lipped all the rear edges of the plywood making up the sides, here being glued on:

Then I had to sit down and think long and hard about how I would glue it together and how the back and dividers would all attach. I decided to use french cleats to hold it to the wall, so the back had to be substantial, so I used beech veneer 18mm MDF. The centre divider which would be seen in the finished article was of course from walnut veneered material. In the end, I decided it would have to be glued up in stages, from the bottom up, with the back panels sliding done in dado's in the cheeks and the top going on last. So I glued the two bottom corners to the bottom, then the next day, was able to carry on dry fitting and trimming all the components to fit perfectly in advance of the final glue up.
I also had to consider how the french cleats would attach, so came up with the plan to fix through from both sides of the back panel, which would not be seen in the completed project and to also make them wider than the back so I could recess them partly into the side panels, thus letting them carry a lot of the weight.
To be continued.......


