Sawdust=manglitter
Established Member
So as the title suggests I'm making myself a vacuum chamber to go with the new vacuum pump I bought a couple of weeks ago when ebay had a 10% off everything deal.
There are many options to buy ready made vacuum chambers on the internet but they 'aint cheap', and for one with a larger capacity they are way too expensive for me! Don't get me wrong, making this myself is not exactly cheap, but its atleast half the price of buying one. (It would be a lot cheaper to make a smaller one though!)
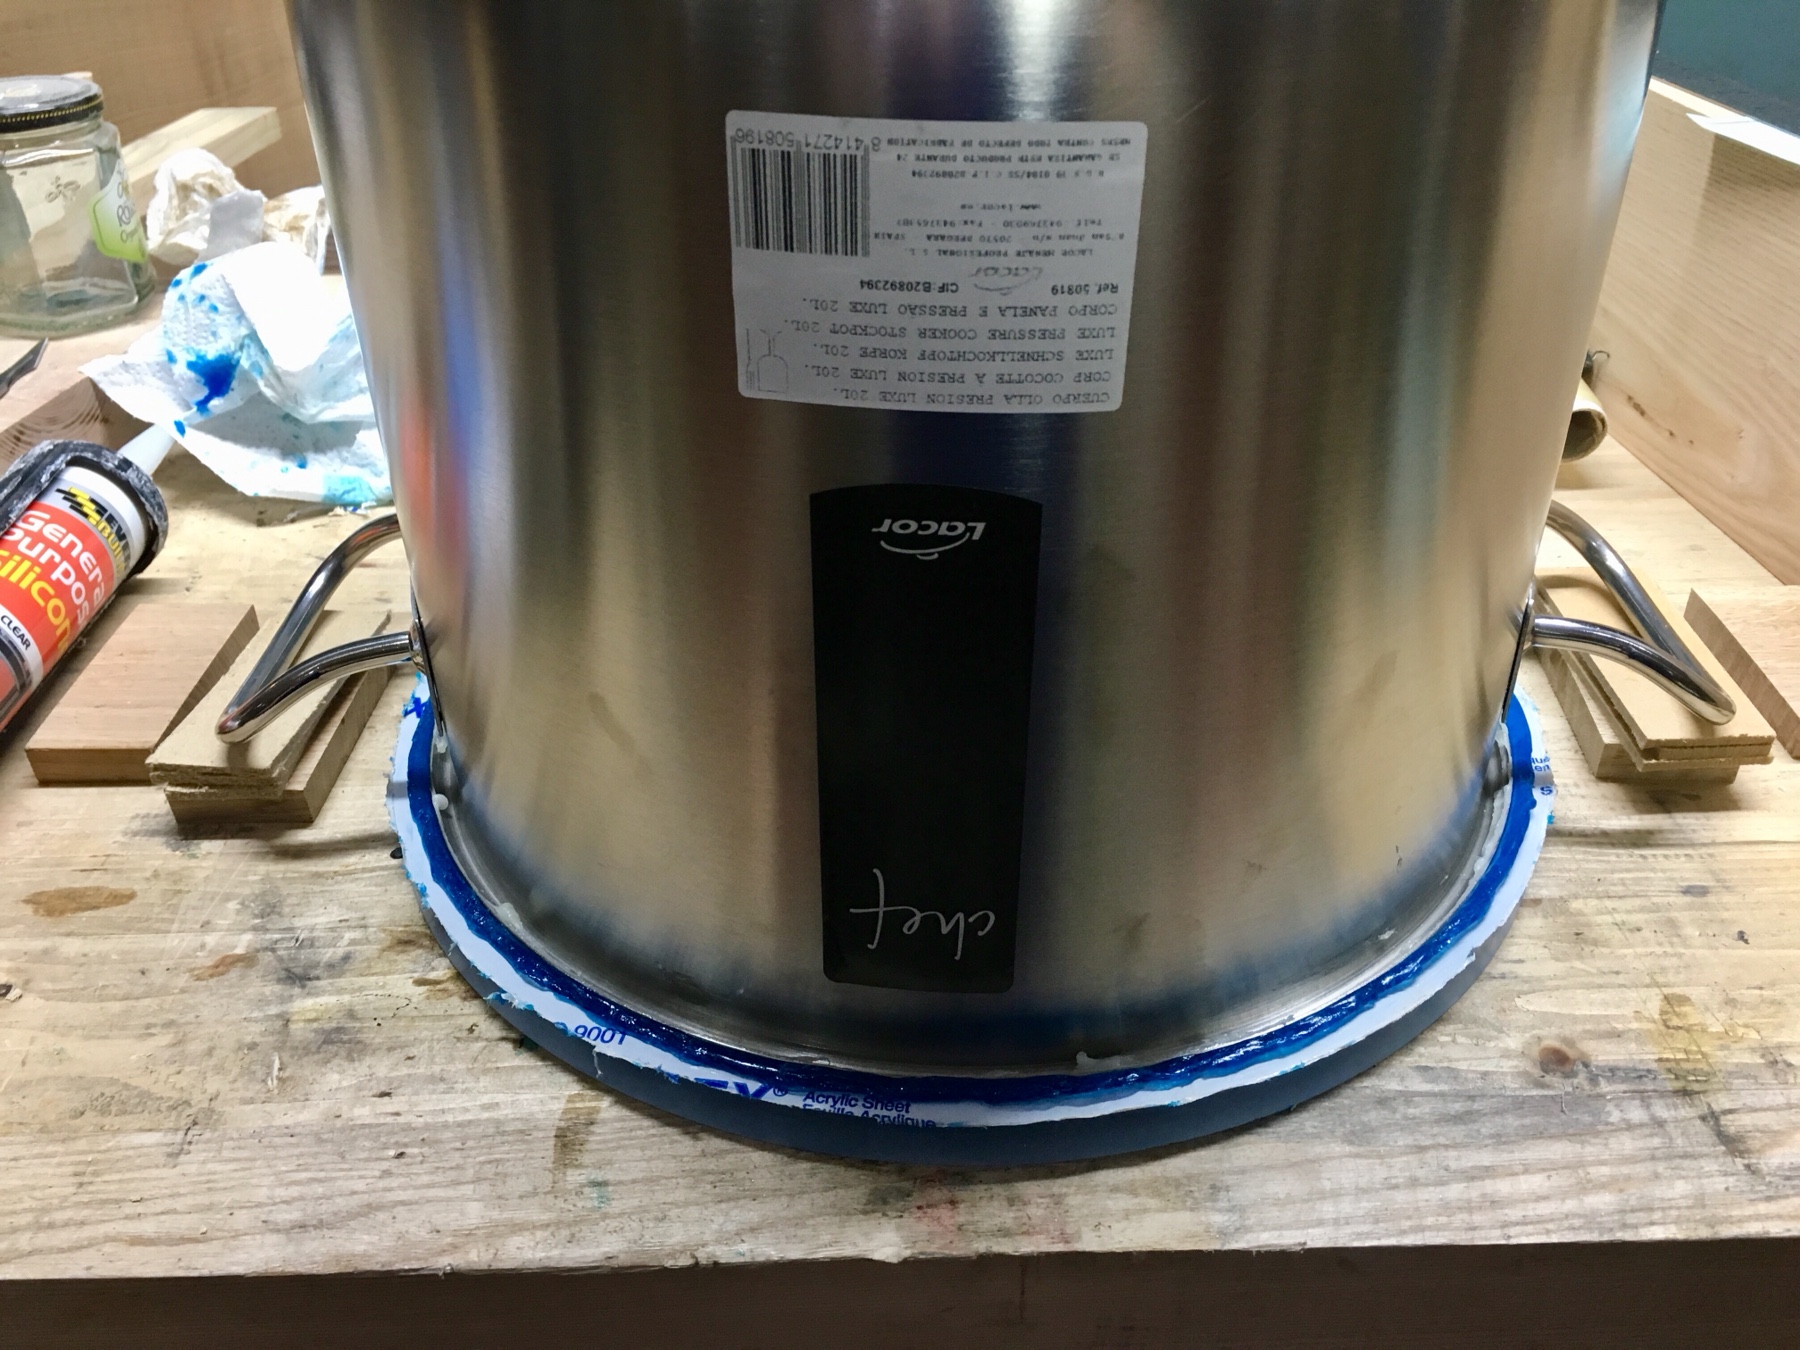
I like to future-proof myself where possible, so I wanted to maximize the capacity of my chamber. When researching how to make one it appears that I shouldn't go for any old cheap pan as the walls are so thin that it would collapse in on itself under a vacuum (especially for a larger one), so I needed to find myself a pressure cooker pot as they are a lot more sturdy with much thicker walls. The pot I went with was a 20L capacity one I found on Amazon at the below link...
https://www.amazon.co.uk/gp/product/B00 ... UTF8&psc=1
And dont be fooled by the price, it seems that they are sold out since I bought it, I paid £38 for it (i had a £20 amazon voucher which needed using so that's why i went with Amazon).
The next step is the lid. I wanted to get a clear lid to enable me to inspect inside while its working under a vacuum, so I decided to go with Perpex. Again, if you go for material that's too thin then it may collapse in on itself or even shatter/explode. I was originally looking for 20mm thick perspex in order to go get something much thicker that I would need, but 20mm thick perspex was too expensive with not many suppliers about, so I decided to go for 15mm thick which should still (hopefully) be more thickness/strength than I’ll need. I waited until I received this pressure cooker pot before ordering the perspex to ensure that I had something big enough. I went with the below perspex from ebay...
https://www.ebay.co.uk/itm/Clear-Cast-A ... 2749.l2649
It worked out cheaper to get a 600x400mm section than it was to get something that was 350x350mm which I need! So it was £31 for the perspex. (Total so far approx. £69)
By the way, this is the vacuum pump I bought...
https://www.ebay.co.uk/itm/BACOENG-220V ... 2749.l2649

The lid... so the first thing to do was to cut the sheet of Perspex I got into a rough circle on the bandsaw. I chose to make the clean circle using a very quick/easy jig on the router table. First of all I cut a 6mm hole in the centre, which is a lot less that I’ll need when attaching the plumbing fitting. I had a scrap piece of MDF with a couple of scrap blocks of ply a little thicker than the 15mm thick Perspex. I stuck a 6mm dowell into the scrap wood and clamped this in place over the blocks to either side of the router table. I could then gradually turn the Perspex by hand while the router is spinning pretty fast (I used a cheap 1/2” four flute spiral bit mean for milling machines, but seems to work well in the router table).

The finish to the cut edge of perspex turned out surprisingly well with no chip etc. I’ve worked with thinner Perspex before for some of the early picture frames I’ve made, and that chips a lot and is quite brittle, but this is my first time working with thicker Perspex. I’m guessing the faster speed of the router bit helped.
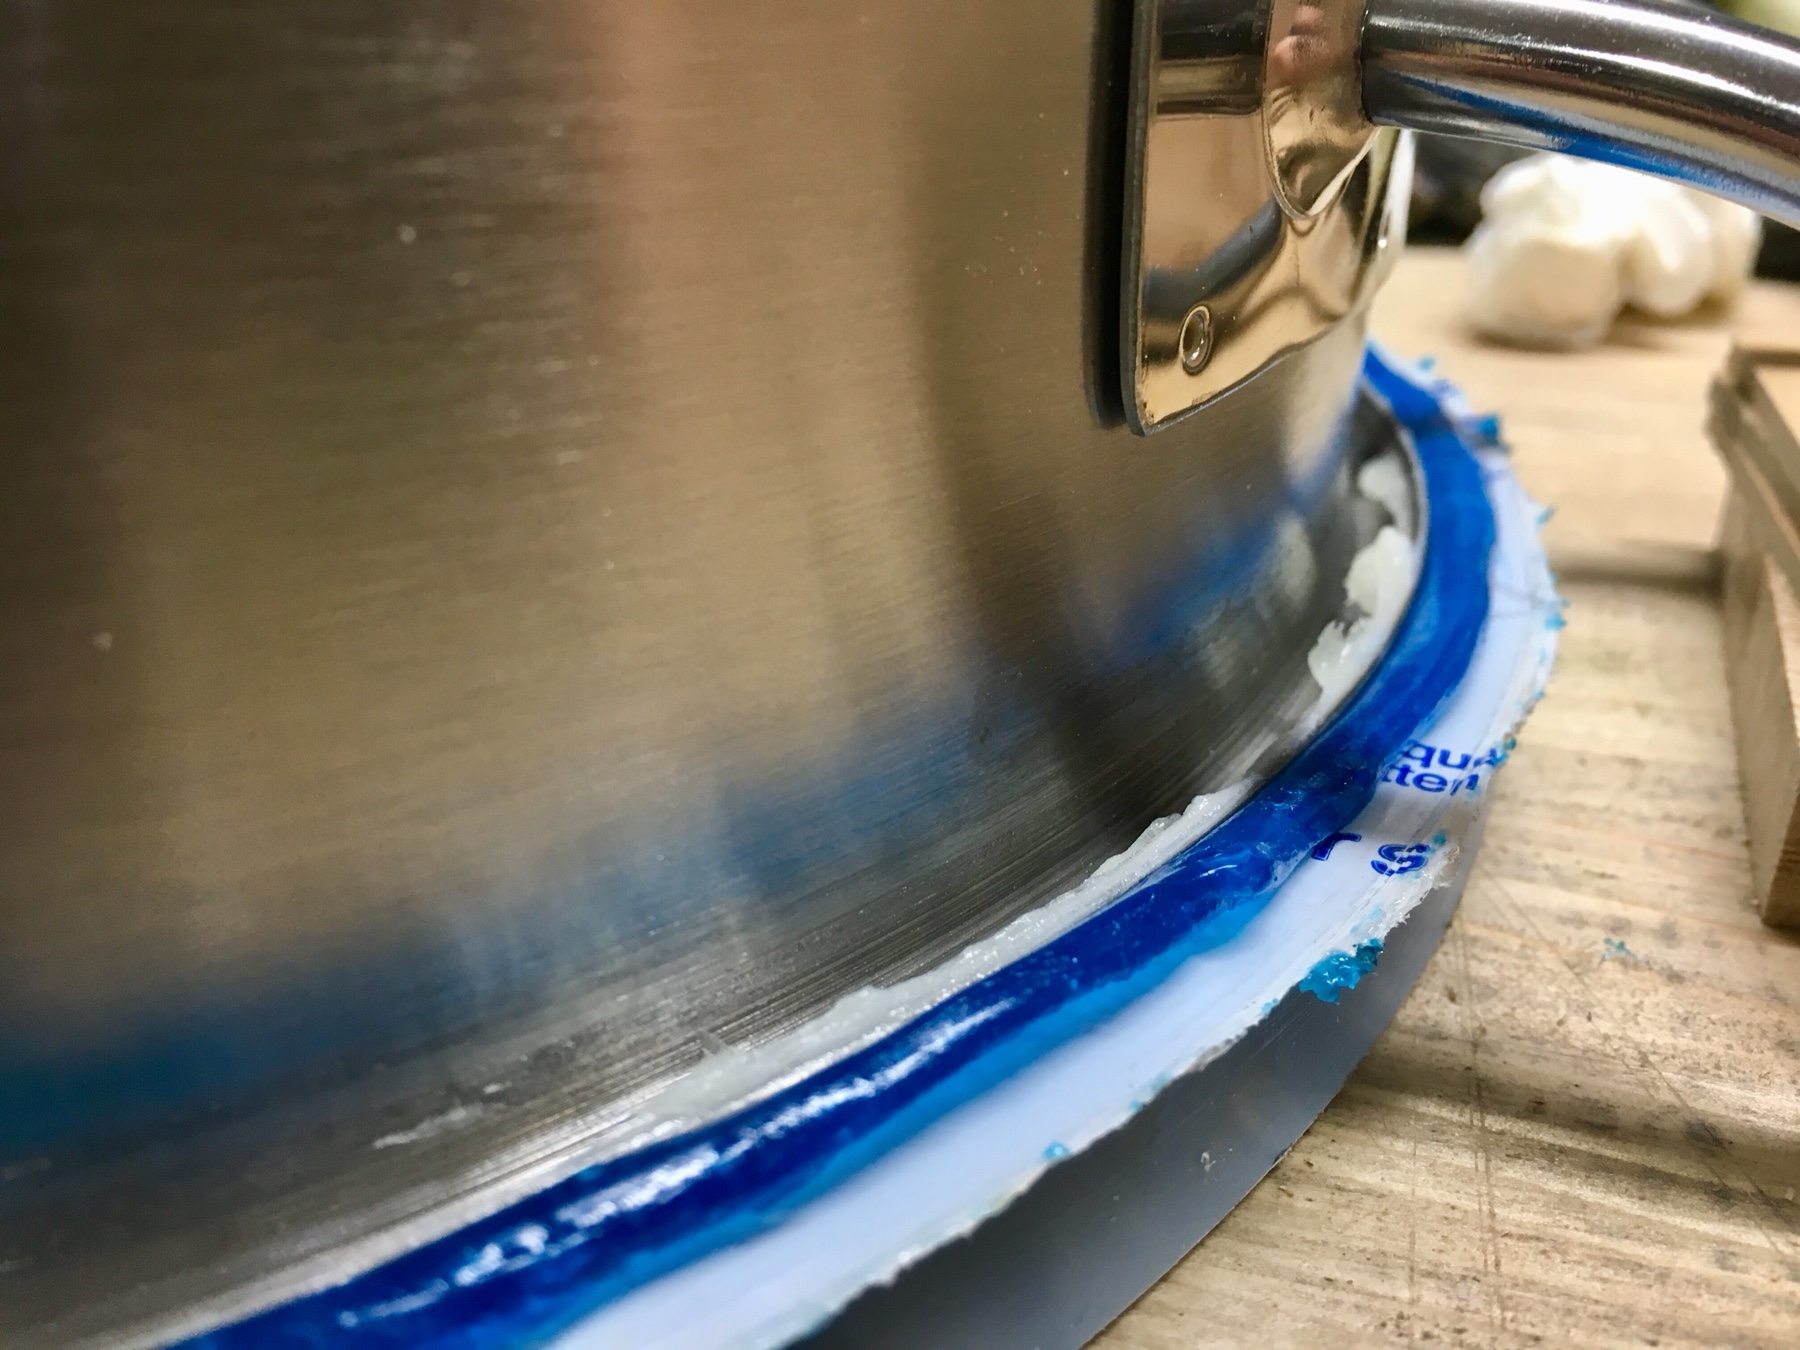
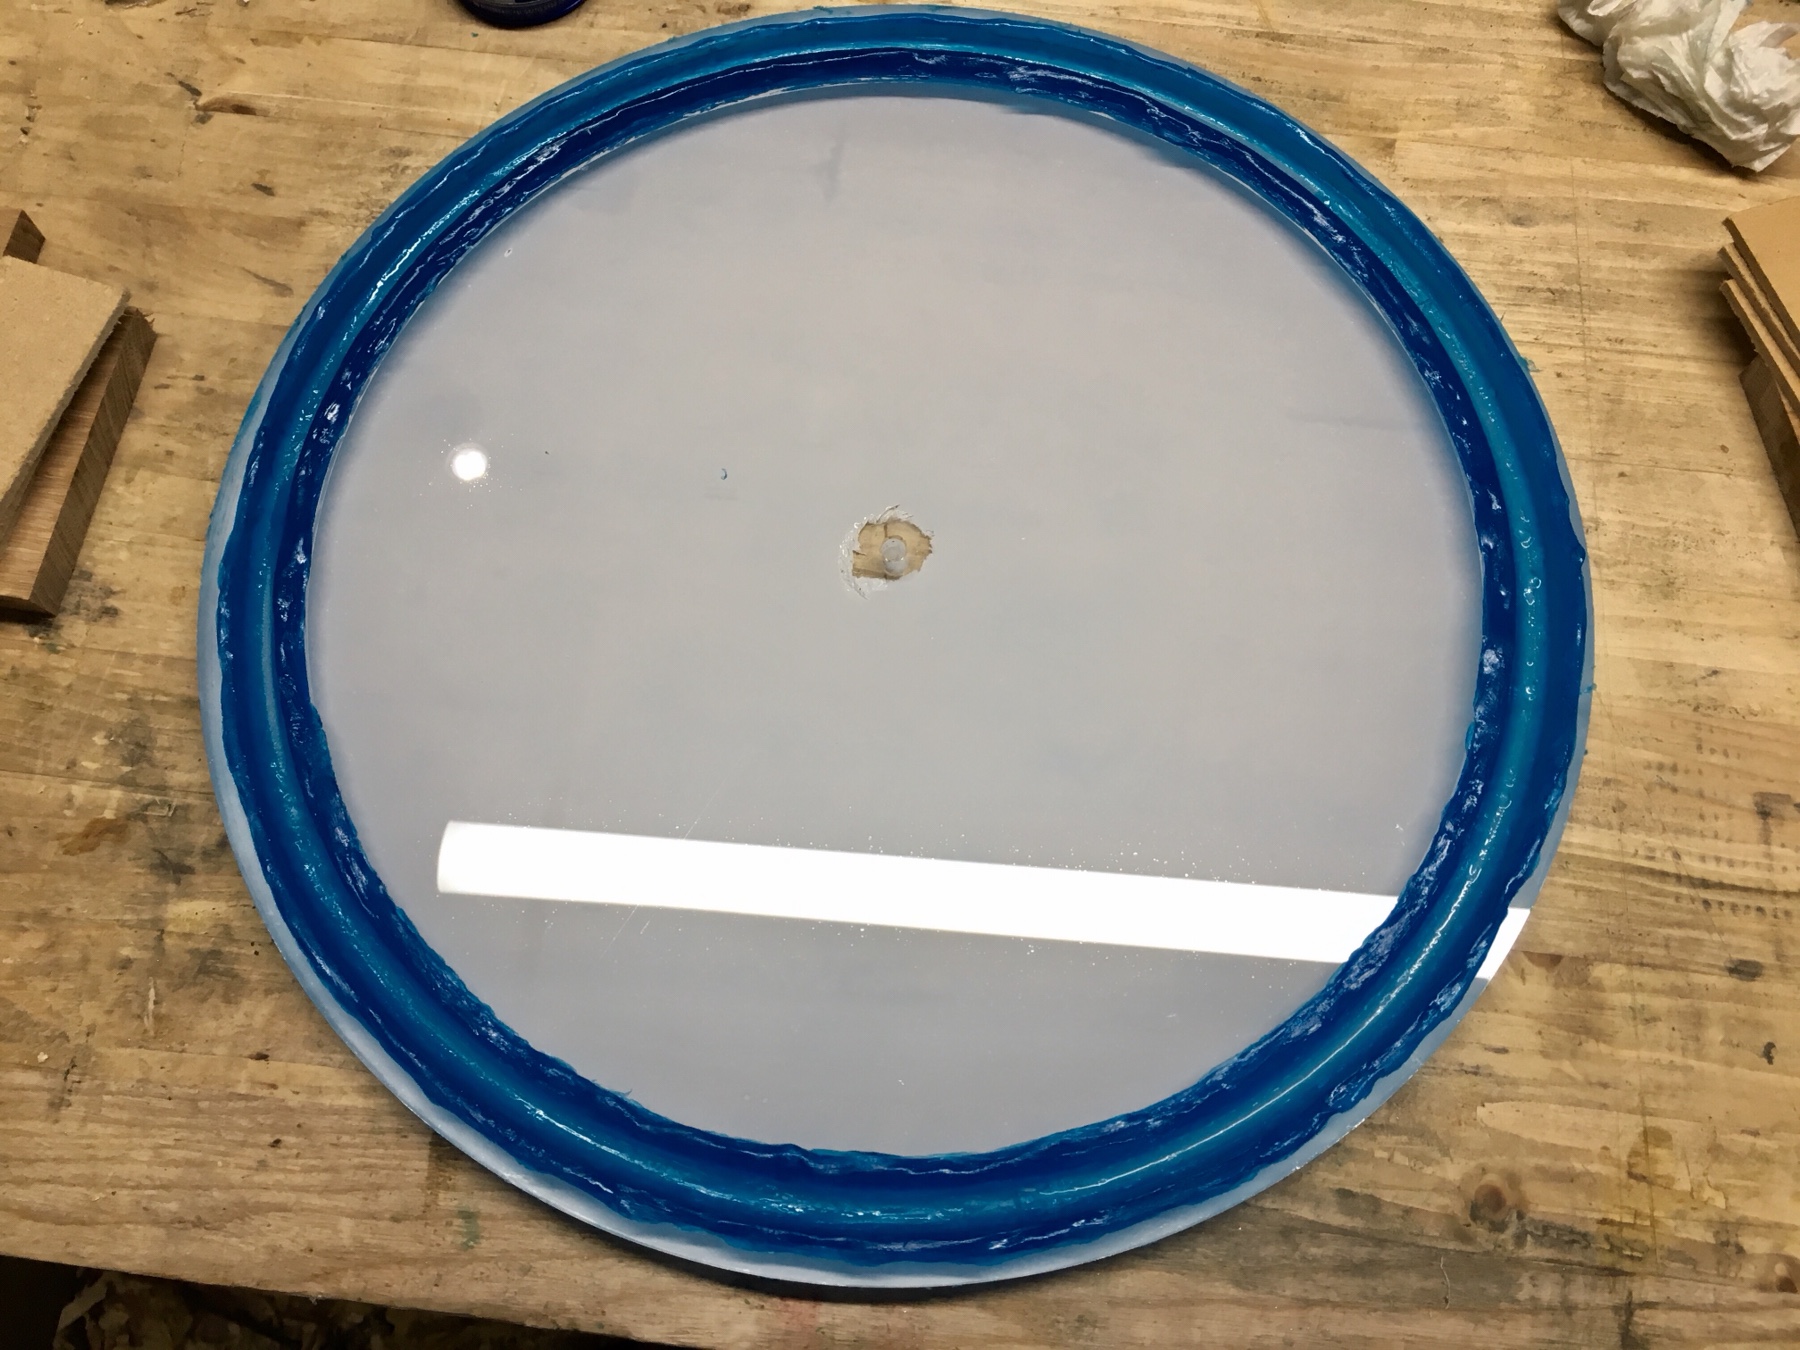
Next step was to cut a circular groove into the lid around where the rim of the pressure cooker pot meets the lid. This is to provide a channel for silicone sealant to help create as airtight a seal as possible. So u used the same simple jig on the router table, but measured carefully to get the location correct. I did this by locating the jig in the correct position from the router bit (without the Perspex in place, as the protective film is still there which stops being able to see through it), then marking the scraps of ply on the router table with a pencil and then get the Perspex in place and just hope that my pencil marks/measurements are correct!
Note that I purposely clamped the Perspex down clear of the height adjustment feature on my Trend router table. This is to enable me to raise the router bit in shallow passes. Note that the manufacturer does not recommend doing this while the bit is spinning (but I was very careful!). I did this using the same spiral bit to relieve as much of the material as possible before using a wider 3/4” straight bit for the finished width. Finished depth was 5mm.


The next step is the silicone. I’ve seen someone recommend putting a thinner layer of silicone to the bottom half of the groove and leaving that dry before putting more in and placing the pot on top (ensuring that the pot is in contact with silicone rather than in contact with the perspex to the base of the groove). But I wanted to try and dye the silicone, because why not, so I didn’t trust myself to be able to mix exactly the same colour/consistency twice, so I decided to do it all in one hit. So I bought some clear silicone and just mixed in some really cheap dry I bought from China for resin (which I’ve not tried out until now). Surprisingly the dye mixes with the silicone quite easily, but it’s a messy job so rubber gloves on! I have seen somewhere that you can mix this with cornflour to make it more opaque and less messy to use (try googling proto-putty), but I think it looses its adhesive qualities somewhat when doing this and I need it to stick to the groove in the lid to try to ensure a good seal. But the colour turned out alright.

There are many options to buy ready made vacuum chambers on the internet but they 'aint cheap', and for one with a larger capacity they are way too expensive for me! Don't get me wrong, making this myself is not exactly cheap, but its atleast half the price of buying one. (It would be a lot cheaper to make a smaller one though!)
I like to future-proof myself where possible, so I wanted to maximize the capacity of my chamber. When researching how to make one it appears that I shouldn't go for any old cheap pan as the walls are so thin that it would collapse in on itself under a vacuum (especially for a larger one), so I needed to find myself a pressure cooker pot as they are a lot more sturdy with much thicker walls. The pot I went with was a 20L capacity one I found on Amazon at the below link...
https://www.amazon.co.uk/gp/product/B00 ... UTF8&psc=1
And dont be fooled by the price, it seems that they are sold out since I bought it, I paid £38 for it (i had a £20 amazon voucher which needed using so that's why i went with Amazon).
The next step is the lid. I wanted to get a clear lid to enable me to inspect inside while its working under a vacuum, so I decided to go with Perpex. Again, if you go for material that's too thin then it may collapse in on itself or even shatter/explode. I was originally looking for 20mm thick perspex in order to go get something much thicker that I would need, but 20mm thick perspex was too expensive with not many suppliers about, so I decided to go for 15mm thick which should still (hopefully) be more thickness/strength than I’ll need. I waited until I received this pressure cooker pot before ordering the perspex to ensure that I had something big enough. I went with the below perspex from ebay...
https://www.ebay.co.uk/itm/Clear-Cast-A ... 2749.l2649
It worked out cheaper to get a 600x400mm section than it was to get something that was 350x350mm which I need! So it was £31 for the perspex. (Total so far approx. £69)
By the way, this is the vacuum pump I bought...
https://www.ebay.co.uk/itm/BACOENG-220V ... 2749.l2649
The lid... so the first thing to do was to cut the sheet of Perspex I got into a rough circle on the bandsaw. I chose to make the clean circle using a very quick/easy jig on the router table. First of all I cut a 6mm hole in the centre, which is a lot less that I’ll need when attaching the plumbing fitting. I had a scrap piece of MDF with a couple of scrap blocks of ply a little thicker than the 15mm thick Perspex. I stuck a 6mm dowell into the scrap wood and clamped this in place over the blocks to either side of the router table. I could then gradually turn the Perspex by hand while the router is spinning pretty fast (I used a cheap 1/2” four flute spiral bit mean for milling machines, but seems to work well in the router table).
The finish to the cut edge of perspex turned out surprisingly well with no chip etc. I’ve worked with thinner Perspex before for some of the early picture frames I’ve made, and that chips a lot and is quite brittle, but this is my first time working with thicker Perspex. I’m guessing the faster speed of the router bit helped.
Next step was to cut a circular groove into the lid around where the rim of the pressure cooker pot meets the lid. This is to provide a channel for silicone sealant to help create as airtight a seal as possible. So u used the same simple jig on the router table, but measured carefully to get the location correct. I did this by locating the jig in the correct position from the router bit (without the Perspex in place, as the protective film is still there which stops being able to see through it), then marking the scraps of ply on the router table with a pencil and then get the Perspex in place and just hope that my pencil marks/measurements are correct!
Note that I purposely clamped the Perspex down clear of the height adjustment feature on my Trend router table. This is to enable me to raise the router bit in shallow passes. Note that the manufacturer does not recommend doing this while the bit is spinning (but I was very careful!). I did this using the same spiral bit to relieve as much of the material as possible before using a wider 3/4” straight bit for the finished width. Finished depth was 5mm.
The next step is the silicone. I’ve seen someone recommend putting a thinner layer of silicone to the bottom half of the groove and leaving that dry before putting more in and placing the pot on top (ensuring that the pot is in contact with silicone rather than in contact with the perspex to the base of the groove). But I wanted to try and dye the silicone, because why not, so I didn’t trust myself to be able to mix exactly the same colour/consistency twice, so I decided to do it all in one hit. So I bought some clear silicone and just mixed in some really cheap dry I bought from China for resin (which I’ve not tried out until now). Surprisingly the dye mixes with the silicone quite easily, but it’s a messy job so rubber gloves on! I have seen somewhere that you can mix this with cornflour to make it more opaque and less messy to use (try googling proto-putty), but I think it looses its adhesive qualities somewhat when doing this and I need it to stick to the groove in the lid to try to ensure a good seal. But the colour turned out alright.


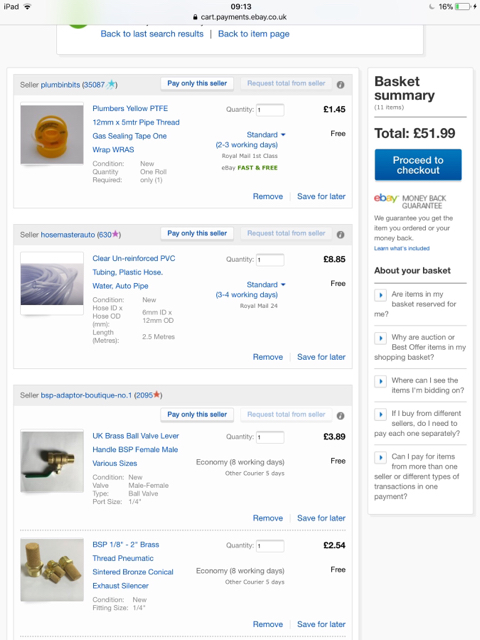


 . Have left a vacuum in the chamber overnight to see how well it holds up, so we shall see in the morning. So total investment, including some bits which are probably not necessary, is around £128. It’s a good chunk cheaper than some you can buy of a comparable size, and I’d like to think it’s better quality or at least heavier duty than the ones you can buy, so all in all it was worth doing (he says while touching wood).