


Hi Guys - some of you may have seen my questions about this over the last 10 months or so but i'm now at a point where I might be able to finish so thought I'd start posting progress
Before I do though I must say I couldn't have done it without the help from this forum so a big thanks.
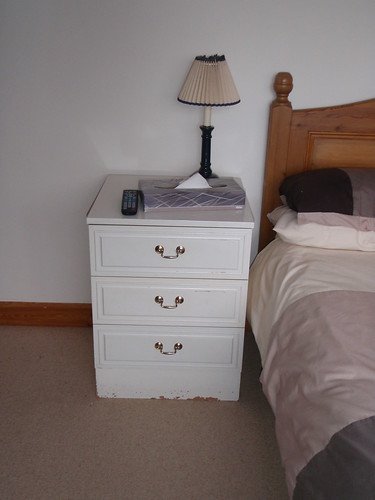
A long time ago I thought I ought to do something about this which I am embarrassed to even post here
Couldn't think what to do though (apart from burn it) till Chems built this and kindly said I could copy it a bit
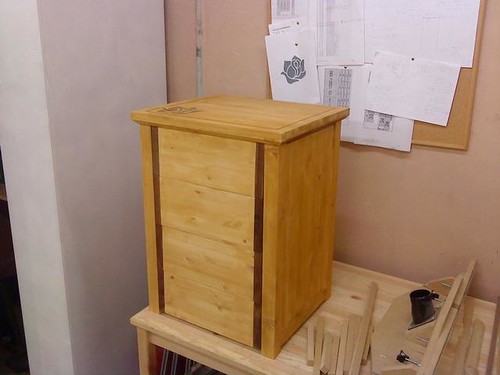
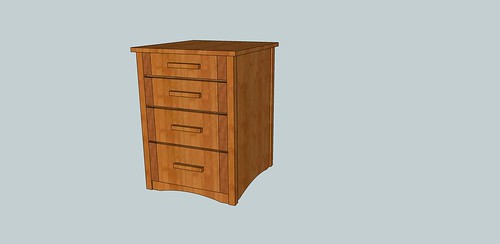
which gave me this (ok there may be a slight resemblance)
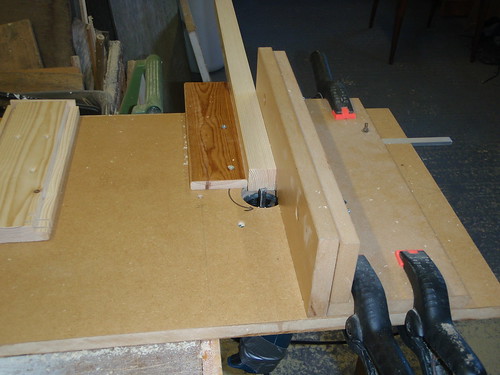
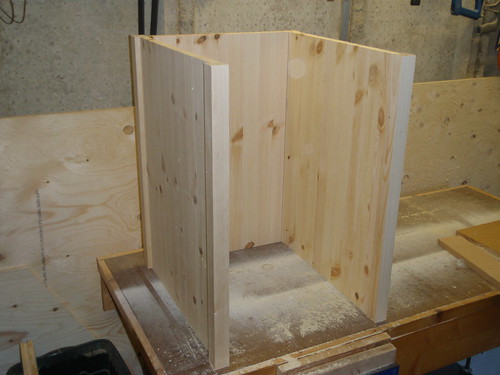
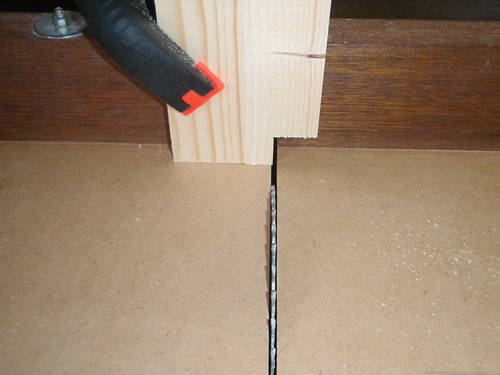
so - to the build. I bought three of those pine boards and a packet of 44x44mm par cut it up a bit and put a rebate on the edge of the board with my (Ahem) router table

Then I cut a 6mm channel in the 44mm stuff with the same tool to accept the boards. I had to screw that bit of wood to the left to stop the router pushing the piece out - sort of a super sturdy feather board - I have a feeling I was doing something wrong there, but I got away with whatever it was
and they all slid together - hurrah!
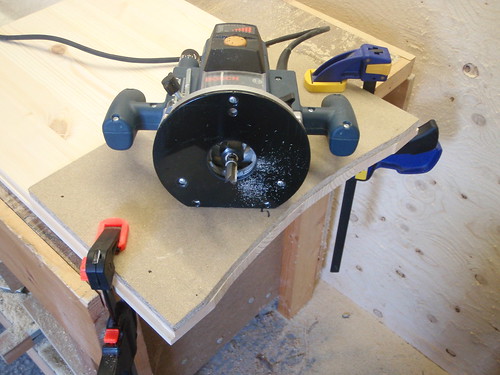
I then routed a curve on the bottom with my bearing guided template router cutter
I then glued the panels to the square bits while I fiddled about with the drawer runners
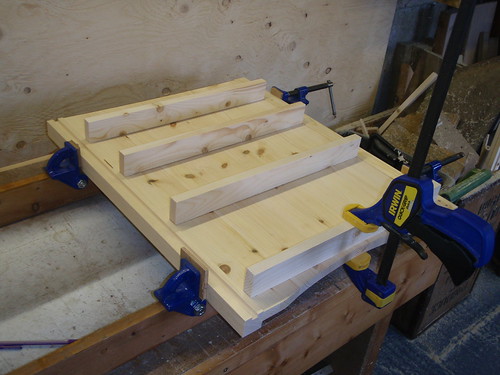
Which I stupidly decided to make much thinner which was a problem as the pine board had bowed and the thinner drawer runners wern't man enough to pull it back flat - which I didn't notice till it was too late
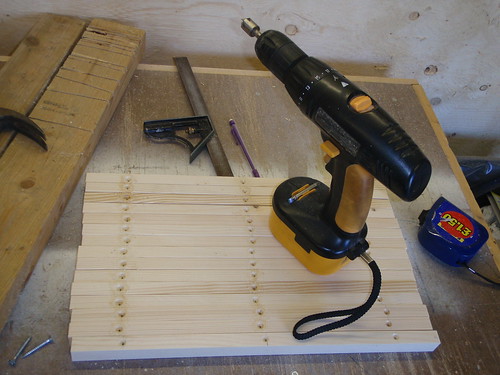
anyway then this incredibly handsome guy turned up and started fixing on the runners

and now I remember I fixed the runners then glued it up - oops
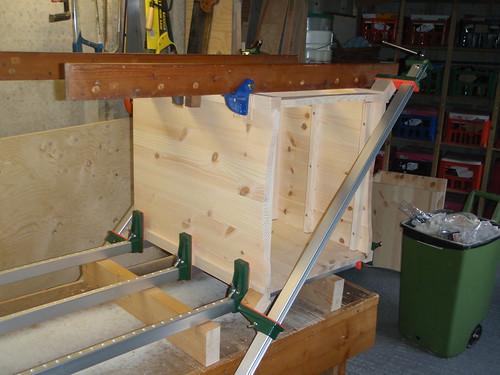
next - because of some shoddy design work - I had to cut a lump out of the front cross rails drawer runner things
and used my joint genie to dowel them all together - which again was a pain as I had to joint one on the drawer runner and one on the 44mm vertical piece - you see why this has taken since January to make? But boy have I learnt a lot
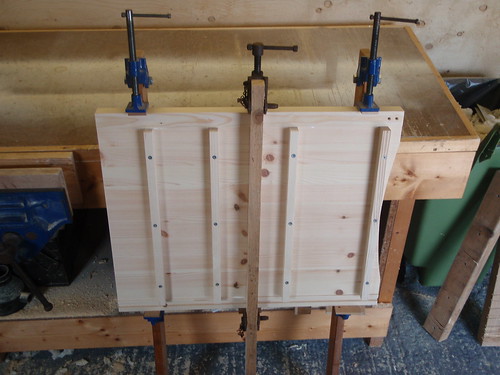
so I glued it all up with my new clamps (reviewed by me elsewhere on this wonderful forum)
and then did it all again for the second one - ok I did them at the same time but it still took twice as long - carcasses finished and a faint smug tingle between the ears
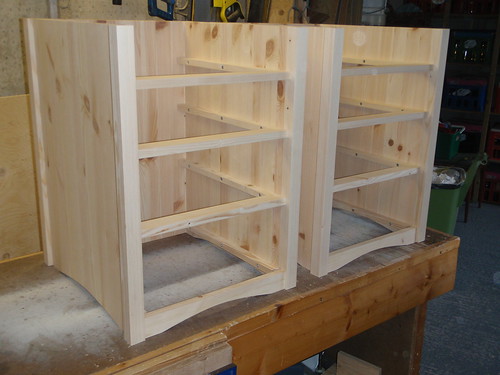
hope that wasn't too many photo's for you - my key learning point from that was (I think) that you're meant to make the drawer runners frame thing first and then fit the sides to it - avoiding all the silly bitty dowelling in strange places.
to be honest I'd got bored with sketchup and not done that bit of the design so maybe i'd have spotted it if i'd done the design properly - anyway I got round it.
Next installment is I think the flamed oak inserts!!
Before I do though I must say I couldn't have done it without the help from this forum so a big thanks.
A long time ago I thought I ought to do something about this which I am embarrassed to even post here
Couldn't think what to do though (apart from burn it) till Chems built this and kindly said I could copy it a bit
which gave me this (ok there may be a slight resemblance)
so - to the build. I bought three of those pine boards and a packet of 44x44mm par cut it up a bit and put a rebate on the edge of the board with my (Ahem) router table
Then I cut a 6mm channel in the 44mm stuff with the same tool to accept the boards. I had to screw that bit of wood to the left to stop the router pushing the piece out - sort of a super sturdy feather board - I have a feeling I was doing something wrong there, but I got away with whatever it was
and they all slid together - hurrah!
I then routed a curve on the bottom with my bearing guided template router cutter
I then glued the panels to the square bits while I fiddled about with the drawer runners
Which I stupidly decided to make much thinner which was a problem as the pine board had bowed and the thinner drawer runners wern't man enough to pull it back flat - which I didn't notice till it was too late
anyway then this incredibly handsome guy turned up and started fixing on the runners
and now I remember I fixed the runners then glued it up - oops
next - because of some shoddy design work - I had to cut a lump out of the front cross rails drawer runner things
and used my joint genie to dowel them all together - which again was a pain as I had to joint one on the drawer runner and one on the 44mm vertical piece - you see why this has taken since January to make? But boy have I learnt a lot
so I glued it all up with my new clamps (reviewed by me elsewhere on this wonderful forum)
and then did it all again for the second one - ok I did them at the same time but it still took twice as long - carcasses finished and a faint smug tingle between the ears
hope that wasn't too many photo's for you - my key learning point from that was (I think) that you're meant to make the drawer runners frame thing first and then fit the sides to it - avoiding all the silly bitty dowelling in strange places.
to be honest I'd got bored with sketchup and not done that bit of the design so maybe i'd have spotted it if i'd done the design properly - anyway I got round it.
Next installment is I think the flamed oak inserts!!
")