condeesteso
Established Member
I don't usually give things names, but there is a clear reason for this one, and I've come to like it.
I had decided I had a justifiable need for a new bench. It was going to be quite a change from my current (now sold) one which was an 8 foot very heavy beast with big double-screw face and Maguire wagon, sliding deadman etc.
The outline brief was: 6' long; 20" deep (roughly), 34" high; solid but knock-down (industrial grade flat-pack).
I wanted it as simple as possible - except that I will have 2 vices. I know truly simple would be no vices, but I can work fast and efficiently with 2, and that is what I am used to.
Vices are Record 52s (the 7") - a bit about why and so on to follow.
Whilst fairly compact, it will need to be chunky and quite heavy. But I did a rough sum on the top and it should be around 60Kg with vices... .
This could be a low-cost bench. I got the vices off eBay and paid top price on one of them so mine were about £80 for the two.
European steamed beech, I got 9+ cubic ft but really need about 7. I pay £30+vat a cube so allowing for odds and ends etc, a little over £300 could have done it and those vices can be got for a good bit less with some patience.
Top is 75mm (will flatten to around 72), legs are 4" sq. Leg assemblies are made complete with front-to-back stretchers with a registration tenon at top of front legs only (back of top free to move).
Here's a few pics of w.i.p.
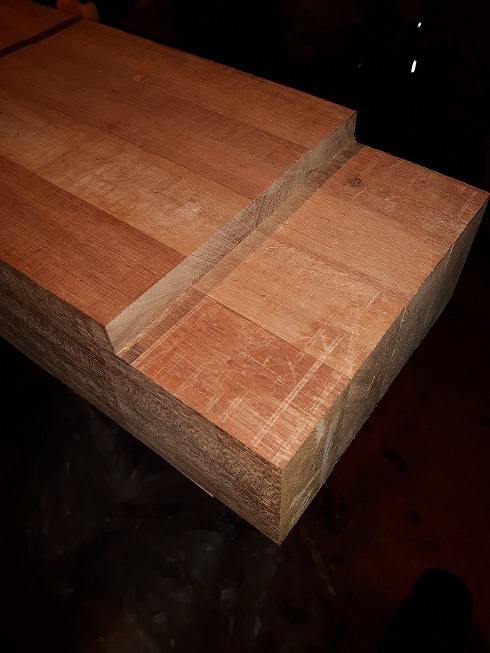
Top glue-up. Done in 2 halves first as the open time is not enough to sort all 8 boards.

Components for the leg assemblies, with endcap for tail vice at front, and a stretcher at bach

Wedges ready for leg assemblies. Legs are in 2 halves so tenons are one half deep, then wedged, then leg laminates assembled (so a cheat foxed tenon)

Cutting the tapered mortice for the wedged stretchers.

I make a master wedge which is used to test every mortice - they all have to be identical. The final wedges are shallower so they exit further (half and half). Also the mortice is deeper have clearance inside the leg

A loose-assembled test with the reference wedge. Final wedges might be fumed oak, could be maple. Not sure yet.

I'll keep it quick and simple. But I do fuss over the details, I want it to be a really nice thing. The influence not only helps decide overall spec, but goes a long way to inform the design details.
It's called the Hemingway after a line in The Old Man and the Sea: 'He was too simple to wonder when he had attained humility. But he knew he had attained it and he knew it was not disgraceful...'
More pics and a finished bench soon.
I had decided I had a justifiable need for a new bench. It was going to be quite a change from my current (now sold) one which was an 8 foot very heavy beast with big double-screw face and Maguire wagon, sliding deadman etc.
The outline brief was: 6' long; 20" deep (roughly), 34" high; solid but knock-down (industrial grade flat-pack).
I wanted it as simple as possible - except that I will have 2 vices. I know truly simple would be no vices, but I can work fast and efficiently with 2, and that is what I am used to.
Vices are Record 52s (the 7") - a bit about why and so on to follow.
Whilst fairly compact, it will need to be chunky and quite heavy. But I did a rough sum on the top and it should be around 60Kg with vices... .
This could be a low-cost bench. I got the vices off eBay and paid top price on one of them so mine were about £80 for the two.
European steamed beech, I got 9+ cubic ft but really need about 7. I pay £30+vat a cube so allowing for odds and ends etc, a little over £300 could have done it and those vices can be got for a good bit less with some patience.
Top is 75mm (will flatten to around 72), legs are 4" sq. Leg assemblies are made complete with front-to-back stretchers with a registration tenon at top of front legs only (back of top free to move).
Here's a few pics of w.i.p.
Top glue-up. Done in 2 halves first as the open time is not enough to sort all 8 boards.

Components for the leg assemblies, with endcap for tail vice at front, and a stretcher at bach

Wedges ready for leg assemblies. Legs are in 2 halves so tenons are one half deep, then wedged, then leg laminates assembled (so a cheat foxed tenon)

Cutting the tapered mortice for the wedged stretchers.

I make a master wedge which is used to test every mortice - they all have to be identical. The final wedges are shallower so they exit further (half and half). Also the mortice is deeper have clearance inside the leg

A loose-assembled test with the reference wedge. Final wedges might be fumed oak, could be maple. Not sure yet.

I'll keep it quick and simple. But I do fuss over the details, I want it to be a really nice thing. The influence not only helps decide overall spec, but goes a long way to inform the design details.
It's called the Hemingway after a line in The Old Man and the Sea: 'He was too simple to wonder when he had attained humility. But he knew he had attained it and he knew it was not disgraceful...'
More pics and a finished bench soon.


