jimi43
Established Member
During the making of the infill panel plane I decided to get the lever cap hand engraved by Ian at CHALCO using the Copperplate script so common at the time.
I am still going to do this as I realise this skill is born of talent and years of experience and something I couldn't possibly do anywhere near as well...but...I was still interested in the technique so I decided to do a bit of research.
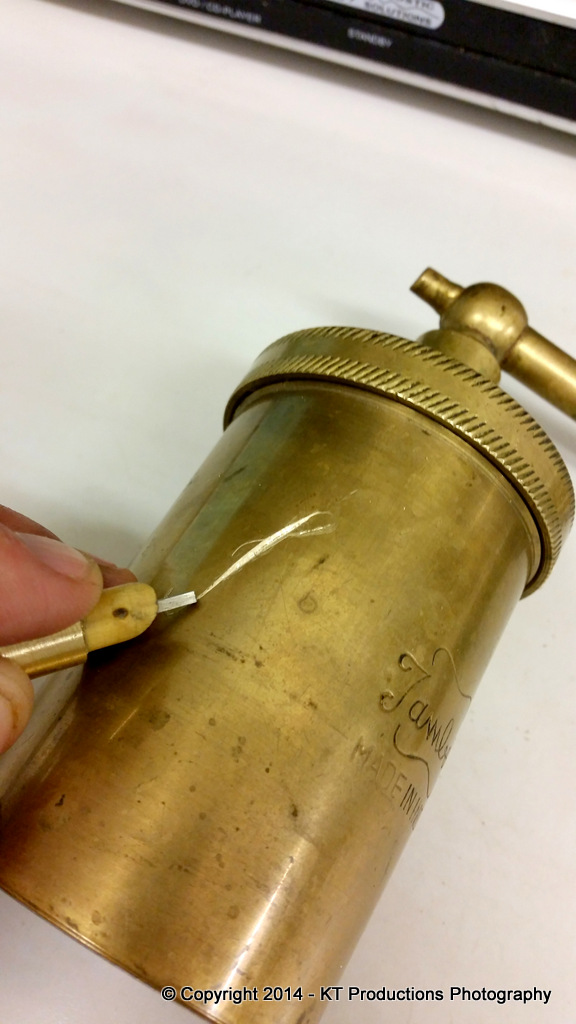
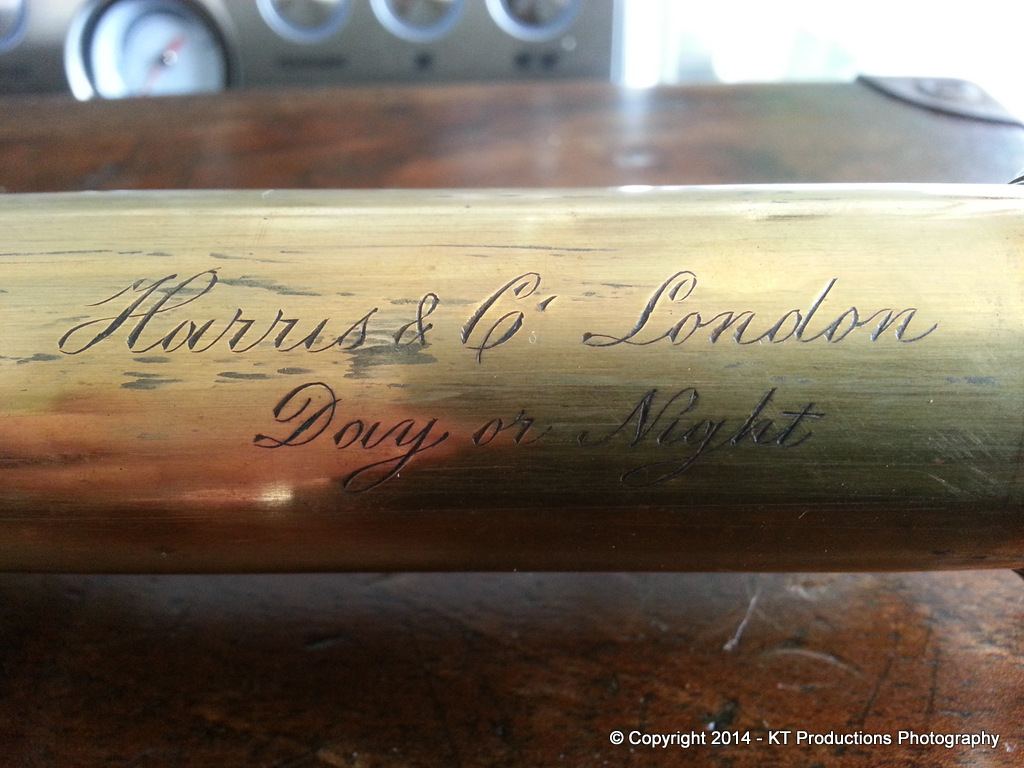
I had put this off but my interest was rekindled by a bootfair find in the form of a rather nice old ship's telescope a few weeks back.
The telescope was engraved in EXACTLY the way I wanted the lever cap to be done...isn't this just beautiful....
The first thing I always do in any research is to ask the experts and it would appear that the graver tools used to do this vary from very cheap ones to some lovely old examples. Two makers from the past stood out. Namely EZRA BOWMAN of LANCASTER PENNSYLVANIA - USA and VAUTIER of GENEVA - SWITZERLAND.
I then moved on to research these makers and they obviously command the sort of prices other fine tools do.
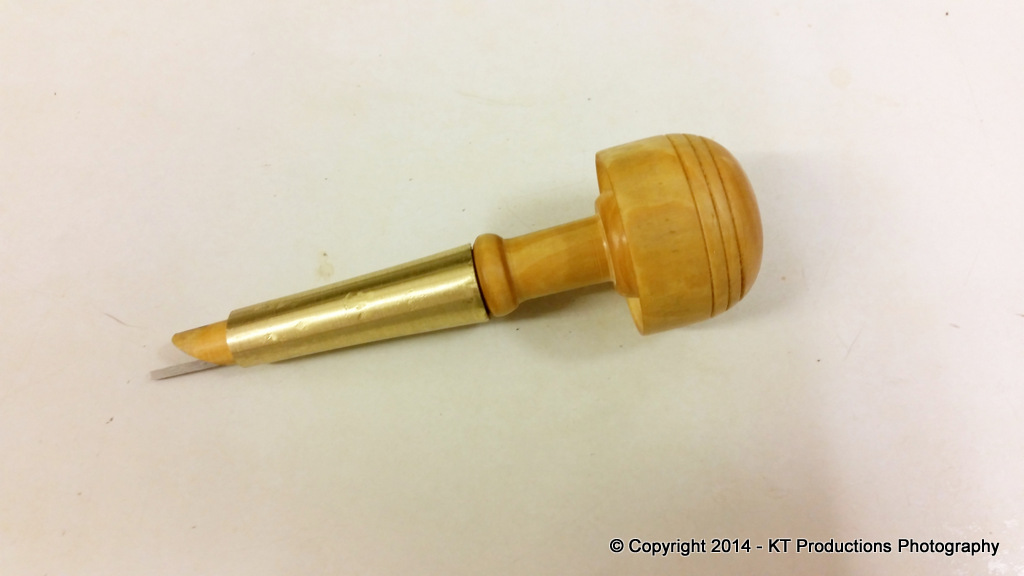
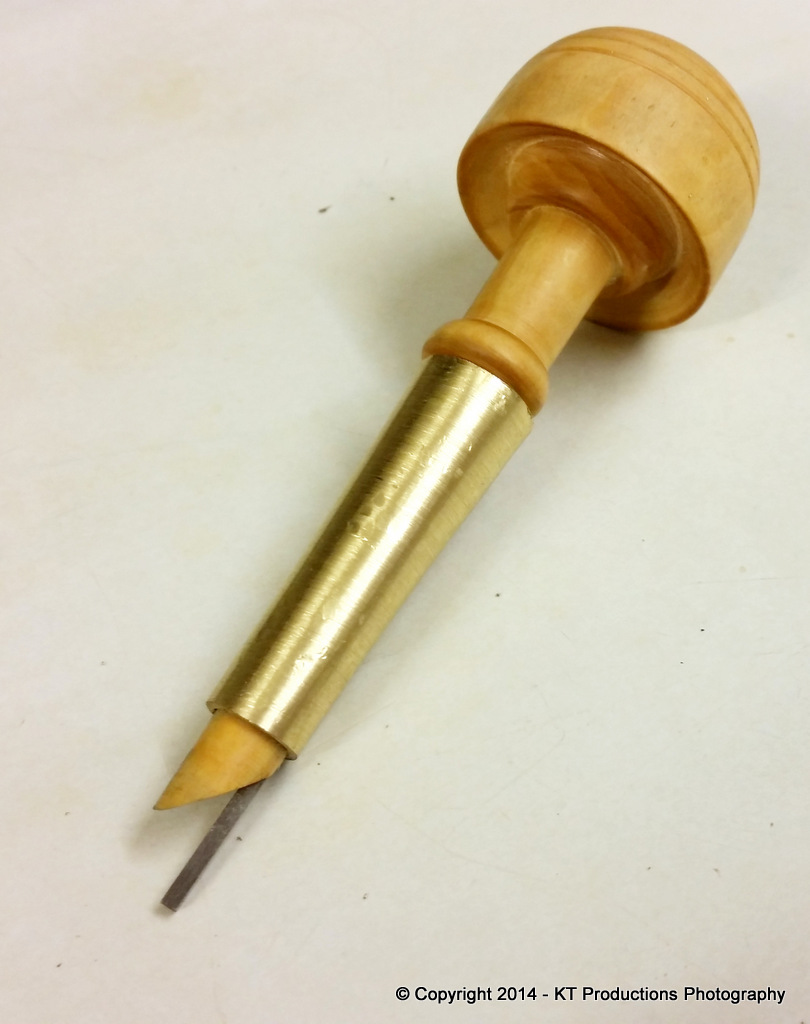
But there are little orphans around and again FleaBay USA was my friend and I am now the proud owner of an EZRA BOWMAN one....
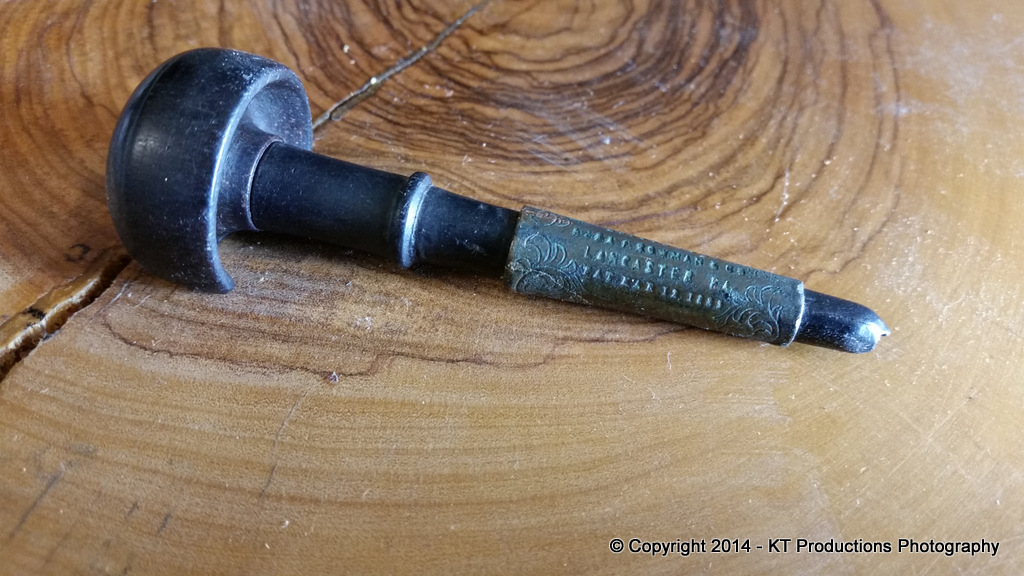
This tool is from that magical era where care was taken to make even the most basic of tools for the craftsman and it really is a beauty...
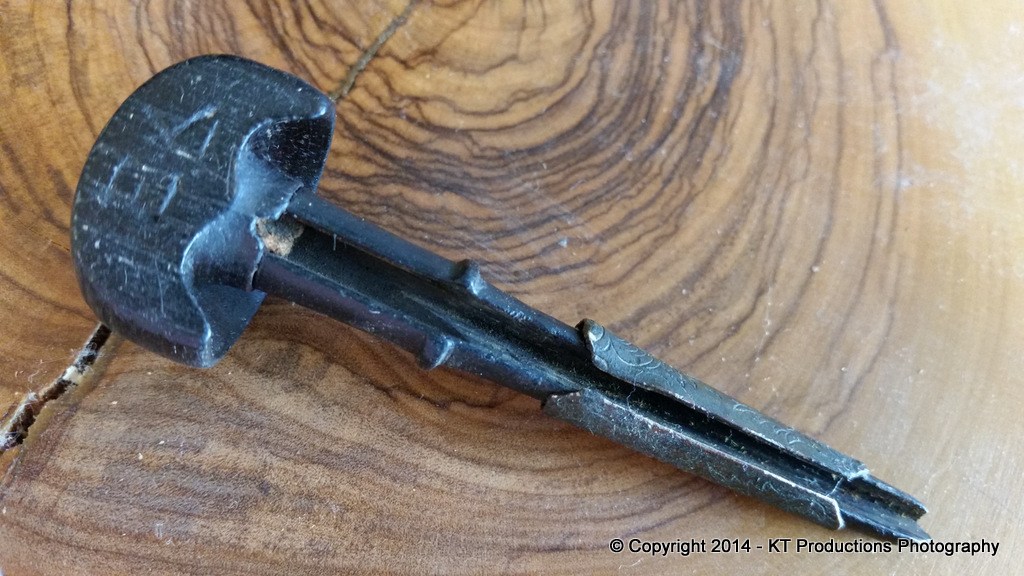
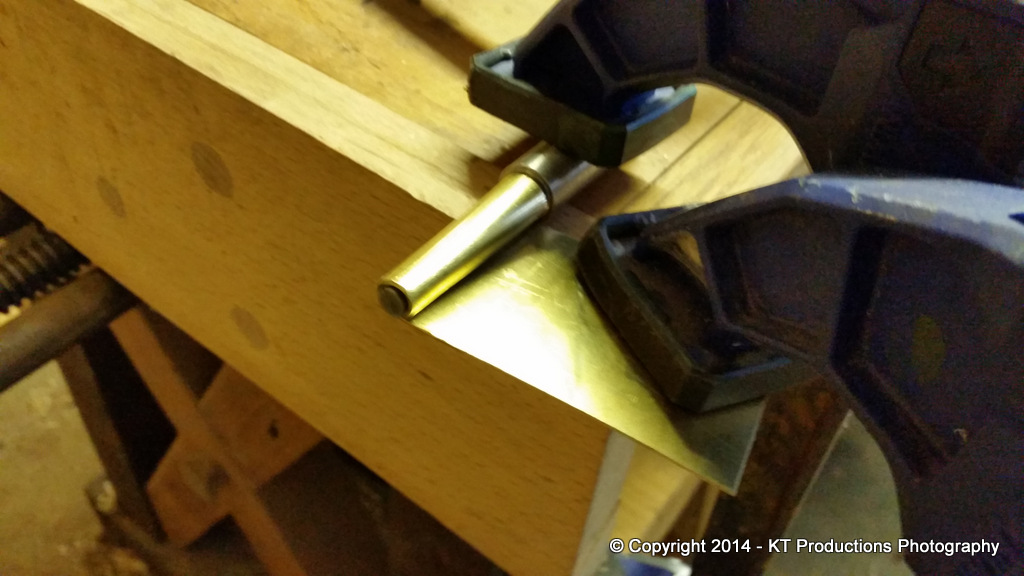
The graver steel which is made of hardened tool or nowadays HSS is laid in the groove and pushed up so that the brass cone collar springs against one edge and holds it in place. A simple yet elegant idea.
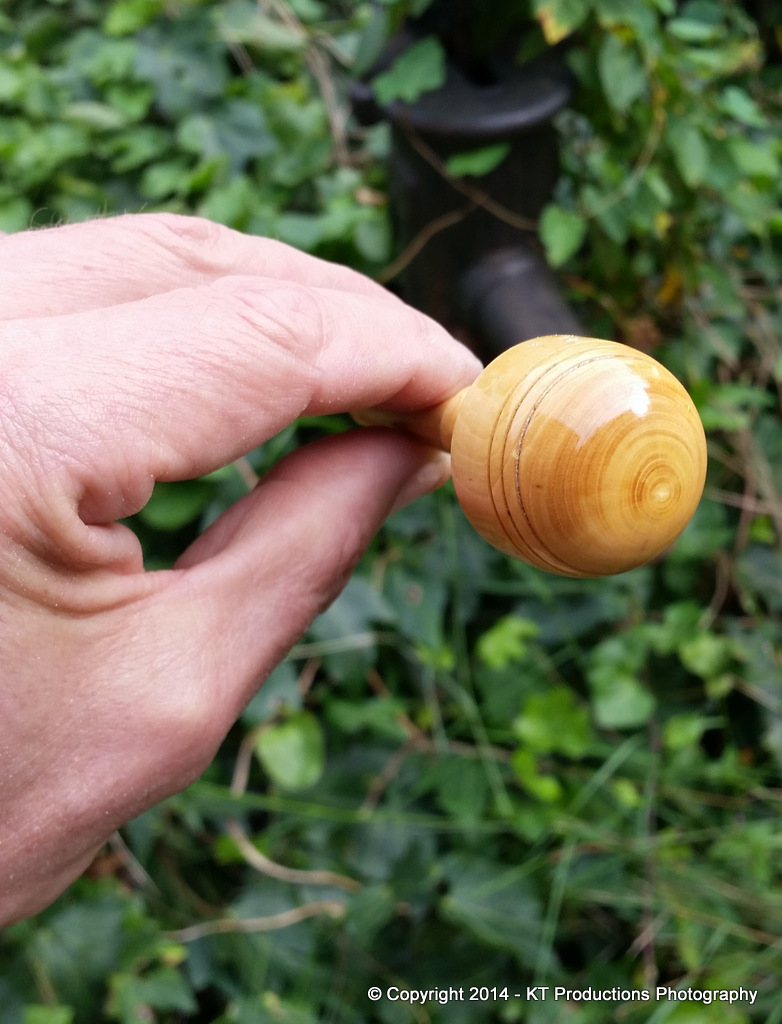
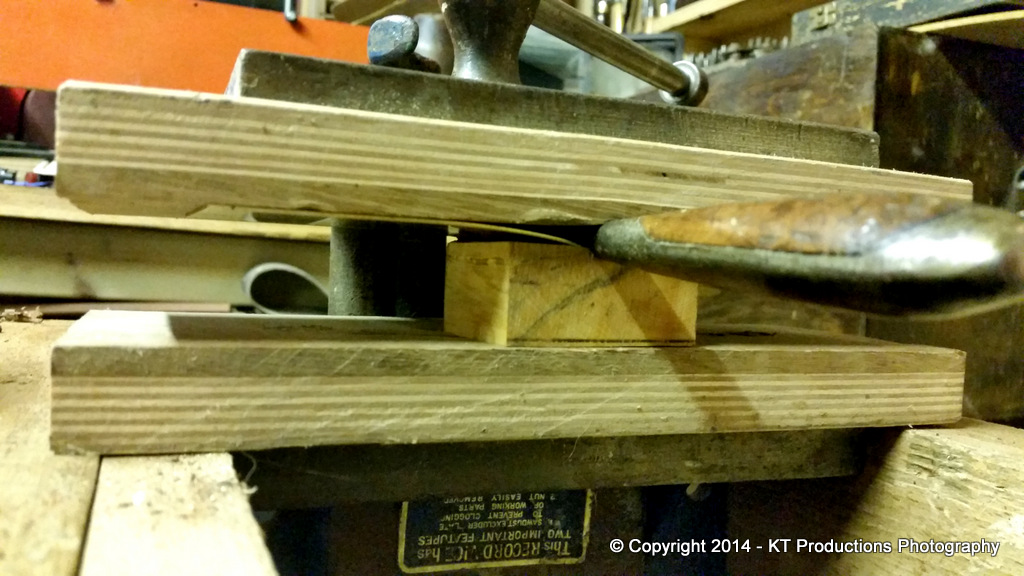
So I decided to make a set of these starting with a prototype. Clearly, a hard wood is require as these are very delicate instruments so I opted for either African Ebony or Boxwood or both. As I had just received some of the former and having never worked it before I decided to use this first.
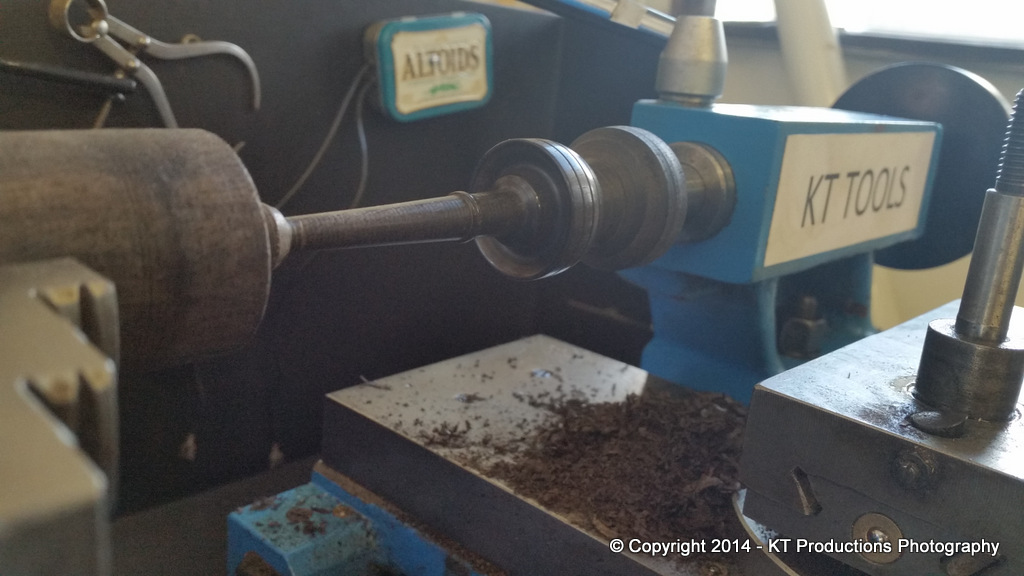
So Old Taylor was fired up to cut the stock down to a rough shape...
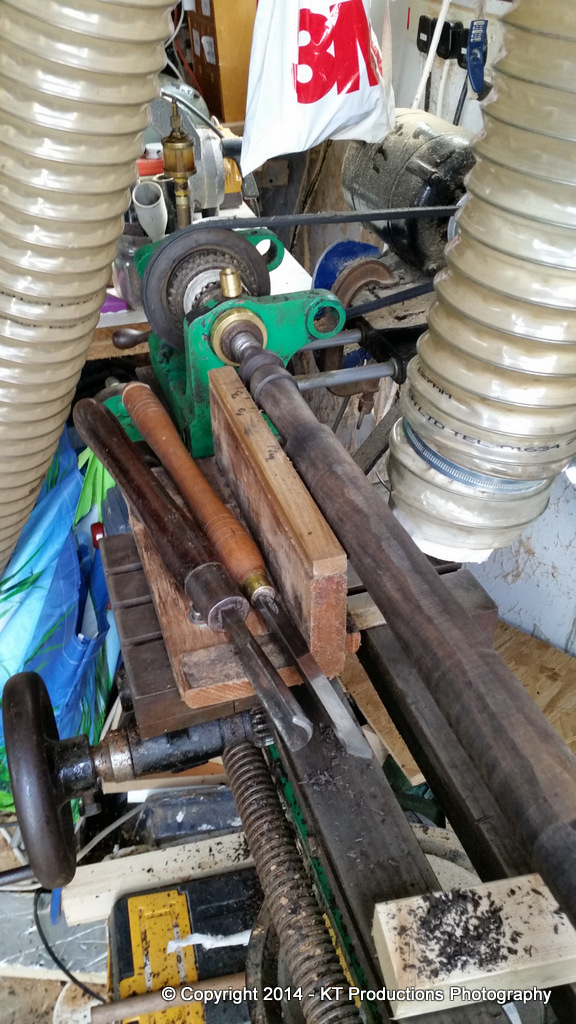
I'm not much of a turner so delicate stuff on here is beyond me so the rough shape was where I stopped...
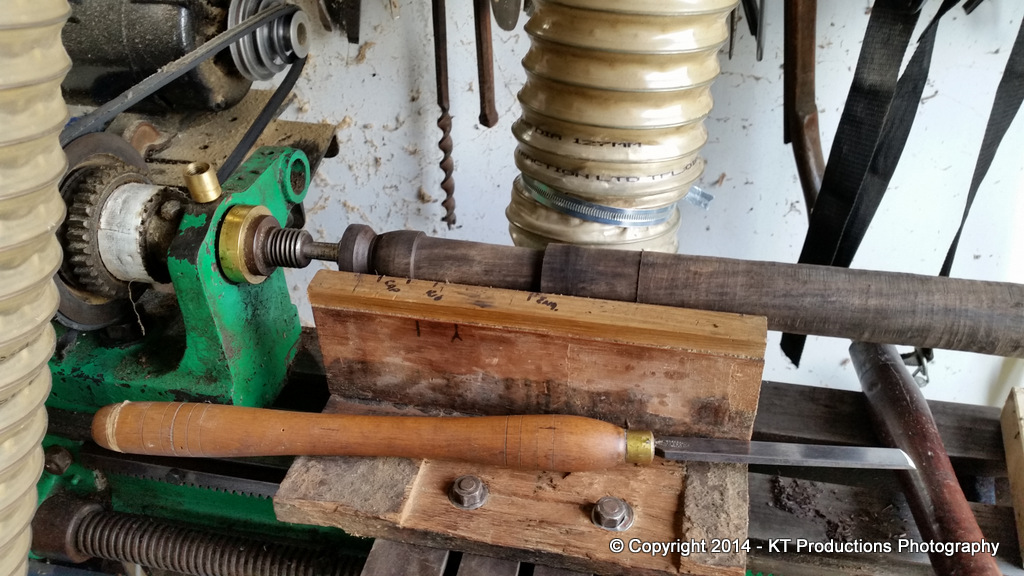
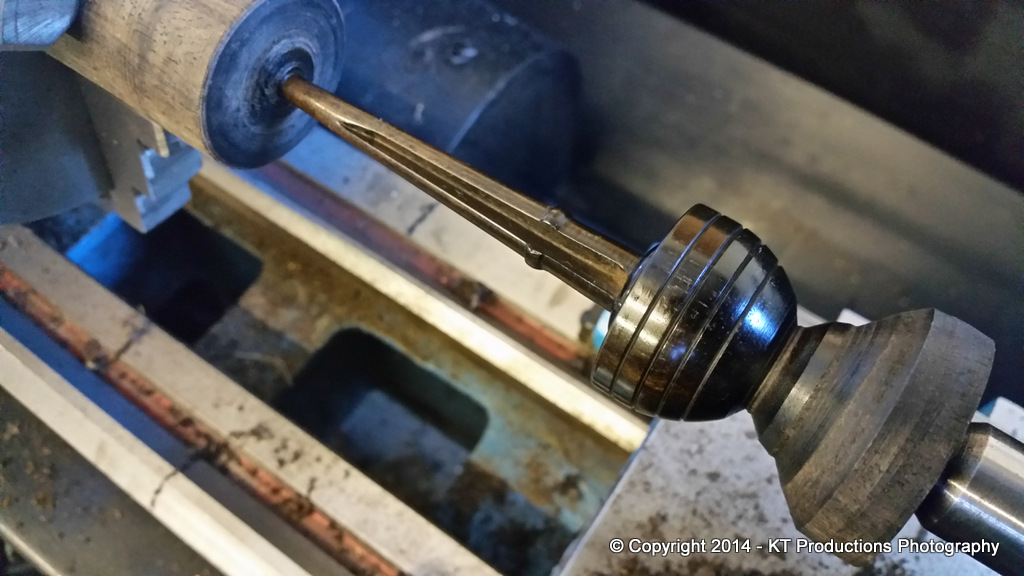
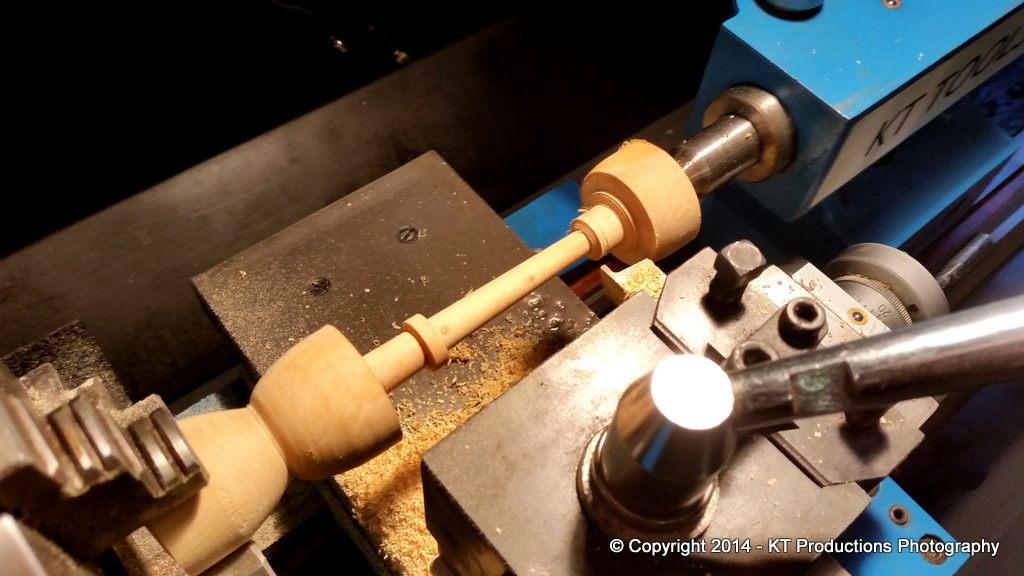
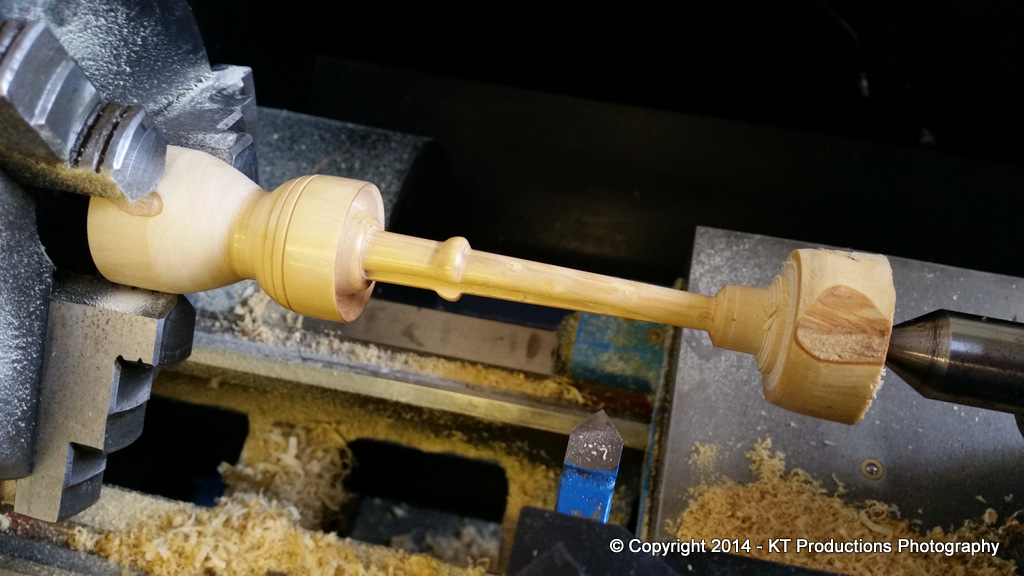
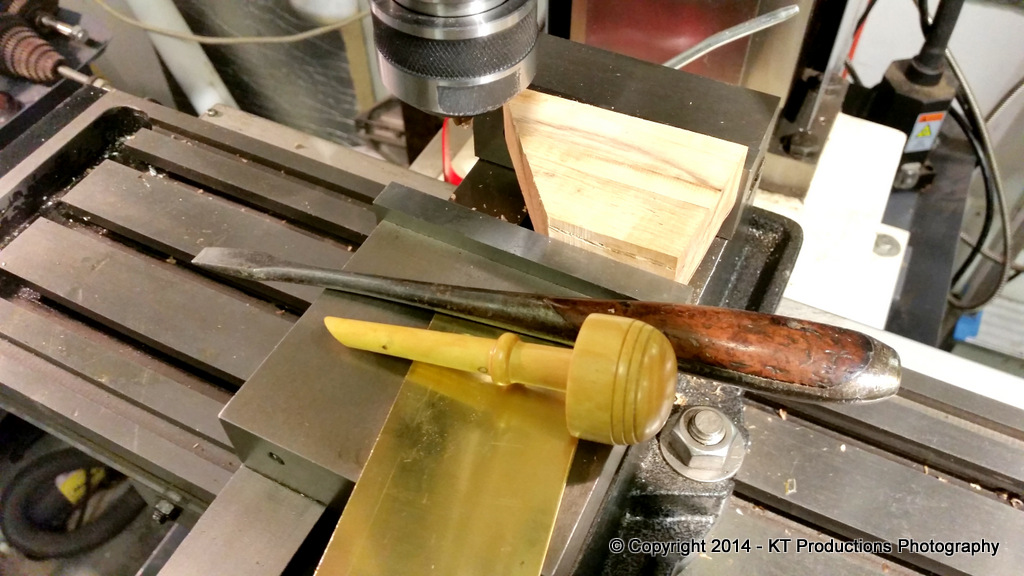
I then transferred this over to the metal lathe where various cutters and angles were used to fashion the rest of the tool shape....
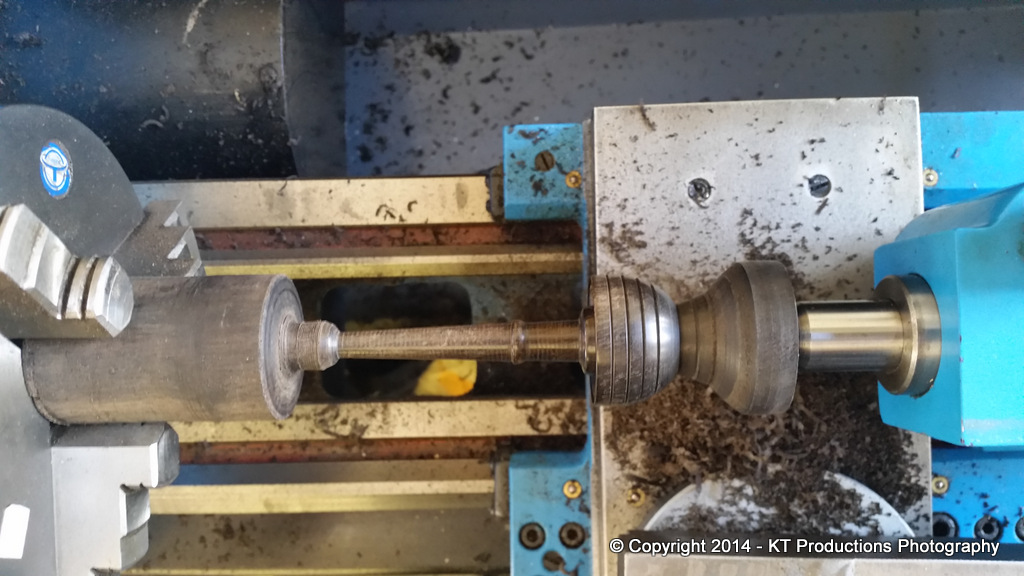
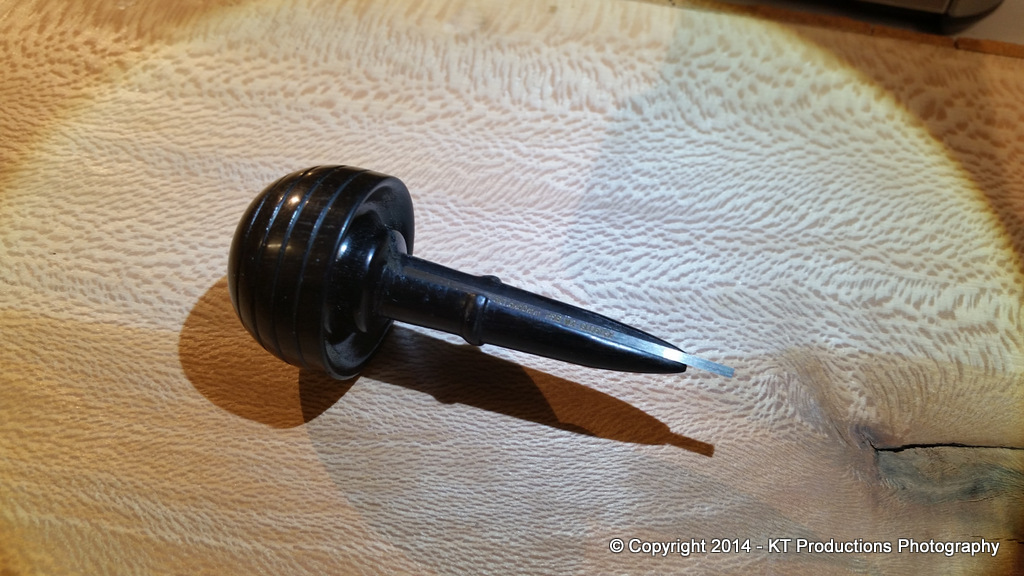
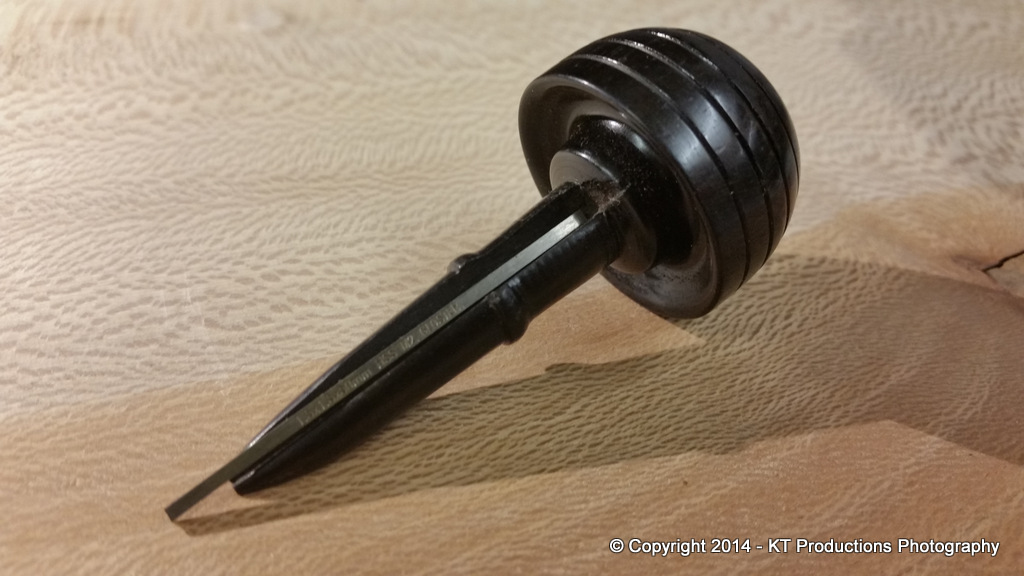
I have to cut the accurate groove yet but so far I'm fairly happy the way this is turning out...
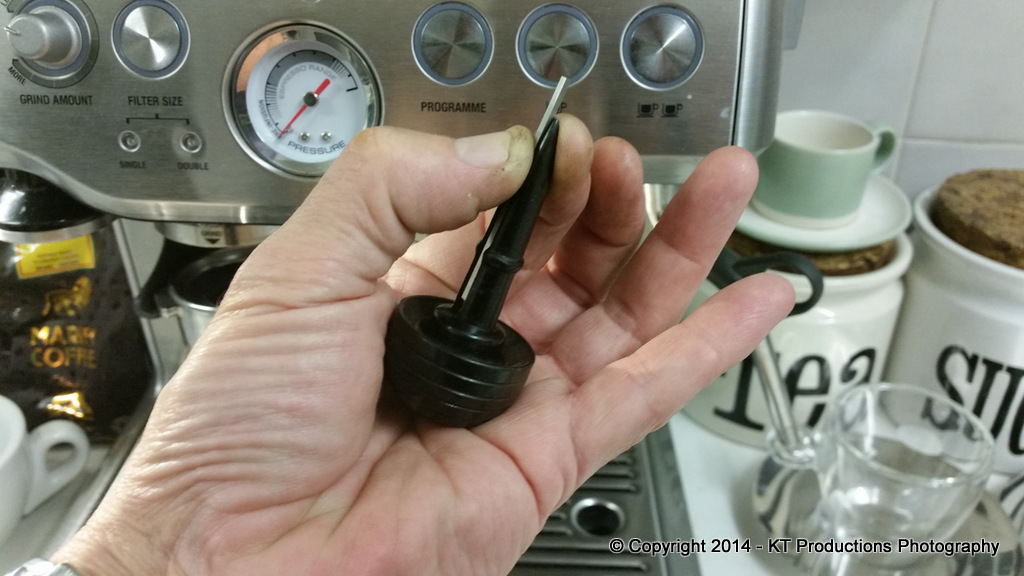
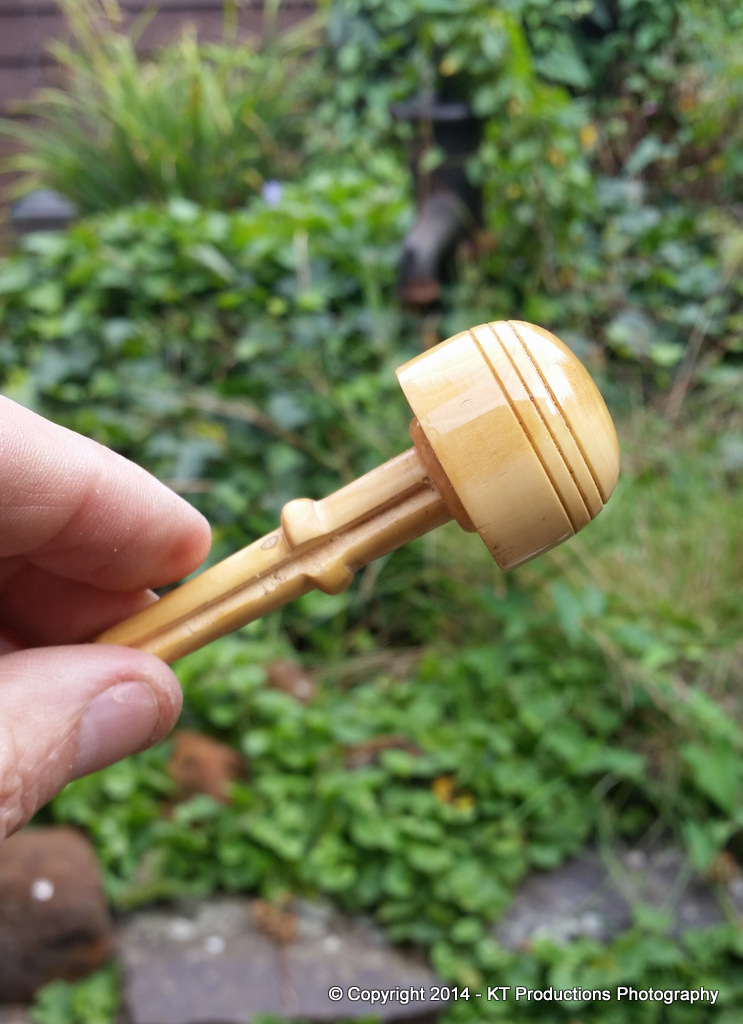
I have yet to receive the VAUTIER ones....but for now I will finish this prototype complete with brass collar.
If it works ok..I think I might make a silver one too! 8)
If there are any engravers out there who want to chip in then feel free...I am really fascinated by this old traditional skill.
Cheers
Jimi
I am still going to do this as I realise this skill is born of talent and years of experience and something I couldn't possibly do anywhere near as well...but...I was still interested in the technique so I decided to do a bit of research.
I had put this off but my interest was rekindled by a bootfair find in the form of a rather nice old ship's telescope a few weeks back.
The telescope was engraved in EXACTLY the way I wanted the lever cap to be done...isn't this just beautiful....
The first thing I always do in any research is to ask the experts and it would appear that the graver tools used to do this vary from very cheap ones to some lovely old examples. Two makers from the past stood out. Namely EZRA BOWMAN of LANCASTER PENNSYLVANIA - USA and VAUTIER of GENEVA - SWITZERLAND.
I then moved on to research these makers and they obviously command the sort of prices other fine tools do.
But there are little orphans around and again FleaBay USA was my friend and I am now the proud owner of an EZRA BOWMAN one....
This tool is from that magical era where care was taken to make even the most basic of tools for the craftsman and it really is a beauty...
The graver steel which is made of hardened tool or nowadays HSS is laid in the groove and pushed up so that the brass cone collar springs against one edge and holds it in place. A simple yet elegant idea.
So I decided to make a set of these starting with a prototype. Clearly, a hard wood is require as these are very delicate instruments so I opted for either African Ebony or Boxwood or both. As I had just received some of the former and having never worked it before I decided to use this first.
So Old Taylor was fired up to cut the stock down to a rough shape...
I'm not much of a turner so delicate stuff on here is beyond me so the rough shape was where I stopped...
I then transferred this over to the metal lathe where various cutters and angles were used to fashion the rest of the tool shape....
I have to cut the accurate groove yet but so far I'm fairly happy the way this is turning out...
I have yet to receive the VAUTIER ones....but for now I will finish this prototype complete with brass collar.
If it works ok..I think I might make a silver one too! 8)
If there are any engravers out there who want to chip in then feel free...I am really fascinated by this old traditional skill.
Cheers
Jimi