


TrimTheKing
Established Member
Evening all
I've finally got round to finishing my second complete project this evening, a swinging crib/cradle for my impending firstborn.
When we found out we were expecting I had a real urge to make something for the Bambino, that was of some use and could be a family heirloom (wishful thinking...?), so after some judicious Googling I decided on a swinging crib that I found plans for, so I bought the plans and modified them with some changes of my own, and here's the pics and story...
Decided on making it in ABW, so two 10'x11"x2" boards were purchased from Irmass in Salford and having worked out the lengths I would need I got them to x-cut them in half for me to make it easier to get in the car
Then got them on the bench and cut and planed up the first couple of pieces
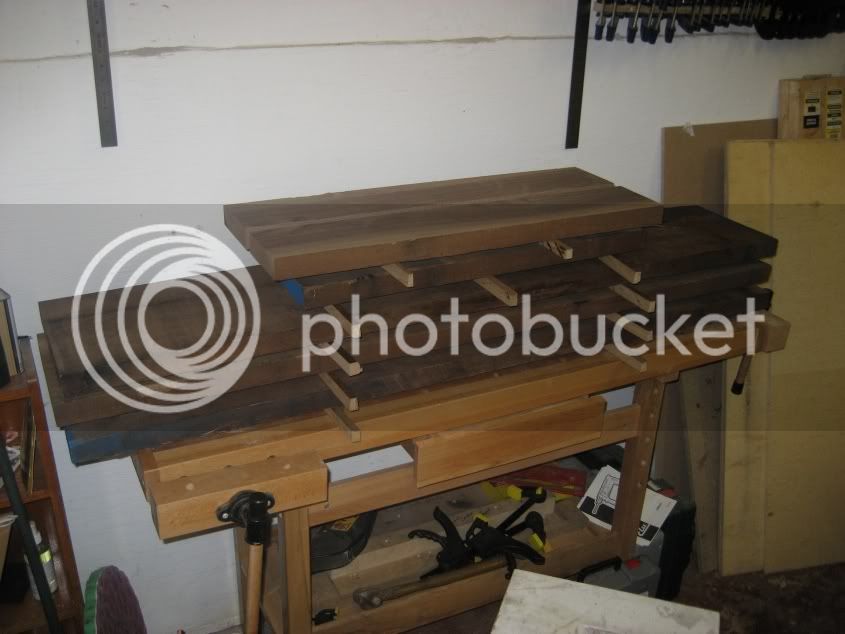
Cut all the pieces out to correct width, slightly over length and 1/8" over thickness and put them all in stick in the back bedroom for 6 weeks....
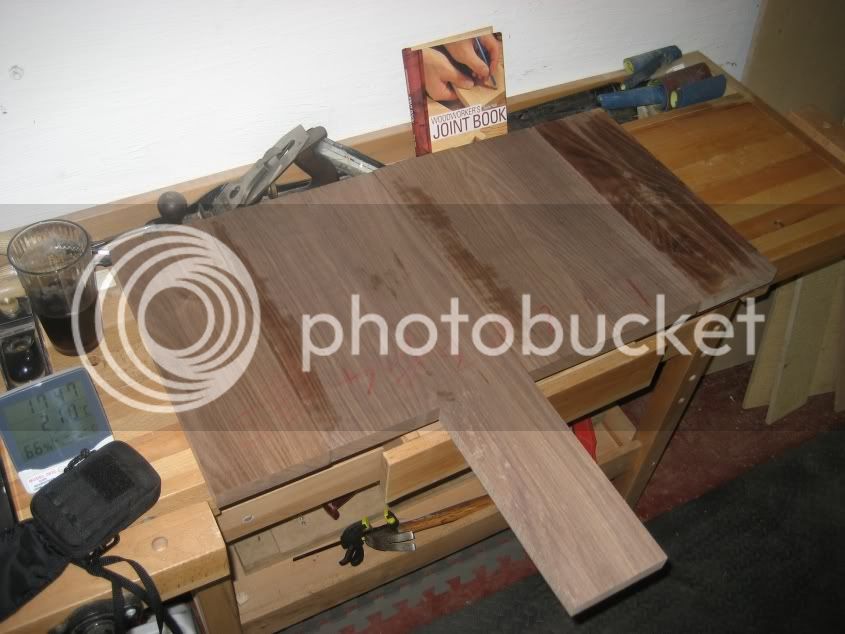
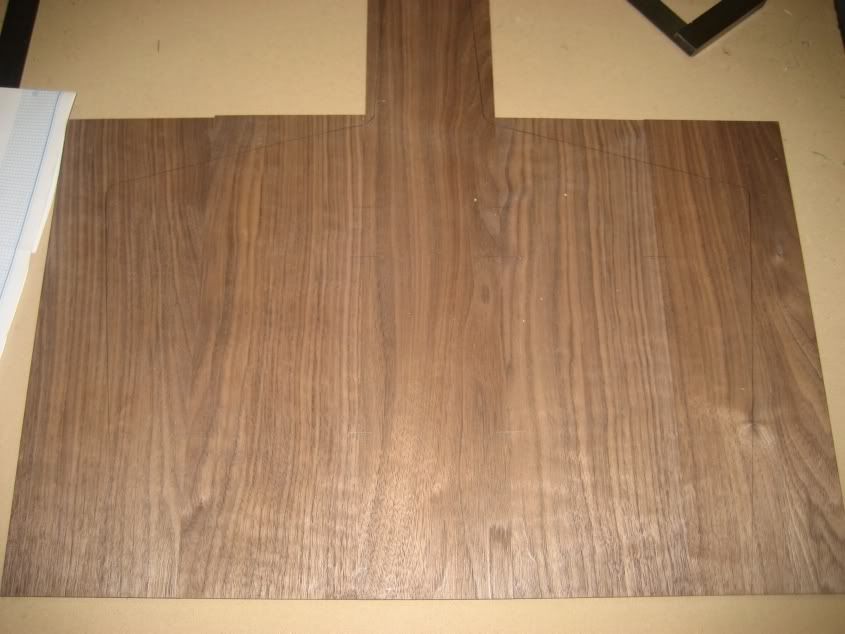
...6 weeks later and here's an end panel laid out on the bench to match the grain for the best look (dark bits are where I wiped with white spirit to get a better look at the grain).
Final thicknessing down of end panel parts
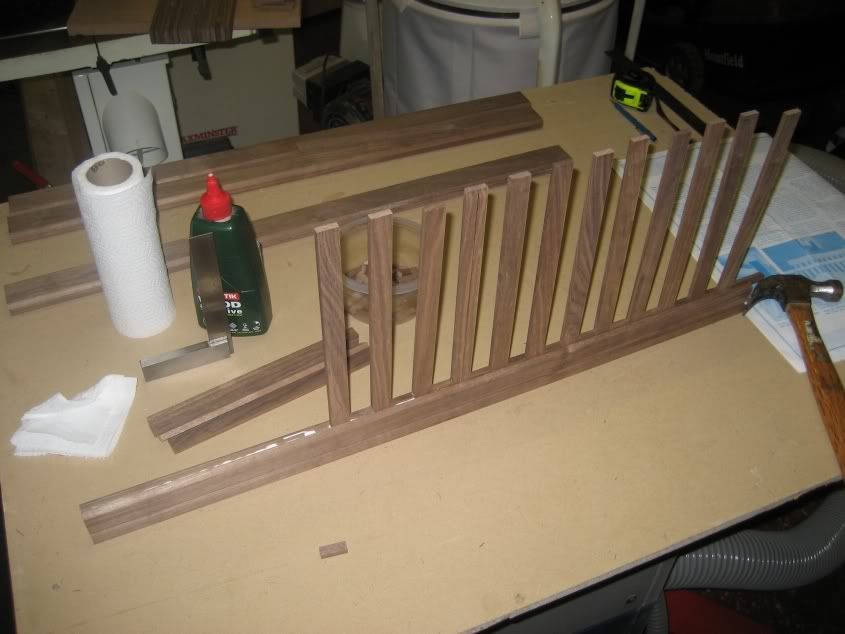
Cutting the basket slats to length after sizing...
Cutting out the feet...
My Heath Robinson attempt at a dowelling jig...
Legs clamped up, the dowelling jig worked...
An end panel grain matched and marked up for biscuits...
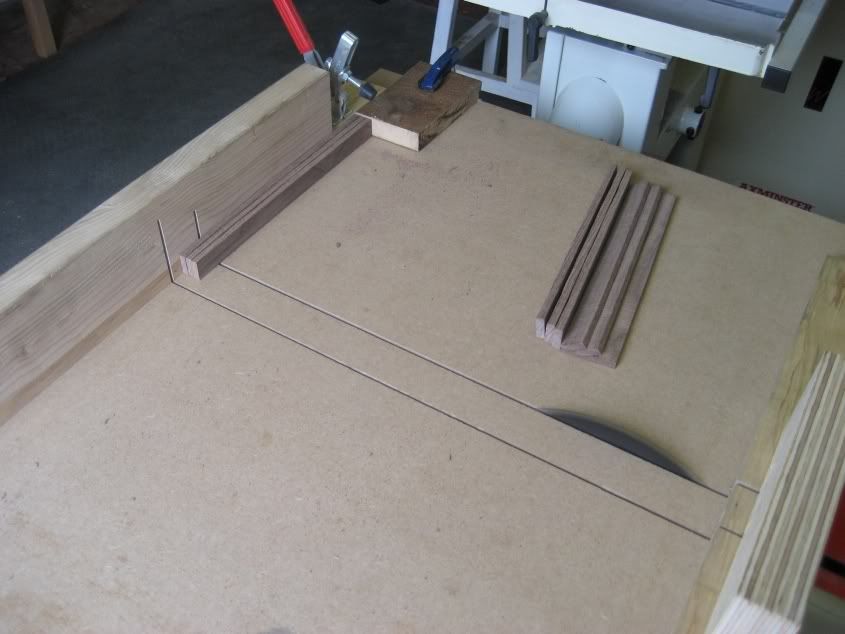
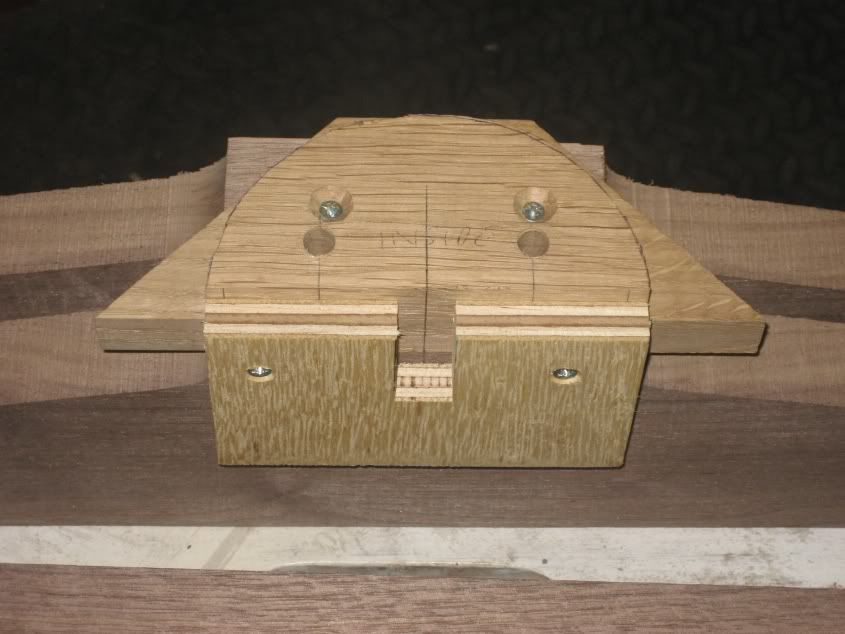
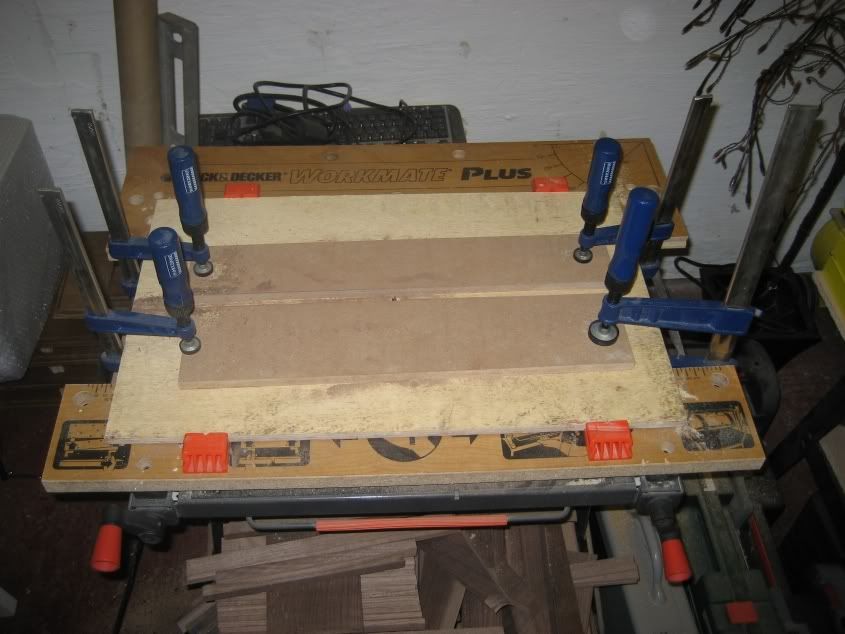
How to make your own router table. :lol: Used this setup for cutting the slots/dadoes/trenches/whatever in the rails to take the slats...
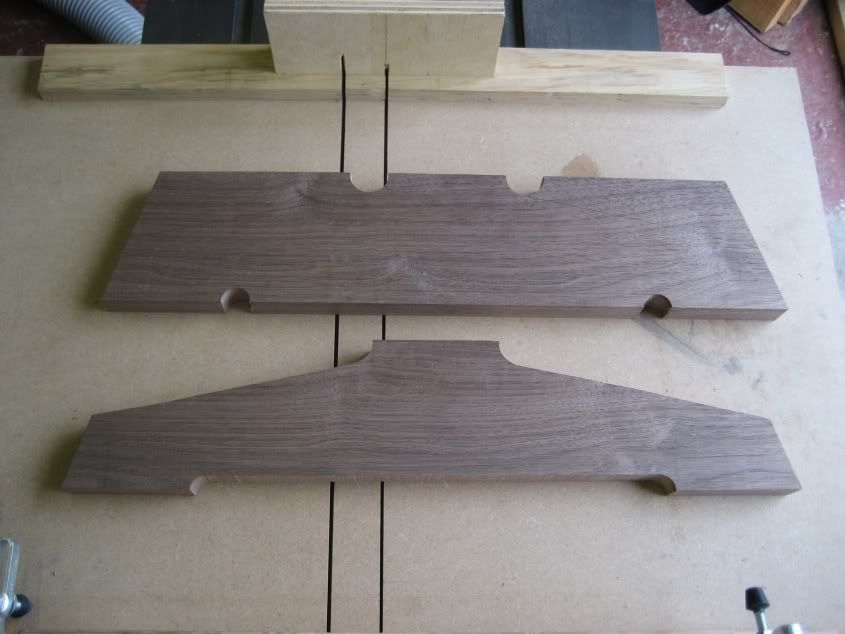
Dry fit of a slat in rail...
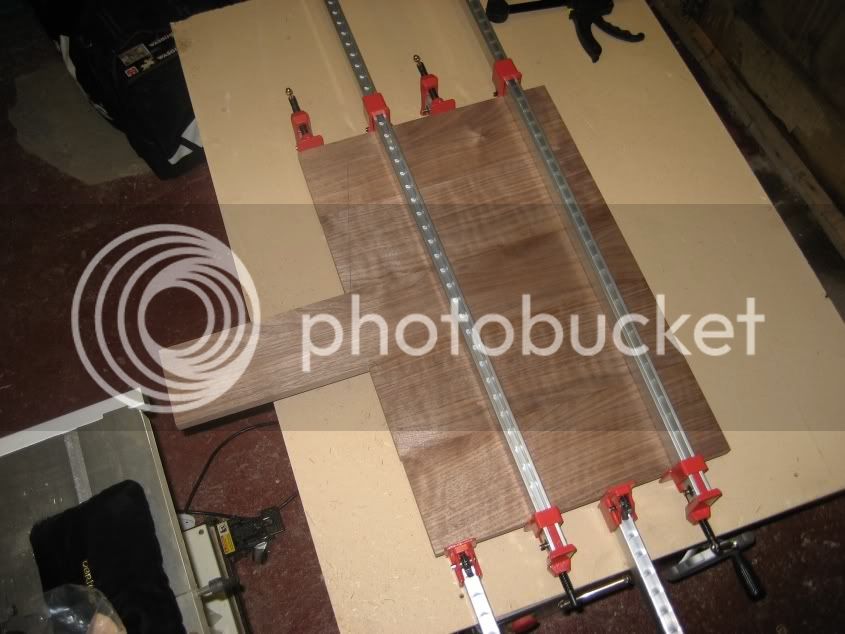
Biscuiting up the end panels then sticking in the clamps...
Gluing up the basket sides...
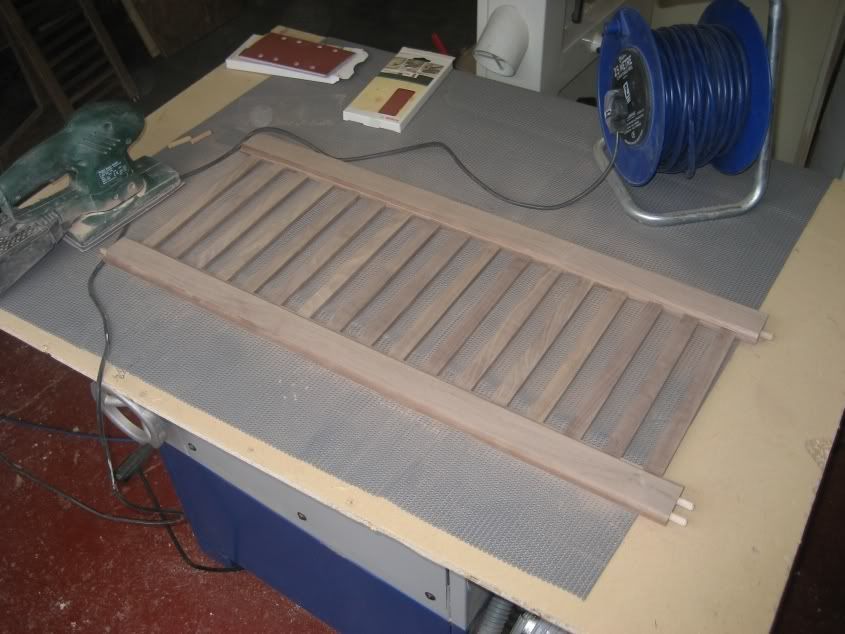
Finished basket side waiting to go in the clamps...

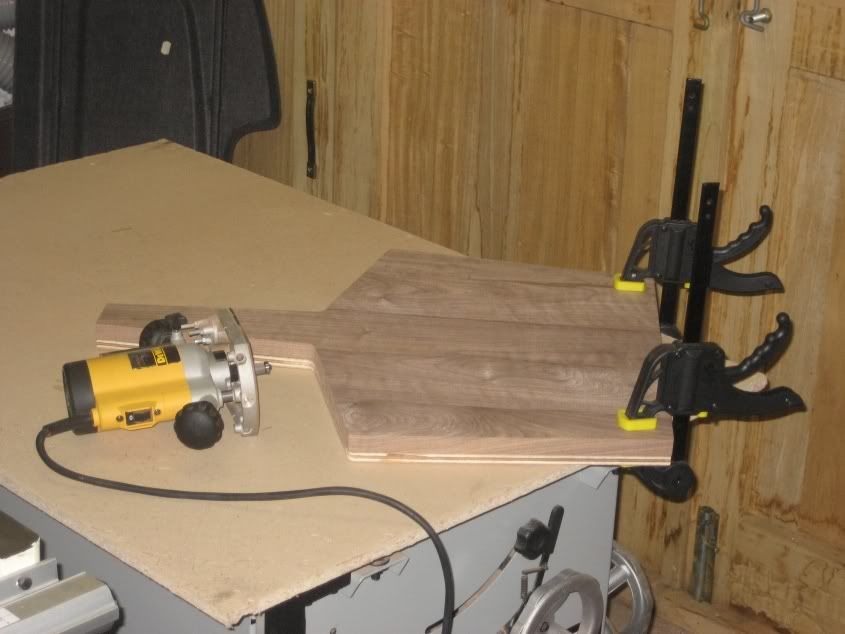
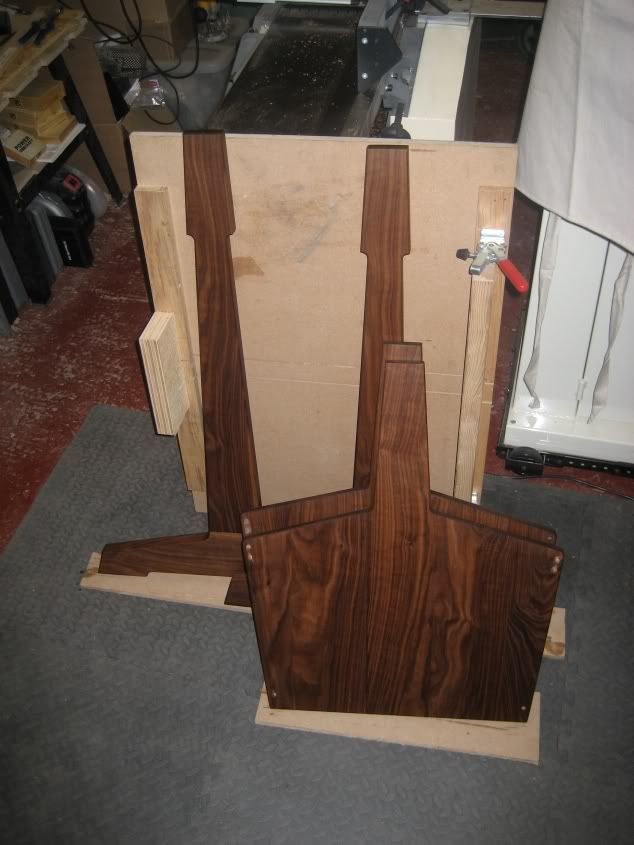
I cut the end panel out 1/8th" outside the lines the used a bearing guided cutter in the router to trace around a plywood pattern. Spent quite a while on the pattern to ensure that I didn't pineapple up the ABW...
The legs got the same pattern treatment, but this time I had cut too close to the lines so I had to do some fettling with block plane and files to tidy them up...
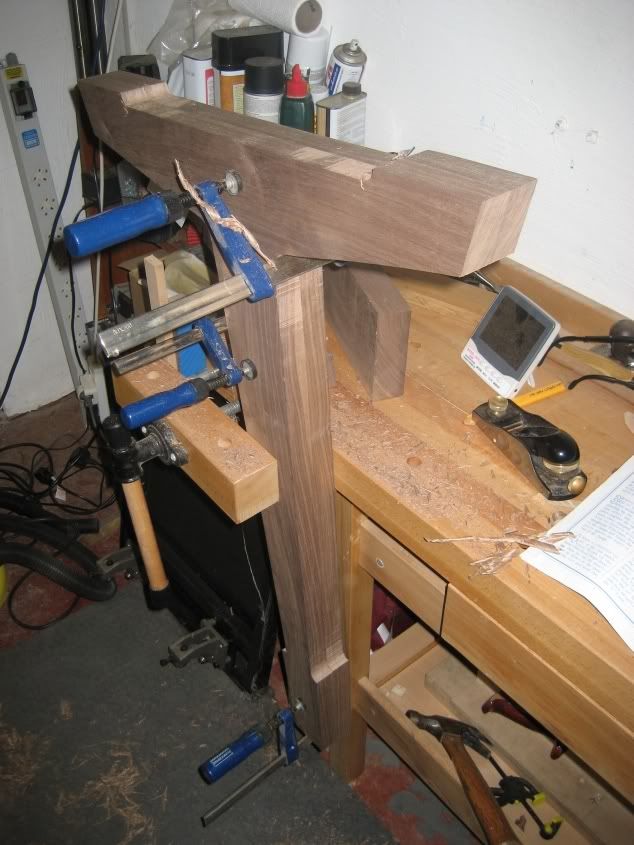
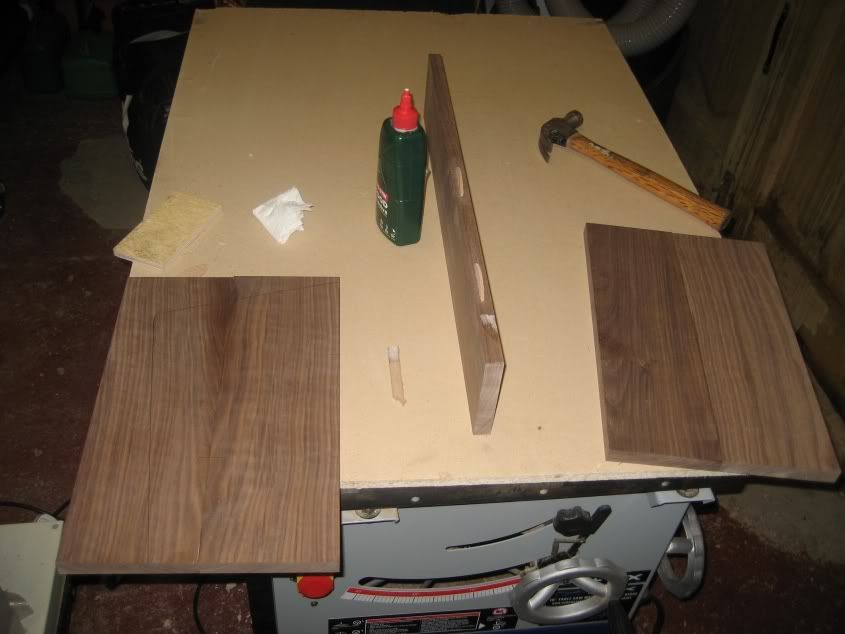
Next I clamped the basket sides between the end panels to drill the dowels. I had planned to do through wedged tenons on the rails but haste and lack of concentration meant that I cut the rails to the shoulder length and forgot the tenons :roll: SWIMBO can be seen overseeing proceedings...
Here's the dowels drilled through the end panels and into the rails...
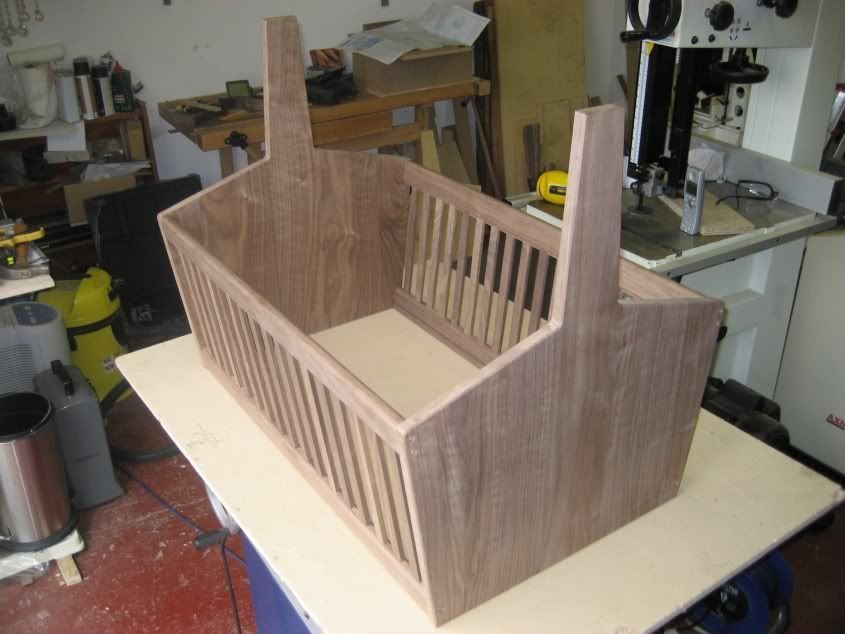
Basket dry fit with all dowels in place...
Basket sides being sanded...
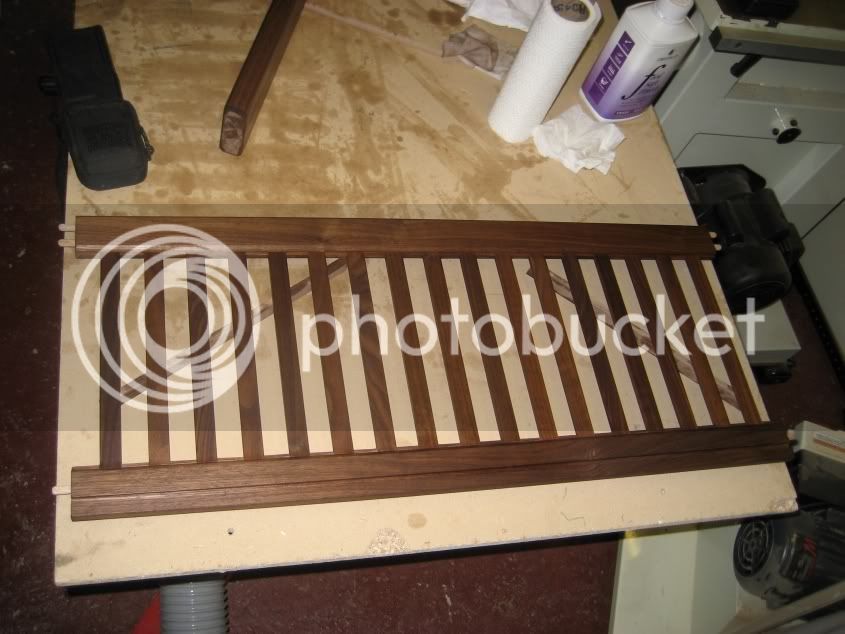
Basket side with first coat of Chestnut Food Safe Finish oil...
Legs and end panels with first coat of oil...
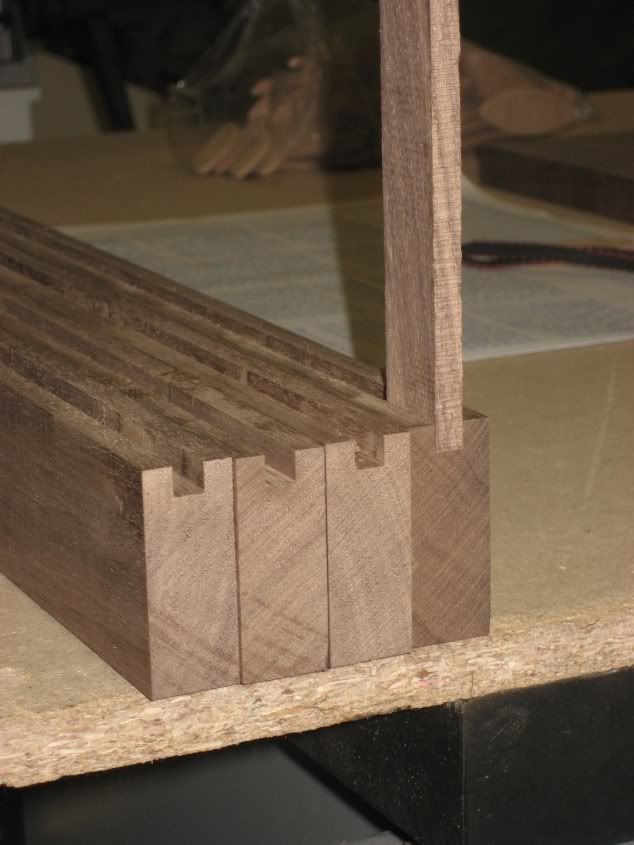
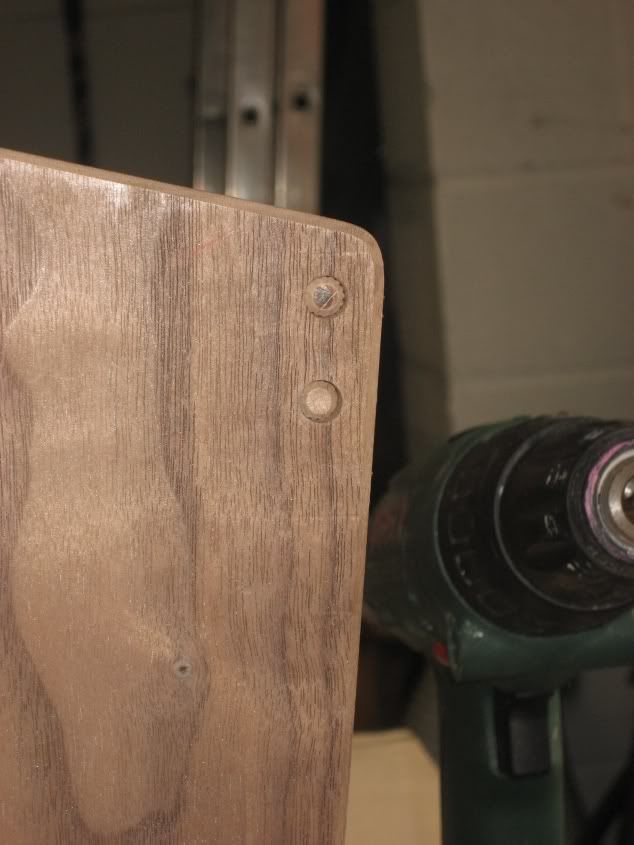
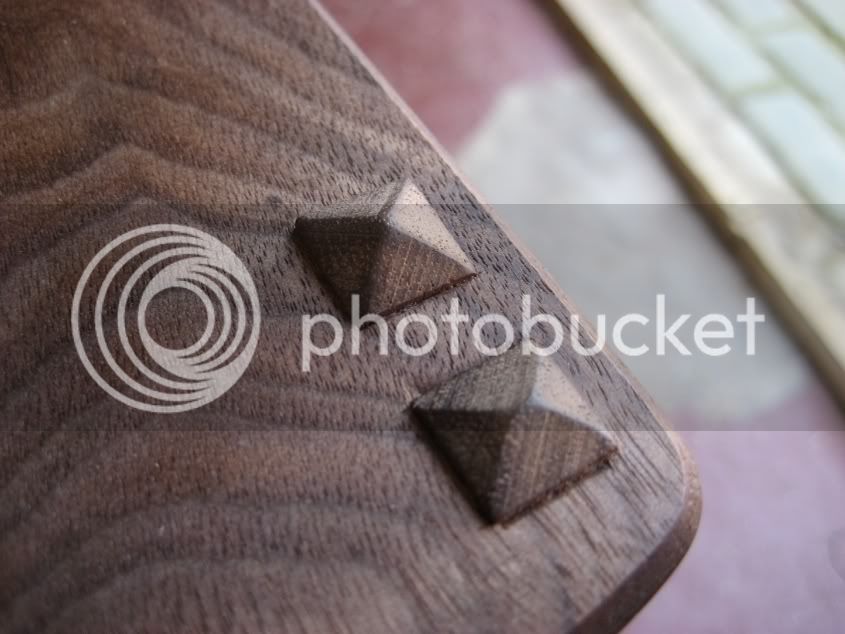
Now I needed something to cover up them pesky dowel holes. I tried plugs but couldn't match the grain perfectly so went with these. Cut from square stock with profile on the end and inset by 3mm, You can see that all arrises have been eased with a small chamfer which I think gives it a nice look and feel...
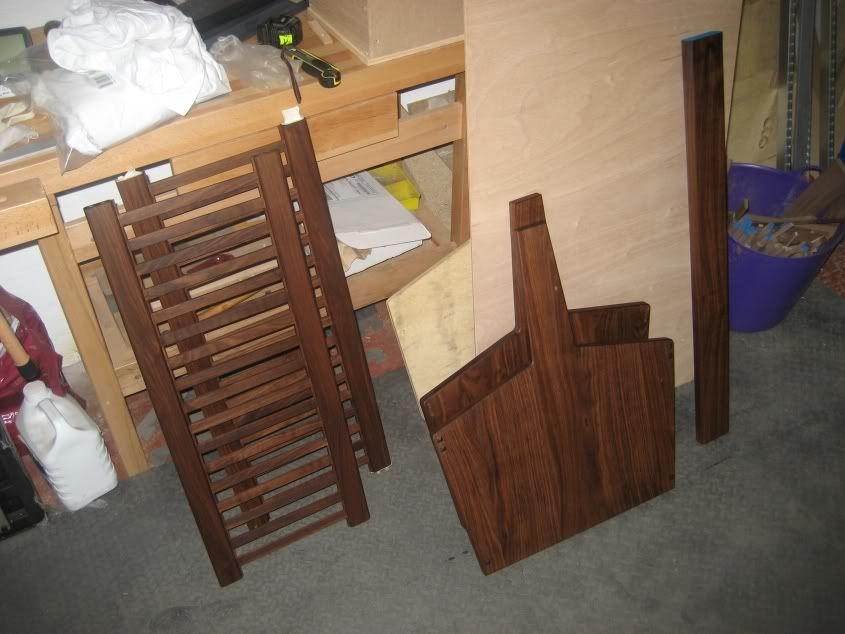
Here's the end panels, basket sides and cross brace after 3 coats of oil and 2 coats of Liberon Black Bison clear paste wax...
Here it is with the tee nut in place for the pivot and dry fit while measuring for the base panel...
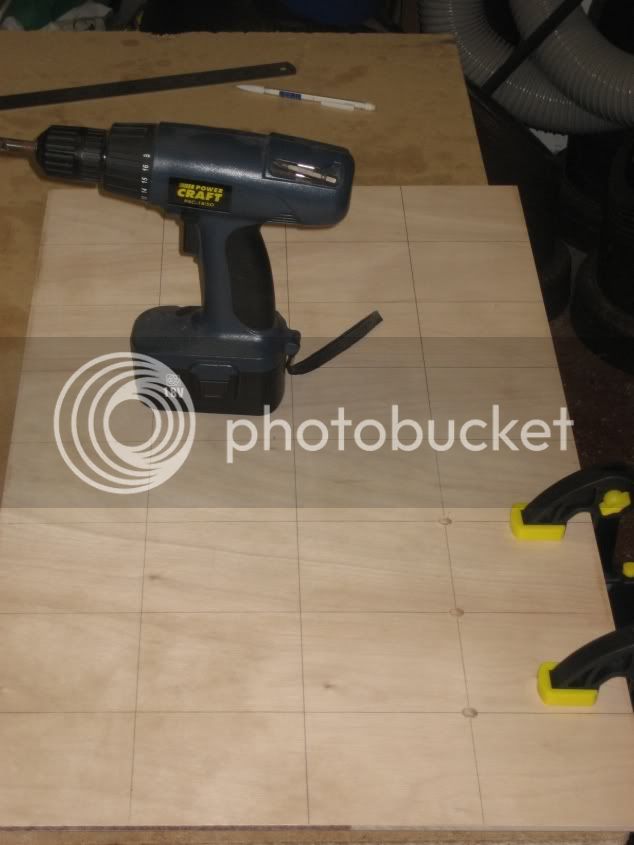
Here's the base panel (6mm ply) marked up and having vent holes drilled. This was then sanded and given a coat of sanding sealer...
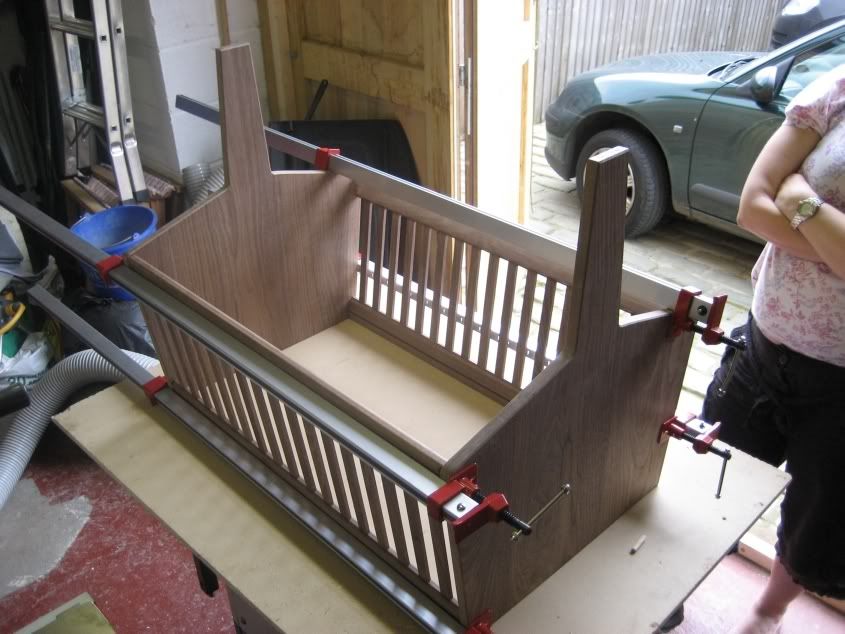
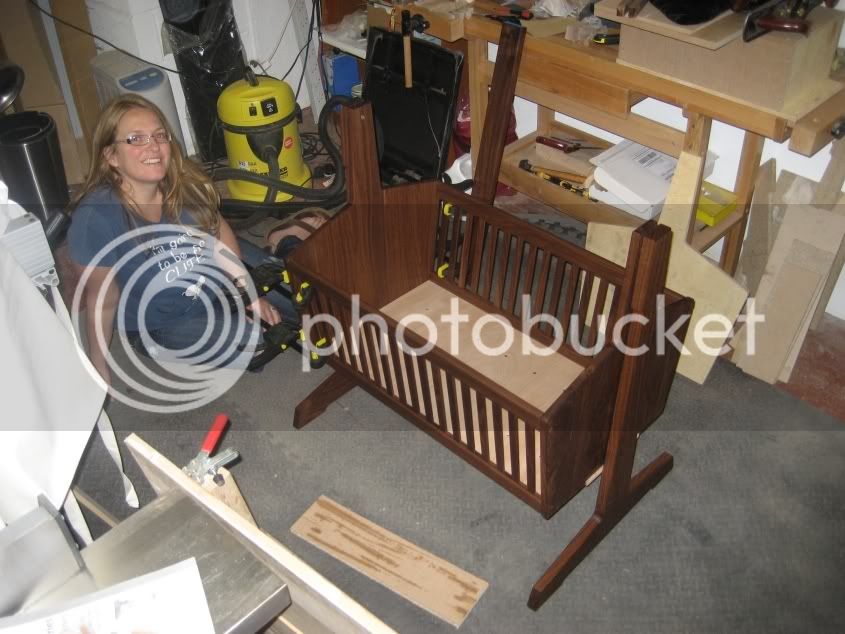
Basket all glued up with base fitted, pivot in place and legs clamped up, with spacer, to measure the exact length needed for the cross brace. SWIMBO came in at the end of the process to see how I was getting along and to offer any help. She's now 7 months pregnant so can't do any heavy stuff but she helped me balance stuff and screw in the pivot screws etc. At the end she then claimed that she can now say that she made it
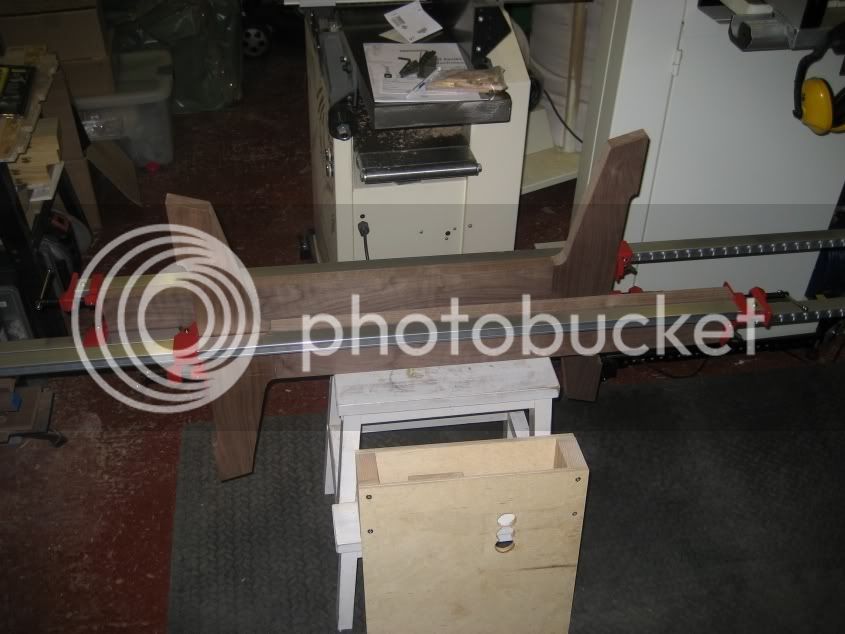
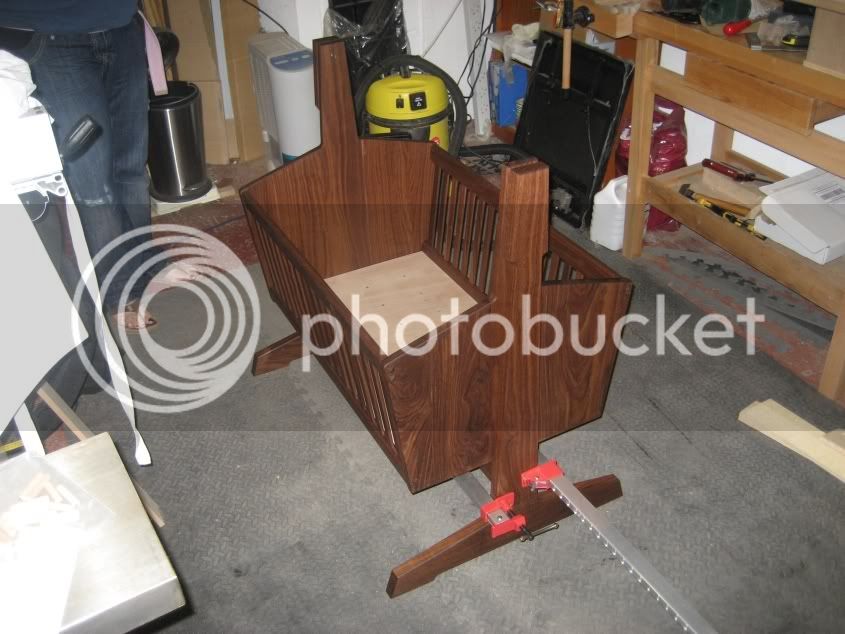
Next the brace was clamped in place to make sure it didn't splay at the top, all looking good so far...
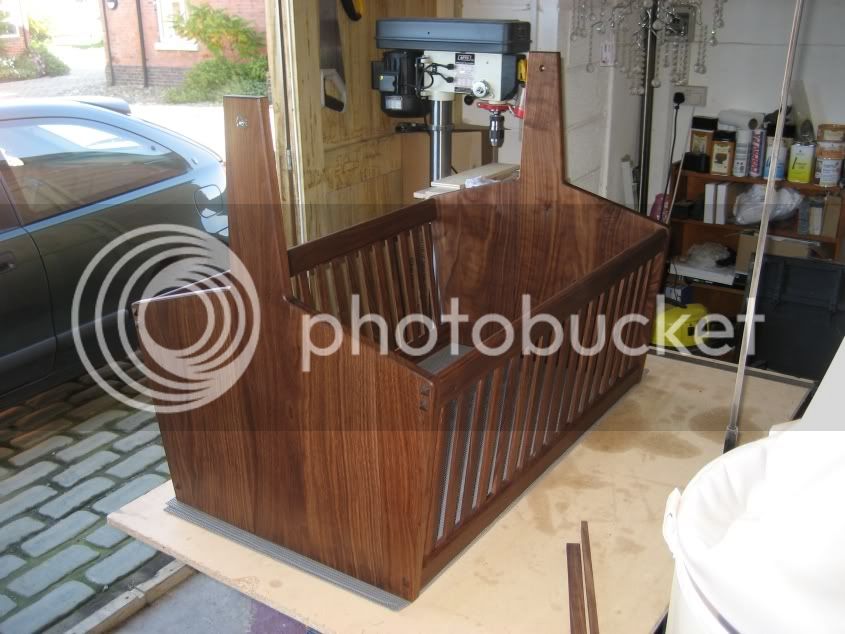
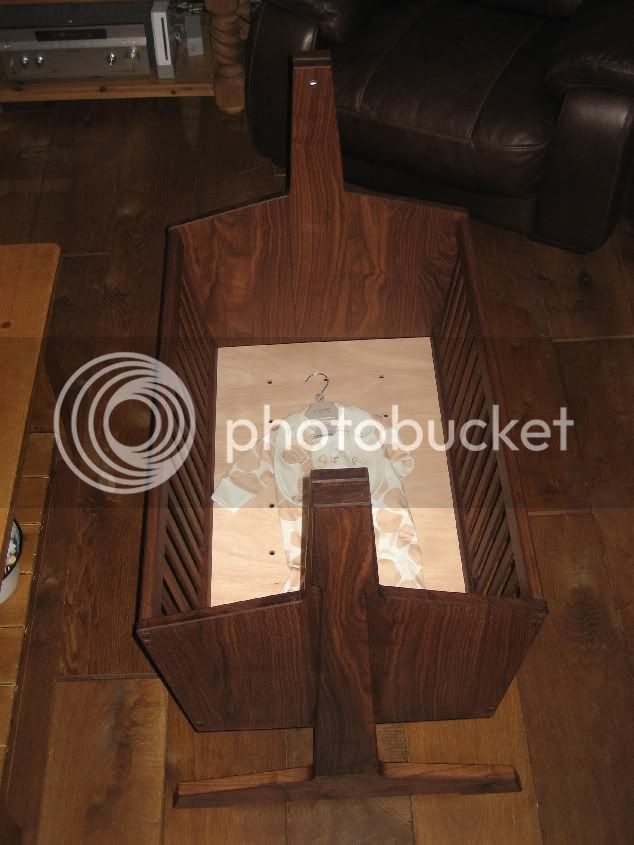
And here's a few shots of it in the living room, with a 6-9 months babygrow to check for size
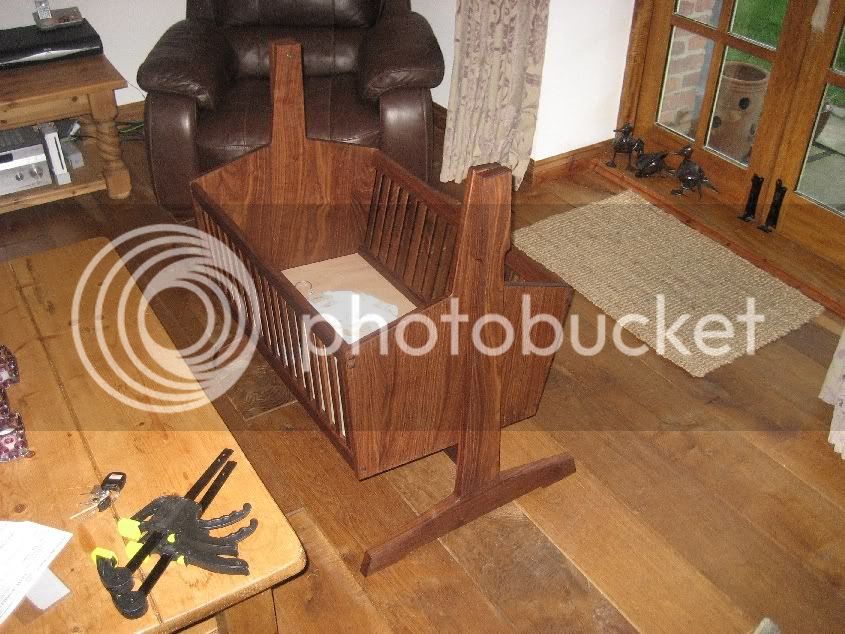
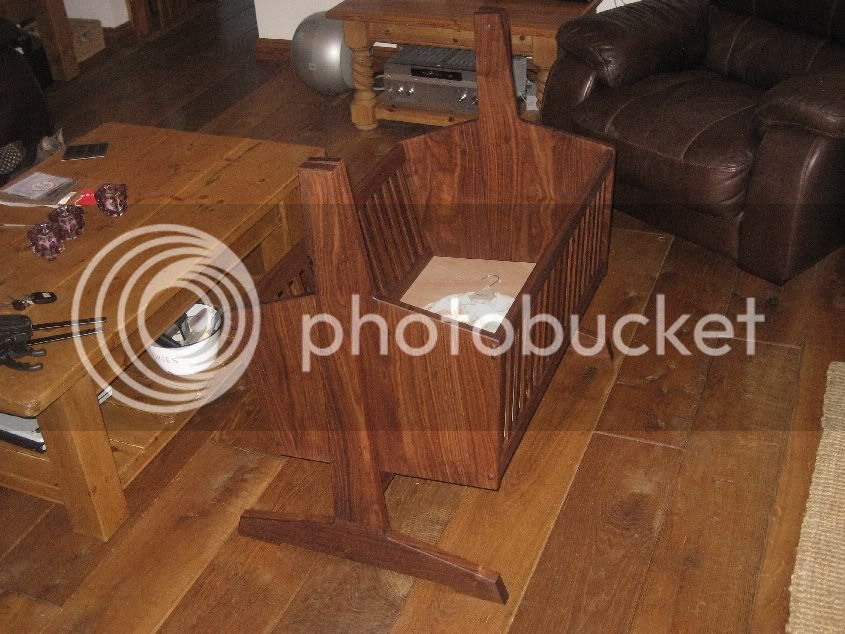
So, hope you like it and would love to hear any thoughts. Love to hear what you might change to, and thanks for looking. Hopefully the little one will get more than a couple of weeks use out of it
Cheers
Mark
I've finally got round to finishing my second complete project this evening, a swinging crib/cradle for my impending firstborn.
When we found out we were expecting I had a real urge to make something for the Bambino, that was of some use and could be a family heirloom (wishful thinking...?), so after some judicious Googling I decided on a swinging crib that I found plans for, so I bought the plans and modified them with some changes of my own, and here's the pics and story...
Decided on making it in ABW, so two 10'x11"x2" boards were purchased from Irmass in Salford and having worked out the lengths I would need I got them to x-cut them in half for me to make it easier to get in the car
Then got them on the bench and cut and planed up the first couple of pieces
Cut all the pieces out to correct width, slightly over length and 1/8" over thickness and put them all in stick in the back bedroom for 6 weeks....
...6 weeks later and here's an end panel laid out on the bench to match the grain for the best look (dark bits are where I wiped with white spirit to get a better look at the grain).
Final thicknessing down of end panel parts
Cutting the basket slats to length after sizing...
Cutting out the feet...
My Heath Robinson attempt at a dowelling jig...
Legs clamped up, the dowelling jig worked
...
An end panel grain matched and marked up for biscuits...
How to make your own router table. :lol: Used this setup for cutting the slots/dadoes/trenches/whatever in the rails to take the slats...
Dry fit of a slat in rail...
Biscuiting up the end panels then sticking in the clamps...
Gluing up the basket sides...
Finished basket side waiting to go in the clamps...
I cut the end panel out 1/8th" outside the lines the used a bearing guided cutter in the router to trace around a plywood pattern. Spent quite a while on the pattern to ensure that I didn't pineapple up the ABW...
The legs got the same pattern treatment, but this time I had cut too close to the lines
so I had to do some fettling with block plane and files to tidy them up...
Next I clamped the basket sides between the end panels to drill the dowels. I had planned to do through wedged tenons on the rails but haste and lack of concentration meant that I cut the rails to the shoulder length and forgot the tenons :roll: SWIMBO can be seen overseeing proceedings...
Here's the dowels drilled through the end panels and into the rails...
Basket dry fit with all dowels in place...
Basket sides being sanded...
Basket side with first coat of Chestnut Food Safe Finish oil...
Legs and end panels with first coat of oil...
Now I needed something to cover up them pesky dowel holes. I tried plugs but couldn't match the grain perfectly so went with these. Cut from square stock with profile on the end and inset by 3mm, You can see that all arrises have been eased with a small chamfer which I think gives it a nice look and feel...
Here's the end panels, basket sides and cross brace after 3 coats of oil and 2 coats of Liberon Black Bison clear paste wax...
Here it is with the tee nut in place for the pivot and dry fit while measuring for the base panel...
Here's the base panel (6mm ply) marked up and having vent holes drilled. This was then sanded and given a coat of sanding sealer...
Basket all glued up with base fitted, pivot in place and legs clamped up, with spacer, to measure the exact length needed for the cross brace. SWIMBO came in at the end of the process to see how I was getting along and to offer any help. She's now 7 months pregnant so can't do any heavy stuff but she helped me balance stuff and screw in the pivot screws etc. At the end she then claimed that she can now say that she made it
Next the brace was clamped in place to make sure it didn't splay at the top, all looking good so far...
And here's a few shots of it in the living room, with a 6-9 months babygrow to check for size
So, hope you like it and would love to hear any thoughts. Love to hear what you might change to, and thanks for looking. Hopefully the little one will get more than a couple of weeks use out of it
Cheers
Mark
