Shed / Workshop Build

UKworkshop.co.uk

Help Support UKworkshop.co.uk:

This site may earn a commission from merchant affiliate links, including eBay, Amazon, and others.
........in fact, in a normal cut roof with rafters, joists and diagonal bracing, you could go along with a hand-saw after the roof was built and cut through the ridgeboard between each pair of rafters, and it wouldn't make any difference to the roof whatsoever. Once the roof is finished, a ridgeboards sole job is as part of the bracing.

Mike
 
Haldane":3ulsp070 said:
These are only rough figures from memory

Base materials, ballast cement roadstone £700.00
Timber inc sheet materials £1400.00
Electrics materials only £400.00
Roofing felt and laying £500.00

Total approx £3000.00
plus a lot a trips to wickes and DIY sheds for for those little things you
forget another £7/800 (propably more but I don't like to think about it to much)

I did look at kit type sheds but they were nowhere near the quality of what I think I've ended up with. Plus the fun, enjoyment and satisfaction of making it yourself

Hope this helps
Dave

Appreciate that. The figures may appear expensive compared to "flat pack" sheds, but I bet yours will outlast most. Thanks again.
 
Martin,

I reckon it is roughly 3.8m x 6.0m (12'-6" x 20'), but if you want exact measurements you'll have to wait for Haldane.

Mike
 
Mike Garnham":2zpdk5ot said:
Martin,

I reckon it is roughly 3.8m x 6.0m (12'-6" x 20'), but if you want exact measurements you'll have to wait for Haldane.

Mike

mike that's fine, just looking at his rough costings so i've got something to compare against, seeing as i intend to build 6.00x3.00 (20 x 10) this year , well as soon as really


martin
 
Mike Garnham":2uzbx9ev said:
........in fact, in a normal cut roof with rafters, joists and diagonal bracing, you could go along with a hand-saw after the roof was built and cut through the ridgeboard between each pair of rafters, and it wouldn't make any difference to the roof whatsoever. Once the roof is finished, a ridgeboards sole job is as part of the bracing.

Mike

Now I've looked harder I can see the sag and I'd be pretty worried if it was my shed. The ridgeboard ought to be non-loadbearing, however in this design it is and clearly isn't strong enough, with the ties holding the walls together it will remove the load on the ridgeboard and place the trusses back into compression, interesting design to not have cross-ties or whatever those thingys are called you usually lay the floorboards on in the loft isn't it?

Aidan
 
Aidan,

it does have a tie.......but only one. This type of tie is perfectly good enough, but there isn't enough of them here, and I have seen no detail of how the tie links to the plate. Two additional ties like the one already in situ, (or the alternative I also suggested), and the plates would be pulled back to where they should be, and the non-structural ridge can go back to doing its job.........ie nothing at all!

Mike
 
Mike Garnham":1bphp1yy said:
Aidan,

it does have a tie.......but only one. This type of tie is perfectly good enough, but there isn't enough of them here, and I have seen no detail of how the tie links to the plate. Two additional ties like the one already in situ, (or the alternative I also suggested), and the plates would be pulled back to where they should be, and the non-structural ridge can go back to doing its job.........ie nothing at all!

Mike

I didn't count that one as a "proper" tie, 1" steel rod with hydraulic rams is more my thing

Aidan
 
Hi All

Answers to questions

Chippy- regarding the floor I did think about staggering the joints between the boards but then thought, seeing as its a floating floor and would have no voids and the polystyrene would be giving support in all areas it wasn't going to make much difference and would save me cutting boards up (did try to make sure the chipboard and polystyrene joints were always at right angles) Hope I don't regret that decision in future!

Ninjabika- Mike was spot on with the size 6x3.8m

I found the rest of the photo's on the computer today but it won't let me open them stating "file type not supported" these pictures were taken on the same camera as all the others and downloaded in the same way, have checked the properties of the pics and they are the same file type as the others that will open :? just don't understand computer sometimes suspect they have been corrupted somehow. :x

So took some more this morning to finish thread off.
It's just a quick tour of where I am now

003.jpg


005.jpg


007.jpg


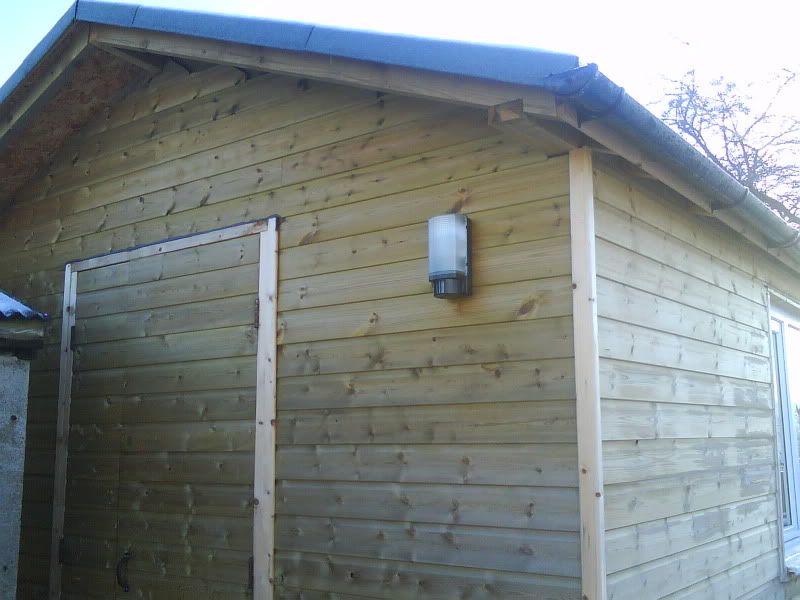
It was just a little below freezing when I took these this morning and it had been snowing in the night. There is still some trim to finish on the outside and some dripboards? above the doors wouldn't go amiss.

012.jpg


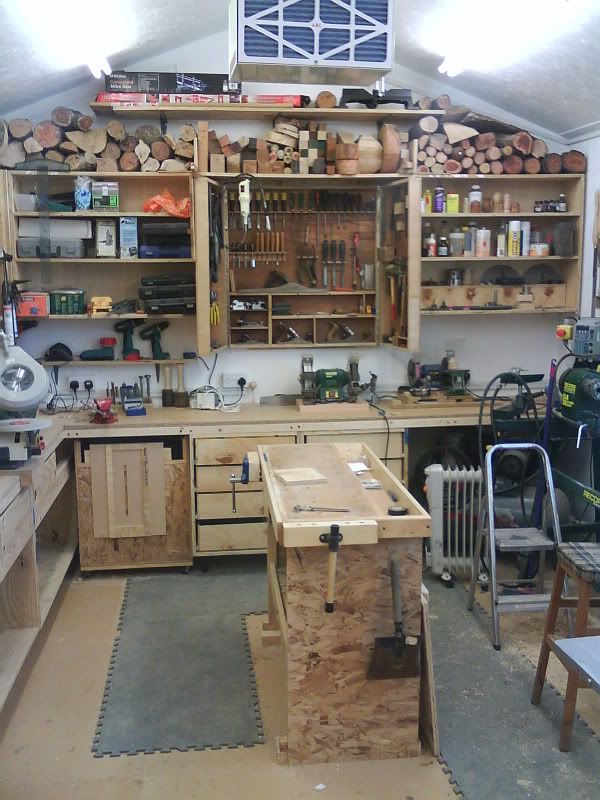
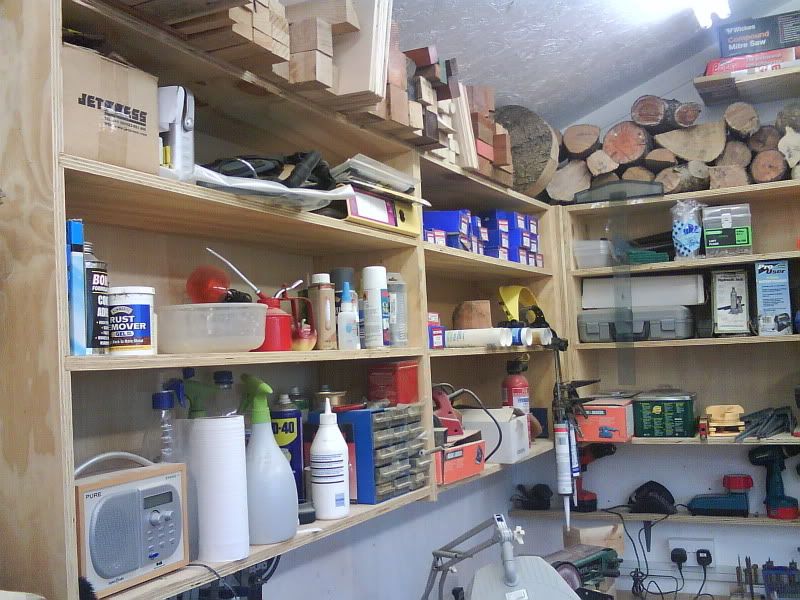
View of the shed as you walk in, have been leaving a small oil filled radiator on low all night which works a lot better than I thought 12 degrees centigrade when you walk in not toasting hot but warm enough to work without a coat :)

008.jpg


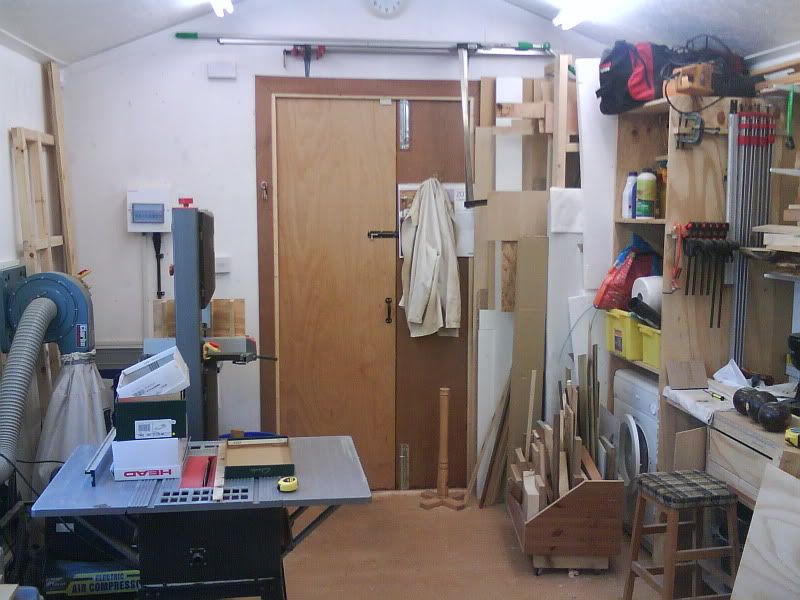
Doors have been located slightly off centre this allows 8x4 sheet materials to be stored upright against wall without getting in way.

010.jpg


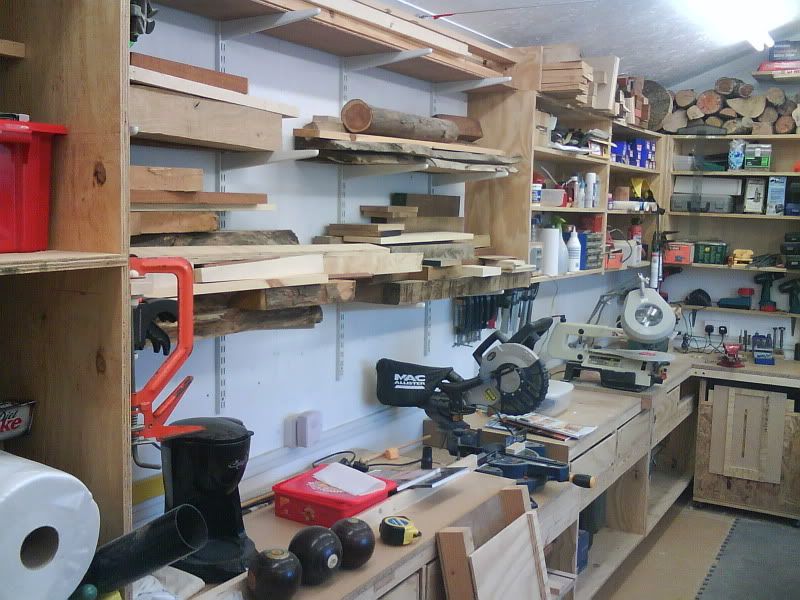
Spur shelving for timber storage will accommodate 8' lengths longer on the top row as you can go onto the tops of the cabinets. Sliding mitre saw set into middle of worktop allows up to 8' length of timber each side, the wooden bin at the end under the cabinet is for off cut storage.

021.jpg


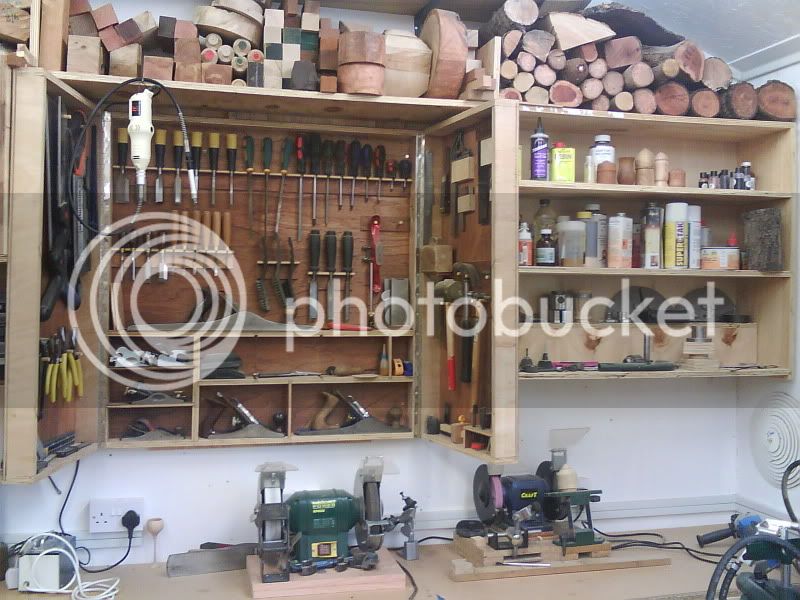
I made the wall cabinets from 18mm ply and hung them on french cleats? so they can be taken down/rearranged easily if needed.

023.jpg


The tool cabinet came off the wall in the old garage so doesn't quite fit will replace with something that fits better when get time

020.jpg


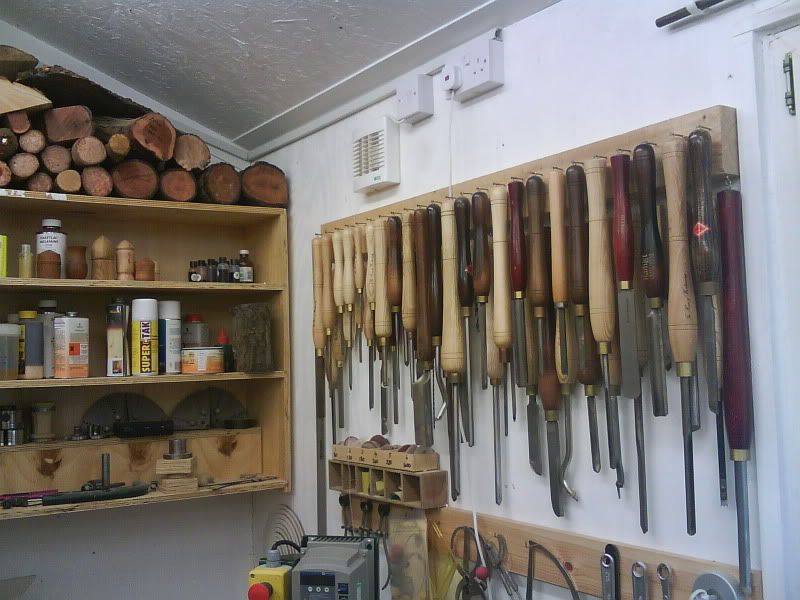
Woodturning tools and extractor fan to keep humidity down (not been needed as yet)

015.jpg


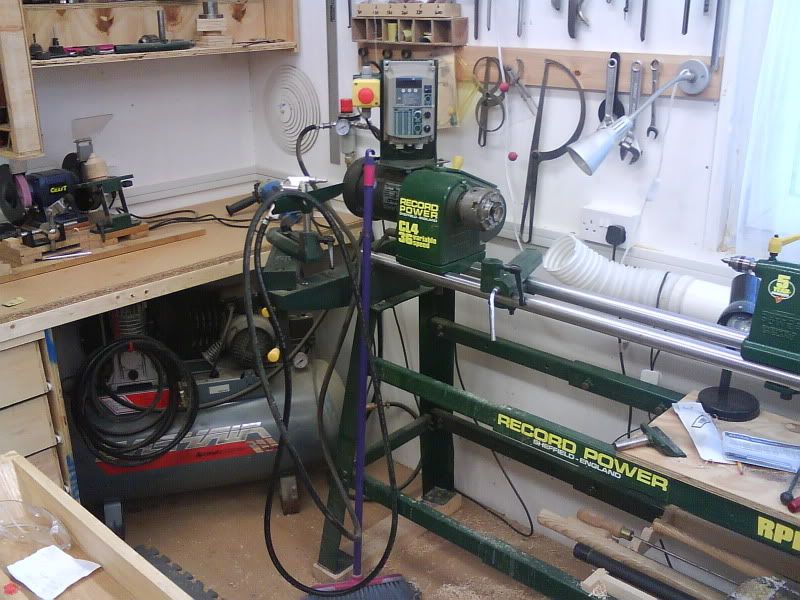
Lathe and compressor

016.jpg


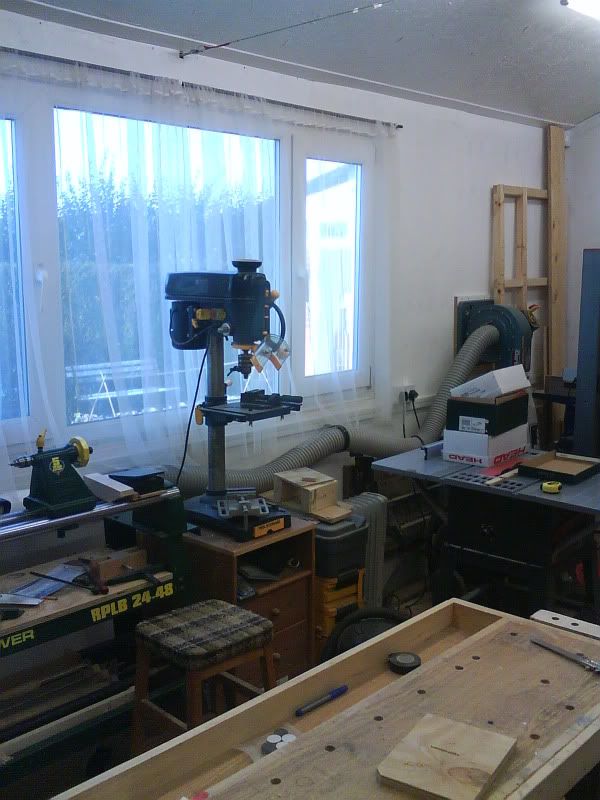
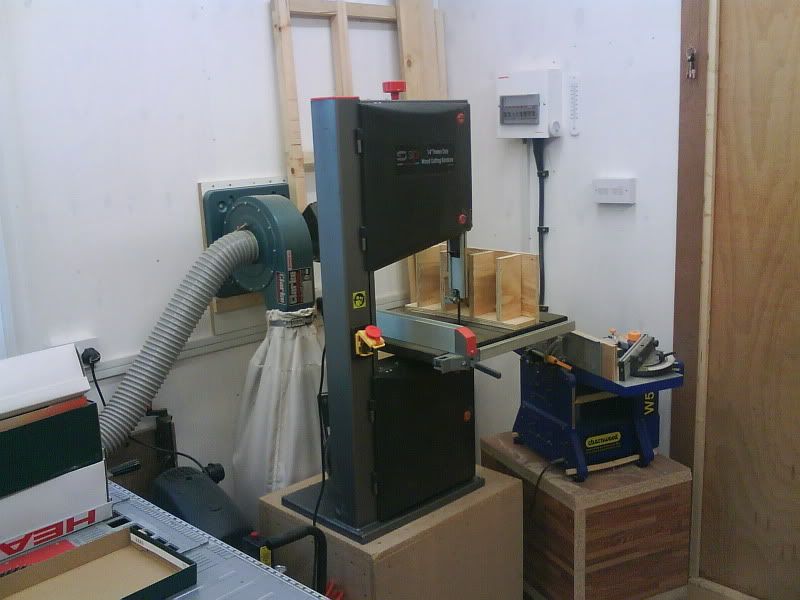
Pillar drill, tablesaw, bandsaw there is also a small planner/thicknesser behind them somewhere and chip collector on wall.
he frame standing against the wall fits onto the workbench in the centre allowing you to cut large sheet material with circular saw to get them into more manageable sized pieces

018.jpg


All of the machines are on castors and can be pulled out to work on with plenty of space around them.

Still plenty more to do, doors on the cabinets better flooring (hardboard is a bit slippy may put vinyl tiles or safety paint down) But I think i'll live with it for a while now and try to get some projects made.

Hope you enjoyed the pictures

Dave
 
Many thanks Dave
I have enjoyed the thread enormously.
These workshop threads are always so instructive,
I will hopefully start mine soon

John
 
Ignoring the washing machine, that looks like a great workshop! Now, it's time to get some projects done and upload the photos... :D

How are your turning tools hanging on the racks? I can see hooks in a couple of them. Are they all like that?

Many of us would kill for 12° working temperature at the minute!! :wink:
 
Can you get the hardboard up?

You could just flip it over so the rough side is uppermost as a temporary measure.

Slippery floors are not good especially when covered in fine dust.

Mick
 
Just cover the ramaining floor area in that rubber matting. That's what I've done, costs buttons for that amount of space, kind on the feet (and dropped toolage), easy to clean and save you any messing around with painting or ripping up flooring.

Simples ;)
 
Wow.. What an excellent workshop, well designed and built, and now finished, well equipped.. what next.. :lol: ... Time for turning...

Regards. David.
 
Fantastic build. I'm really glad this is on here as it's almost the exact size that I'm hoping to build!

I have a question though: You have the damp-proof membrane under the concrete and a DPC between the blocks and the wood but isn't rain going to try to soak in between the edge of the membrane and the slab?
 
dh7892
Now you mention it, I think the rain will get between the slab base and the DPM I'm thinking it should not be to much of an issue, the DPM will stop moisture being constantly drawn up into the concrete from below. I think any trapped rainwater will dry out and not cause to much of a problem. However when the weather picks up I still have plenty of odd jobs to finish one of the first will be to tidy up the edge of the DPM

Dave
 
This is the very reason why I always say leave the top edge of the concrete about 50mm above ground level. This arrangement will dry out any of the trapped rainfall which comes into contact with the edge of the concrete. The DPM is to prevent groundwater under the slab keeping the slab constantly wet.

Mike
 
That sounds fair enough thanks for the reply.

So why does the stud wall want a vapour barrier but not the blockwork?

If there needs to be a DPC between the blockwork and the timber then that must imply that the blockwork might get damp right? Is that not going to be a problem inside since it's a single skin wall?

Sorry if I'm being daft, just wanna make sure I get my ideas straight for when I try my luck.
 
FANTASTIC, what have you got in the way of heating? something I thought about last summer and did nothing about? wish I had of.
 
Hi Dh
To be honest I don't think is was strictly necessary to put a vapour barrier on as the 18mm ply would probably do the job just as well, likewise with the DPC between the blockwork and timber the blockwork is high enough to keep the timber frame well away from any damp. But the 2 items together only cost about £20 and its the correct convention? for the minimal cost it didn't seem worth not doing it.

OldSchoolTool
Heating. At first I was using a Fireray propane type heater which warms the shed in no time but originally I had this to use in a drafty garage where it was fine, I now understand why it warns you not to use them indoors as the fumes give you headache as was the case in the new well insulated and draft proof shed. I now have 2 small oil filled electric radiators I have been leaving one on low all the time even during this bad weather it keeps the shed at a steady 50 degrees and use the second one for a boost when i'm in there but usually end up turning it off after an hour as it gets to warm when you're working

Dave
 
Back
Top