


Saintsman
Established Member
Hi guys,
After much thought and head-scratching, I decided to build a bench based on Lon Schleining's 'best of old and new' in his excellent book. The only modifications were that I would fill in the end frames with raised panels and add a central tool tray (or dust collector) with a removable centr section to aid clamping (copied from DC's design for LN's bench)
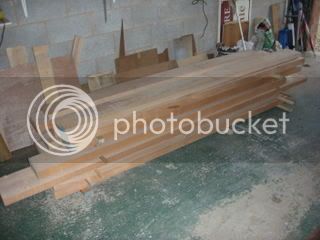
One large pile of steamed beech duly collected, chosen for strength, stability, price, availability and appearance.
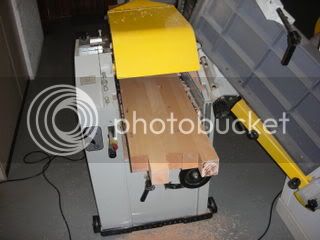
Having cut, sized and planed the legs and cross pieces, I glued up a couple of panels and raised them on my Norm-based jig
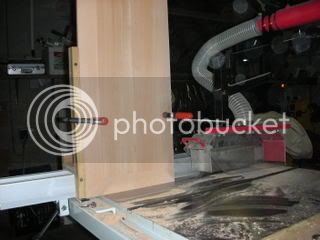
Guard removed for clarity, ahem..........
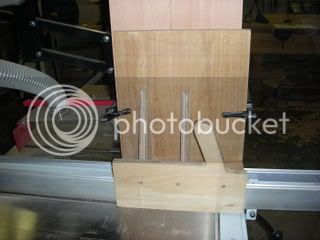
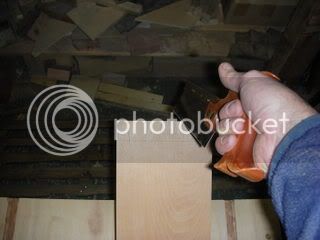
View of the other side of the jig, with finely crafted handles....
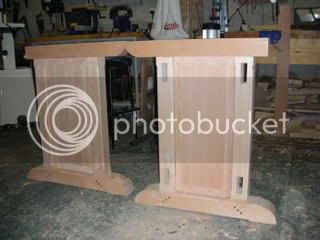
I used draw-bored mortise and tenons for the lower joints and wedged tenons for the upper joints, using walnut for the dowels and wedges for a nice contrast.
One end frame all assembled, complete with floating panel
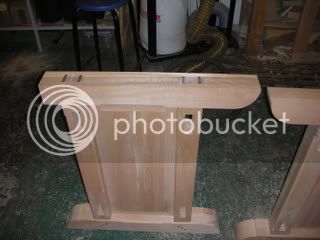
And with its twin.
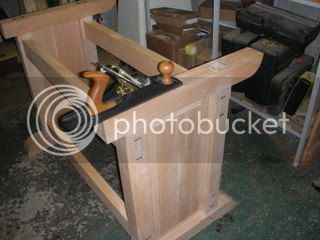
Next was to fit the four stretchers (again with wedged M & T joints) and finish off the joints with the 5.5
Now for the top: two sections (with the tool tray in between) each made up of 5 pieces of beech, 2" wide and 2.75" deep.
Having cut and jointed each piece, next job was to rout the square dog holes using a jig
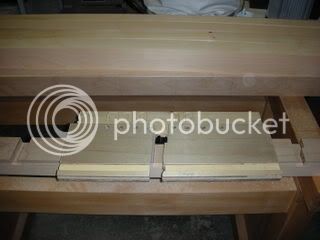
Note the use of scrap sign-writing pieces for the jig!
One strip complete with dog holes.
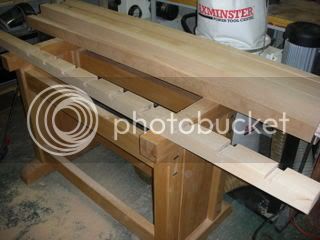
Glued the strips into two slabs, aligning as carefully as possible with strategically placed biscuits to minimise final flattening. Then ran each slab through the P/T to a shade over 2.5". Bloody hell, they're getting heavy now!
Now the fun starts! Cutting the half-blind dovetails to fit each end cap to the front apron.
The end caps have a groove routed in them to fit (with a small allowance for seasonal movement) onto a tongue on each end of the slabs to form a breadboard end. The caps are attached to the slabs with bed bolts and a little glue at one end of each cap.
Forgot to take pics of the next couple of stages, so jump to an upside down view of the assembled top, having fitted the end vice (a Veritas twin screw that I bought about two years ago!). Having read elsewhere of one or two drawbacks for this bit of kit, I decided to fit no-clearance supports for the two screws to eliminate sag at full extension (those who suffer from this affliction will no doubt sympathise........
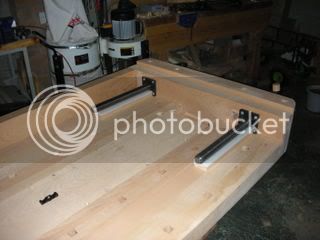
Another view of the underside, showing the support block for the front vice (a simple quick release one) and the high tech release system for the removable section of the tool tray.

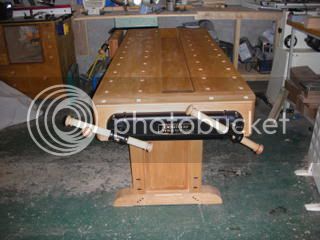
Et voila: all done. Finished with three coats of Danish oil.
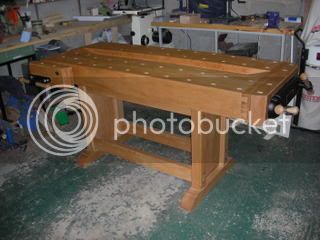
Hope you approve, guys: it's my first big project after lots of planters, garden tables, small cupboards, etc and my first go at posting pictures!

All the best,
Paul
After much thought and head-scratching, I decided to build a bench based on Lon Schleining's 'best of old and new' in his excellent book. The only modifications were that I would fill in the end frames with raised panels and add a central tool tray (or dust collector) with a removable centr section to aid clamping (copied from DC's design for LN's bench)
One large pile of steamed beech duly collected, chosen for strength, stability, price, availability and appearance.
Having cut, sized and planed the legs and cross pieces, I glued up a couple of panels and raised them on my Norm-based jig
Guard removed for clarity, ahem..........
View of the other side of the jig, with finely crafted handles....
I used draw-bored mortise and tenons for the lower joints and wedged tenons for the upper joints, using walnut for the dowels and wedges for a nice contrast.
One end frame all assembled, complete with floating panel
And with its twin.
Next was to fit the four stretchers (again with wedged M & T joints) and finish off the joints with the 5.5
Now for the top: two sections (with the tool tray in between) each made up of 5 pieces of beech, 2" wide and 2.75" deep.
Having cut and jointed each piece, next job was to rout the square dog holes using a jig
Note the use of scrap sign-writing pieces for the jig!
One strip complete with dog holes.
Glued the strips into two slabs, aligning as carefully as possible with strategically placed biscuits to minimise final flattening. Then ran each slab through the P/T to a shade over 2.5". Bloody hell, they're getting heavy now!
Now the fun starts! Cutting the half-blind dovetails to fit each end cap to the front apron.
The end caps have a groove routed in them to fit (with a small allowance for seasonal movement) onto a tongue on each end of the slabs to form a breadboard end. The caps are attached to the slabs with bed bolts and a little glue at one end of each cap.
Forgot to take pics of the next couple of stages, so jump to an upside down view of the assembled top, having fitted the end vice (a Veritas twin screw that I bought about two years ago!). Having read elsewhere of one or two drawbacks for this bit of kit, I decided to fit no-clearance supports for the two screws to eliminate sag at full extension (those who suffer from this affliction will no doubt sympathise........
Another view of the underside, showing the support block for the front vice (a simple quick release one) and the high tech release system for the removable section of the tool tray.
Et voila: all done. Finished with three coats of Danish oil.
Hope you approve, guys: it's my first big project after lots of planters, garden tables, small cupboards, etc and my first go at posting pictures!
All the best,
Paul
")