


Marineboy
Established Member
I’ve been thinking for some time of how to make my own picture frame mouldings, nothing fancy, just rectangular section stock with a rebate cut out for the photo, mount, glass and backing board. Some months ago I took advice from the forum re the feasibility of using a table saw for this and the consensus was that this was unwise. At the time I was tossing up whether to go for a table saw or track saw for more general work, and in particular for making new kitchen cupboard drawers, fronts and door fronts. I went for the track saw and it could not have been a better choice for my needs, accurate and smooth cutting and above all safe.
Anyway, I revisited the picture frame issue and after much thought came up with a jig. The idea was to make standard size mouldings, 36 x 18mm in section, with a 28 x10mm rebate. The dimensions make sense because I wanted to use 18mm MDF for the mouldings, see how they went, then possibly move onto solid wood.
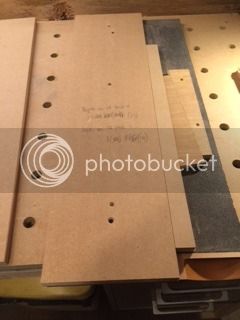
First I used the track saw to cut 36mm wide lengths from the 18mm MDF. I then made the jig from one of my old kitchen door fronts (18mm MFC) and some more 18mm MDF. The door front forms the base of the jig with a piece of MDF screwed to it as the guide for cutting the rebate in the 36mm wide face of the moulding. The wedge holds the workpiece firmly against the guide.
The track then sits on the guide and overlaps onto the workpiece, I set the exact cutting line with two pieces of scrap 12mm ply which I joined to provide the distance of 8mm (plus kerf) from the edge of the track.
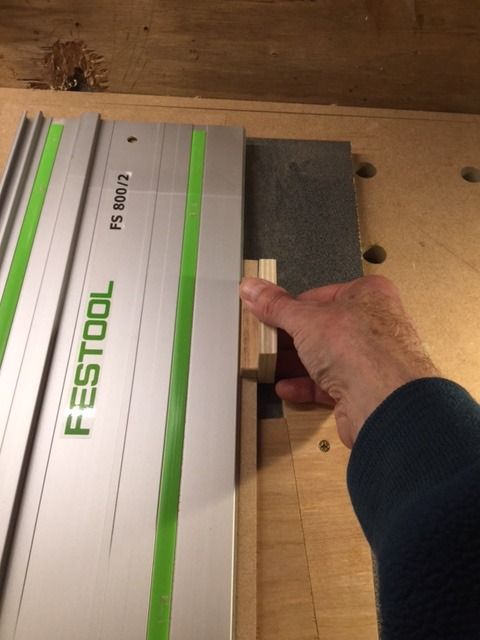
That’s the first cut made at a depth of 8mm. The next step is the cut in the 36mm wide face of the moulding. I made another piece of MDF to sit exactly on top of the bottom guide, located with 2 dowels so it goes on and off easily.
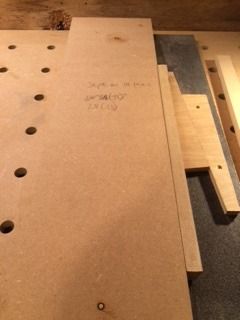
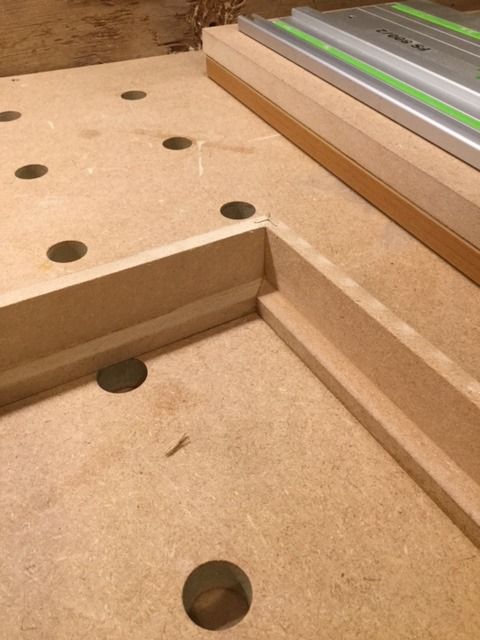
Now the guide is 36mm high, so corresponds exactly with the height of the workpiece. This is wedged in place, cut line of 8mm from the edge established, then the cut made to a depth of 28mm.
I find this method quick, easy accurate and repeatable. First effort is OK, I may move on to solid wood but TBH the MDF seems strong and of course very stable so won’t warp. It’s not exactly fine woodwork but I am chuffed that I can put the track saw to a use not usually associated with it. This is the final result, mitred with Nobex saw, glued and clamped, then secured at corners with V nails. Still quite rough but should be OK when cut edges of MDF sized with PVA, sanded, and sprayed.
Anyway, I revisited the picture frame issue and after much thought came up with a jig. The idea was to make standard size mouldings, 36 x 18mm in section, with a 28 x10mm rebate. The dimensions make sense because I wanted to use 18mm MDF for the mouldings, see how they went, then possibly move onto solid wood.
First I used the track saw to cut 36mm wide lengths from the 18mm MDF. I then made the jig from one of my old kitchen door fronts (18mm MFC) and some more 18mm MDF. The door front forms the base of the jig with a piece of MDF screwed to it as the guide for cutting the rebate in the 36mm wide face of the moulding. The wedge holds the workpiece firmly against the guide.

The track then sits on the guide and overlaps onto the workpiece, I set the exact cutting line with two pieces of scrap 12mm ply which I joined to provide the distance of 8mm (plus kerf) from the edge of the track.

That’s the first cut made at a depth of 8mm. The next step is the cut in the 36mm wide face of the moulding. I made another piece of MDF to sit exactly on top of the bottom guide, located with 2 dowels so it goes on and off easily.

Now the guide is 36mm high, so corresponds exactly with the height of the workpiece. This is wedged in place, cut line of 8mm from the edge established, then the cut made to a depth of 28mm.
I find this method quick, easy accurate and repeatable. First effort is OK, I may move on to solid wood but TBH the MDF seems strong and of course very stable so won’t warp. It’s not exactly fine woodwork but I am chuffed that I can put the track saw to a use not usually associated with it. This is the final result, mitred with Nobex saw, glued and clamped, then secured at corners with V nails. Still quite rough but should be OK when cut edges of MDF sized with PVA, sanded, and sprayed.
