OPJ
Established Member
While I haven't taken as many WIP photos as I would've done for almost any previous project, I have mostly been documenting this one in video format, as part of an on-going YouTube 'experiment' (I will post here once the first video on this one is up).
I recently bought a job lot of 3x3in pressure-treated softwood, which was advertised locally on a couple of websites:
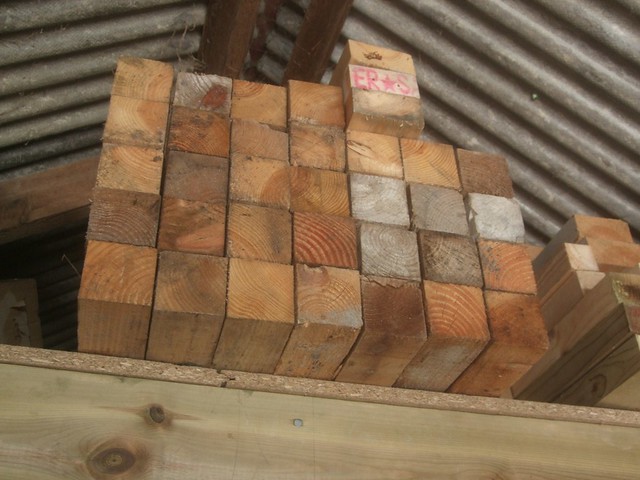
He was offering thirty-two length, each about 4ft long (they appeared to be 2.4m lengths cut in half) for only £40. That in itself seemed like a great deal, considering that I'd expect to pay £3-4 a length for the same stuff brand new. So, you can probably imagine how I felt when he accepted my offer of £30 in cash!
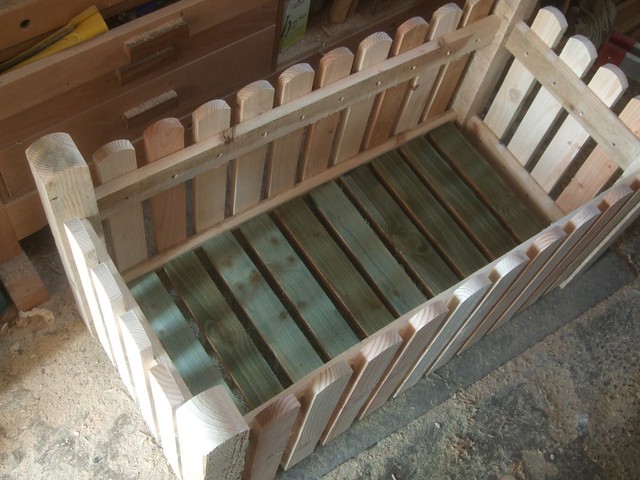
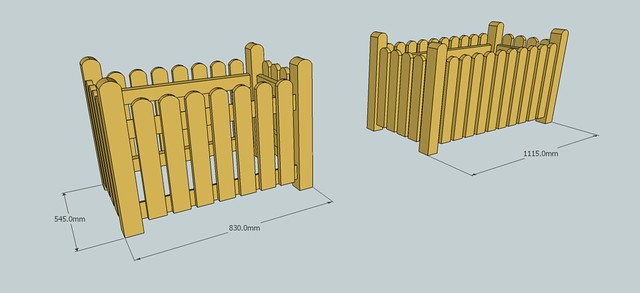
I knew exactly what I wanted to do with this wood as well - to make some garden planters in the style of a round-top picket fence! (Whether I actually get around to planting anything in them, well, I'm not making any promises...! ;-))
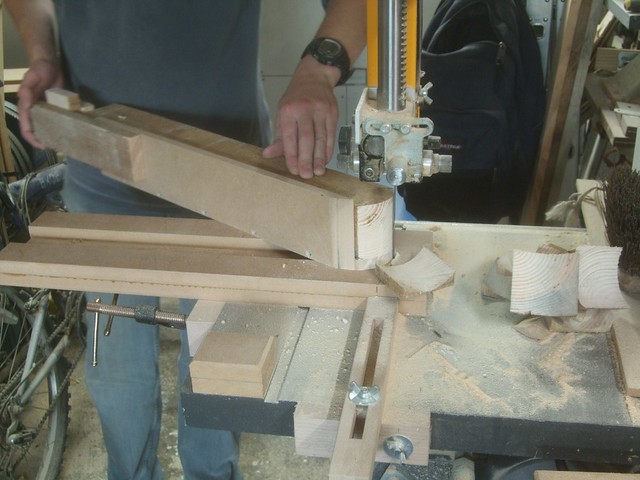
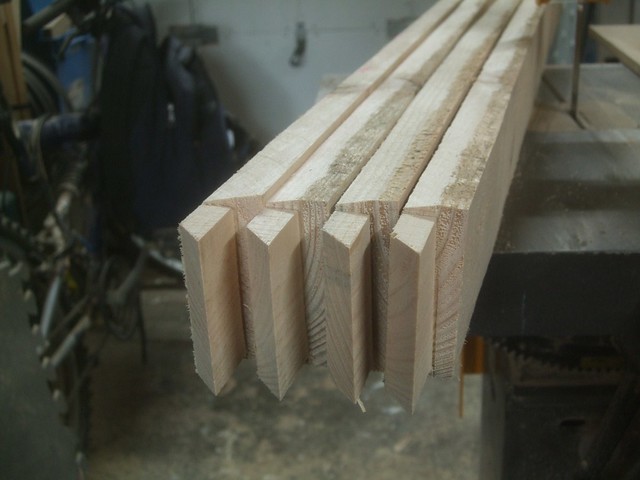
My first job, a fortnight ago, was to resaw much of this stock in to 22mm thicknesses which could be used for the pickets and rails. I ordered another Supertuff Fastcut blade from Ian at Tuff Saws some time ago (probably last year!) and, as this was the first time I'd used it, the blade cut through each length like the proverbial 'hot knife through butter'... When I get around to sorting out the videos, I think it will speak volumes for what this blade can do. ;-)
After leaving the wood for another wood, allowing it some time to 're-acclimatise' to my workshop and do whatever it likes (in this case, not much at all!), I set about making a jig to round-top every picket and post. I started by making a replica of Steve Maskery's circle-cutting jig, which is so simple to make and yet, so effective once set up correctly. One limitation of my bandsaw (Startrite 401e) is that, with such a narrow width of table to the right of the blade, I'd be restricted to cutting circles with a maximum radius of about 220mm... Not that I'd expect to do that sort of work very often.
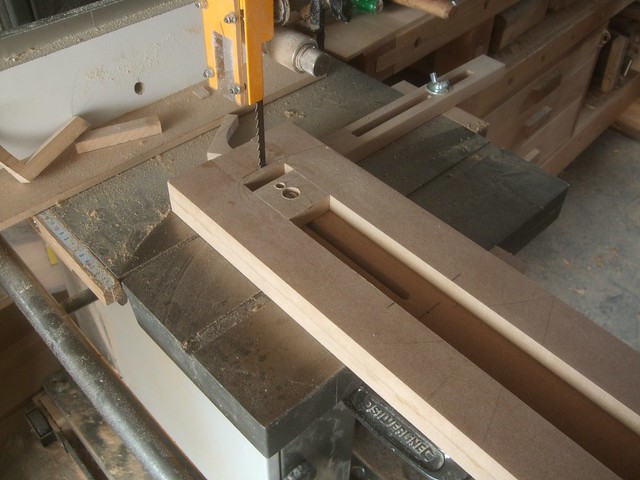
On this occasion though and, after a few test cuts, I was looking for a radius of about 1½in (I think I settled on 40mm), which was just about achievable with a 3/8in wide blade (another Tuff Saws purchase!) after rounding off the back edges. On top of Steve's jig, I added a simple 90° fixture in to which I could fit a stack of pickets or one post and, with a bit of care, round over the top of each with precision.
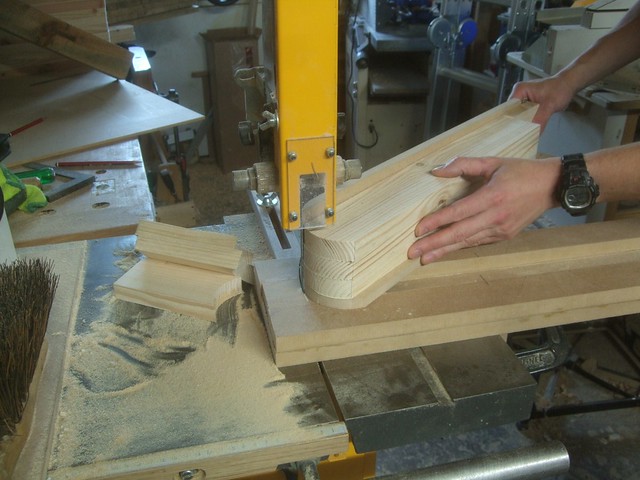
Considering the fact that I was using a blade with 3tpi (Ian's recommendation), the finish was very good. I would've probably gone for 4tpi otherwise but, given the 'wet' nature of this treated wood, that may not have been the best selection, given the thickness of stock I was looking to cut (70mm posts or 3 x 22mm pickets).
My only negative view with regards to Steve's jig is that it potentially makes the dust extraction on your bandsaw less effective. Although, on the other hand, you could argue that more could be done to implement something setup above the table.
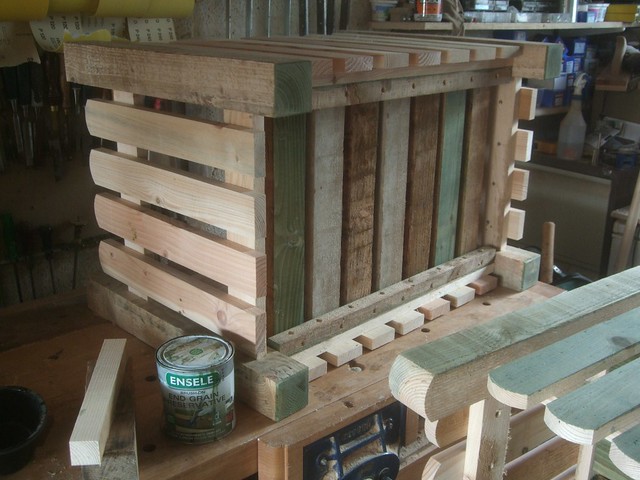
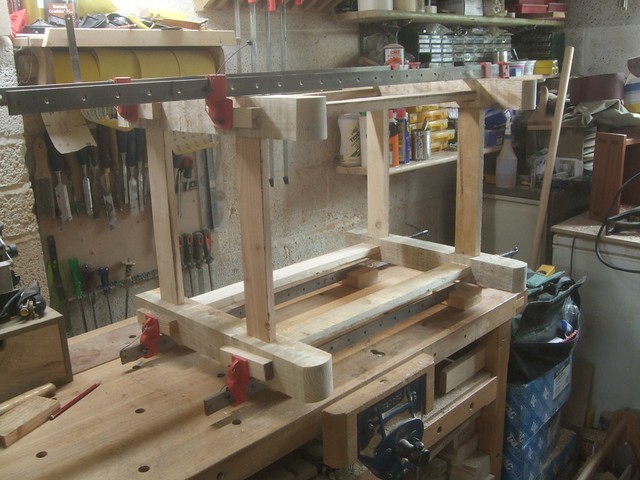
All the bare-faced tenons on the ends of each rail were cut on the bandsaw (aside from the shoulders, which were cut on the mitre saw using the depth stop - and, of course, the mitred ends!). If the angles look a bit strange, it's because I chose to bevel the top edge of each rail by 10° on the table saw, so that rainwater is encouraged to run off and not to sit or creep in behind the pickets, which could otherwise lead to problems with rot later on.
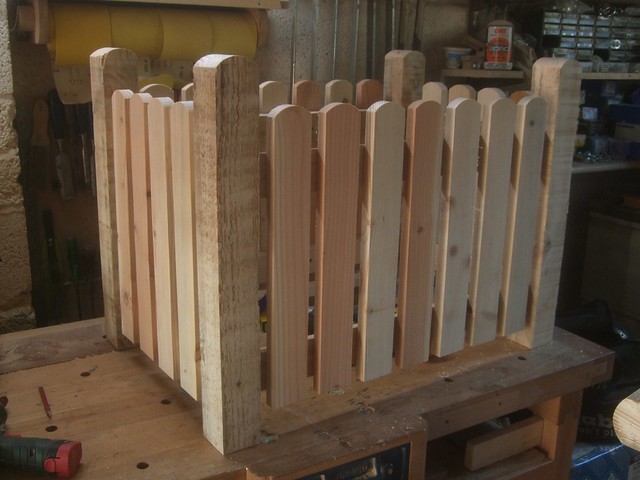
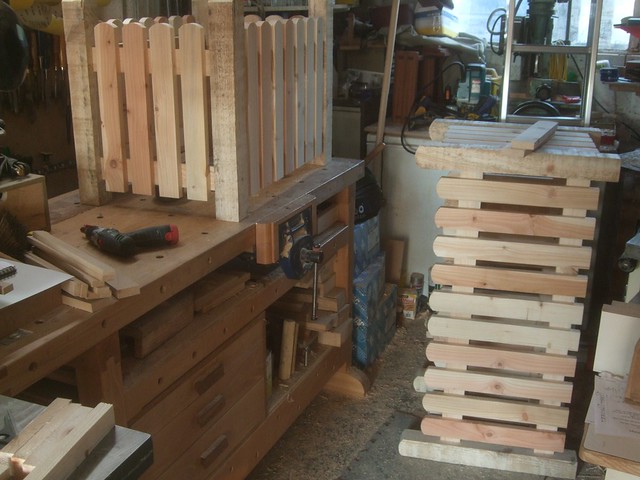
Managed to get all the pickets (only fifty) attached to both planters in about ninety minutes. I know I could've done the job much faster with a decent nail gun (even allowing for time spent messing around with the camera) but, we use what we have available.
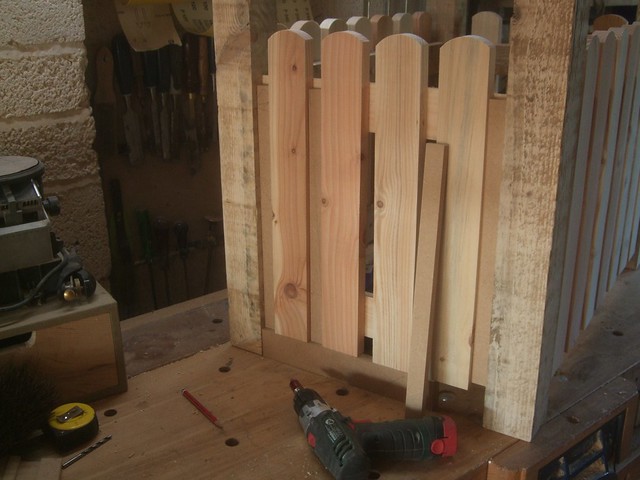
You should be able to see how and where spacers played their part in this - there's one underneath to see the clearance from the floor and a collection of others (each about 1in wide) that sit in between each picket.
Originally, I was thinking of nailing these in place - but, I don't like the appearance of round wire nails and galvanised lost heads are very hard to find. I almost went for these stainless annular ring shanks on eBay (they length would've made things a bit tricky!). Not only were they comparatively expensive against the cost of two boxes of screws but, hammering nails (ring shanks, as well!) in to an 'open' frame structure would've been difficult, to say the very least. Had I sorted this out beforehand, I might have attached the pickets before assembling the frames.
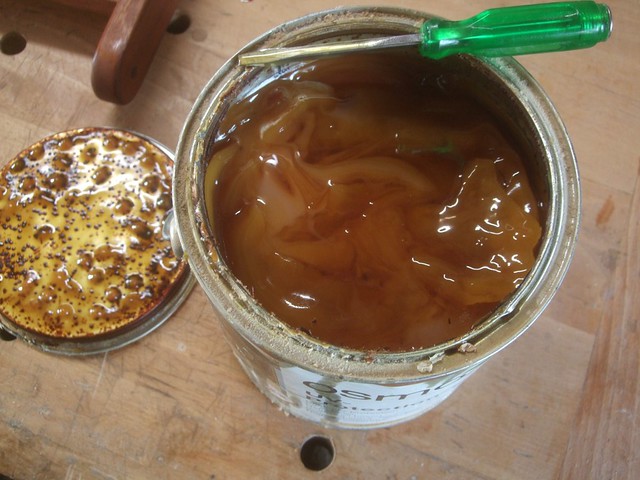
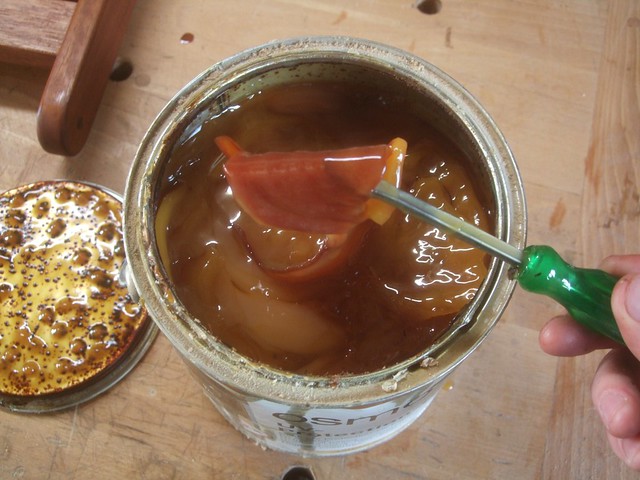
I still haven't made my mind up over how I'm going to finish these planters... I've gone off the idea of painting or staining them a certain colour. Perhaps I should got with a clear finish? Maybe even an oil? I do have a big bucket of Osmo UV hiding somewhere...
Any opinions from anyone?
Clearly, I'll need to get these two out of the way (literally!) before I can move on to anything else. One thing I've really enjoyed about this project though... NO SANDING!!! :-D
(...Well, okay. I admit that I lightly went over the posts with my belt sander as they were otherwise in stark contrast against the Supertuff finish on the pickets... ;-))
More to follow shortly, as I come to fit the base boards.
Thanks for reading so far.
I recently bought a job lot of 3x3in pressure-treated softwood, which was advertised locally on a couple of websites:
He was offering thirty-two length, each about 4ft long (they appeared to be 2.4m lengths cut in half) for only £40. That in itself seemed like a great deal, considering that I'd expect to pay £3-4 a length for the same stuff brand new. So, you can probably imagine how I felt when he accepted my offer of £30 in cash!
I knew exactly what I wanted to do with this wood as well - to make some garden planters in the style of a round-top picket fence! (Whether I actually get around to planting anything in them, well, I'm not making any promises...! ;-))
My first job, a fortnight ago, was to resaw much of this stock in to 22mm thicknesses which could be used for the pickets and rails. I ordered another Supertuff Fastcut blade from Ian at Tuff Saws some time ago (probably last year!) and, as this was the first time I'd used it, the blade cut through each length like the proverbial 'hot knife through butter'... When I get around to sorting out the videos, I think it will speak volumes for what this blade can do. ;-)
After leaving the wood for another wood, allowing it some time to 're-acclimatise' to my workshop and do whatever it likes (in this case, not much at all!), I set about making a jig to round-top every picket and post. I started by making a replica of Steve Maskery's circle-cutting jig, which is so simple to make and yet, so effective once set up correctly. One limitation of my bandsaw (Startrite 401e) is that, with such a narrow width of table to the right of the blade, I'd be restricted to cutting circles with a maximum radius of about 220mm... Not that I'd expect to do that sort of work very often.
On this occasion though and, after a few test cuts, I was looking for a radius of about 1½in (I think I settled on 40mm), which was just about achievable with a 3/8in wide blade (another Tuff Saws purchase!) after rounding off the back edges. On top of Steve's jig, I added a simple 90° fixture in to which I could fit a stack of pickets or one post and, with a bit of care, round over the top of each with precision.
Considering the fact that I was using a blade with 3tpi (Ian's recommendation), the finish was very good. I would've probably gone for 4tpi otherwise but, given the 'wet' nature of this treated wood, that may not have been the best selection, given the thickness of stock I was looking to cut (70mm posts or 3 x 22mm pickets).
My only negative view with regards to Steve's jig is that it potentially makes the dust extraction on your bandsaw less effective. Although, on the other hand, you could argue that more could be done to implement something setup above the table.
All the bare-faced tenons on the ends of each rail were cut on the bandsaw (aside from the shoulders, which were cut on the mitre saw using the depth stop - and, of course, the mitred ends!). If the angles look a bit strange, it's because I chose to bevel the top edge of each rail by 10° on the table saw, so that rainwater is encouraged to run off and not to sit or creep in behind the pickets, which could otherwise lead to problems with rot later on.
Managed to get all the pickets (only fifty) attached to both planters in about ninety minutes. I know I could've done the job much faster with a decent nail gun (even allowing for time spent messing around with the camera) but, we use what we have available.
You should be able to see how and where spacers played their part in this - there's one underneath to see the clearance from the floor and a collection of others (each about 1in wide) that sit in between each picket.
Originally, I was thinking of nailing these in place - but, I don't like the appearance of round wire nails and galvanised lost heads are very hard to find. I almost went for these stainless annular ring shanks on eBay (they length would've made things a bit tricky!). Not only were they comparatively expensive against the cost of two boxes of screws but, hammering nails (ring shanks, as well!) in to an 'open' frame structure would've been difficult, to say the very least. Had I sorted this out beforehand, I might have attached the pickets before assembling the frames.
I still haven't made my mind up over how I'm going to finish these planters... I've gone off the idea of painting or staining them a certain colour. Perhaps I should got with a clear finish? Maybe even an oil? I do have a big bucket of Osmo UV hiding somewhere...
Any opinions from anyone?
Clearly, I'll need to get these two out of the way (literally!) before I can move on to anything else. One thing I've really enjoyed about this project though... NO SANDING!!! :-D
(...Well, okay. I admit that I lightly went over the posts with my belt sander as they were otherwise in stark contrast against the Supertuff finish on the pickets... ;-))
More to follow shortly, as I come to fit the base boards.
Thanks for reading so far.