Large oak dining table.

UKworkshop.co.uk

Help Support UKworkshop.co.uk:

This site may earn a commission from merchant affiliate links, including eBay, Amazon, and others.

Allubo

Established Member
Joined
20 Jan 2013
Messages
52
Reaction score
0
Location
Snarestone
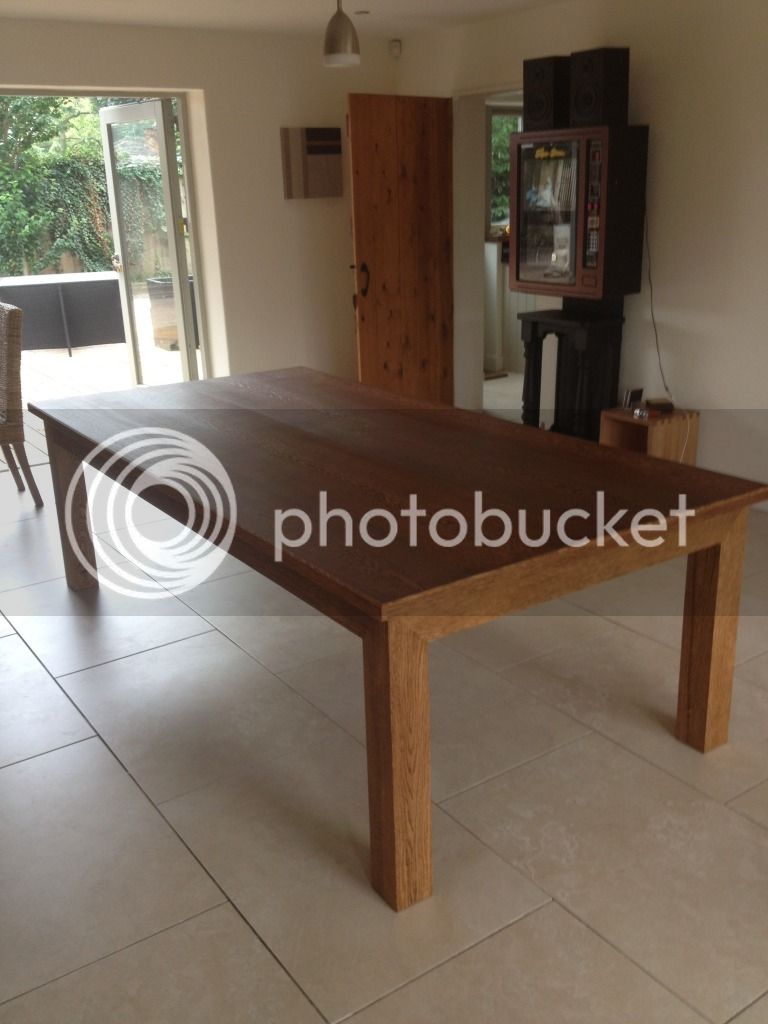
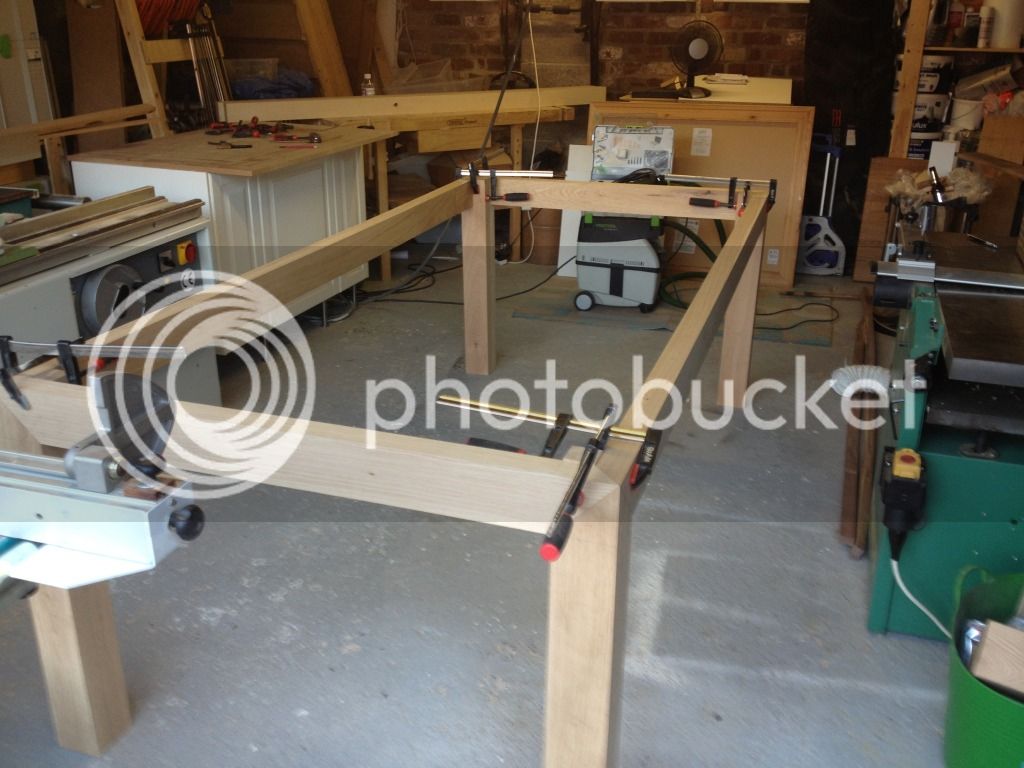
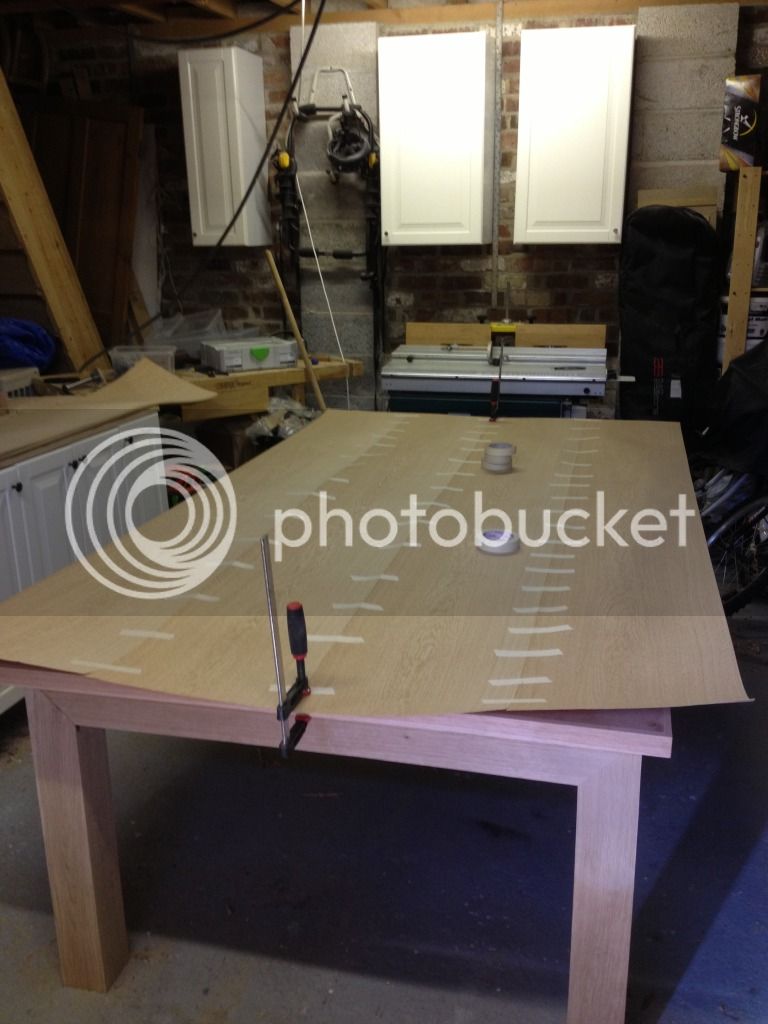
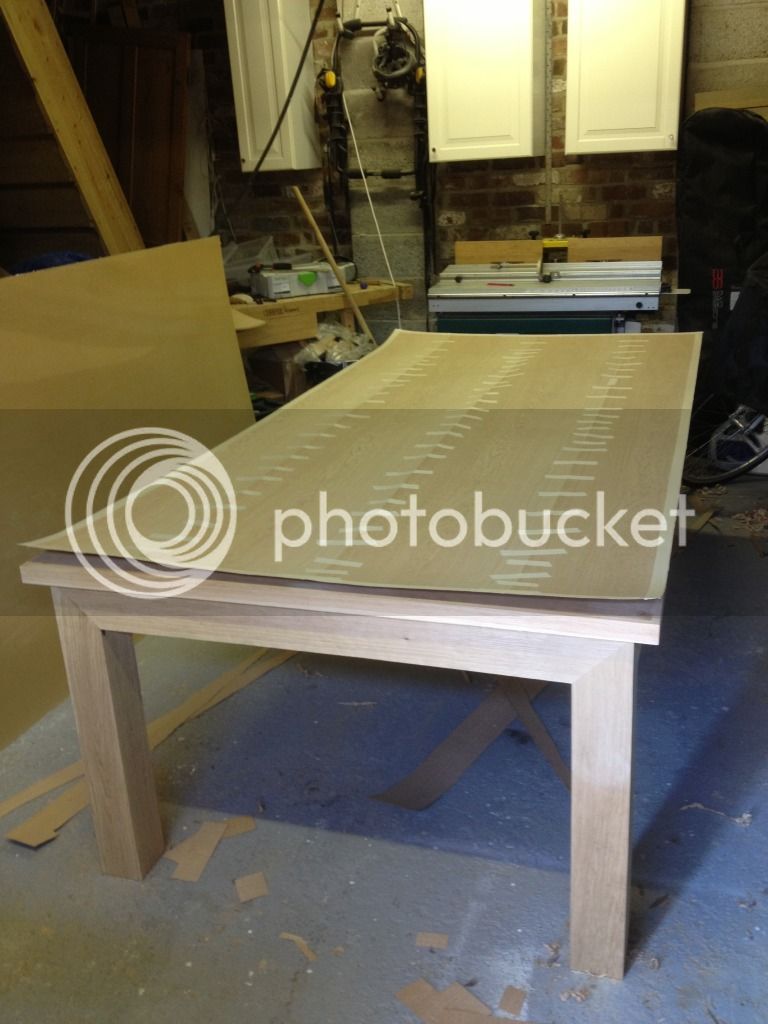
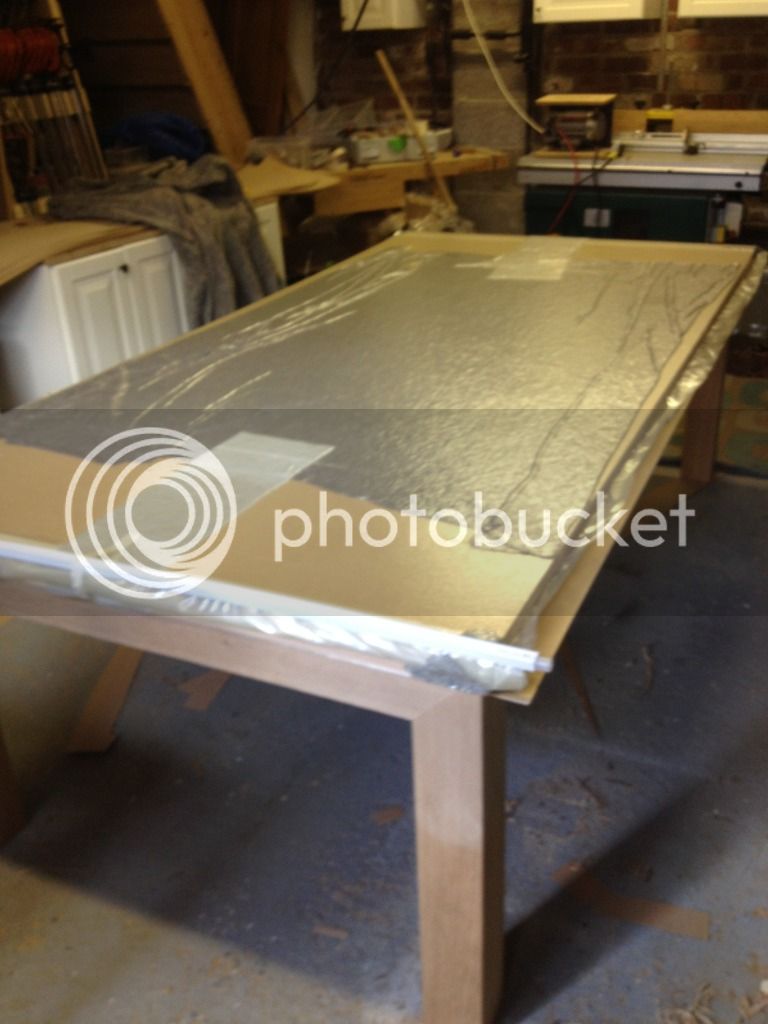
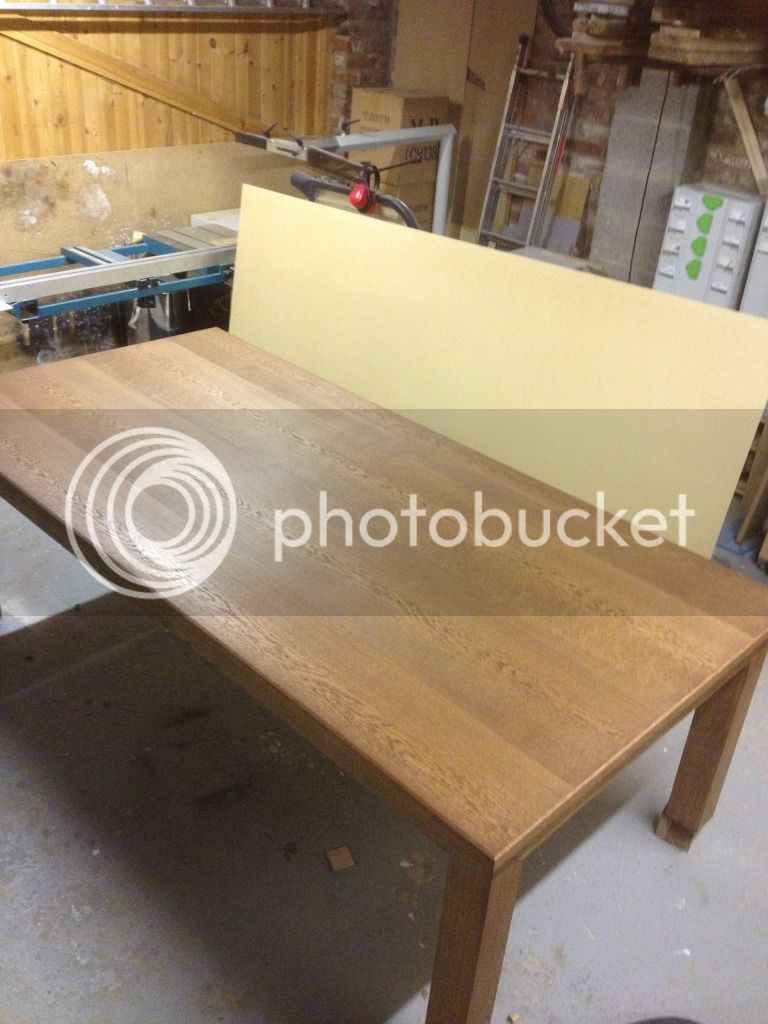
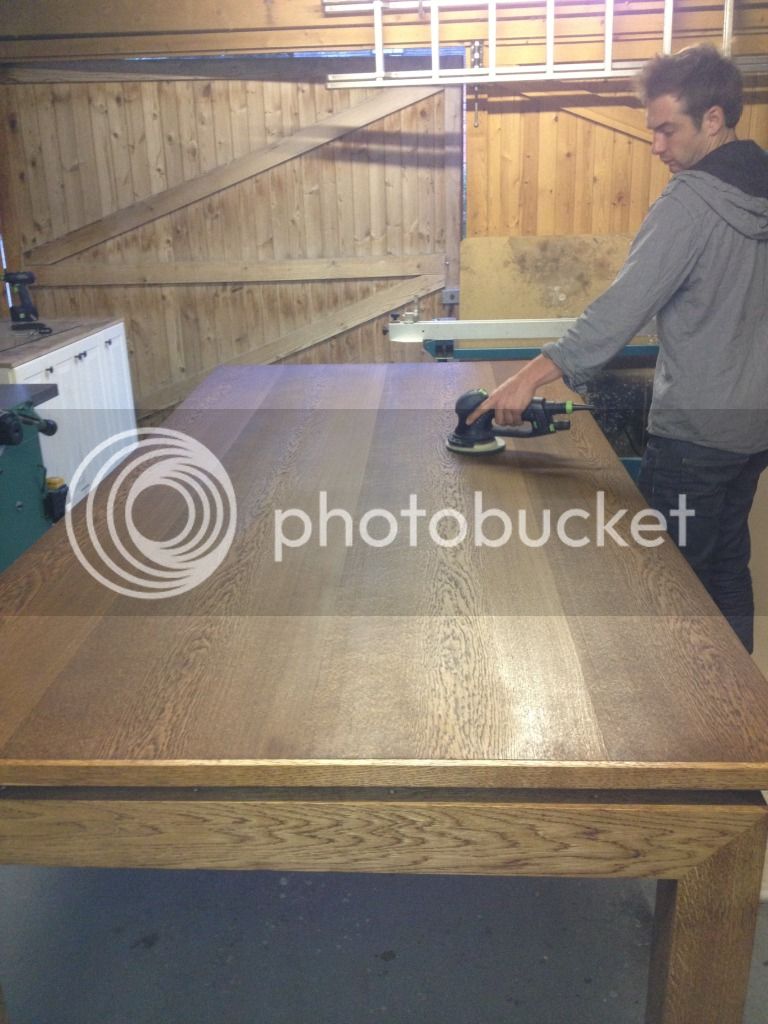
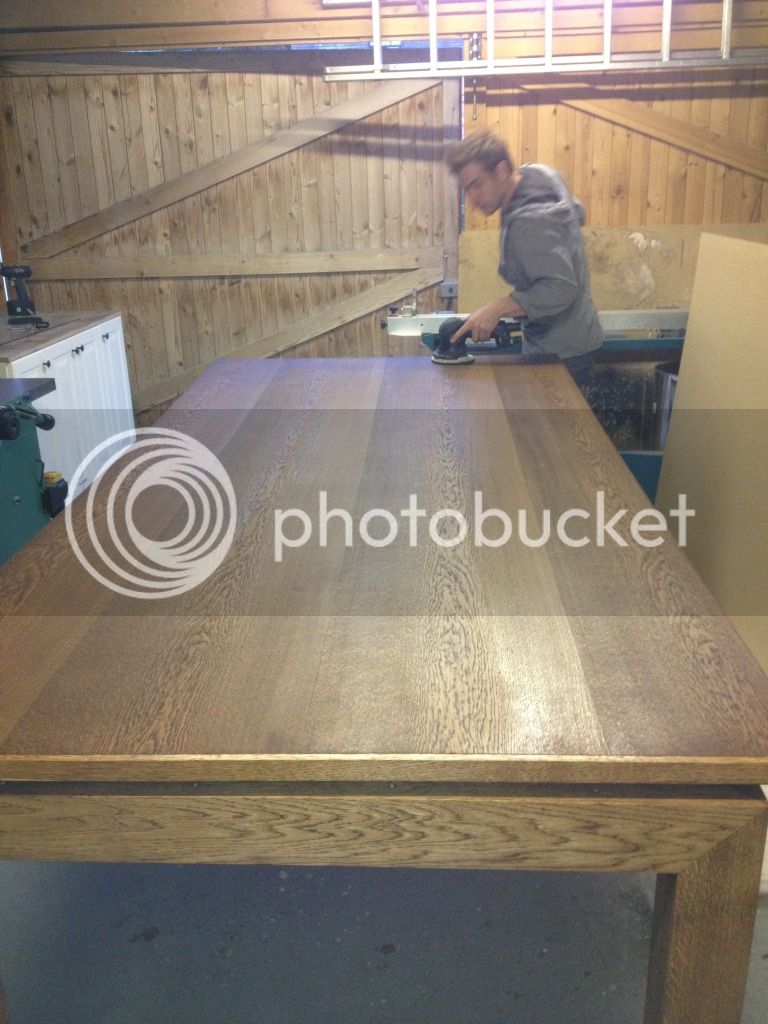
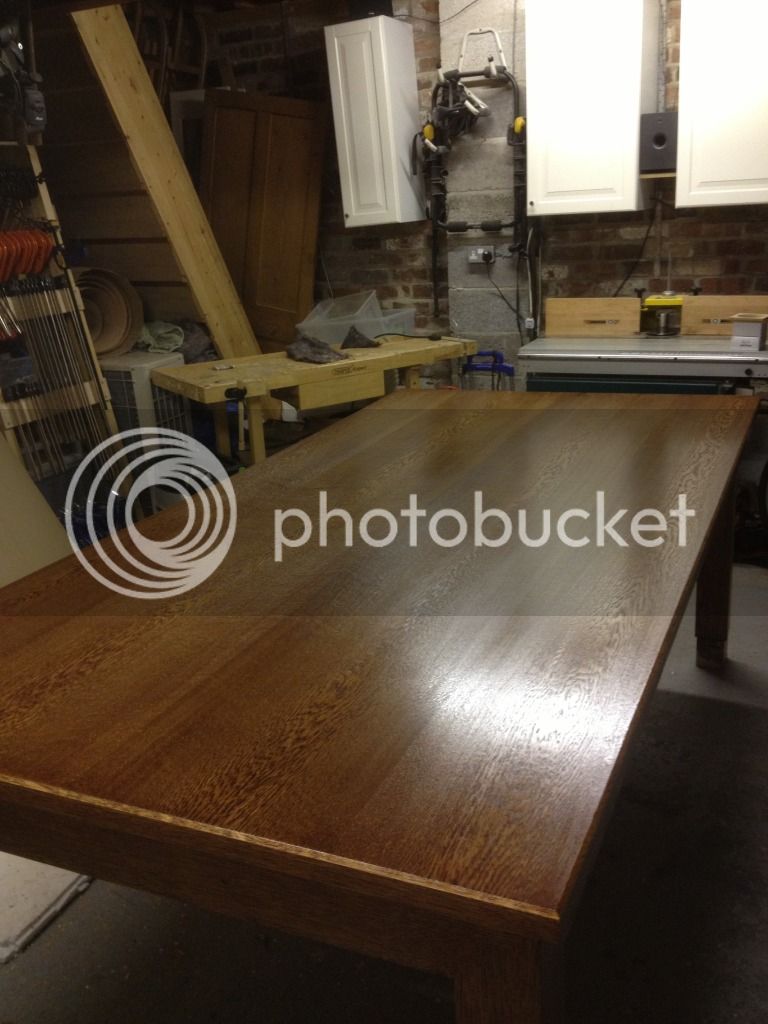
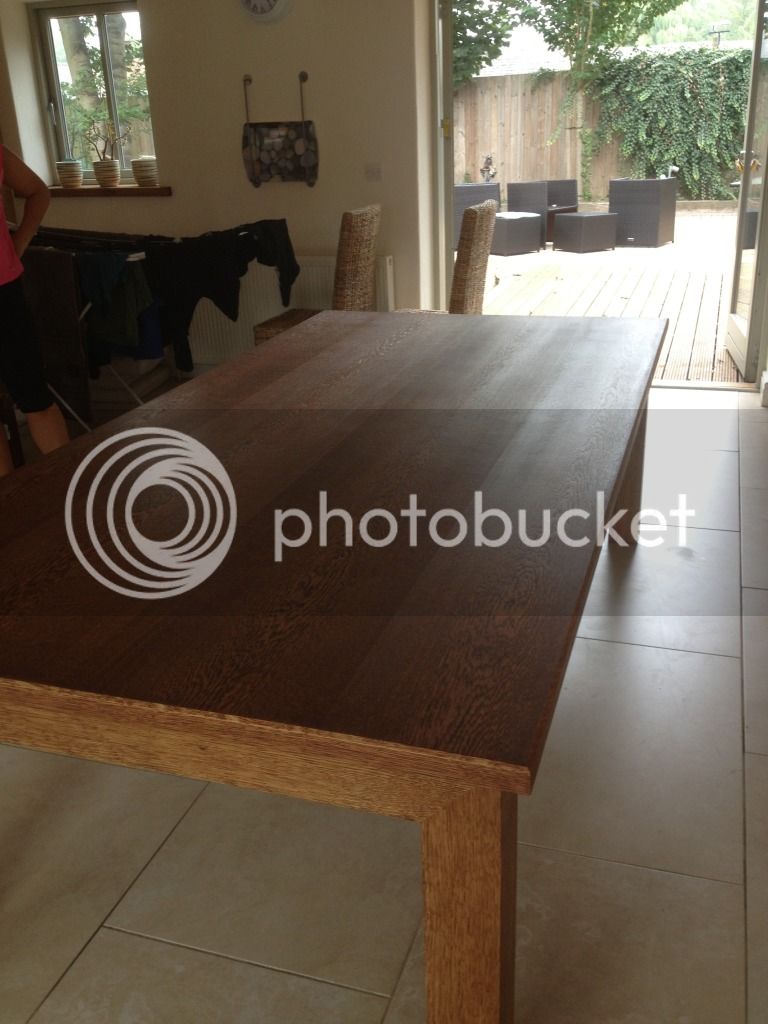
Last week we finished an oak dining table commision, the table was made for a fairly big kitchen to seat a maximum of 12 so settled on the basic 8x4 size. The client wanted something to similar to his original table just bigger.

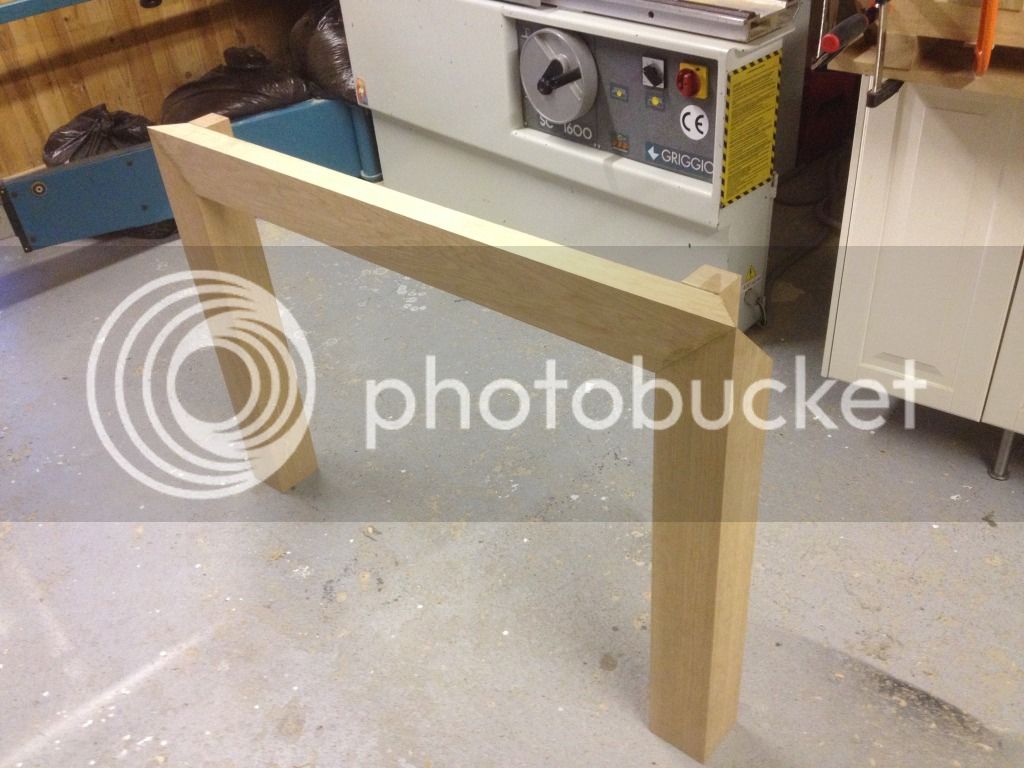
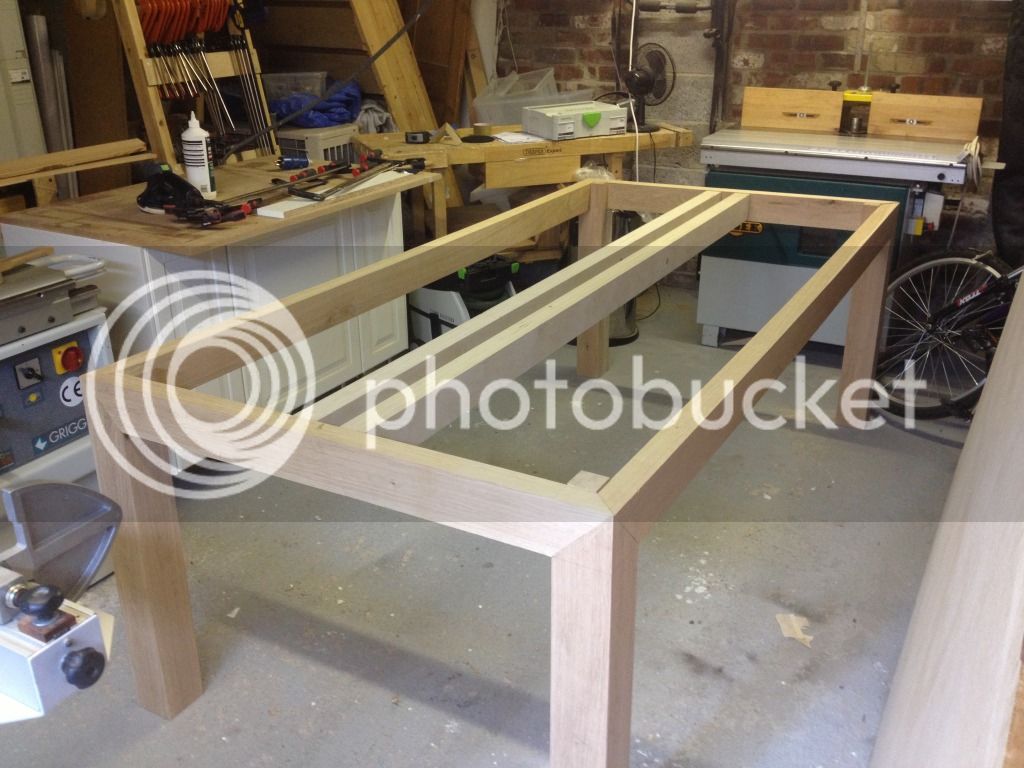
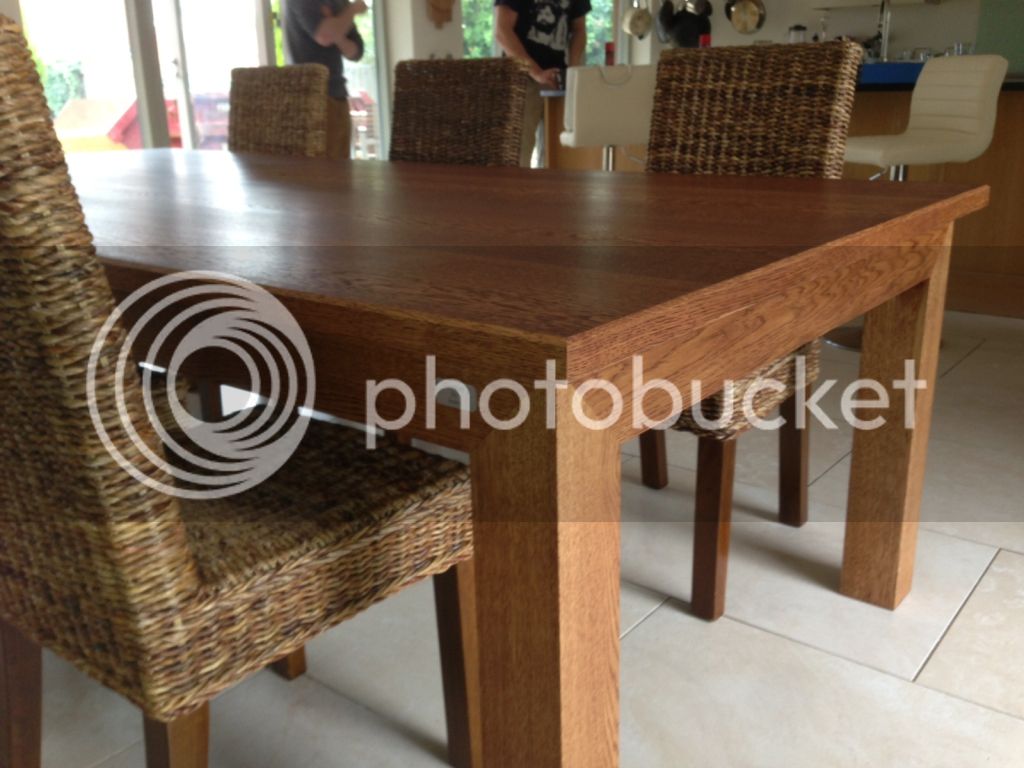
We settled on a 36mm oak veneered top sitting on 100mm square legs with a triple mitred frame.
92EF7B4B-BBAF-457F-8C8C-CAC451E98AB5-2247-0000026A905FE611_zps20bfa4d9.jpg


Here's how it was done.

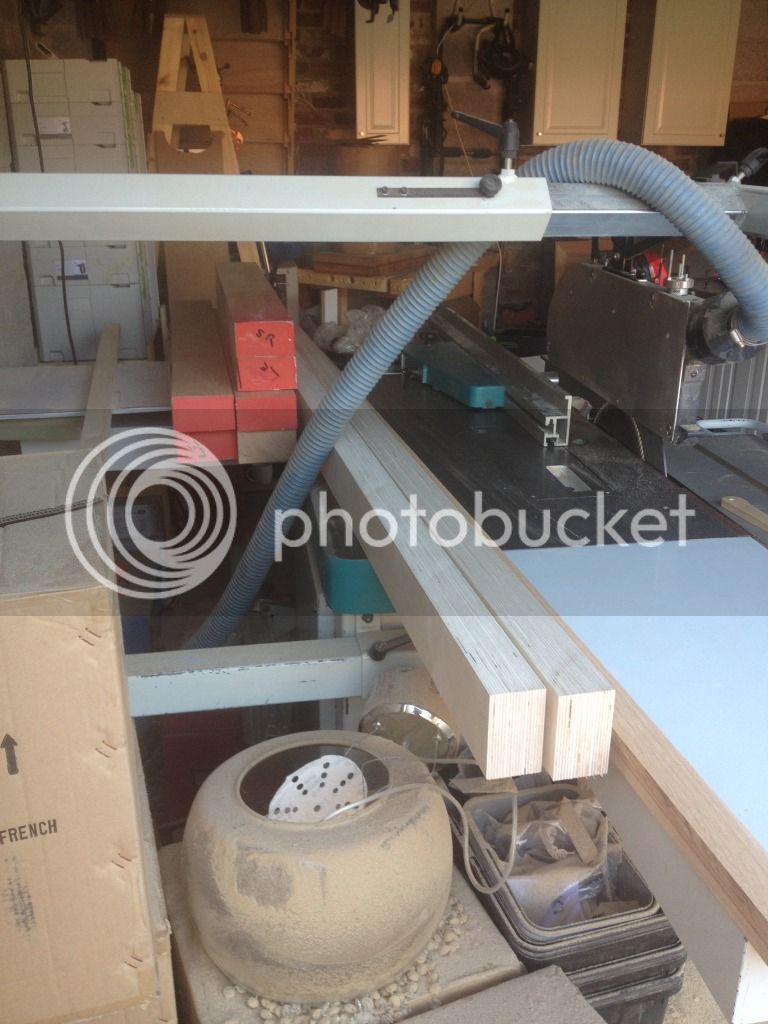
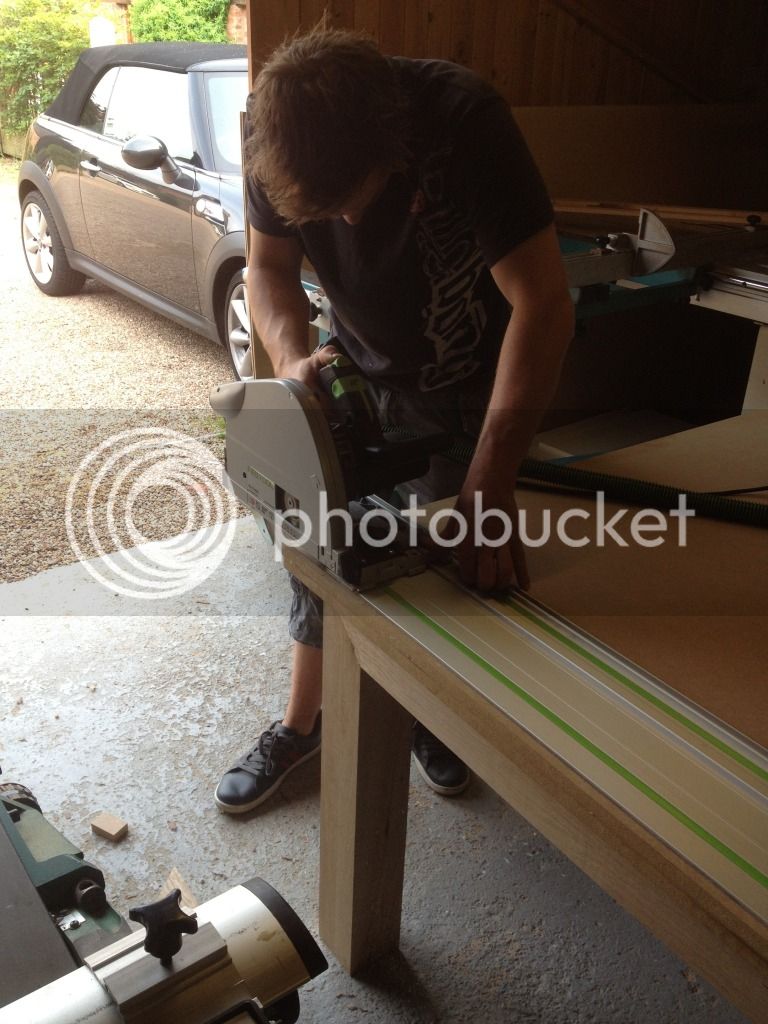
The timber used was 65mm prime square sawn oak. So first things first, labelling and machining.
08BFB745-F600-42EE-BCF2-44CD1E8B8425-2247-000002683A4AC72C_zpsc589e924.jpg


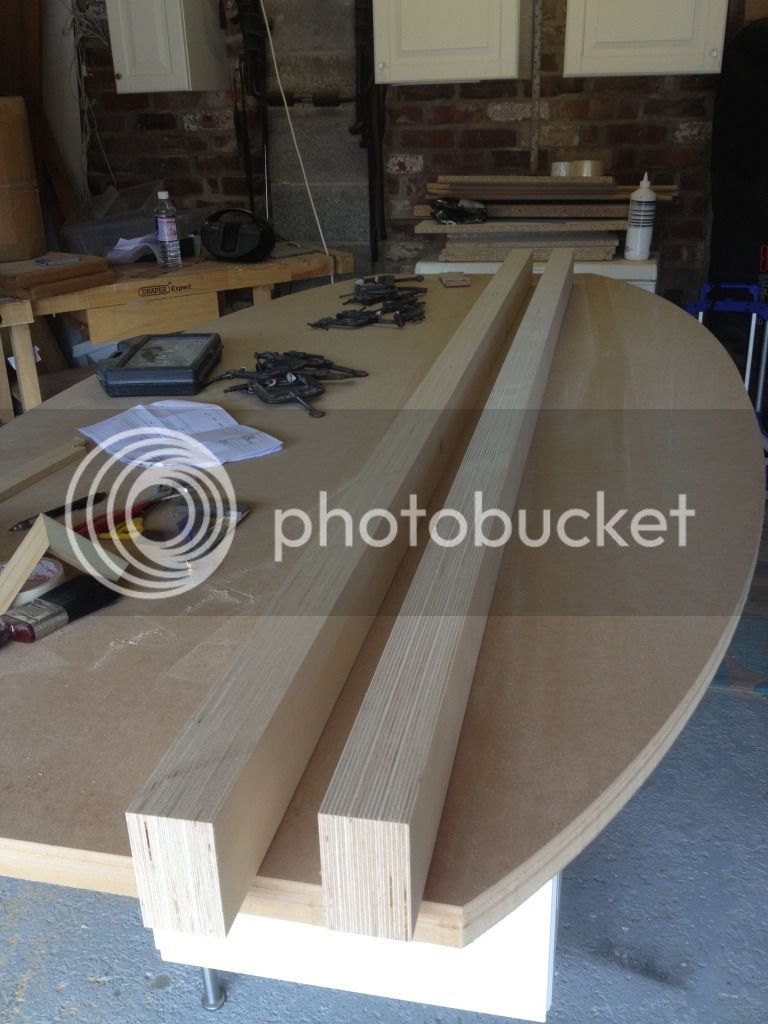
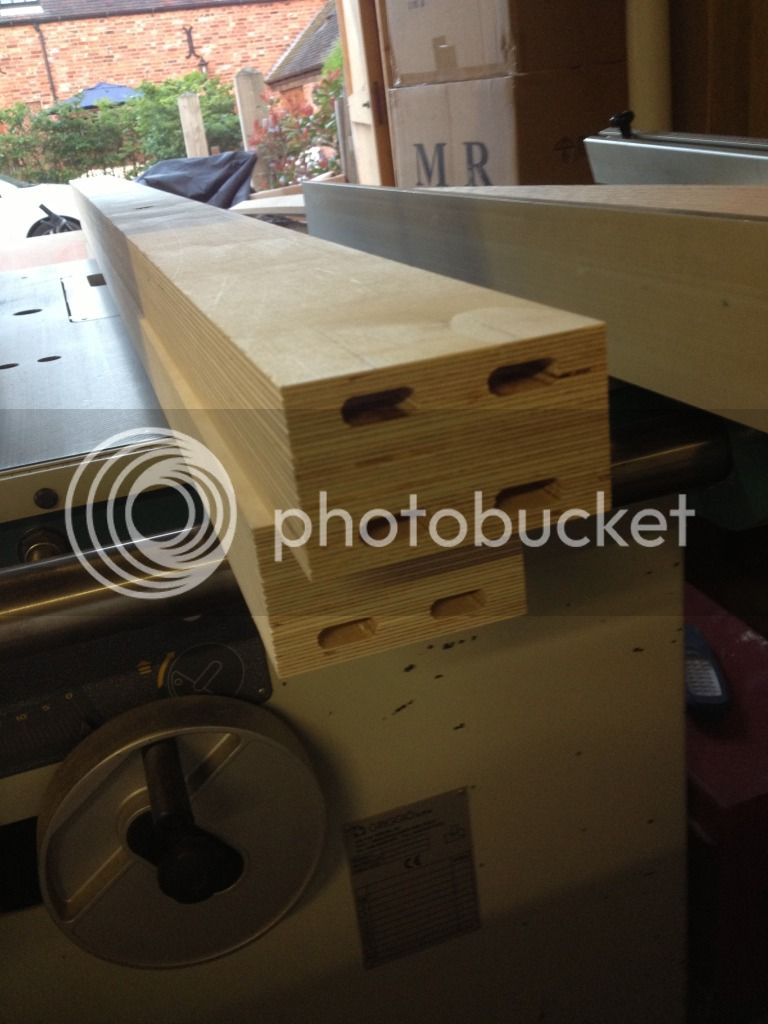
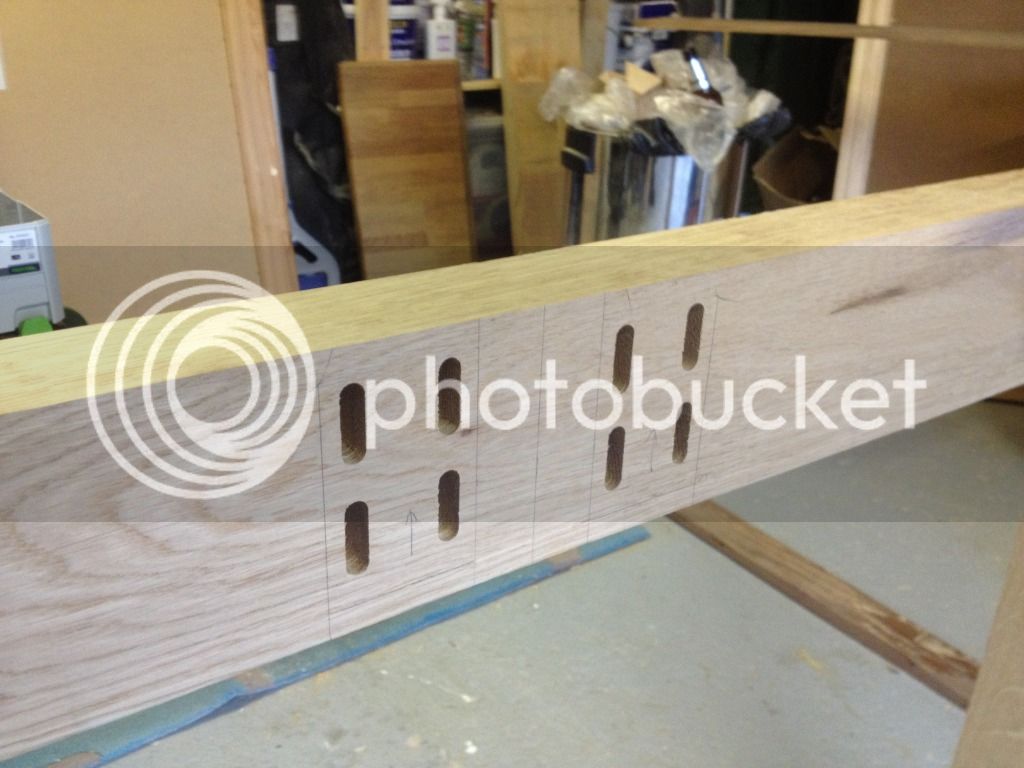
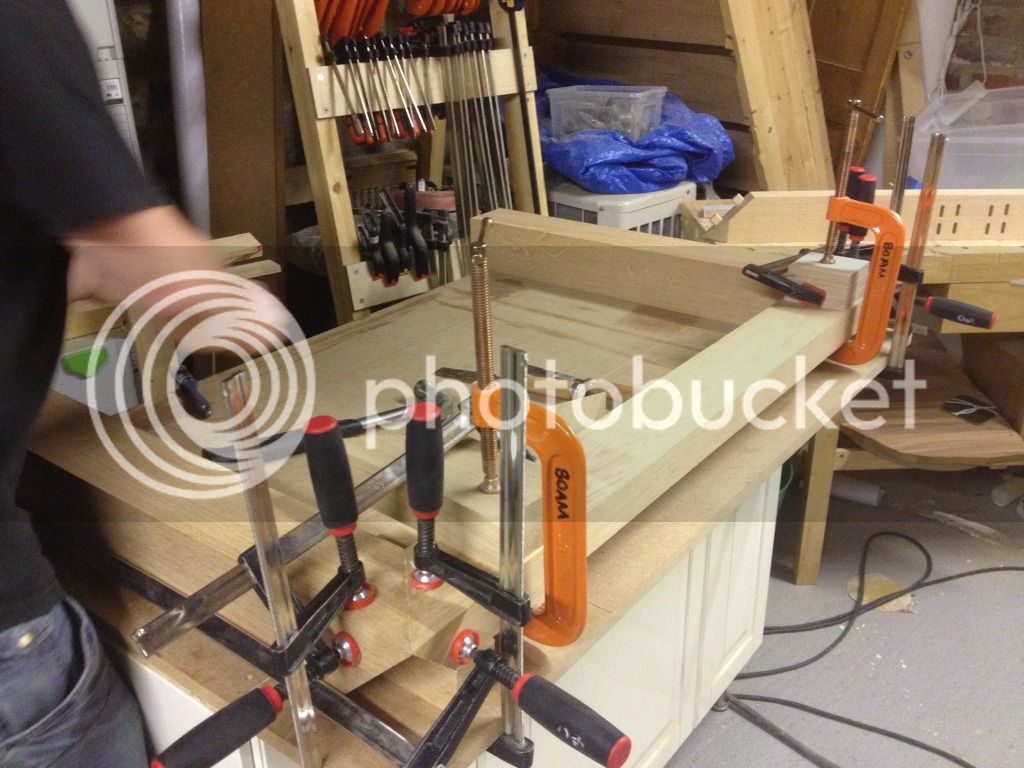
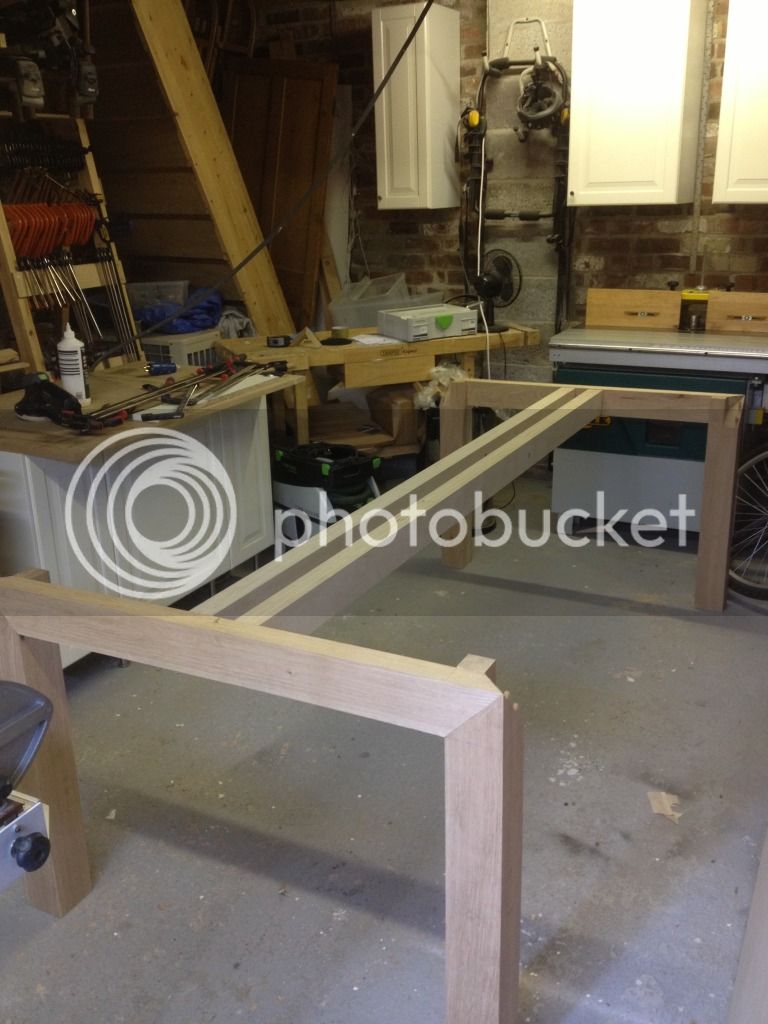
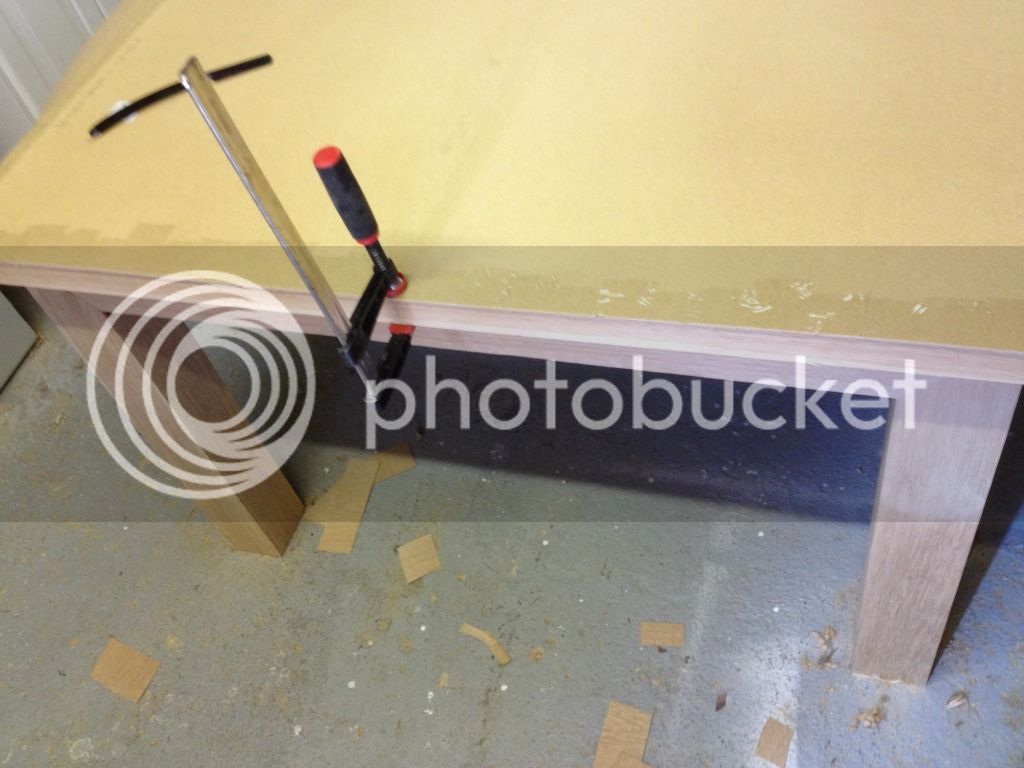
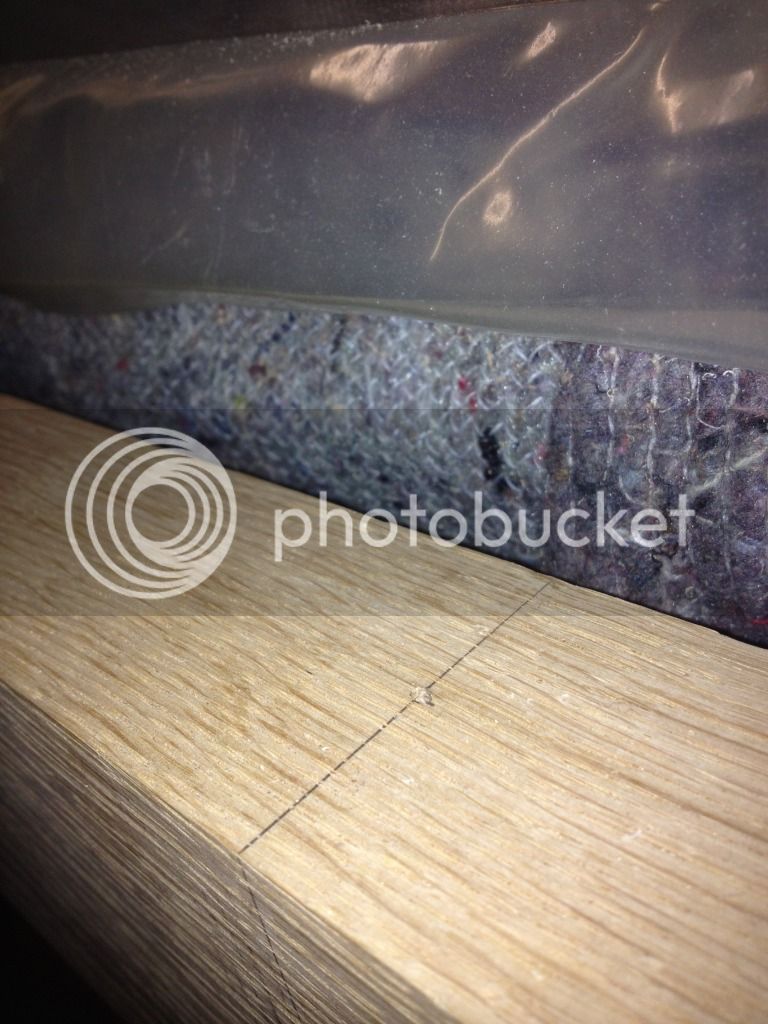
There are two 54mm thick ply runners which go down the centre of the frame for support in the centre of the table. These stop the top from sagging in the middle and give reassurance should the client need to stand on it.
EF2C8A6D-4DCF-40C8-88F1-0A8409096A44-2247-0000026831E0C7A0_zps84429a28.jpg


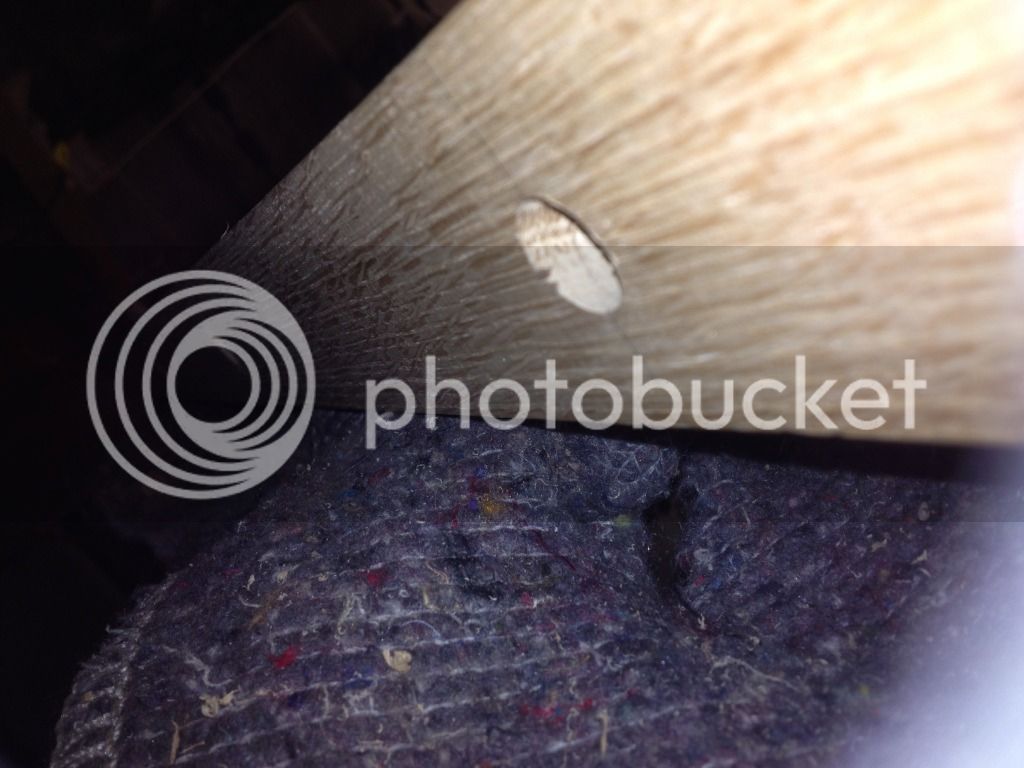
Because I used 65mm stock I planed the leg components down to 54mm and glued together to make 108mm square pieces, because I would machine this again after, I didn't use clamping blocks.
AE4B00AF-25DE-4DBF-96AC-04CC66F80F4E-2247-000002684103FE4C_zpsdd96196b.jpg

FB66E70F-D2D5-4B5E-82B7-92BF2795674E-2247-00000268607E8EE0_zpse6c3bd8c.jpg


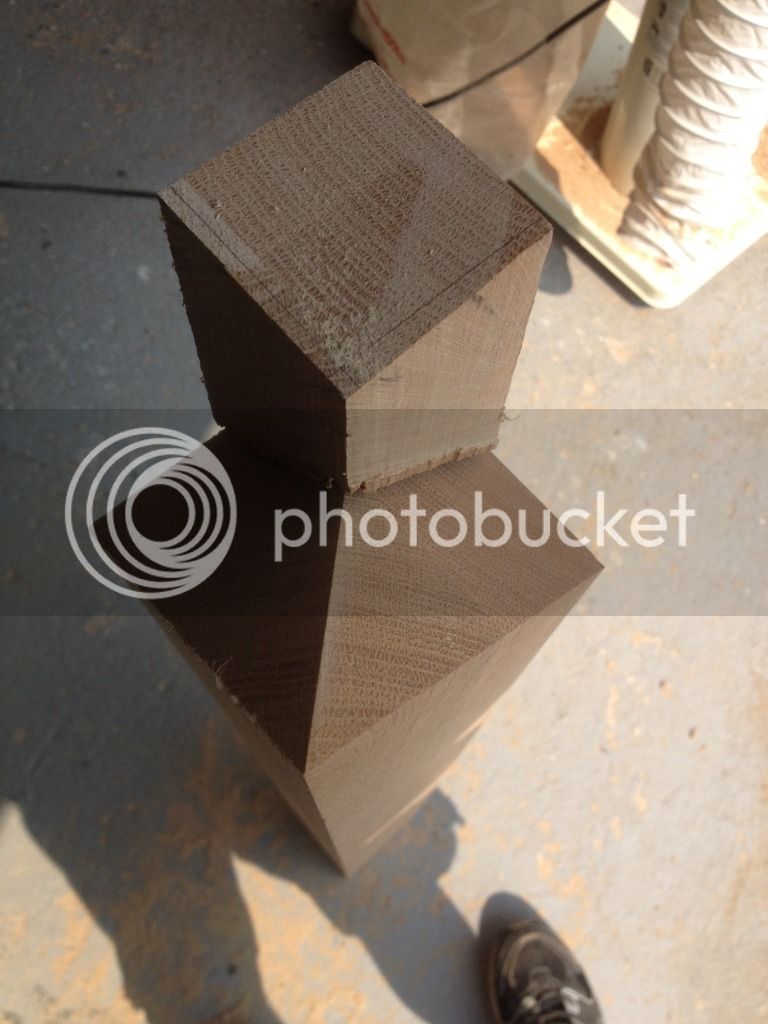
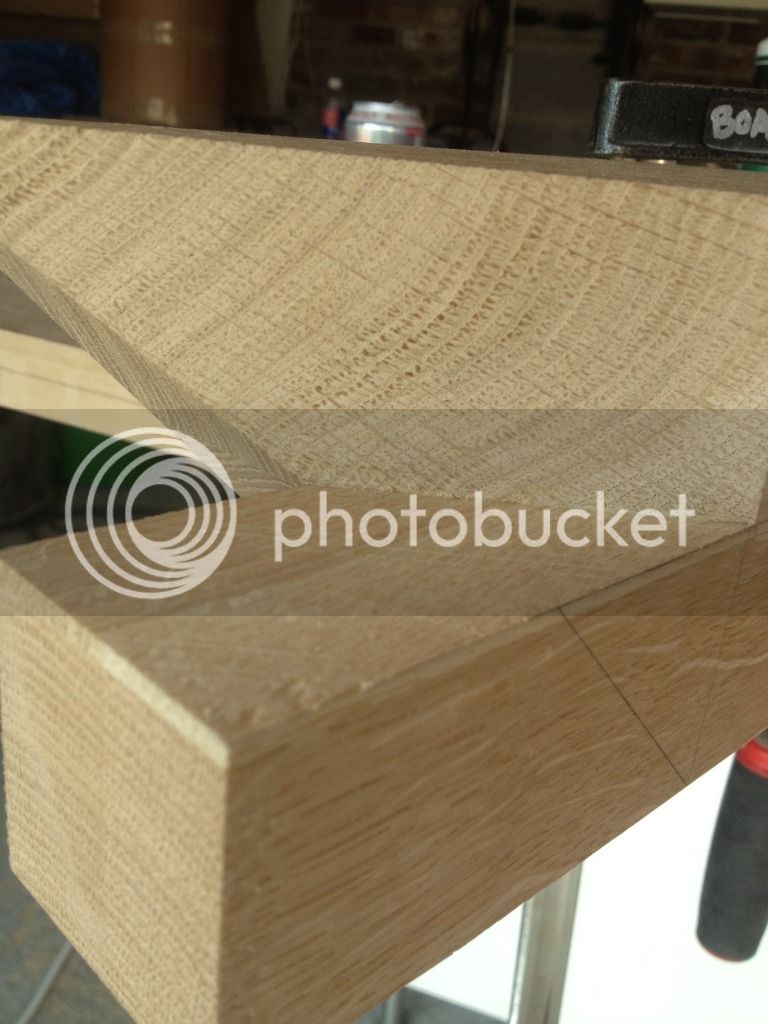
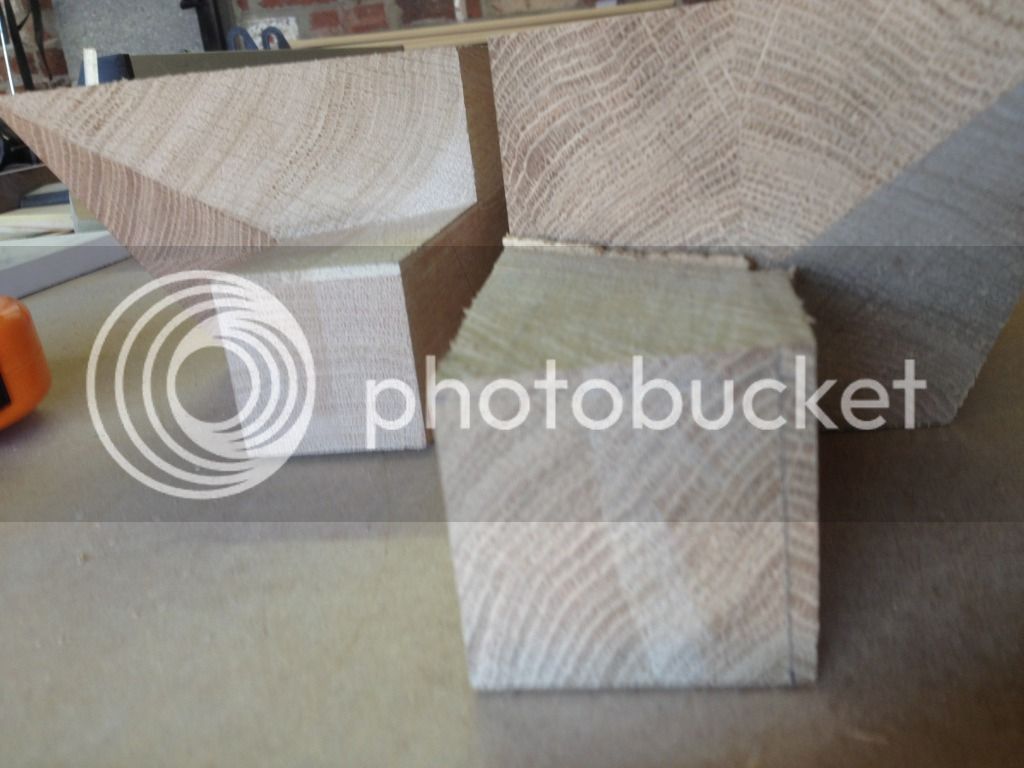
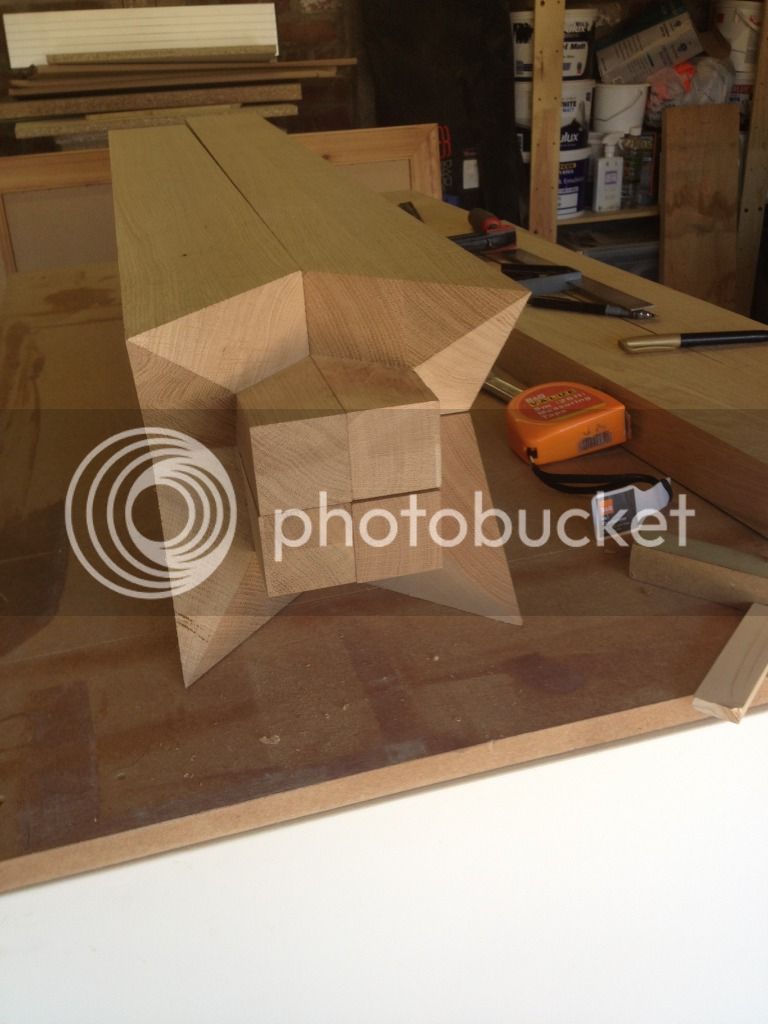
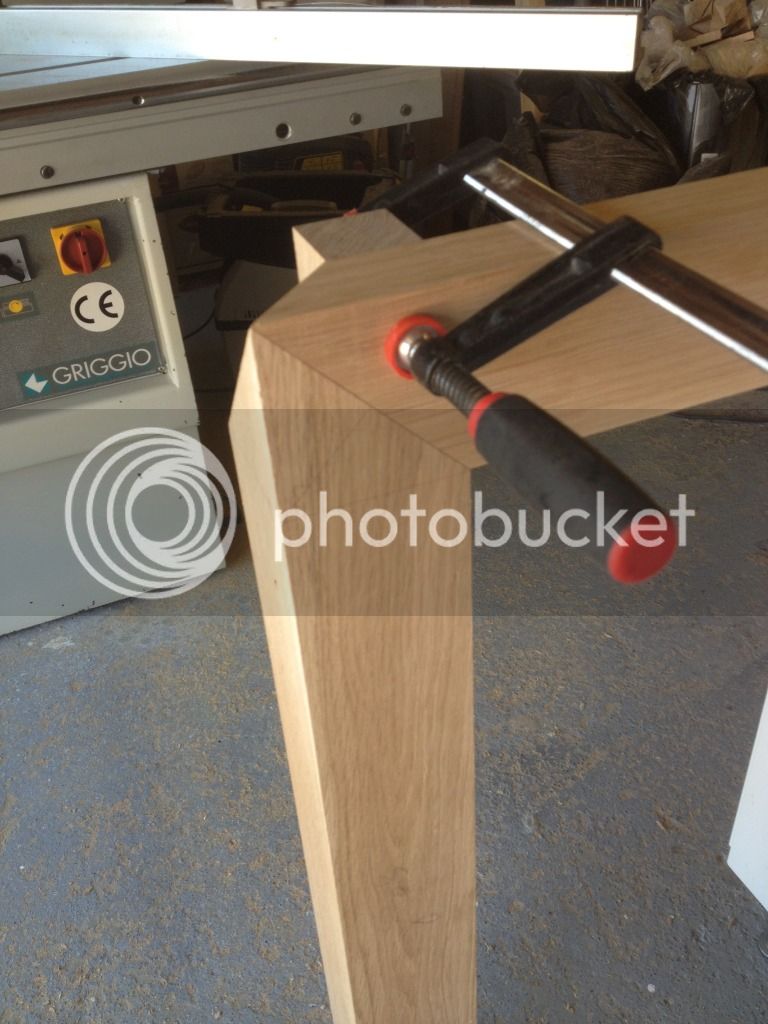
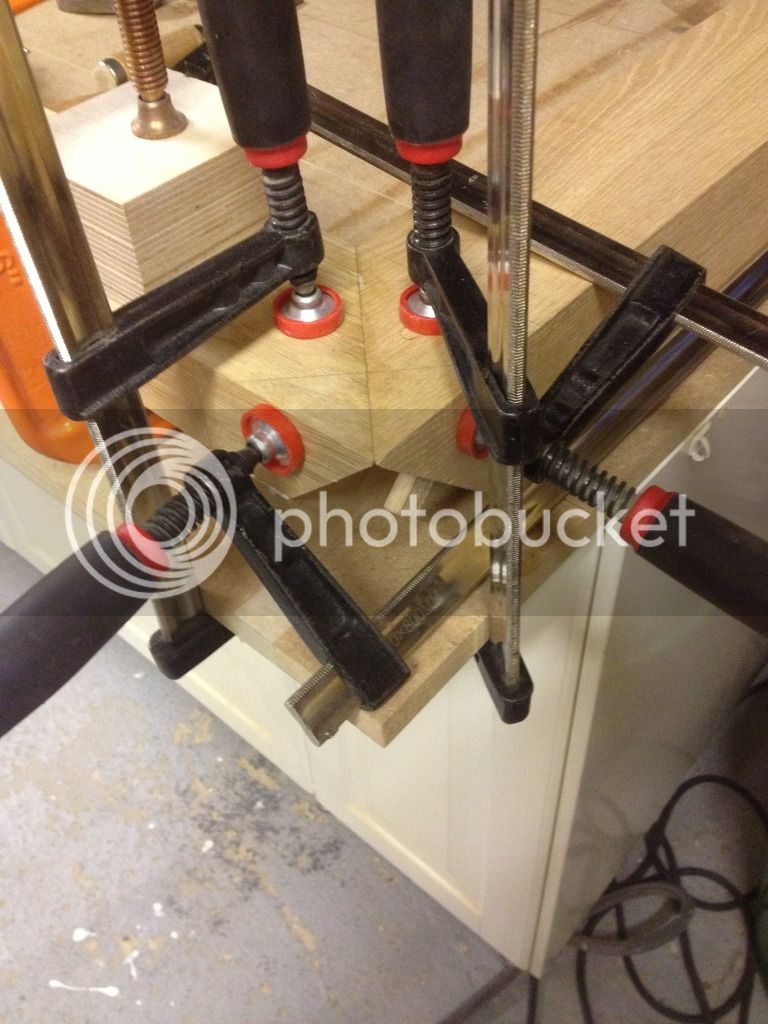
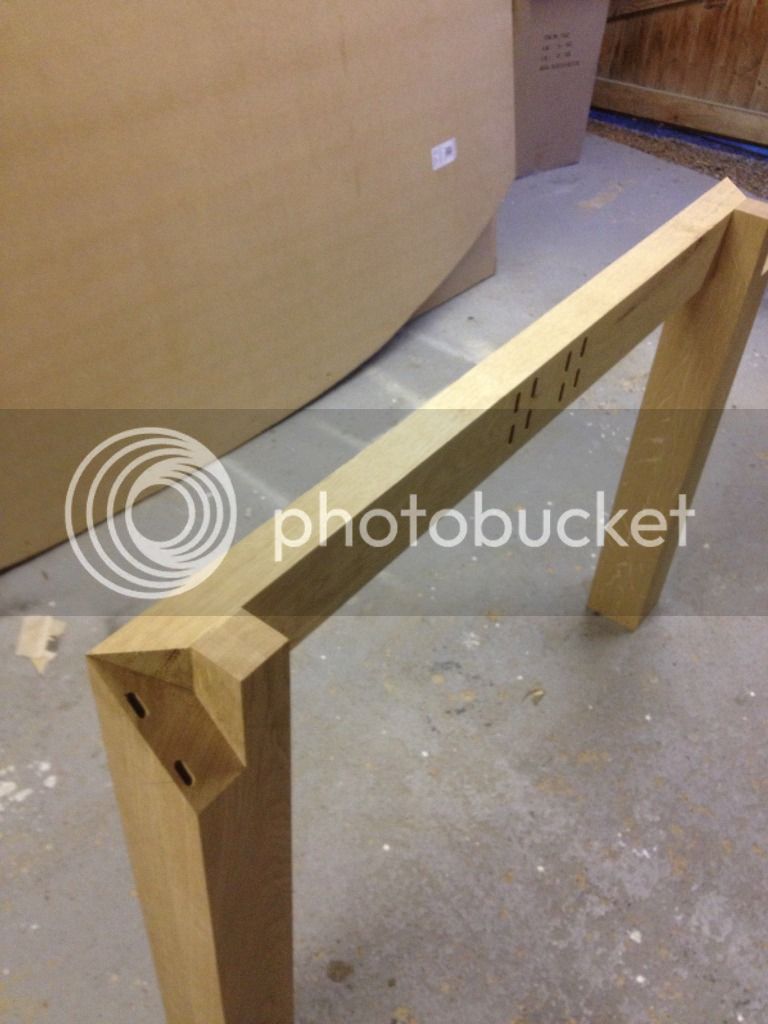
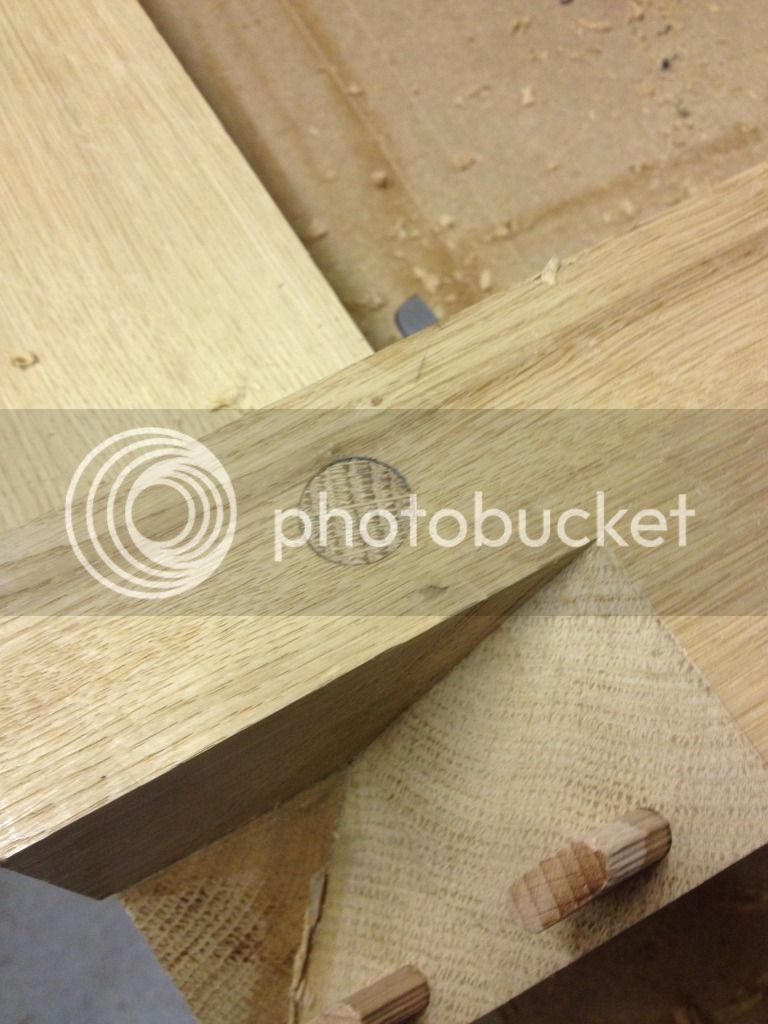
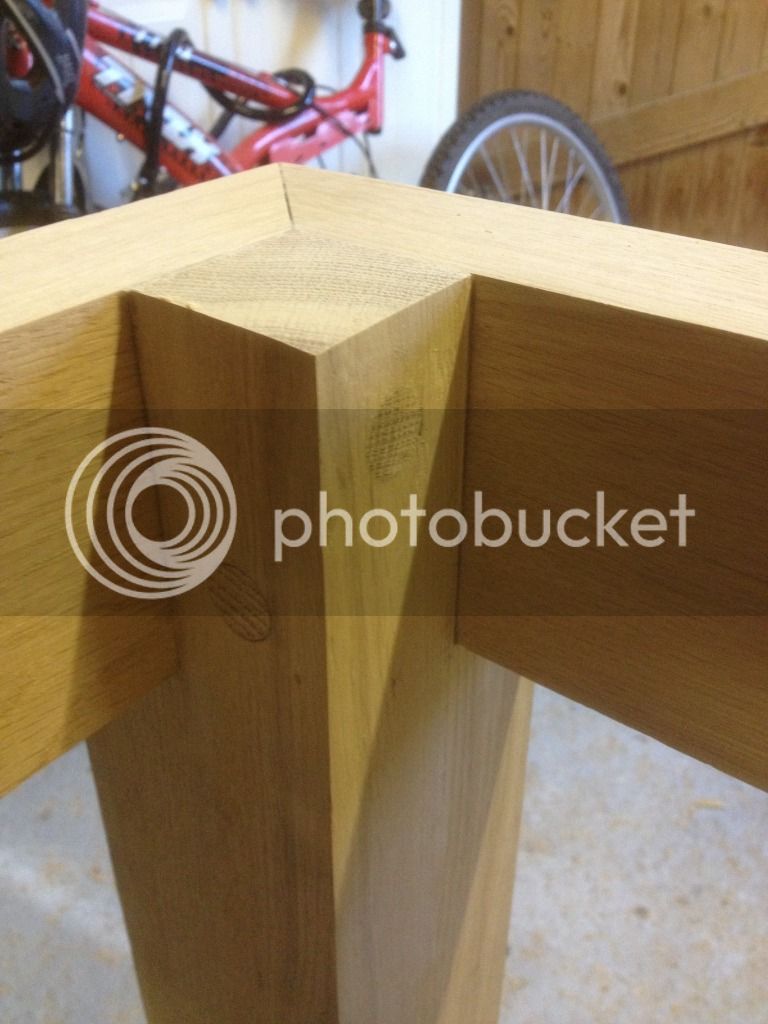
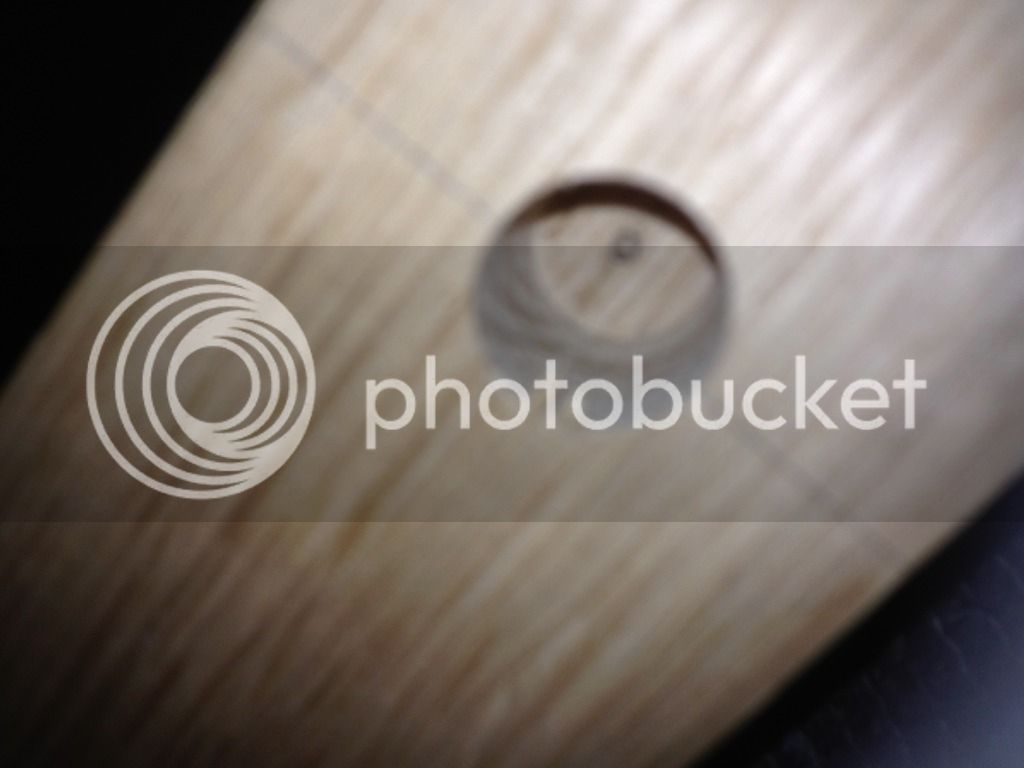
The legs were the centre piece of a triple mitre, we made a scale model of this first to test how well we could do it and were happy so then moved on to the real components. Because the rails were 100x50mm we could allow for the inside of the leg to remain to add to glueing surface.
35069896-A735-4534-ABC9-09E57E4F6BBC-2247-00000268670B15C7_zps2dceb09b.jpg


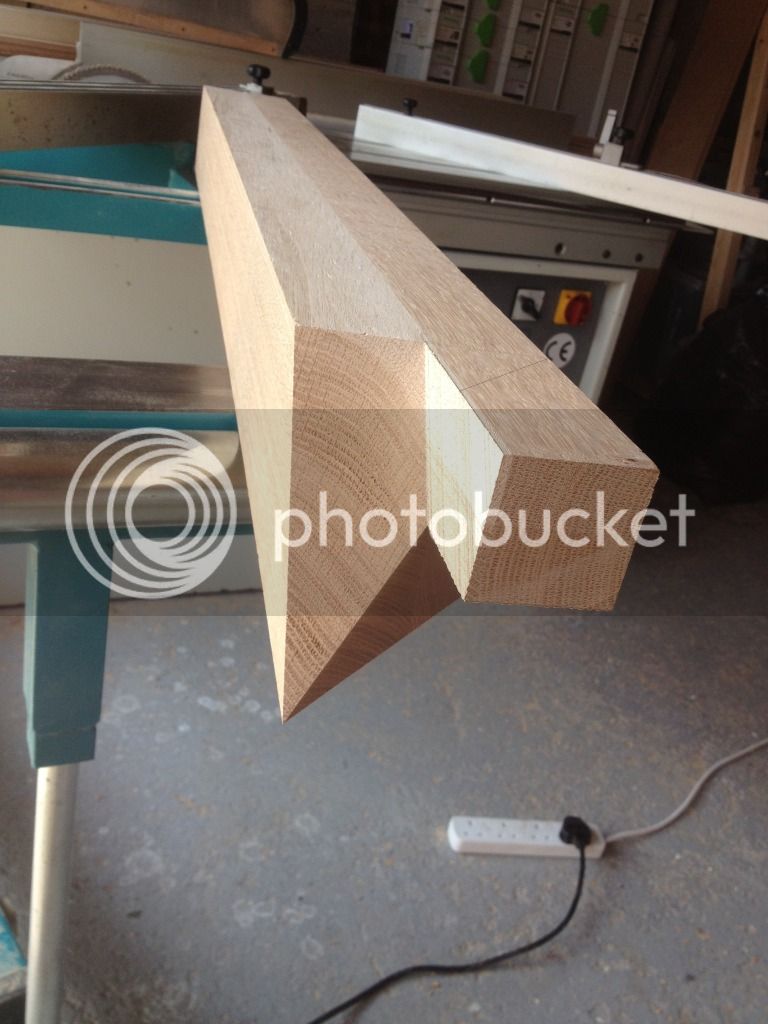
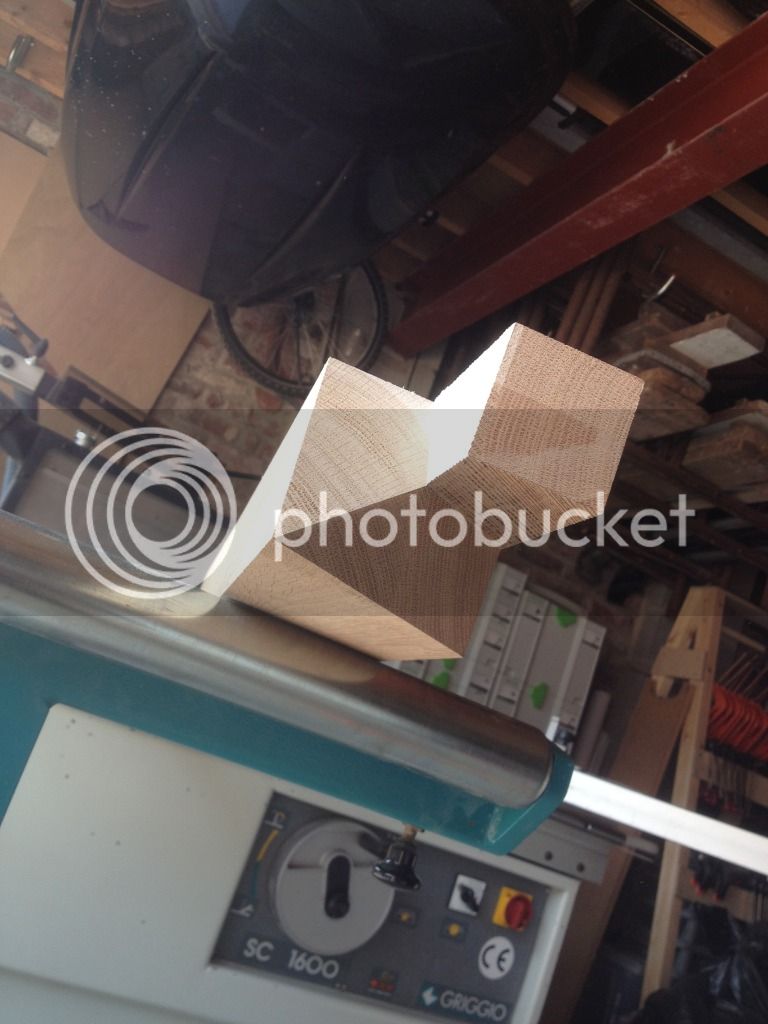
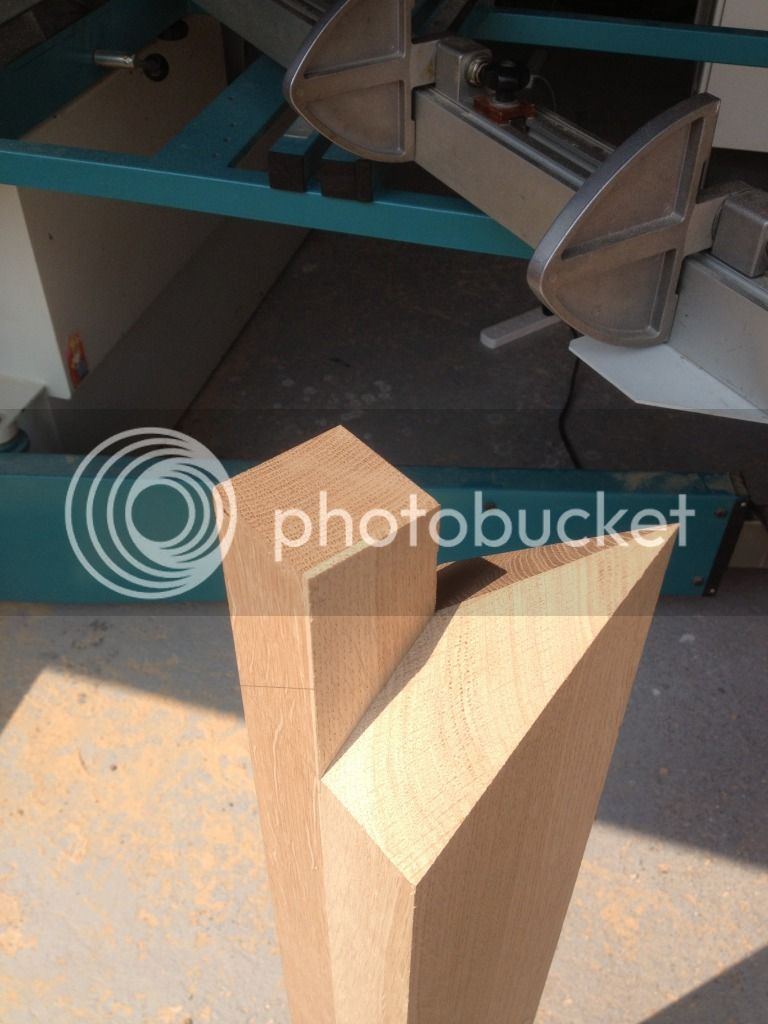
Two initial cuts gave the outer faces to which the rails would meet up to and the. I removed most of the material with a hand saw,
85D4990E-3E27-4887-B423-AA958EC6CA96-2247-000002687E78A8BD_zps8ed0aeaa.jpg


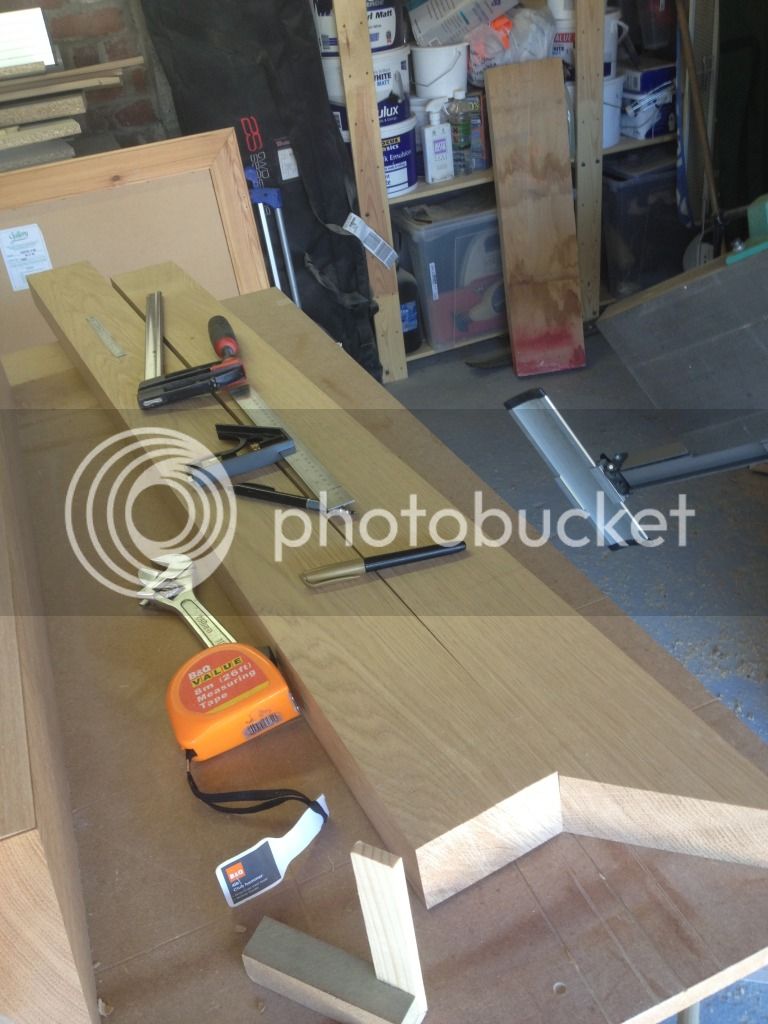
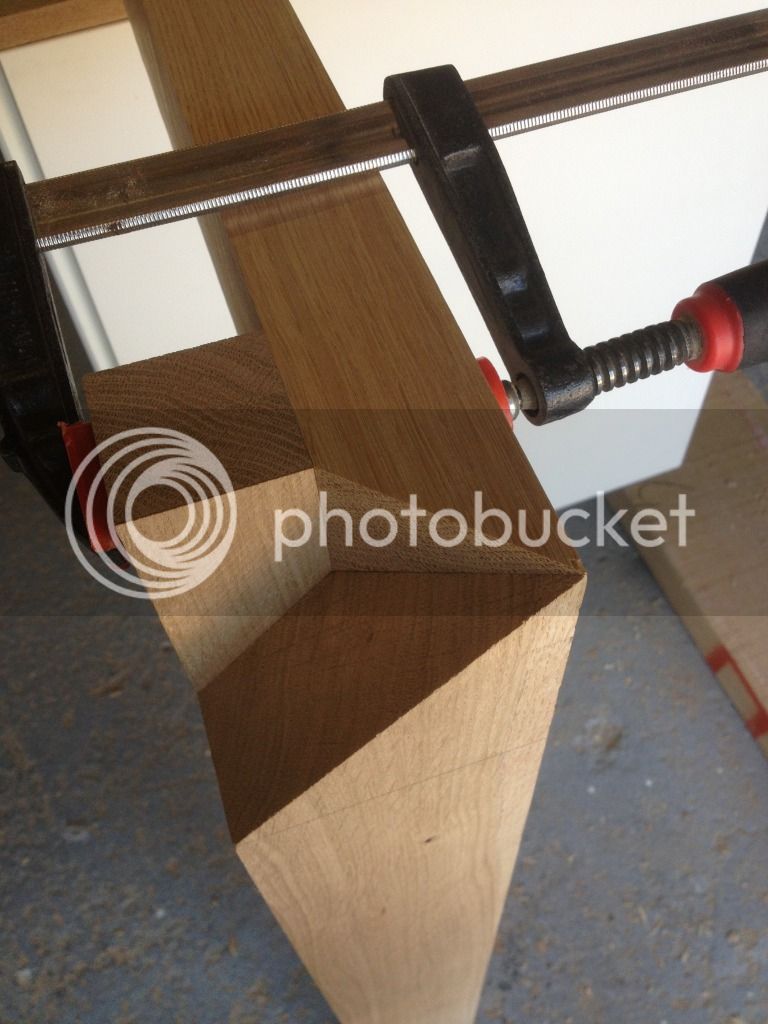
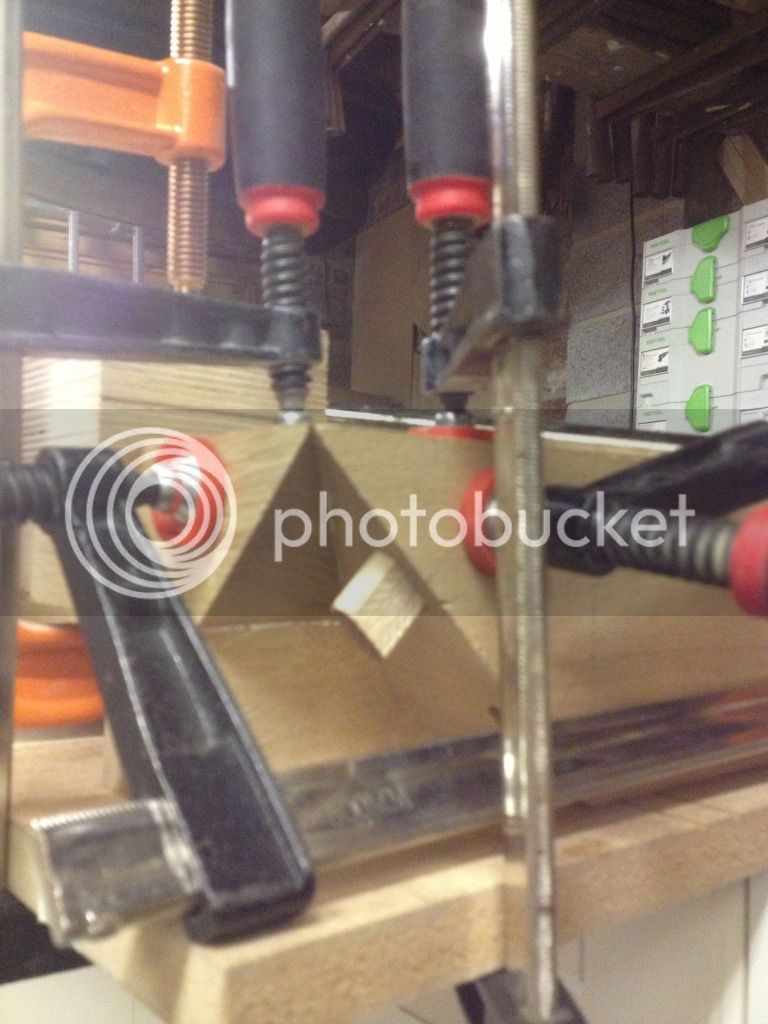
Then it went back on the dim saw to nibble away the remaining material.
B515A0FC-86DF-4E8C-A9C7-0A0FC13519B6-2247-000002688DB35A38_zpsc00f4064.jpg
 
Then the saw marks were removed by block plane to make it flat.
EB35A66A-BB48-4EAF-991B-A6EB7E28D073-2247-0000026893DB3B63_zps66f16a2f.jpg


5E656471-CA68-49CC-B21E-C88FBEEB2213-2247-00000268A02A4CF2_zps325b5024.jpg


Before and after.
9882B39D-CC95-4608-A89C-D944C26D5725-2247-00000268B11E4A66_zps2b20d947.jpg


All four done.
8F42FA25-9EE5-4C02-AE2D-EF0AC8DE0C72-2247-00000268BC0BA2EB_zps20958ae8.jpg


39CF51DB-F720-4178-A5AC-AD0ECD573D36-2247-00000268C427476A_zpsef6054d9.jpg


Next for the short rails, being 100x50mm these were just straight timbers with a 45o at either end, however because the long rails would foul on the end, the had to be mitred again the other way to form the triple mitre joint.
732AC947-7F68-43D1-95F3-5ABBB4077248-2247-00000268CD1EC4A0_zps7ef187f3.jpg


CE2AF1C7-80E7-482C-A850-EE414438910F-2247-00000268F28B16F8_zps1cf17a1c.jpg


22D9FB11-58A3-4D80-9BAE-535D5821E529-2247-00000268DE26CECA_zps69d1a588.jpg
 
Clamped up to trial.
E1AA3D58-6F6D-4F1F-8A50-EAA83AACAF18-2247-00000269129C1848_zps4a25bd86.jpg


Domino holes cut for ply stringers.
06428861-20CF-4C05-9DED-E2F044DF25CC-2247-000002691ABC2A86_zpscc432867.jpg


And corresponding holes for the rails.
BF3EE7D2-E989-4811-B5B5-F8EE0BC3D62C-2247-0000026925A01AAF_zps90be2662.jpg


Glue up of the short sides.
B31ADF23-5E4D-445B-8059-1BB3B7BFE222-2247-00000269371445BE_zps87536e2d.jpg


The mitres were also dominoed.
29987CF0-6A6A-4810-965F-BBA3C23EEF26-2247-0000026943761BF0_zps19a3ebae.jpg


You can never have enough clamps!
B37DF0FE-7BED-4790-89B5-ABBA1C629BED-2247-000002694C8B0A22_zpsdf32f110.jpg


Side complete.
B24B1BB1-A3A9-492D-B894-2086A3A8C2CA-2247-0000026954A283C4_zps36aabe7b.jpg


Inside face.
9A695205-EFB6-4A27-BBFC-4759E6FD552F-2247-000002696655181B_zps8b3ba301.jpg
 
Test fitted the ply stringers.
FD4330B9-509B-42BA-AA19-3EAF58F1E1A6-2247-0000026973BBEF56_zpsc7a33098.jpg


Then dropped the long rails in for a dry run.
68463C4D-04D1-4608-8D61-FA50C43D509C-2247-000002697E31044A_zpsf2564b46.jpg


Once the rails were glued to the legs, they were dowels through the inside with 19mm oak to ensure it cannot physically come loose, it ensured each corner was completely secure and will not come apart without removal of the dowel.
Coming through the inside meant it wouldn't be seen unless you go underneath the table, I've never liked the look of through dowels as a feature so happy it's not on display.
A3612221-8BAC-46C4-B6AC-2389B81A0F9A-2247-000002698DCF0025_zpsd119c12f.jpg


Planed flush
1C62D1F9-3239-4F28-9629-A820DFE87D30-2247-0000026995ECDA6C_zpsad49792c.jpg


Corner locked up
538E4D2F-575D-4DF9-9908-DFD395B894D7-2247-0000026A2E992A73_zps57b4d9f6.jpg


Next it was time to assemble the top, started by glueing to 18mm mdf boards together and then trimming 12mm off all the way round to square off and then add the oak lippings to make back up to 2440x1220mm.
EF630670-CE2C-4FA9-B8D0-10D49D19EDC6-2247-00000269A58679B1_zps54d600c7.jpg


Oak veneer straight edged ready to go onto the oak lipped top.
410BAAB0-5DA7-40AE-9141-41ECF56F44BA-2247-00000269C32DE750_zps2f0b8e33.jpg


Joined oversize.
5A290D95-20E2-4AE9-A6DD-5F7F91ABDEE7-2247-00000269D37C5D7A_zps61a62fc2.jpg
 
A sheet of hardboard was used to trim the veneer, it was then covered in panel tape on its smooth side to stop any glue sticking to it when it gets pressed.
CF97ECEB-03D9-4A06-89EA-28AD13B7E5CC-2247-00000269E04C2BC4_zps176e5c9c.jpg


I use a straight razor to trim the veneer.
1C59BEC7-EC17-43C6-94A8-EC61DDE90EF5-2247-00000269EA75274C_zpsfd5e9ad9.jpg


The veneer was trimmed to the same size as the top but the finished piece would have a 5x5mm chamfer so a little movement was acceptable. The masking ate was pit around the edges for two reasons, 1, to prevent breakage, and 2, to give a little more pressure to the edges when pressed.
A7666C3B-395D-4806-BCEF-69E6CAE284B5-2247-00000269F50983C7_zps4007ae16.jpg


In the bag with the hardboard on top, the blanket is to allow the air to escape easily without leaving air pockets.
1DA2E83E-C7C1-4FC9-A3F3-ED6CDD105ED1-2247-00000269FDE779CC_zpsf53801ea.jpg


Next the points were marked on the rails where the screws would come through to secure the top.
42D6348A-4BEA-493A-89EE-4E391D9F986B-2247-0000026A0AA7CA87_zps17b8ae35.jpg


Underneath.
CE4D0264-1A5B-467D-804C-F4E764A781CA-2247-0000026A1676FF91_zpse292fb22.jpg


EDC37C6A-C9DD-4639-B9FE-F62CAA21B4E8-2247-0000026A21E12E75_zpsa08fa2bb.jpg


After cleaning up and sanding it was stained. I would have rather just applied an oil but the client wanted it to match the rest of the wood in the house.
DE9F60AA-5AC6-449E-B23D-554CE397831E-2247-0000026A58D76FB6_zpsb0548cd0.jpg
 
Looks great, especially those double mitres - how long did you spend working them out ?

And well done for the wip, you know we like to see every step =D>
 
The table was then finished in a heavy duty oil and buffed up, this was done twice for durability.
E057B9F5-6CD2-4944-9412-01F868D4FB1B-2247-0000026A621C94D6_zps93d5696d.jpg


222D3550-255A-4341-B2CB-32A945E8182B-2247-0000026A6AA73DEC_zps968472a9.jpg


33A7814F-8ED4-43D1-AACA-48CC8B62DD09-2247-0000026A84189C0F_zps660da22b.jpg


And finished.

There was also some 90x90mm leather squares glued to the legs to protect the floor, think it have a nice finishing touch to when it was put down, made a satisfying noise.

92EF7B4B-BBAF-457F-8C8C-CAC451E98AB5-2247-0000026A905FE611_zps20bfa4d9.jpg


8A912CF1-6CFE-4698-80EF-522B9C378046-2247-0000027F2913C774_zpsa9308846.jpg


To show who made it.
964ebb471c65f6ea9921ff43dc4e4f91.jpg
 
dm65":v8gnw6ug said:
Looks great, especially those double mitres - how long did you spend working them out ?

And well done for the wip, you know we like to see every step =D>


Thanks, I was a little worried after saying I could do the mitres but after a little play with some mdf we worked it out ok, the legs were left quite a lot oversize in case they got FUBAR but thankfully not. I like to document work when I can but sometimes it's easy to get carried away :S
 
Any particular reason for not using veneered MDF rather than doing it yourself?
 
Those trisexual mitre thingys are proper smart :cool: bet it feels nice and solid !
Cheers

Sent from my GT-I9300
 
MrYorke":2l6oxa49 said:
Any particular reason for not using veneered MDF rather than doing it yourself?


I never have and never will, we use preveneered at work and I think post lipped boards look terrible, I also really enjoy straightening veneer and joining it and think it looks much nicer as you can specify your veneer when ordering. It is also thicker than the veneer you get on preveneered boards so you're less likely to sand through. He also wants a coffee table in the same style so this can be made with the same bundle of veneer to create a matching set.

Thanks

Alex
 
RossJarvis":1xrmx3se said:
nice job, I like the way you hide all the "working" bits to give a clean style.


Thanks, the nice thing about hiding it aswell is that when someone does look underneath/ inside the realise it's more complex than it looks and they've actually got something that's had some thought gone into it.
 
Alex that looks great.
Can you tell us what stain you used please? I've made a little Shaker stand and am making a coffee table and I want a little colour to them. Not dark, but darker than natural and I don't know much about stains and dyes.
S
 
Thanks for the comment, im not a big stainer either (haha), the wood was obvious normal euro oak, I used wickes antique pine stain with a hard wax oil over the top, I applied with a sponge in a methodical linear pattern then followed with a dry cloth to remove excess. It looked very dark when applied but once buffed off it bought the grain back out and gave it that colour. I only applied one coat if stain so can't tell you what multiple coats does ect.

Hope that's helped application wise.

Thanks

Alex
 
Lovely work Alex. Why are table tops veneered and not solid wood. Is it a stability thing or a cost thing?
mark
 
Both reasons, it would have increased the cost considerably and I would see it warping very quickly from solid wood, you can minimize warpage but not eliminate it. Veneering also gives a cleaner mor consistent surface in my opinion. Think there's a lot of false stigma that solid is better than veneered nowadays because of the likes of oak furniture land and such.

Thanks for the comment

Alex
 
Back
Top