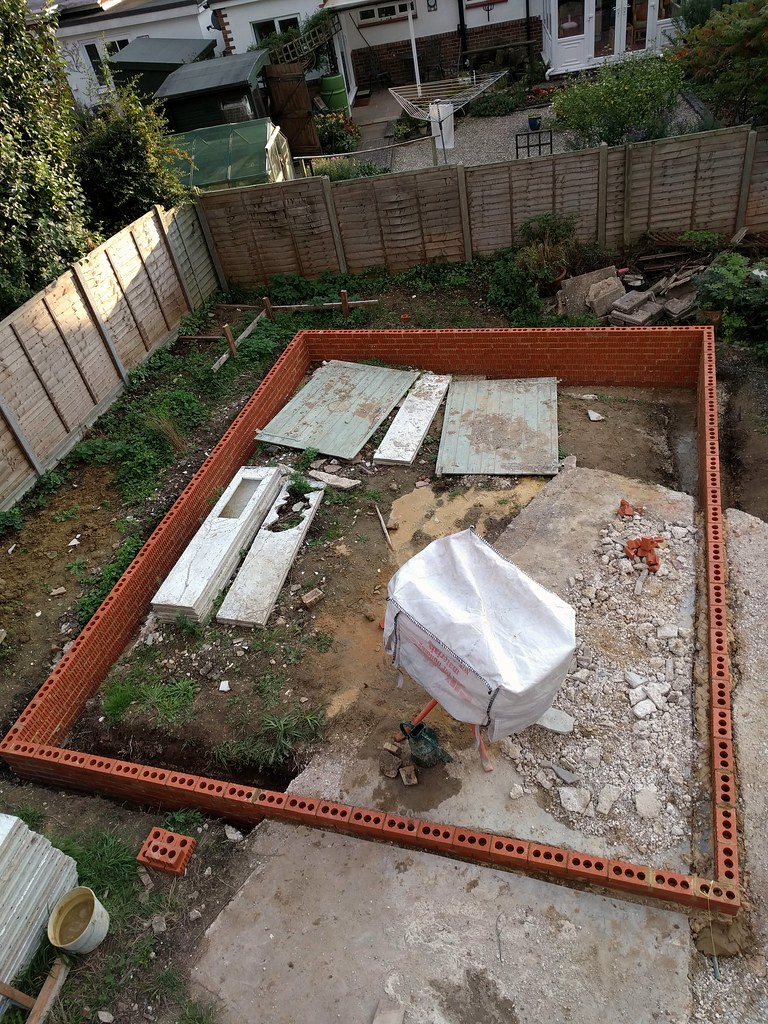
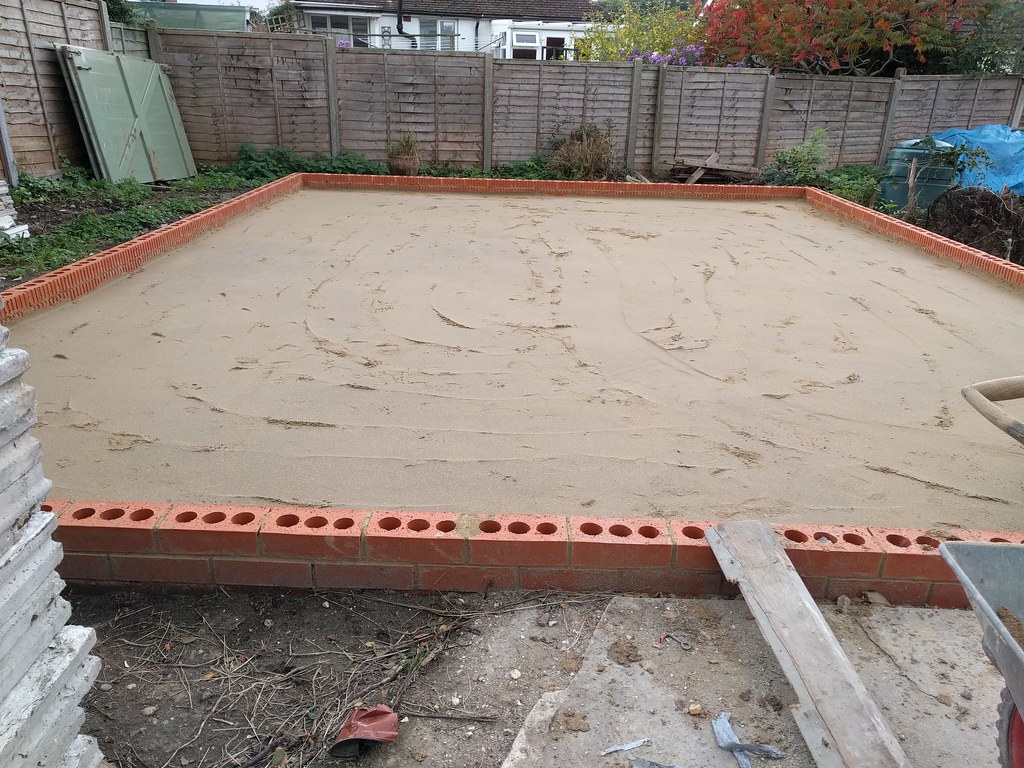
I'll need something to put my tools in...

UKworkshop.co.uk

Help Support UKworkshop.co.uk:

This site may earn a commission from merchant affiliate links, including eBay, Amazon, and others.
Dandan":29ckabfl said:
- With an air gap and 20mm cladding, my finished walls move 45mm closer to the boundary, my bricks are already exactly 2m from the boundary, so if someone were to ever complain and send someone round to check I was within permitted development, would 45mm be an issue, is that an allowable level of error? Could I minimise that air gap perhaps?

I've made precisely the same error, although mine is compounded by the fact that the closest wall has a hug bow in in and approaches the shed by about 10cm more. However seeing as it is my neighbours trees causing the bow I plan to argue the case that the wall no longer represents the boundary.

I have a few other issues like this, eg. my roof is 20cm wider than on my planning permissions, as i had not included the width to overhang the cladding. And the front edge of my roof is 10cm higher than on my planning permission as the garden is not level and falls away, which i didn't pickup on when I drew the plans.

I will have to submit a formal completion certificate and I am petrified about an inspection picking these things up, no idea what the outcome would be.

Regarding the floor, one option would be a floating floor ie 20mm thick boards on a 20mm insulation layer. You have the damp-proof layer so no need for air gaps. This would steal 4cm from your roof height but an insulated slab floor will be very cold.

F.
 
For the floor you might wish to consider an electric heating mat embedded under a screed of some kind, this would help to reduce the cold feelign and also help fight the dreaded damp on expensive machines and tools.

Doesn't have to be run very warm, just enough of a trickle to keep the edge off, and a small stove heater for when you are working in there.
 
Thanks chaps, no progress to report this week I'm afraid, I had a wedding to attend at the weekend (not mine) which was apparently more important than bricklaying...
I've done a bit more on the design in CAD but it's a long way from finished, I will share some pictures and sections from the CAD once it's closer to the finished product so I can get more feedback, I'm really keen to get the wall and roof sections right so that the building will last decades and not years.
 
I have 4 walls!


I'm pleased with the wall, it all came together nicely, and do you know what the worst bit of brickwork is on the whole thing? One of the corners laid by my professional bricklayer friend! I know he knocks out 500 bricks on a good day so you can't get too hung up on perfection and get a level on every single brick, but his top outside corner brick looks like the bus from the Italian job, it's tipping downwards so badly! I'm tempted to chisel it out and put another one in, but I figure the mortar under the wall plate will take up the slack and the bottom of the cladding will hide the jaunty angle. If I try to chip it out i'll more likely damage further bricks and end up with a right mess.

I also backfilled the trenches inside and out, moved everything out of the centre and started to level the ground on the inside, I didn't quite get finished but there's only an hours worth of digging left. It was dark before I though to take a picture though, sorry!

So, before I put my hardcore in, is it worth getting a whacker plate to stabilise the dirt, then whacking again after the hardcore, or can I get away with one hardcore whacking session? (not a euphemism)
 
I made some more progress this weekend, I actually came home from work a day early so I had Friday to play with as well. Considering I had 3 days available, I suppose really I didn't do that much, I had provisionally planned to pour a slab next weekend but I'm not ready for it yet so it will have to be the following one at the earliest. I feel like the weather may start to interrupt things soon so I'd like to get this slab down.
I finished getting the dirt levelled inside the walls, and got a compacter plate on it:


You can see my helper, Derek, in this picture, I say helper, there's only so much use a slobbery tennis ball dropped at your feet can be, but he means well.

Then it was Tetris time, I had a whole mess of rubble that I wanted rid of, and my wallet wanted to spend as little as possible on expensive imported hardcore, so I got busy slotting the rubble together:


Now I don't know if this is the right way to make a base, or whether it should really be graded hardcore all the way through, instead of the broken remains of all my other DIY projects, but I've told my plan to a quantity surveyor, a bricklayer and an electrician and nobody has raised an eyebrow yet.
I'm also not entirely sure what I expected would happen once I'd put all this rubble in place, perhaps I was hoping to channel the spirit of an Egyptian mason and end up with credit-card thick gaps between blocks and the height correct to 2 decimal places, but alas, my clairvoyant robes were in the wash, so I ordered a ton of actual hardcore to fill in the gaps, but it won't arrive until this coming weekend. I'm now thinking I might order 2 tons, there's a fair few gaps...

My electrician friend came by on Saturday and gave me a lovely coil of 32amp armoured cable, we just about managed to force it through the access pipe I had laid under the wall, I had no idea it would be so thick so I only put a small pipe in! He also gave me a huge floor mounted box so I can have some sockets in the centre of the floor, I was going to buy a single socket with little flappy lid but this is much better, with the added advantage that the plug is sub flush too so I don't risk running it over when moving the table saw, nice.


I'll make a little square shuttering for this and mount it after the floor has been laid, i'll only get it covered in concrete if I try to mount it directly into the slab.
The electrician is also going to unload a bunch of LED lights that he has acquired as overs from various jobs in the past (that's what he told me Your Honour) including some really diffuse wall mounted lamps and a huge 600x600 roof panel that I can mount right in the middle over the table saw.
 
Using the power of CAD (Computer Something Something), I'm able to extract the crazed jumble of thoughts from my tiny mind and bring my dream workshop one step close to reality!


It's nice to be able to visualise the potential end result, it's also good for spotting little issues before you cut any wood. Things like roof beams lining up with studs, spacing things out, whether to overlap this bit or that bit, it should save me a lot of ad-lib adjustment when it comes to the actual build.
It's also great for measuring up for materials, now I can massively over-order with confidence!
 
Looks like it's coming together nicely. Have you thought about using the area above the rafters for storage, or do you have other plans for it?
 
rafezetter":18mqdxwk said:
For the floor you might wish to consider an electric heating mat embedded under a screed of some kind, this would help to reduce the cold feelign and also help fight the dreaded damp on expensive machines and tools.

Doesn't have to be run very warm, just enough of a trickle to keep the edge off, and a small stove heater for when you are working in there.
The problem there being that there is no insulation so your heat can perpetually drain downwards. You're not just heating the screed, but the ground underneath.
 
jnw010":3he6mh9g said:
Looks like it's coming together nicely. Have you thought about using the area above the rafters for storage, or do you have other plans for it?

Thanks, yes the plan is to have raised ceiling joists to give just over 2400mm ceiling height so I can move and store full length boards more easily.
I'll board above the joists to make a storage area but I will exclude the first and last joists to leave a gap either end to access the roof space and to let light into the main area from the eaves windows. I'll have a significant ridge beam to account for the two missing joists.
Incidentally, those eaves windows will be made from a 40mm thick extruded polycarbonate sheet like that found on conservatory roofs, it has similar insulation and security levels to double glazing but is a fraction of the price. As I only want light from those windows and don't need to actually see through them, it seemed like a no-brainer, plus I can cut it to any shape I like so could potentially omit the middle window frame beam, giving one big triangular window each end which might look quite nice.
 
No real progress this weekend, I got home to a ton bag of scalpings in the front garden, and it seems that it's been a while since I was up close and personal with a ton bag of anything, because just like Mars bars and packets of Walkers crisps, I'm sure they used to be bigger.
I remember shifting a ton of gravel to the bottom of the garden when I was about 12, and aside from raising questions about my dad's attitude to child labour, my lasting memory was that it took me most of a day and I felt like I had shifted a literal mountain of material.
Skip forward a couple of decades and I had it shifted in under an hour and I hadn't come even close to filling the foundation, or breaking a sweat. This was pleasing in the sense that it was nice to know my body had improved since I was 12 (even if my mind hasn't), but it was disappointing that I had managed to so massively under-order.
I got on the phone and ordered 2 more bags plus 2 bags of sand for the blinding but they wouldn't turn up until this week, so that was that for garage building. It did mean I was able to get a bunch of other odd jobs done about the place, sorted some bits of guttering, fixed a built-in wardrobe, so it's good to have them out of the way.
The news from home this week is that the 4 bags have turned up already, although they have stacked them 2 deep, so quite how I'm going to shovel from the top bag into a wheelbarrow remains to be seen. I'm loathe to cut a hole in the bags as they seem so potentially useful, although I do have 6 now so could probably afford to waste a couple...
 
Progress this week!
I got all my hardcore and sand in and compacted, i'm glad I hired the compactor.
I thought I could probably just stomp around in my workboots to compact it all down but the compactor does an incredible job, it flattened the sand to such a degree that I didn't even leave footprints in it!


Then I got my ludicrously oversized membrane on and tucked in.


I also placed all of the old concrete prefab garage panels onto the membrane for two, well, three reasons. First, it reduces the amount of concrete I have to order by nearly a cubic metre, second its a good way to get shot of 30 massive panels that were in my way, and thirdly, it was my Surveyor friend who suggested it so I can blame a professional if it goes wrong.

Concrete is ordered for Friday, exciting times!
 
The slab is down!
Not without a bit of a fight, but it's solid and (mostly) flat which is the important bit.

I calculated that I would need 2.6 cubic metres of concrete, it was a slightly complicated calculation because I was putting the old garage sections into the base to save money, but I was very surprised to unload the full 2.6 metres and still apparently be a long way short of filling the base! Myself and my dad were on wheelbarrow duty while my father in law was doing his best to spread the material out, so we didn't get a chance to start tamping the slab straight away. Well I needed to finish the slab so the guy just kept pouring us more concrete and we kept pouring it in until it looked filled, I ended up using 3.2 cubic metres, which is a hell of a miscalculation!


It turns out, when you only have 3 people on the job and one of them with a bad back and you don't tamp the concrete as you go, it's very easy to end up with what looks like a flat slab of concrete when it is in fact quite a bulging pile of material.
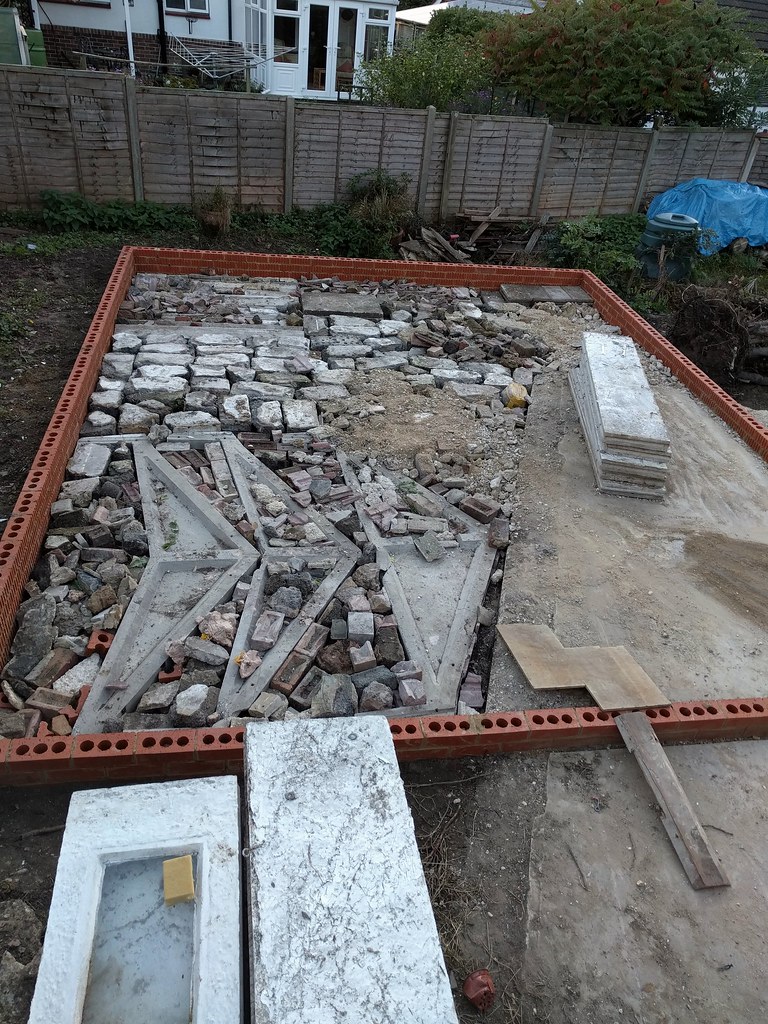
My calculations were pretty spot on and we had to shovel probably the full extra 0.6 cubic metres back out, I now have a step base in front of my shed, a 300kg hot water tank shaped lump of concrete, and an entirely unplanned 2m x 1m slab to one side of the workshop.
It's annoying because it was a huge waste of effort barrowing the material in and then shovelling it back out, not to mention the extra cost, it could all have been avoided if I'd had one more person on site to help out, ah well.

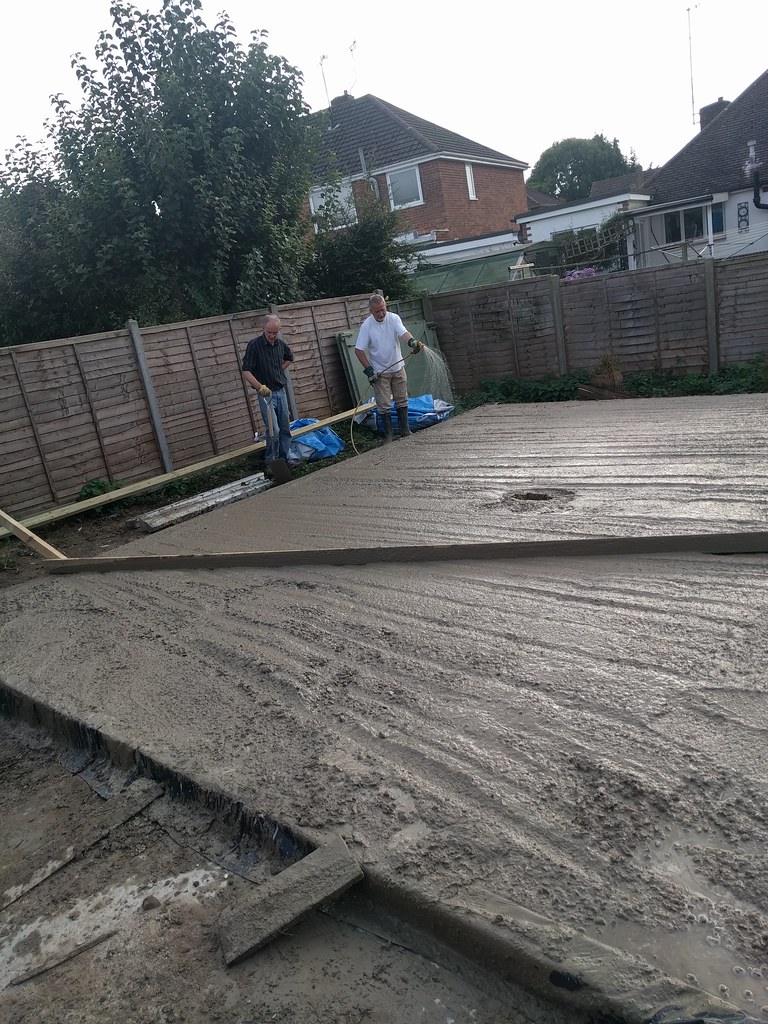
I hired a bull float to try and get a decent finish to the surface, wow those things are good. I floated it while it was still very wet (and there was still daylight left) and got a pretty decent result on the first pass:


I made another pass when it had set a little, trying to improve the finish further, unfortunately this required floating it by headtorch, as it was now 9pm at night. It probably wasn't the smartest idea I've ever had, it's a toss-up as to whether that pass helped or hindered.
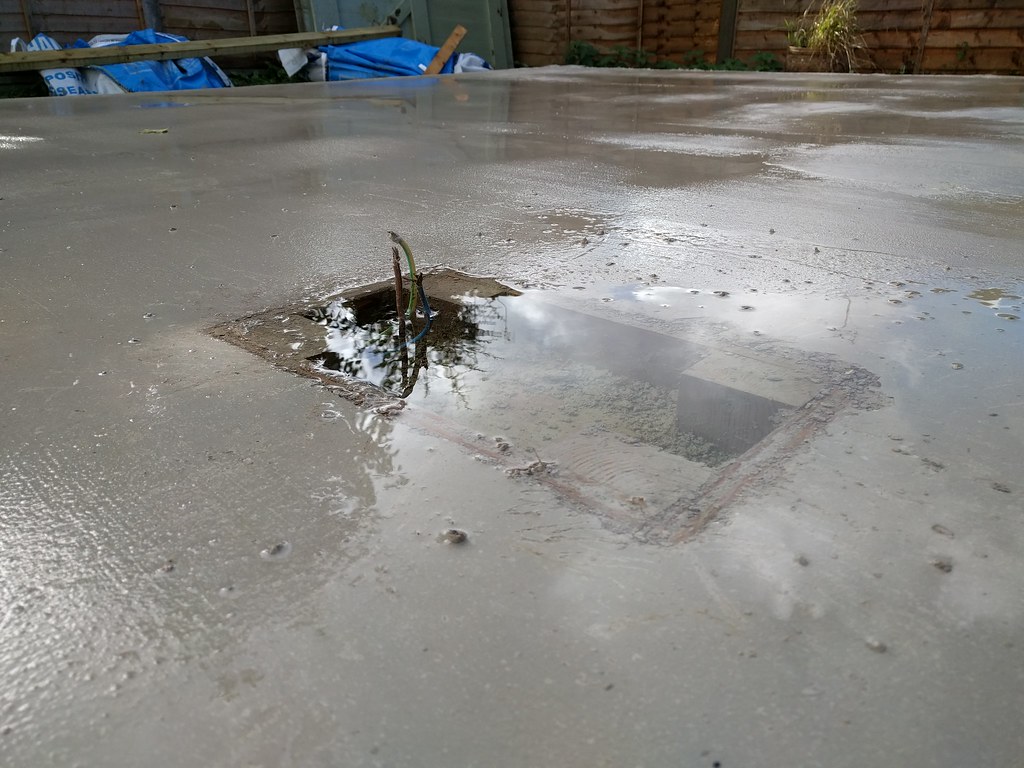
I wanted to do a final pass with a magnesium float once it had gone off further, but due to the autumn weather, it was setting very slowly and I wasn't prepared to go out at 1am to do it, by the morning it had gone off enough that no more floating was possible, it's a pretty decent finish generally with a few scars here and there, but should look fine when painted. It doesn't quite meet my vision of a perfect, polished slab, but it's ok for a first go I reckon.

I set a little shuttering in the middle to accept my floor mounted sockets, I may have forgotten to cover it before the rain came in...


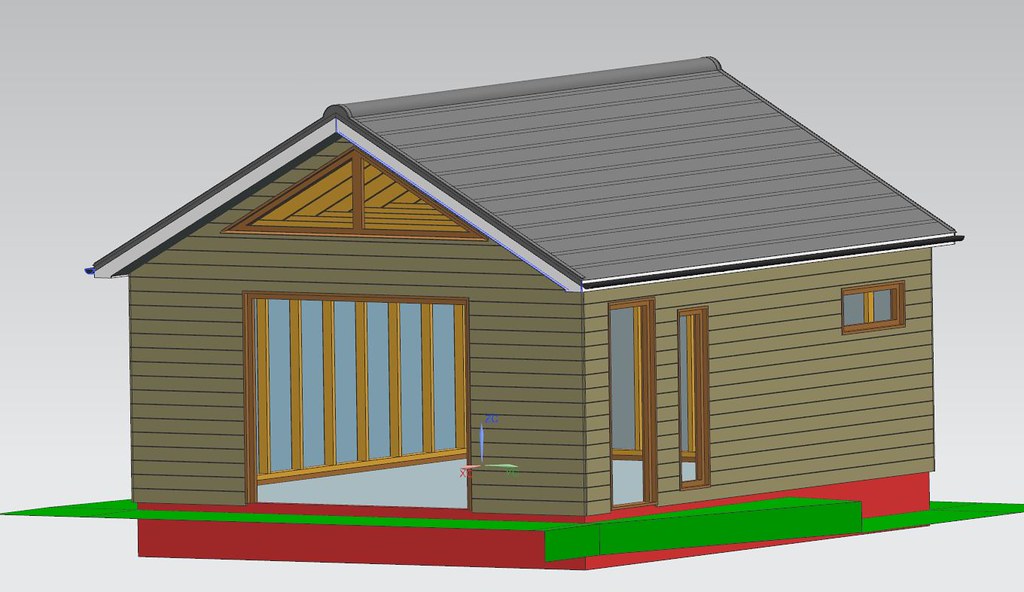
You know what this means though, the next instalment might involve some wood!

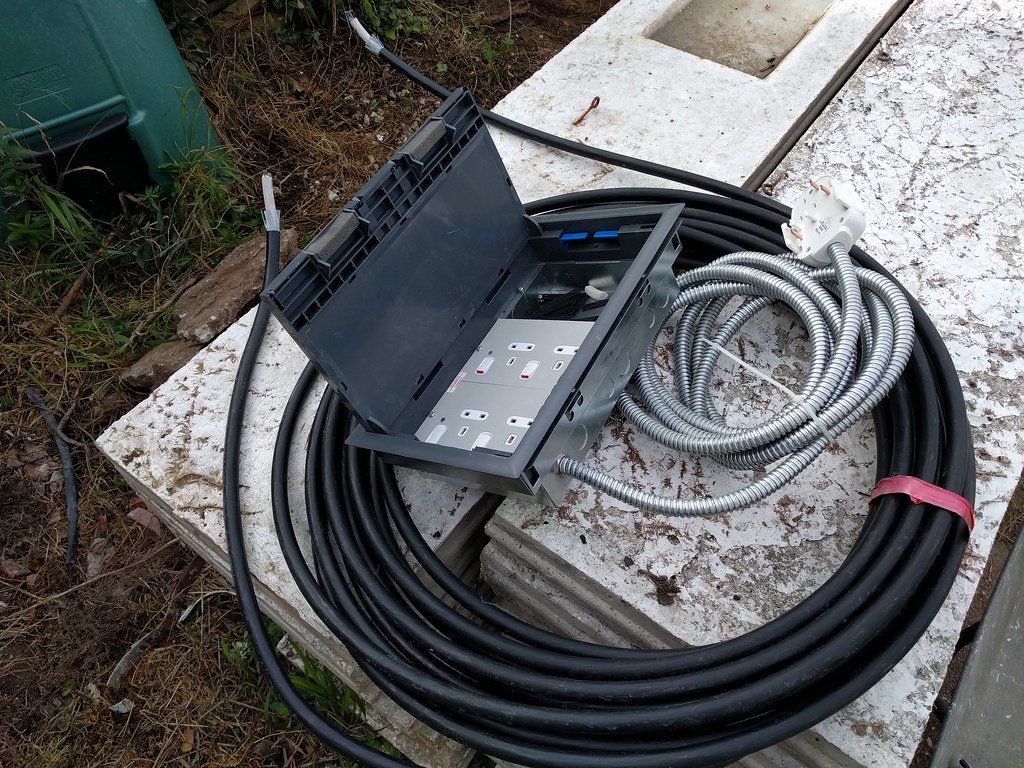
Oh, I also got some awesome freebies this week, my dad moved into a new house and the previous occupant left all sorts of gear behind, I bagged a load of new electrical cable, a 110v transformer (in case I ever end up with a 110v tool) and this little puppy:


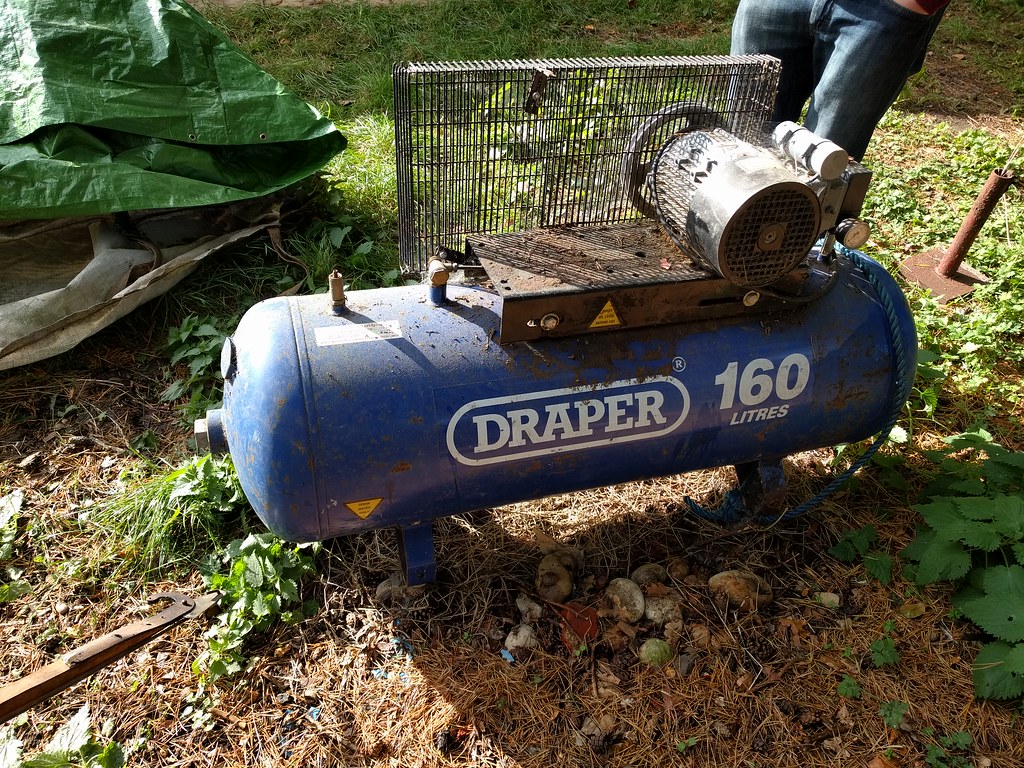
(it has a compressor too)
It's a little tatty but in perfect working order, I never planned to have air tools in the workshop but it would be rude not to now!
 
Looking great.. I needed 12 cube for mine to make up for the slope..I had the bulge problem too and ended up adding a nice 'v' gully in the service passage under the house. It's come in handy since when we've had floods.. Nice score on the air tank too.. Air tools are really handy to have around, Aldi do some cheap air tools now and again. Best ones I've had from there are the tyre inflater/wax oil kit and die grinder.. great for that nut that won't come loose, just cut it off..:) Also if you want to give upholstery a go an Air tacker is a must. Looking forward to seeing the wood going up.
 
lee celtic":1koy2mzu said:
Looking forward to seeing the wood going up.

You're not the only one!
I'm on holiday this coming week so I won't be getting my chop saw out for a couple of weeks yet, I'm trying to work out how I can get the wood ordered and delivered so that it's waiting for me on my return from holiday, without it being left out in the elements for a week...

I'd forgotten about those Aldi deals too, I'll keep an eye out for those, an airline will be a nice thing to have.
 
Great progress! Exciting to see it taking shape.

You could still hire a concrete polisher to flatten and polish the surface if you wanted
 
It is tempting, especially as it would be a lot easier to do now before the walls go up, but I need to decide if it's worth the extra cost and effort when the finish I have should be perfectly suitable for my needs, am I just lusting after a completely unnecessary finish for the sake of it?
Based on my previous history, I imagine the answer is yes!
 
Depends on the cost - if you can afford it, as you say now is the time to do it! Perhaps better to do it now and not regret it? :)
 
You know what, I think I will get a grinder/polisher and run it over the slab, it's all sitting a little high of the surrounding bricks so there is some material to play with there, like you say, I think it might annoy me if I don't.

I've been on my holibobs, but I did manage to just tidy up a bit before I went, the site looks like this now:


I filled the central hole with sand for now to stop it filling up with water, I still covered it to stop our dogs digging all the sand out!
Next weekend I will begin with some wood, if the concrete grinding doesn't take too long...
 
That looks like the perfectly sized space.

I'm in a single garage at the moment and I've been eyeing up the bottom of the garden recently...
 
Back
Top