oddsocks
Established Member
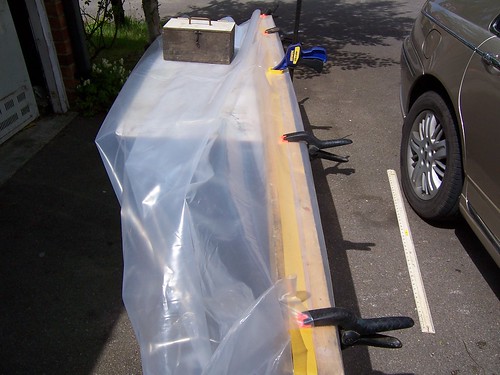
After a busy week gaining info via another thread I was fortunate enough to get a response to my 'Wanted' post in freecycle for a vacuum pump. I collected that on Thursday and have today made my first successful bag. The photos hopefully show it all, I tested it with two pieces of wood and they cannot be budged once the vacuum is applied. Total specific cost £4 so far.....
Pump - free from freecycle
Hose - from leftover stock after building a whirlpool bath some years ago
hose connector - from stock (salvaged from an old broken compressor).
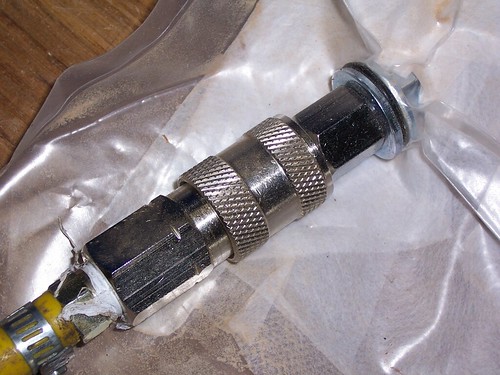
Bag connector made up from:
- matching air hose PCL (i think) connector - salvaged from unwanted air spray gun
-Reducing coupler - I had to buy these and the washers, total cost for 3 sets £4. The air fittings are BSP and the reducer allowed the fitting to be bolted through the bag.
-O ring from stock.
Breather fabric - spare length of frost protection fleece (even in many layers you can breath through this)
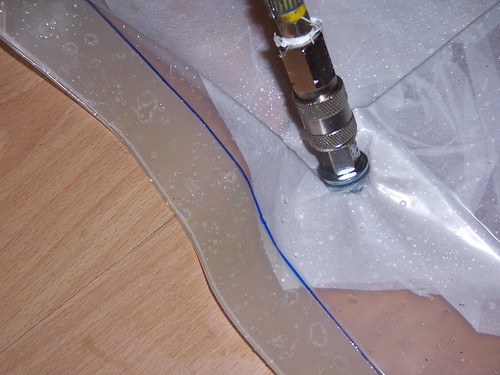
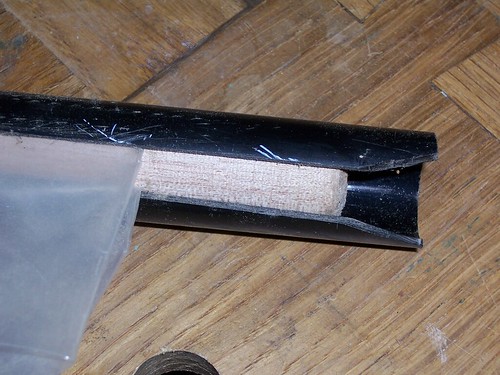
Bag sealer - length of 25mm plastic conduit cut as in photo. The inner diameter is 20mm so I turned a length of broom handle down to approx 19mm to be a good fit inside the pipe.
Bag (for this one) an axminster bag with the hole for the connector cut with a 12mm punch (make sure you cut against a block of wood!)
I have found an online suppler of 250micron plastic sheeting so will make up some bigger bags (for a project I have) hopefully in the next week. I will follow joewoodworker's method of making the bags.
EDIT 17 May- homemade bag details and pics added in page 2
Photos....
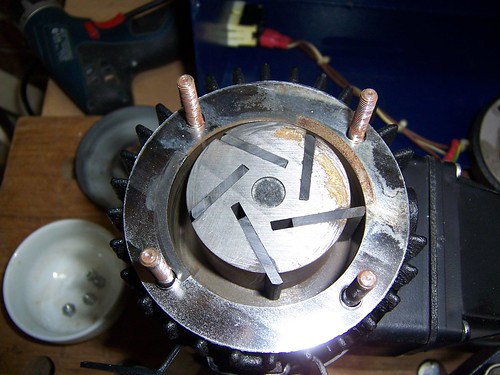
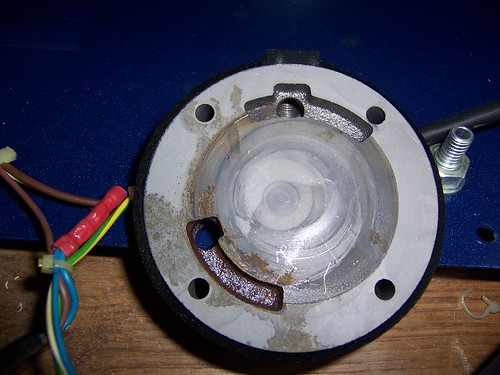
the unit in use:
the bag connector components:
and connected:
and finally the open end sealer, just wrap the bag around the dowel and slide the clip on (note the bevelled lead in). The black pipe edges were sanded smooth.
Pump - free from freecycle
Hose - from leftover stock after building a whirlpool bath some years ago
hose connector - from stock (salvaged from an old broken compressor).
Bag connector made up from:
- matching air hose PCL (i think) connector - salvaged from unwanted air spray gun
-Reducing coupler - I had to buy these and the washers, total cost for 3 sets £4. The air fittings are BSP and the reducer allowed the fitting to be bolted through the bag.
-O ring from stock.
Breather fabric - spare length of frost protection fleece (even in many layers you can breath through this)
Bag sealer - length of 25mm plastic conduit cut as in photo. The inner diameter is 20mm so I turned a length of broom handle down to approx 19mm to be a good fit inside the pipe.
Bag (for this one) an axminster bag with the hole for the connector cut with a 12mm punch (make sure you cut against a block of wood!)
I have found an online suppler of 250micron plastic sheeting so will make up some bigger bags (for a project I have) hopefully in the next week. I will follow joewoodworker's method of making the bags.
EDIT 17 May- homemade bag details and pics added in page 2
Photos....
the unit in use:
the bag connector components:
and connected:
and finally the open end sealer, just wrap the bag around the dowel and slide the clip on (note the bevelled lead in). The black pipe edges were sanded smooth.