Front of house restoration

UKworkshop.co.uk

Help Support UKworkshop.co.uk:

This site may earn a commission from merchant affiliate links, including eBay, Amazon, and others.

billybuntus

Established Member
Joined
23 Feb 2007
Messages
373
Reaction score
1
Location
Durham
Further to my previous post I thought I'd start a project thread.

wooden-door-surround-t69833.html

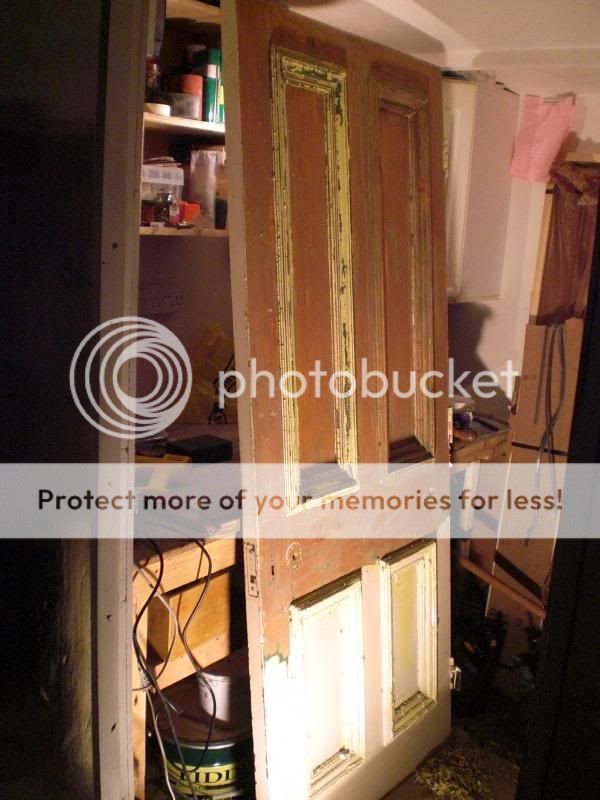
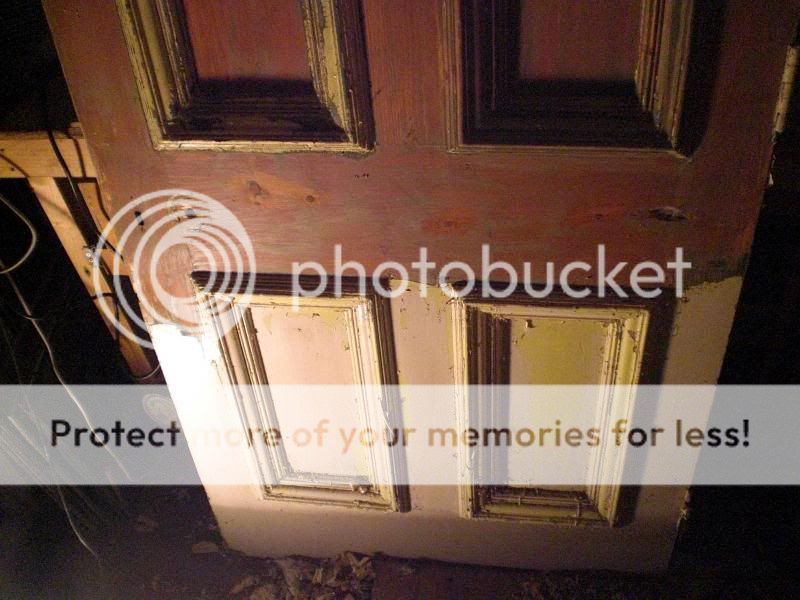
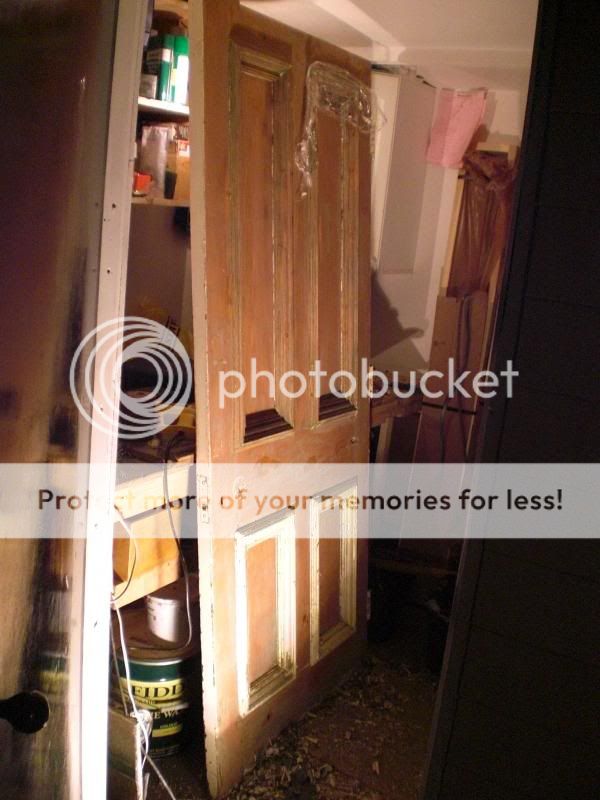
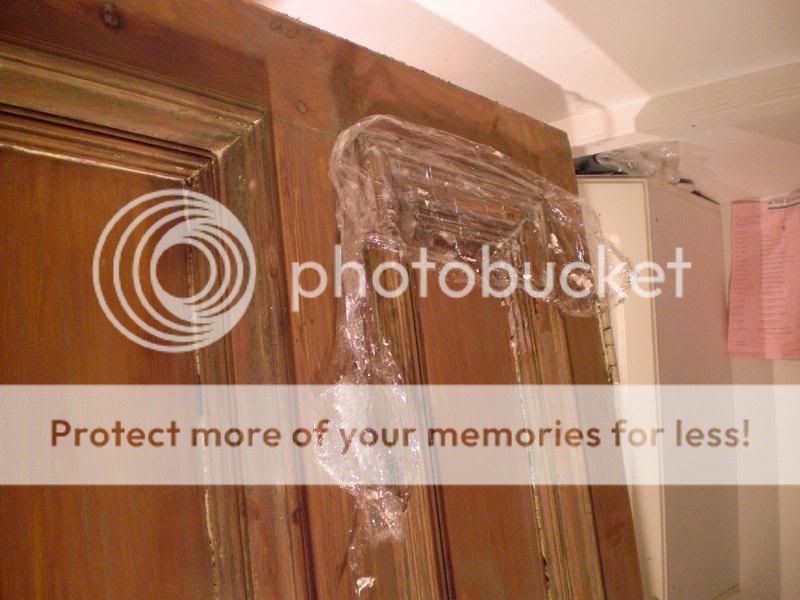
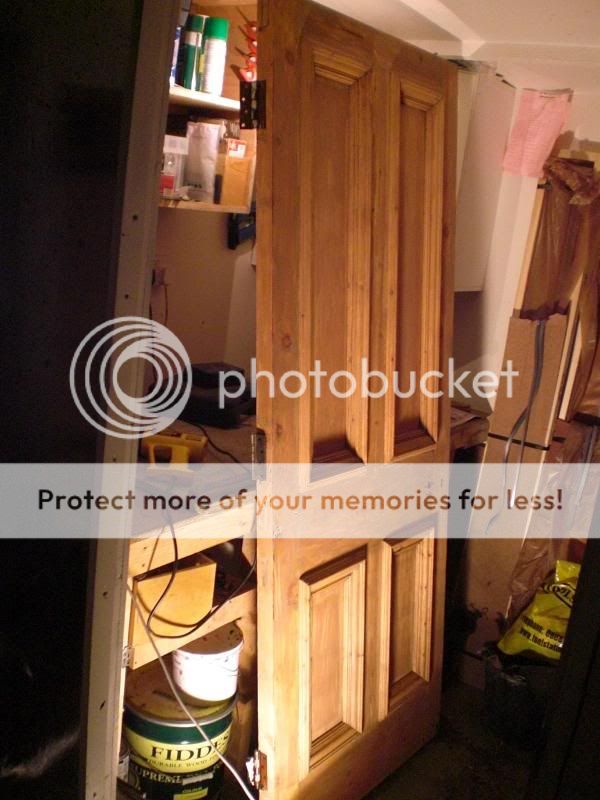
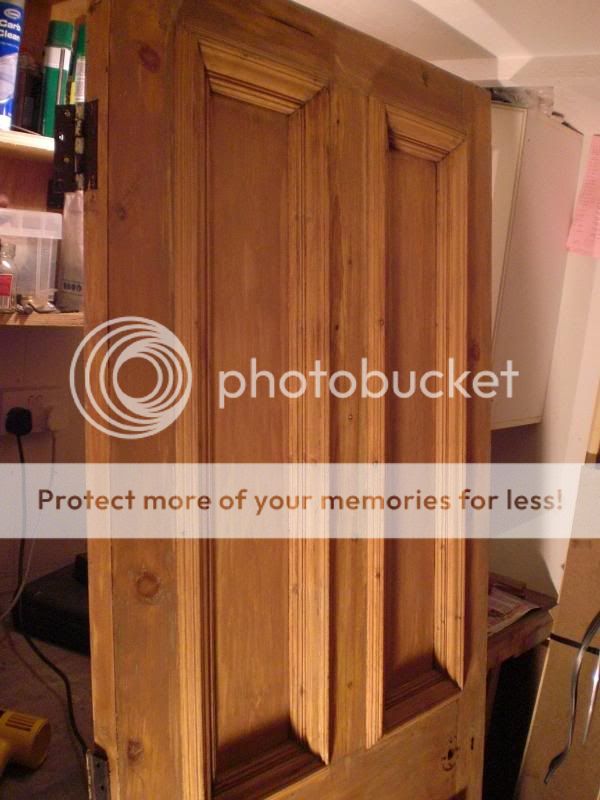
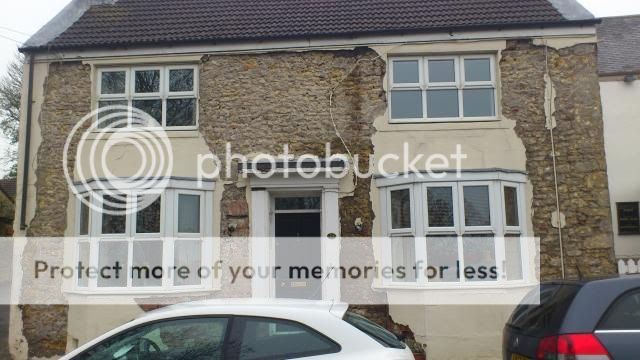
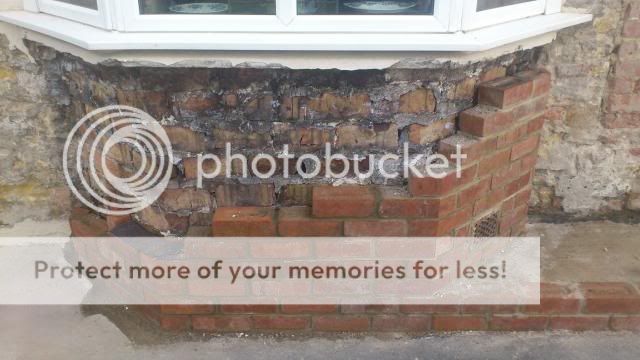
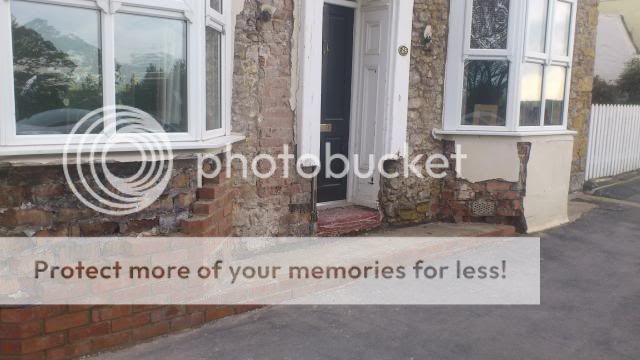
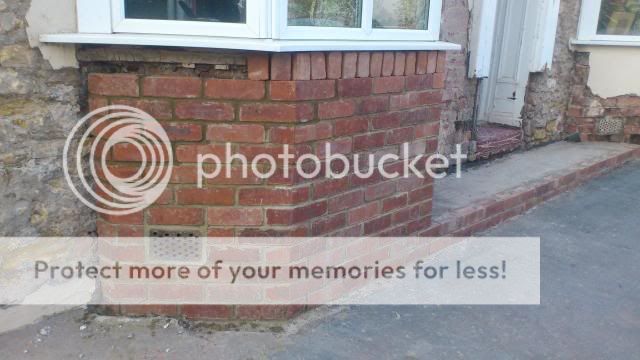
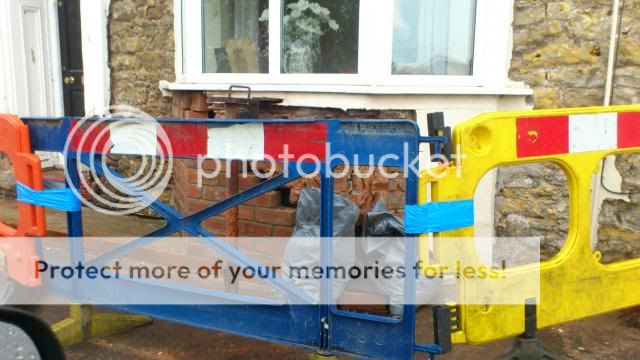
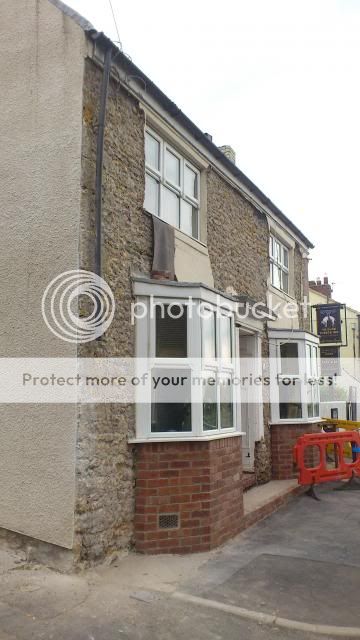
I've started stripping my new (old door) ready for a coat of primer. I'm some way off fitting it as I'm replacing the whole surround for the door (see pics in previous post), , steps leading to it, house render and replacing the bay window roofs.

So I thought I'd get the time consuming job of preparing the door done while it's cold outside.

Started off with non-caustic paint stripper and after getting nowhere, borrowed a heat lamp. Much faster with a lamp and scraper.

Still a way to go yet!

Pics to follow

Thanks
Billy
 
I must be watching too many cooking programmes, seeing the title 'front of house' made think it would be a restaurant refurb D'oh!

Anyway, looking forward to seeing the pics.....
 
RobinBHM":73jhumff said:
I must be watching too many cooking programmes, seeing the title 'front of house' made think it would be a restaurant refurb D'oh!

Anyway, looking forward to seeing the pics.....

Quite a good series on at the minute about that. I've been enjoying them, first was a burger joint and this evenings was a pub.


And yes the following is exactly 50% of my total work space :shock: Challenging at times.

Yesterday evening saw me frustrated with paint stripper and the heat gun this evening saw much more decent progress.

CIMG8746.jpg

CIMG8748.jpg

CIMG8749.jpg
 
Well, I've no doubt 100's of people across the land are awaiting this post. Fear not. An update has landed.

Under the layers of paint is a lovely coating of scumble glaze. I'm not old enough to know why it was ever invented but my uncle reliably informs me that their were a few men who could do a fantastic job on making pine look like walnut or whatever was your chosen timber 'look'.

When heated it turns into a sticky mess then is difficult to remove :(

:( I've scraped as much as I dare for now and used a stanley blade to scrape in the fine grooves. Still a long way to go.

CIMG8751.jpg

CIMG8752.jpg


I've applied toolstations water based stripper to the moulding as a test to see if it will remove the nasty sticky scumble devil. I fear it won't. Any tips on how to remove this devils work?
CIMG8753.jpg


Thanks
 
It certainly looks like the old finish is there to stay, be careful of the fumes when using a flame/heat gun on this lovely door.
Unless you wish to make you're own stripper, carefully using caustic soda, I found The heat gun was the only way to get the "gunge" off. Each time the scraper has a load of "gunge" stuck to it, gently torch the nasty mess, making it crispy and then it's easier to scrape that off after cooling for a few seconds.
It's a laborious unpleasant smelly job but worth it in the end.
when prepped for painting, it would probably pay you to prime the door with dulux silver primer. or very similar, as it will be a sealer against the former oily finish as well. Regards Rodders
 
blackrodd":3lxx0knt said:
It certainly looks like the old finish is there to stay, be careful of the fumes when using a flame/heat gun on this lovely door.
Unless you wish to make you're own stripper, carefully using caustic soda, I found The heat gun was the only way to get the "gunge" off. Each time the scraper has a load of "gunge" stuck to it, gently torch the nasty mess, making it crispy and then it's easier to scrape that off after cooling for a few seconds.
It's a laborious unpleasant smelly job but worth it in the end.
when prepped for painting, it would probably pay you to prime the door with dulux silver primer. or very similar, as it will be a sealer against the former oily finish as well. Regards Rodders

I keep the shed door open a touch to keep air moving around.

I had read about making stripper and have some caustic soda left over. I once had a rather explosive sink unblocking incident with the stuff so I know how dangerous it can be. Picture a 100g of caustic crystals down the sink then some cretin (me) turns the tap on and gets sprayed in the face with burning gel. Not good.

Any top tips on making it up? How do you neutralise it, I read vinegar's effect but don't fancy soaking my door with it.

With regards to paint I was lookign to use sadolin superdec or sikkens rubberol? Maybe a zinnser primer or primer suggested for use with superdec or rubberal. Any advice welcome.
 
billybuntus":20ak56qa said:
blackrodd":20ak56qa said:
It certainly looks like the old finish is there to stay, be careful of the fumes when using a flame/heat gun on this lovely door.
Unless you wish to make you're own stripper, carefully using caustic soda, I found The heat gun was the only way to get the "gunge" off. Each time the scraper has a load of "gunge" stuck to it, gently torch the nasty mess, making it crispy and then it's easier to scrape that off after cooling for a few seconds.
It's a laborious unpleasant smelly job but worth it in the end.
when prepped for painting, it would probably pay you to prime the door with dulux silver primer. or very similar, as it will be a sealer against the former oily finish as well. Regards Rodders

I keep the shed door open a touch to keep air moving around.

I had read about making stripper and have some caustic soda left over. I once had a rather explosive sink unblocking incident with the stuff so I know how dangerous it can be. Picture a 100g of caustic crystals down the sink then some cretin (me) turns the tap on and gets sprayed in the face with burning gel. Not good.

Any top tips on making it up? How do you neutralise it, I read vinegar's effect but don't fancy soaking my door with it.

With regards to paint I was lookign to use sadolin superdec or sikkens rubberol? Maybe a zinnser primer or primer suggested for use with superdec or rubberal. Any advice welcome.

How about the old nitromors, before the H&S carp was introduced? ;)

http://www.diynot.com/forums/viewtopic.php?t=126327

http://www.ebay.co.uk/itm/1-LITRE-Dichl ... 3385434fa7
 
BB, there is a recipe for wallpaper paste and caustic soda, which was very sucessful but i can't remember the details.
I do remember it is really not a good idea to use it in hot water, almost explosive.
As i understand it, you can neutralise with white vinegar which is virtually odourless as you'd probably get fed up with a chip flavoured door!
Sorry, I can't help with the Sikkens query, I stopped using it when a customer reckoned the fumes killed some kittens.
I am glad to say that i was only there to jetwash and paint the masonry. Regards Rodders
 
I just happen to have recently used 'proper' stripper - see here and can vouch for it's effectiveness at removing paint layers built up over 80+ years (shellac like brown stain, distemper, oil and water based etc). Thick, gel like liquid and worked quickly (bubbling after <1 minute). Needed two applications/scraping for full removal.
 
Well, after many hours of stripping and scraping the end is in sight. I ended up buying some panther stripper (chemical) from toolstation which didn't cause my eyes to bleed but once left for 30 mins did what I wanted it to do. It certainly didn't burn my skin on contact. A little patience was all I needed.

I've thoroughly washed the door down with warm soapy water then rinsed with a hose. Just finished drying the door off.
CIMG8765.jpg

CIMG8768.jpg

CIMG8766.jpg


My plan up until now is to give the door a final clean with methylated spirits (unless anyone has any better suggestion) then sand with 120 then 240 grit then apply a coat of zinnser bin 123.

I have a few repairs to do on the molding most of which can be filled but one needs a minor wood graft which I'll do by cutting the donor piece from another piece of old molding and glue it in place then fill and sand to shape.

I'll then sand the primer back with 240 and apply a second coat. Then it'll be time for a coat of sadolin superdec.

I need to seal the gap (external side) between the panel and the molding, will decorators caulk be find or should I be using something a little more robust like Polysulphide Sealant or frame sealant?

Any criticism of my plan? I don't want to make a balls up.

Thanks
 
Excellent work on that door! It has, by you're efforts, been well re-juvinated.
I can see the vast amount of sometimes tedious work that's gone into this, and it will look really good.
Almost any one can paint, This is the preparation needed to get that excellent finish!
Which sealant is flexible and compatible with the Sikkens? I don't know the answer to that one.
Guessing, I would say frame sealant. Regards Rodders
 
The door is now finally ready for a coat of primer. I've got some other work on so the doors being put away for a few weeks in order to raise funds for the rest of the work.

I've been deliberating on whether or not to copy the original surround albeit scaled up a little or whether to change it slightly as I'm paranoid about joining the two corners together without movement.

Found an interesting read on front doors.

Got a price on a sapele 3x4 frame including fan light which weighs in at £300 including a weather seal. The whole budget appears to be growing. I'd originally thought around £600 tops but it's about double that just for materials.

http://patrickbaty.co.uk/2009/07/06/som ... rs-part-1/
 
Well, it's been a while. The doors had 2 coats of zinnser 123 primer (zinnser bin used for spotting and edges) and two coats of superdec. Not sure where the pics I took of it are so I'll have to have a look for them later (the doors buried beneath 15 other at the moment).

On to my next challenge. Started taking off the awful crazy paving yesterday and some render. The crazy paving came off well to reveal a sound base. I was actually expecting it to be soil and rubble infill so double bonus. Although I need to remove 3 inches from the steps height to make the steps proportions correct. I'll be cutting away a bricks width and facing the bottom step with two courses in height. I'm yet to acquire the bricks. Jewsons stock some engineers that looks like victorian commons so they should fit the bill nicely.

In other news the bay brickwork has seen better days. Looks like the lime mortar is shot and most of the bricks faces came away just using a hammer and chisel to ease the blown render off. I didn't dare touch it with the breaker drill. It's far from solid.

I'm hoping to replace the brickwork by taking it steady and replacing sections at a time. There appears to be a concrete cill under the bay so I'm hoping that will hold while I make good of it. I may have to put a temporary lintel across to take the weight. Any thoughts on how to tackle?

Anyway, pics.


I'll be leaving the rest of the bays render until I make good of this section. It's too weak for my liking.


The door surround replacement is the least of my worries at the moment. That'll come once I've hacked the render off and made good of the bay. I'm hoping the other bay isn't in such a state :(

 
Well I'm a little further on and the plan has changed somewhat.

After spending a while hacking off the render the stone underneath isn't actually that bad. I plan to replace the brick sections and sand blast the stone (carefully) to take off any remaining cement residue then re-point with lime.

I've rebuilt both brick bays and plan to fit stone cills to the upper windows and a soldier course of brick in an L shaped steel lintel to replace the timber lintels above the upper windows.

My current quest is to find some matching stone and get on with making good of the stone.

DSC_0068.jpg


DSC_0083.jpg


DSC_0084.jpg


DSC_0085.jpg


DSC_0088.jpg


DSC_0093.jpg


DSC_0098.jpg


DSC_0101.jpg
 
A bit further on. Brick replaced above each bay, ready to accept new sills. Had to cut a drip edge in the sills with a router a sacrificial v bit (just a standard trend bit).

Most of the stone is hacked out and the rest will be done when the scaffolding arrives on Friday :-D

Quite a bit of spoiled stone to replace and facia to remove. Looking to fit rise and fall brackets along with new guttering.

Should be starting to sandblast in two weeks time. Slow progress aS the only help I have is hacking out and re-pointing. Everything else is me aside from the occasional hand to lift sills in place etc.

Fair bit to do before the woodwork starts.


Thanks for looking.
 
Back
Top