


head clansman
Established Member
Hi all
As some of you will know I am going to try and make an infill plane not as most do manufacture the complete body, but using old planes as the donor body for the infill body. The first plane will be a 2" smoothing plane I 'm using a Record T5 for this plane ,the second one is to be a 2" jack plane and this one will be from an old Bedrock 605.
This is going to take some considerable time to complete so those of you that may be interested stay tuned , I have now sourced all the raw materials to make a start on manufacturing the blade , cap irons , lever cap , lever cap bolts , cap iron bolts lever cap swivel bolts and grub screws plus a lump of beli hardwood for the totes and handles.
Seeing there a lot of metal working involved i decided to get most of it roughed out first , before i start assemble , when assemble actually starts then I'll put the finishing touches to the metal work as the work progresses,
so here go's a few pics to bring you up to date.
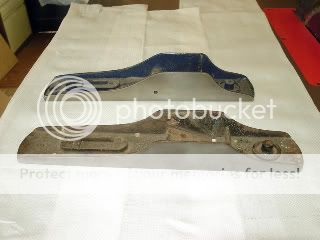
Pic1 showing the dismantled bodies of the donor planes .
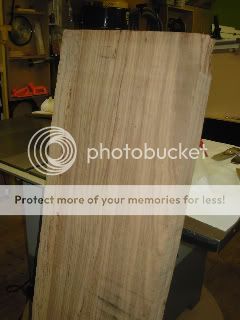
PIC 2 showing lump of timber from yandles of martock as i 'm not that far into hardwoods they tell me it beli , as yet i don't know what it like to work but it does have a very nice grain run which i hoping it will give the tote and handle the effect on the handle that i'm looing for .
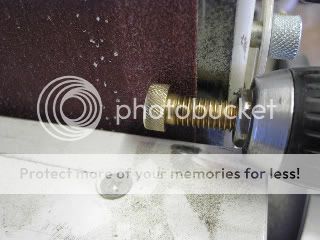
Seeing I wanted to make all components my self and don't have a lathe making the lever cap bolt and cap iron bolt at first seemed like a problem , so I decided to use my axminster sanding machine in conjunction with a battery drill , the drill when switched on is turning inwards towards the direction of the sander pulling in a downward direction so the body of the drill was force to rest on the guard of the sander keeping it a steady position I was really surprised at the results I got , In fact i'm really chuffed with the bolts, i did both the lever cap bolts and the cap iron bolts as well , I cocked up the first cap iron bolts first time around they need to be longer so i could grip them more securely in the chuck to centre them more accurately.
pics 3+
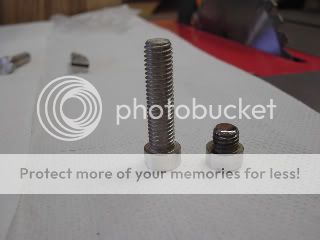
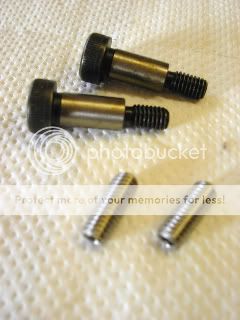
This pic shows the original cap iron bolts + the hexagon bolts before grinding started on the sander and the finished bolts ground down to the size required to fit snugly in to the Norris adjuster .
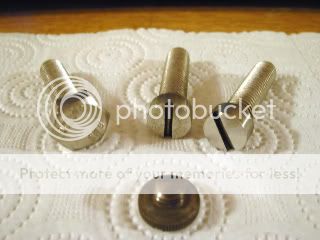
showing the bolt after grinding them this was done to the brass lever cap bolts and the cap iron bolts .
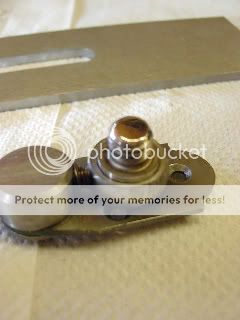
cap iron bolt cut to length and snugly fitted into norris adjuster
cap iron bolts before and after
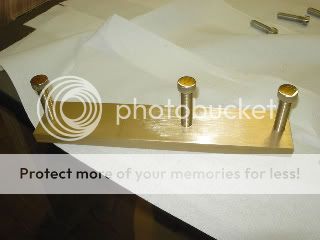
Brass bar drilled and lever bolts in position brass ready to be cut to length to form lever cap at a later date .
Lever cap bolts all buffed up

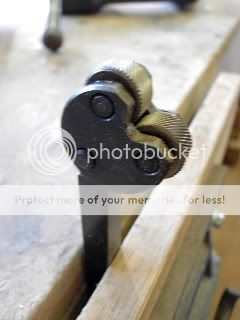
the next two pics shows i bought this knurling tool from ebay clamped in to the vice and again used the battery drill a nd it did the job ok .

this pic shows the swivel bolts for the the lever cap itself the bolt will have the heads cut off to length and slot cut into end at a later date during assemble .
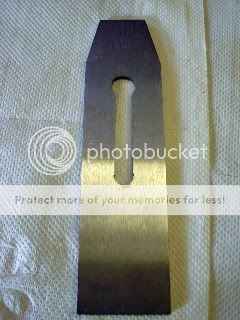
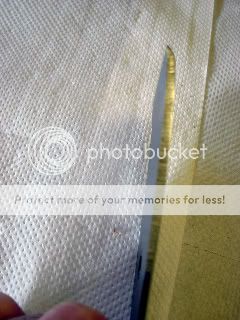
Plane irons phew a lot of work still as yet unfinished still to be ground for angles on the end and to be hardened and tempered and then have there final polishing to a high finish standard .
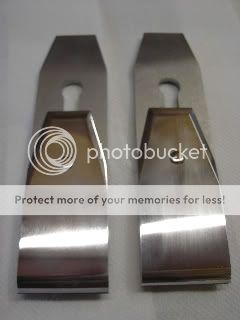
iron cap showing bent to shape
well guys that about it for now , hope you enjoyed and didn't fall asleep half way through the post , stay tuned more as soon as i can . hc
As some of you will know I am going to try and make an infill plane not as most do manufacture the complete body, but using old planes as the donor body for the infill body. The first plane will be a 2" smoothing plane I 'm using a Record T5 for this plane ,the second one is to be a 2" jack plane and this one will be from an old Bedrock 605.
This is going to take some considerable time to complete so those of you that may be interested stay tuned , I have now sourced all the raw materials to make a start on manufacturing the blade , cap irons , lever cap , lever cap bolts , cap iron bolts lever cap swivel bolts and grub screws plus a lump of beli hardwood for the totes and handles.
Seeing there a lot of metal working involved i decided to get most of it roughed out first , before i start assemble , when assemble actually starts then I'll put the finishing touches to the metal work as the work progresses,
so here go's a few pics to bring you up to date.
Pic1 showing the dismantled bodies of the donor planes .
PIC 2 showing lump of timber from yandles of martock as i 'm not that far into hardwoods they tell me it beli , as yet i don't know what it like to work but it does have a very nice grain run which i hoping it will give the tote and handle the effect on the handle that i'm looing for .
Seeing I wanted to make all components my self and don't have a lathe making the lever cap bolt and cap iron bolt at first seemed like a problem , so I decided to use my axminster sanding machine in conjunction with a battery drill , the drill when switched on is turning inwards towards the direction of the sander pulling in a downward direction so the body of the drill was force to rest on the guard of the sander keeping it a steady position I was really surprised at the results I got , In fact i'm really chuffed with the bolts, i did both the lever cap bolts and the cap iron bolts as well , I cocked up the first cap iron bolts first time around they need to be longer so i could grip them more securely in the chuck to centre them more accurately.
pics 3+
This pic shows the original cap iron bolts + the hexagon bolts before grinding started on the sander and the finished bolts ground down to the size required to fit snugly in to the Norris adjuster .
showing the bolt after grinding them this was done to the brass lever cap bolts and the cap iron bolts .
cap iron bolt cut to length and snugly fitted into norris adjuster
cap iron bolts before and after
Brass bar drilled and lever bolts in position brass ready to be cut to length to form lever cap at a later date .
Lever cap bolts all buffed up
the next two pics shows i bought this knurling tool from ebay clamped in to the vice and again used the battery drill a nd it did the job ok .
this pic shows the swivel bolts for the the lever cap itself the bolt will have the heads cut off to length and slot cut into end at a later date during assemble .
Plane irons phew a lot of work still as yet unfinished still to be ground for angles on the end and to be hardened and tempered and then have there final polishing to a high finish standard .
iron cap showing bent to shape
well guys that about it for now , hope you enjoyed and didn't fall asleep half way through the post , stay tuned more as soon as i can . hc
")