


Malcolm R
Member
After lurking here and admiring the work of others I thought it was time to post my latest project – a table. When I started the project I took lots of pictures but forgot in the middle so the build “jumps” somewhat.

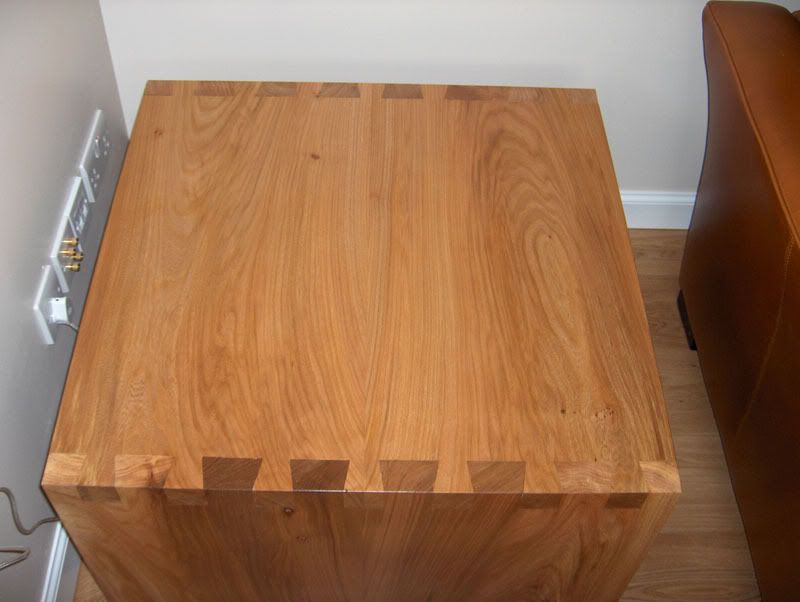
The wood is elm and the finished table is 750mm square and 450mm high. The finish on the table is sanding sealer and wax.
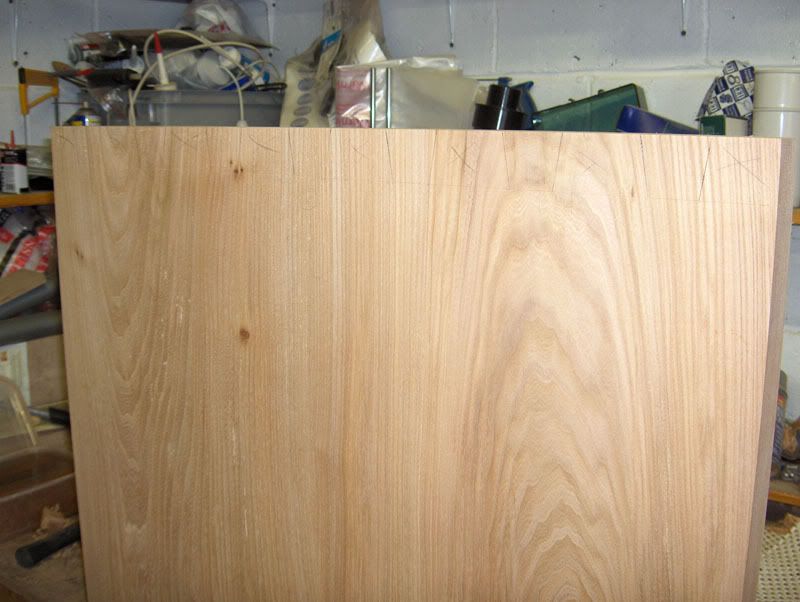
I started with two boards, each approximately 2m x 380mm x 40mm
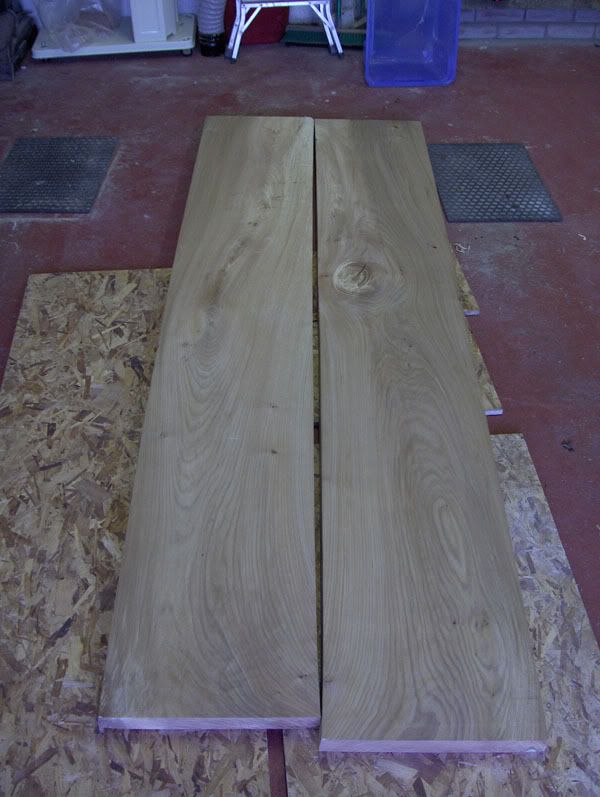
First job was to cut them to approximate length, joint them and glue sections together to give me three pieces about 760mm wide.
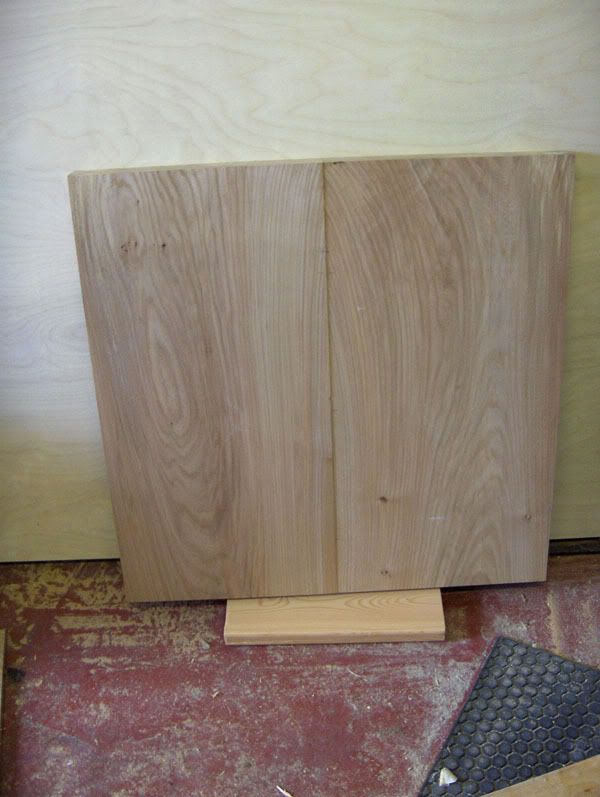
Two rows of biscuits were used.
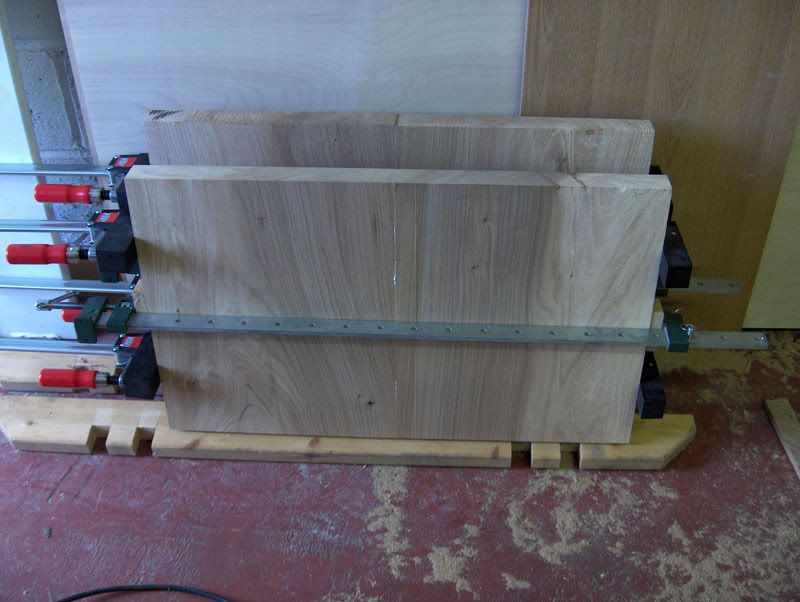
After further planing I was ready for the dovetails.
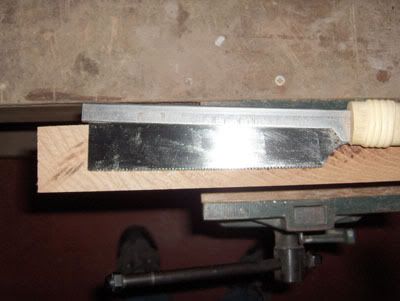
This is where the fun began and the pictures stopped! The problem is the thickness of the wood as my dovetail saw would not cut the full depth. My solution was to cut as far as I could then tip the blade at an angle to get down to the scribed line at either side. You can see in this photo the difference in the thickness of the wood and the depth of the blade.
Removing the waste was the next challenge – started with a coping saw but that was hard going so I next tried the router but that is scary and I made one, very, small mistake. After going back to the coping saw for a bit I next tried the jigsaw which worked fairly well.
After much sawing and chiselling the three pieces were assembled – no dry run as I reckoned I would only get one chance. I am not sure if my joints were too tight or if it was simply the problem of trying to slide wide, thick boards together but I found that the easiest way to assemble was to use clamps and tighten each in turn to slowly pull the pieces into place.
Despite my best efforts, a few of the joints were not as tight as I would have liked so I inserted a few small wedges to fill the gaps before giving the whole table a final plane. The last stage was to cut a curve on the bottom of each side. I reckon most people would suggest doing this before assembling the table but I wanted to keep the bottom edge square for assembly – easier to avoid marking with a hammer if you can get a block on it! The cut was made with the router and a template and a lot of praying.
Lessons learnt: I need to practice dovetails more, routers may remove waste quickly but things can also go wrong very fast and have the courage to stick with my instincts – I convinced myself that one joint was too tight when I knew it had been marked carefully and I was right (one more joint with a wedge)!
The wood is elm and the finished table is 750mm square and 450mm high. The finish on the table is sanding sealer and wax.
I started with two boards, each approximately 2m x 380mm x 40mm
First job was to cut them to approximate length, joint them and glue sections together to give me three pieces about 760mm wide.
Two rows of biscuits were used.
After further planing I was ready for the dovetails.
This is where the fun began and the pictures stopped! The problem is the thickness of the wood as my dovetail saw would not cut the full depth. My solution was to cut as far as I could then tip the blade at an angle to get down to the scribed line at either side. You can see in this photo the difference in the thickness of the wood and the depth of the blade.
Removing the waste was the next challenge – started with a coping saw but that was hard going so I next tried the router but that is scary and I made one, very, small mistake. After going back to the coping saw for a bit I next tried the jigsaw which worked fairly well.
After much sawing and chiselling the three pieces were assembled – no dry run as I reckoned I would only get one chance. I am not sure if my joints were too tight or if it was simply the problem of trying to slide wide, thick boards together but I found that the easiest way to assemble was to use clamps and tighten each in turn to slowly pull the pieces into place.
Despite my best efforts, a few of the joints were not as tight as I would have liked so I inserted a few small wedges to fill the gaps before giving the whole table a final plane. The last stage was to cut a curve on the bottom of each side. I reckon most people would suggest doing this before assembling the table but I wanted to keep the bottom edge square for assembly – easier to avoid marking with a hammer if you can get a block on it! The cut was made with the router and a template and a lot of praying.
Lessons learnt: I need to practice dovetails more, routers may remove waste quickly but things can also go wrong very fast and have the courage to stick with my instincts – I convinced myself that one joint was too tight when I knew it had been marked carefully and I was right (one more joint with a wedge)!
