Cutting Acrylic

UKworkshop.co.uk

Help Support UKworkshop.co.uk:

This site may earn a commission from merchant affiliate links, including eBay, Amazon, and others.
Eric The Viking":24h4rdat said:
I've had the weld-behind-the-blade thing happen in the past, on a motorcycle windscreen (which was expensive!). Hand tools are the way to go, and sand, don't attempt to plane.

Decades ago, I had a summer job in a light engineering factory. We made a lot of small parts - scales, verniers, etc. - from Perspex (= Plexiglas = acrylic). We always finished the edges with a slow-running linisher (belt sander). You can get a really good finish by ending the sanding with Jif-type cream cleaner, followed, if necessary, by toothpaste. There's also some special polish called Novus which you can find on eBay.

You can theoretically melt the edges to be smooth by running a blowlamp along, but use a butane one as it's cooler, and don't hesitate anywhere. I struggle to make this work well though. I'd guess you might try a domestic iron and greaseproof paper, but it might not be hot enough. There's a very fine line between melting and burning the stuff.

I've had equipment cases made up in 3mm and 6mm in the past (for exhibitions). I used an architectural modelmakers, who were happy to do it. They had a special Perspex bonding system with UV curing glue: you put a few drops along the joint, then hit it with a really strong UV source (with a fibre-optic light pipe, I think). The UV helped the glue spread and cured it, so the joint became almost invisible, and with no bubbles. Bubbles are almost impossible to avoid otherwise. the UV curing glue doesn't spread beyond the joint (usually) so the result looks really good, but isn't quite mechanically strong as the unjointed material.

I've recently seen other Perspex glue on eBay. The original formula was chips of perspex dissolved in Chloroform - highly inflammable, quite nasty to humans, and with very limited shelf life. I don't know what the current stuff is like, but I have to get some soon to repair a crack in a windscreen.

Hope you succeed, but I think it's one of those jobs where hand tools really win over power. As mentioned, a backing board may be a good idea too, to mimimise breakout.

Hope it goes well,

E.
Cutting is not a problem if the correct blade is used i.e. we used a 300mm x 64t negative rake TCT on standard table saw and Holz-her wall saw at normal high speeds and never had a blade "weld"
At home, I regularly cut on my SIP table saw, Startrite bandsay, jigsaw and by hand. I also score and snap anything 3mm down if straight cuts.

To polish edges, the method we always used was a fine flat file followed by very fine abrasive on a hard sanding block. You can micromesh and brasso / chrome polish if required. There are specific polishes available including a 2 part system from ICI (Perspex brand), or at least there was as I have some which I still use to polish acrylic pen blanks on the lathe. I would never advise anyone to use a plane.

Tensol cement is / was available specifically for gluing cast acrylic and I never found it any more hazzardous to use than other solvent based glues. It dries clear and makes a very strong joint. Also, despite the published shelf life, it lasts very much longer and I have a tin now well over 25 years old that still works very well.
Eric is right about the basic formula and you can in fact glue just with chloroform is the surfaces are very good or make up your own cement if you can get hold of the chloroform

Flame polishing edges. Very easy to do with a little practice. As said, keep the flame moving but it doesn't take long to recognise the speed of that as you can see the acrylic melt behind the flame. It's a method which was extensively used in my day by most of the plastic forming and display companies and I've done it numerous times. Like everything, the secret is the preparation, if it isn't smooth first then the results will be poor. The other factor is to match the size of flame to thickness of acrylic, i.e. very small pencil flame for 3mm, larger for 10mm or it won't work properly. The flame should ideally stay within the edge and not lap on to the faces of the sheet.

Just my experience and opinion.
cheers
Bob
 
Thanks Bob - I was just a blue-coated droid when I did that stuff ("do what you're told-- don't think about it").

I think the problem of re-welding is because ordinary jigsaw blades heat up very fast - low mass, always close to the cutting teeth, and possibly rubbing the edge of the cut too. I can see why you don't have the same problem with a circular saw and a bandsaw. I use the bandsaw at home, but only to rough-cut stuff as the finish isn't wonderful on plastics. The blade stays cool and the only issue is the static charge given to the chips (but I have good extraction).

I haven't tried neg rake, as even the blade on my mitre saw has slight positive rake (but lots of teeth). It's supposed to be suitable for acrylics, and leaves a glass-like finish on aluminium usually, so I may try it next time. That or get a negative-rake blade for the tablesaw, as I most usually need to make long, straight cuts.
 
Eric The Viking":32qjulms said:
Thanks Bob - I was just a blue-coated droid when I did that stuff ("do what you're told-- don't think about it").

I think the problem of re-welding is because ordinary jigsaw blades heat up very fast - low mass, always close to the cutting teeth, and possibly rubbing the edge of the cut too. I can see why you don't have the same problem with a circular saw and a bandsaw. I use the bandsaw at home, but only to rough-cut stuff as the finish isn't wonderful on plastics. The blade stays cool and the only issue is the static charge given to the chips (but I have good extraction).

I haven't tried neg rake, as even the blade on my mitre saw has slight positive rake (but lots of teeth). It's supposed to be suitable for acrylics, and leaves a glass-like finish on aluminium usually, so I may try it next time. That or get a negative-rake blade for the tablesaw, as I most usually need to make long, straight cuts.
Hi Eric
My jigsaw is variable speed so just take it slowly but you're dead right about friction on the blade and heat build up. I often see advice to use a metal cutting blade, I do the opposite and use a medium woodcutting blade as it clears the chips and reduces friction. No problem if you clamp or sandwich thin sheet. When we were cutting to sell on we needed the best cut possible at best speed, don't need that at home.
Normal mitre saw blades are fine. When it goes wrong is when the material is allowed to move, usually while withdrawing the blade and it grabs and can shatter the plastic, especially thin sheet. - don't ask !!!

If you have time, have another go at flame polishing as it really is just practice makes perfect. There are situations however where that isn't the best method as it slightly stresses the edge. Can't think of any home use where that would apply offhand!
Cheers
Bob
 
Thanks Eric and Bob for the extra info. I realised yesterday that i had a couple of small sheets of 6mm clear perspex (bought last year to make a router jig) so I'll experiment on that first and update how I get on -probably at the end of the weekend. I'll search out some glue as I can use it for the jig.

Re polishing, the kitchen spashbacks came with their own kit - which looks to be various grades of 150mm diameter abranet and a shaped holder plus some polishing cream. I alsoy have some Novus paste that I've used for acrylic pens.

Dave
 
I successfully cut and fitted them last weekend but haven't yet sorted my camera/pc photo problems so just a text update for now....


To cut the splashbacks I made a 3.8m long cutting board using OSBboard and some timber battens glued underneath. I put this on two tables to give me the support. I used my festool rail system (3 x1.4m joined together) and my new trigger festool clamps. The splashback is 6mm thick so i used a 6mm packer so that the clamps caught that before the OSB (one end of the splashback against OSB edge, the other end packer overhung). I also used spring clamps to keep the splashback from moving.

I put masking tape on the splashback and made the markings onto that - the splashback is clearly labelled which is front, the rail goes on that surface (leave the film on both sides). Using masking tape made it easy to remember that once the 'front' label was cut off.

I used a festool aluminium blade ("Flat trapezoidal tooth saw blade (TF) " code 496306) and set the TS55 speed to 2 - this left a very smooth cut, no chipping and could then be sanded and polished with the supplied kit. The kit had 240,400 600 but I also used some abranet 80 & 180 - just to speed up the process (not really necessary for the festool cuts but was for the router ones). The blade cut approx 2mm into the OSB.

For the socket holes I opted to use a dewalt router with a 3.5mm cutter (wealden normal flute one) and set the speed to 2. I wanted a small radius and lowest peripheral speed hence the small cutter. To make a cut out I masking taped the area and then determined the offset for wooden guides (in my router case that was 53mm). I just freehand plunged into the corners and then used basic wooden straight edge guides clamped to the offset mark. Even with the slower feed the router did leave plastic behind it but this was easy to remove - my advice is use the saw first to cut to length/width then practice with the router on the offcut.

I had three pieces to cut. One was straigtht, one was reduced in height under cupboards then full height by the cooker - for this one I used the router to plunge the corner of the cutout and 2cm on each side then used the saw rail to cut it. The last piece was behind the sink so had a thinner bit in the middle by the window. I opted to use the router to cut all three sides of this one. I did have a jigsaw and acrylic blades but the router was easier on the osb table.

Sanding the edges and finishing with the polishing paste gave an excellent finish.

When doing the marking out for the cutouts remember the fact that the splashback will be 3mm away from the surface and corner.

For the splashback by the sink and window we tiled the window cill first then sized the splashback so it came to the top face of the tiles., then white sealed it. We also realised that we couldn't fit this in place due to the wall cupboards and sink tap - so had to remove the sink tap ....plan ahead!

I fitted the splashbacks using Everbuild Stixall Extreme Power crystal clear...excellent stuff. For my three lengths I used just over 3 tubes. I used this to seal the sides and top, but used a white silicon for the worktop and tiles joins (finished with a Fugi edging tool).

Heres a link to fitting it (the actual product is Akril)
http://www.blackheathproducts.co.uk/ima ... on_Web.pdf


Dave
 
Ditto from me - well done!

I came across those Fugi things a few years ago - really like how well they work - you wouldn't think they are anything special by how they look, but there must be something about the plastic used, I think - the sealant slides over them and doesn't seem to stick to them.

We were getting mosaic tiles installed at the time, which I left to a pro, as they're basically glass and a real PITA to do. Anyway, he was a bit sceptical about the Fugi things, but tried them and was impressed. I've used them since for re-doing old sealant, with really good results (blending in to runs where the sealant was still good).
 
I've sorted out my 'missing' hard disc and resized the images to fit below 256k...

I also fitted my normal 48 tooth festool blade today (albeit not a new one) and tried a test cut on an offcut of tekgaze. It was hard work, the saw kept trying to ride up out of the cut and after three passes and a lot of downward pressure it did it but left small chips on the face surface- this could be sanded out but the effort was so much harder than with the 'aluminium' profile blade I'd used.

Heres the photos ...

My OSB table (only because that's what I had) - the wider end bit was for cutting ther 600mm tekglaze to length

TEKGLAZE RAIL.jpg


And the tekglaze ready to be cut

TEKGLAZE ON TABLE.jpg


Routing a socket cutout (eventually I stopped using the side stops has hand control was enough)

TEKGLAZE ROUTER.jpg


And the finished item fitted to three walls....
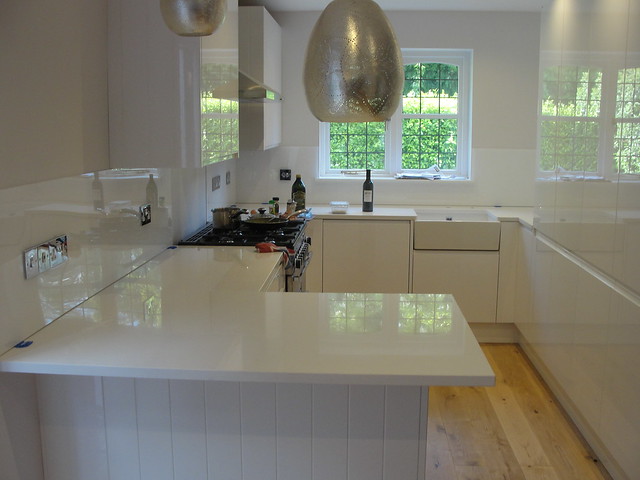
The vertical tekglaze joins had a 3mm gap and where flush sealed with clear sealant. this colour was 'green mist; and the units were wren kitchen "Pacrylic blue quartz gloss".
 

Attachments

  • TEKGLAZE RAIL.jpg
    TEKGLAZE RAIL.jpg
    193.4 KB · Views: 43
  • FITTED TEKGLAZE.jpg
    FITTED TEKGLAZE.jpg
    86.7 KB · Views: 38
  • TEKGLAZE ON TABLE.jpg
    TEKGLAZE ON TABLE.jpg
    171.6 KB · Views: 43
  • TEKGLAZE ROUTER.jpg
    TEKGLAZE ROUTER.jpg
    119.4 KB · Views: 43
Fitted some yesterday a right pain in the backside but im pleased with the end result and more importantly so is the customer.

 
chippy1970":13p9nds3 said:
Fitted some yesterday a right pain in the backside but im pleased with the end result and more importantly so is the customer.


What are the tops chippy?

I started a kitchen yesterday and the Mistral solid surface tops are being delivered tomorrow so got to fabricate them. Not looking forward to it, gonna be a heavy, dusty day. :lol:
 
Bob,

They're quartz Wren arranged that and a company called OMG did them. They did a good job and they werent eastern European which makes a change lol
 
Great thread. I am fitting some coco coloured Mistral in a bathroom in a week or two. Will use my TS55.
Also +1 for the fugen boys. I had mixed results until I realised I was using them the wrong way round! The beveled side should be on the back not the front. I also find baby wipes useful to clean up.

Sent from my GT-I9300
 
Yep ordered a fugi set off eBay ,gonna give it a try next week. Ive always just sprayed with soapy water and used a finger. By the look of the videos on you tube they look like they work well.
 
chippy1970":2yrt7m1a said:
Bob,

They're quartz Wren arranged that and a company called OMG did them. They did a good job and they werent eastern European which makes a change lol
I've only fitted a couple of quartz tops and not too difficult. Yours look excellent.

Are the fuji tool really that good? I've seen but never tried them but the look cheap enough to have a go.

What "coco" Mistral Porker? I have a full set of samples and not sure which one you mean. Don't throw away the offcuts btw, they have uses for turners.

cheers
Bob
 
I recently cut a window for a car from it. was worried as it is inclined to split. I used my Clark bandsaw on vertical at slow speed with a 28 tooth blade. went through it like butter. much easier than a intermittent cut with a jigsaw.
 

Latest posts

Back
Top