Newbie_Neil
Established Member
Anyway, this will be only the 3rd thing I've ever made (apart from the workshop) so be gentle with me 
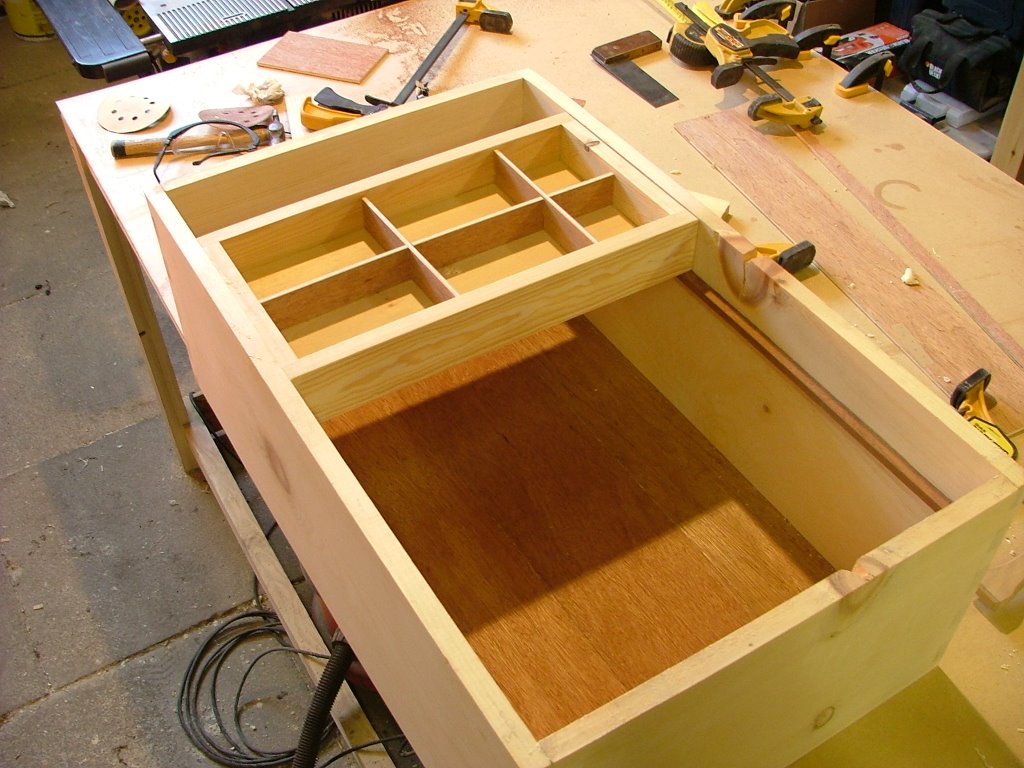
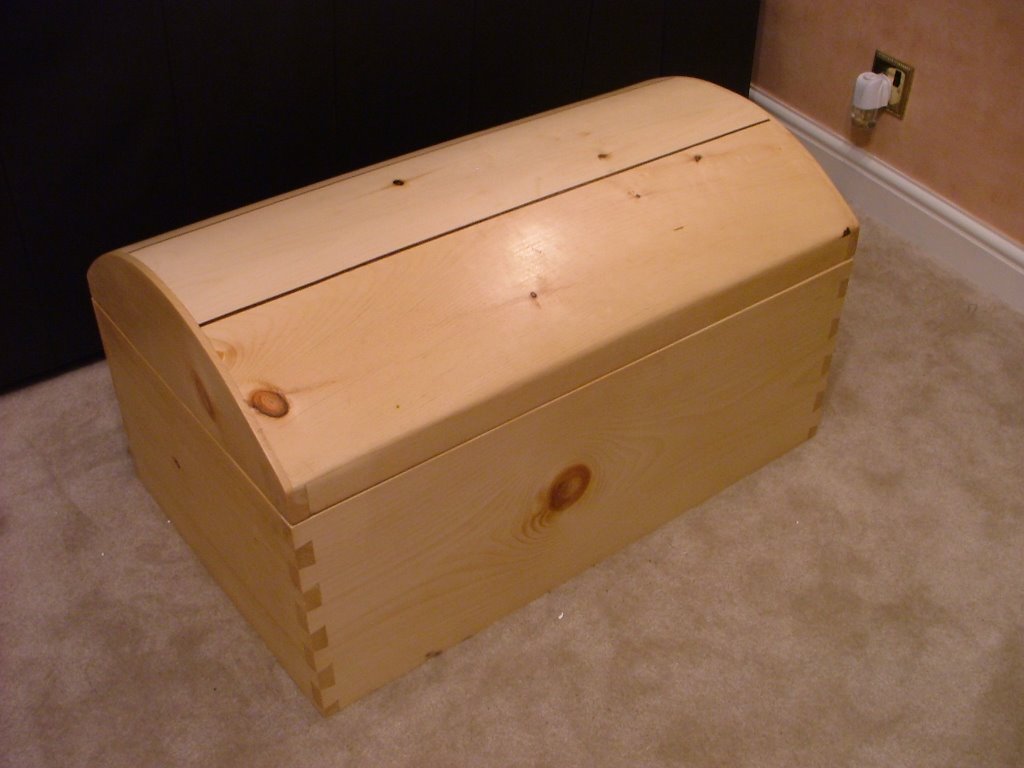
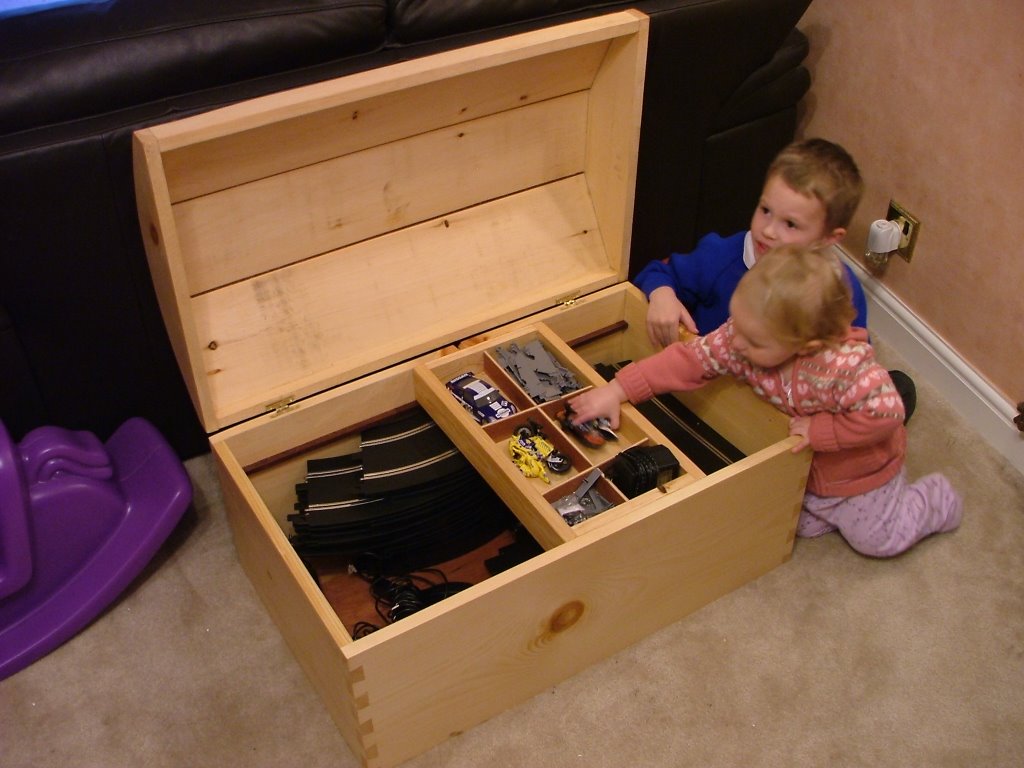
SWMBO has been nagging me for ages about making something to put George my 5YRO Scalextrics sets in. He has 2 of the large sets and there are lots of pieces and Cars/Bikes to protect. I thought if I can throw in a curve somewhere I could combine this with the comp and provide something usefull too.
I started with Sketchup -something else I need to learn and came up with a basic box, with a curved lid. Nothing too fancy, but I'm a total beginner.
I bought the Pine for the box this morning 12"x1" boards. really nice stuff, much better than the rubbish that I normally work with from B&Q. The boards have some large Knots but I quite like it and it will go with the furniture that is already in Georges' room when finished.

I used Cutlist following recommendations here to calculate the best cuts and set to work trimming the boards to length and square.
I had planned to dovetail all the pieces on my new jog from Axminster. But all this changed when I realized that the boards were too big to fit in it However I need the practice cutting them by hand anyway, so I set about marking everything up.

I did make a mistake with one of the Pins, I cut it too narrow I had George in the workshop with me after School and I was distracted talking to him whilst cutting. Anyway, I'm sure I can fix it with a couple of wedges before final glue up. It was a good lesson learned anyway.
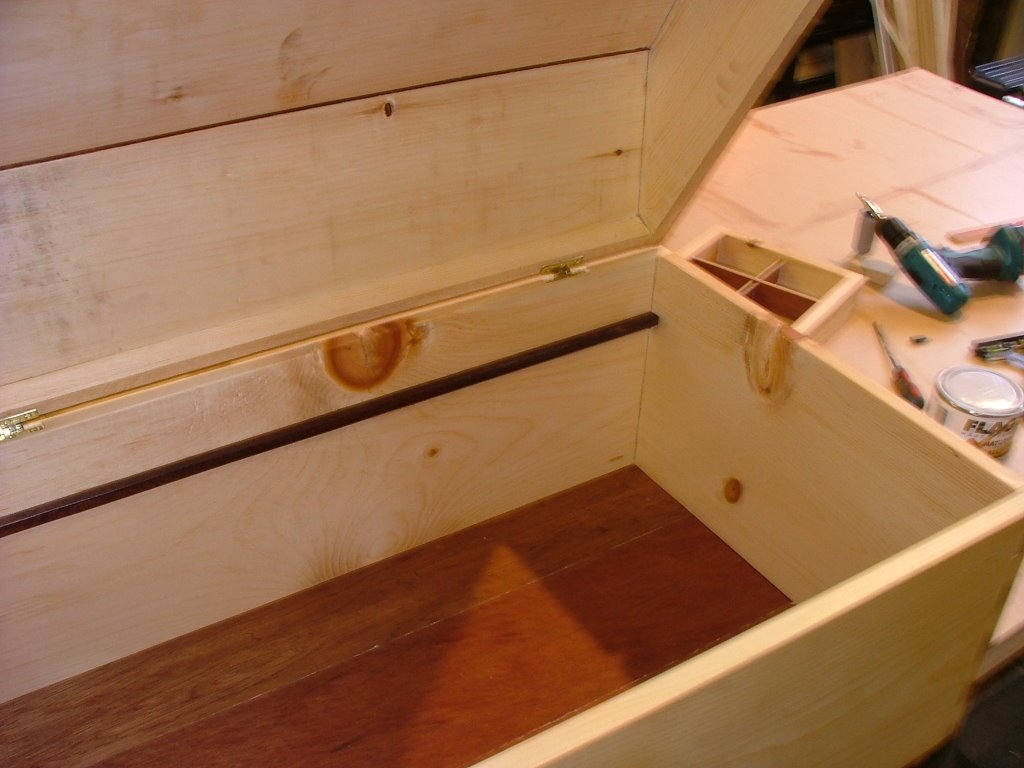
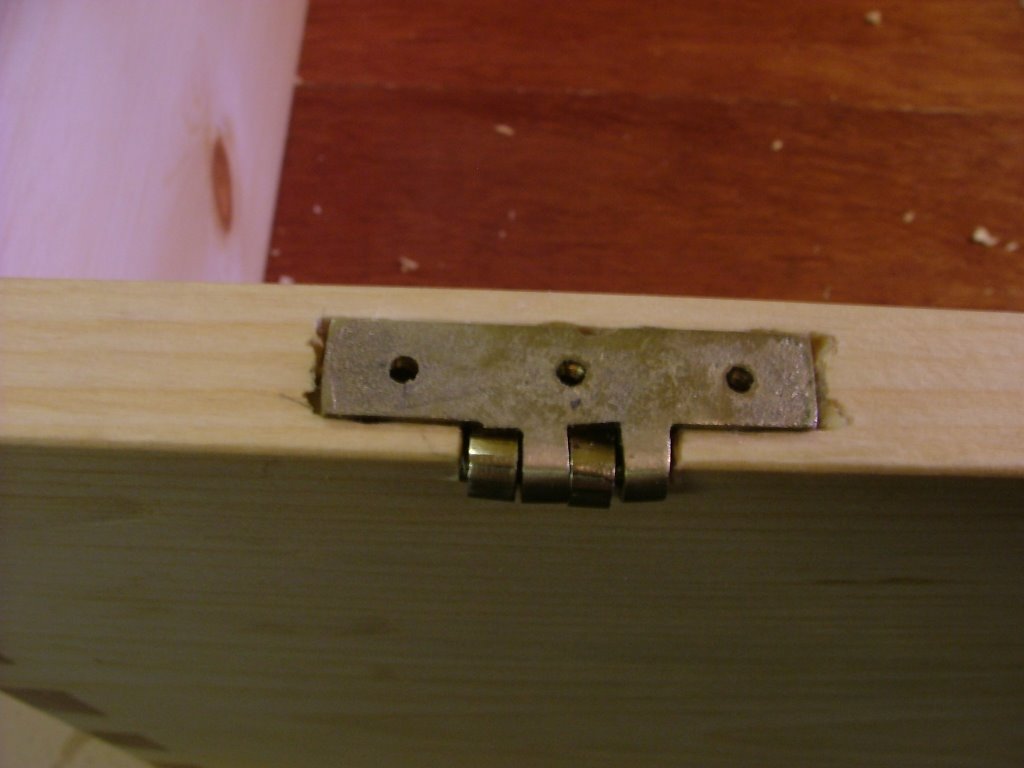
I now have all the Dovetails cut and test fitted. I then had to route a slot for the baseboard. I did not want the slots to be visible from the outside so I read a book that showed how to cut 'stopped dado's'. Looked pretty straight forward. I did this with a 6mm bit in the router with the fence thingy attached. Not too bad but had to look carefully for the pencil marks.
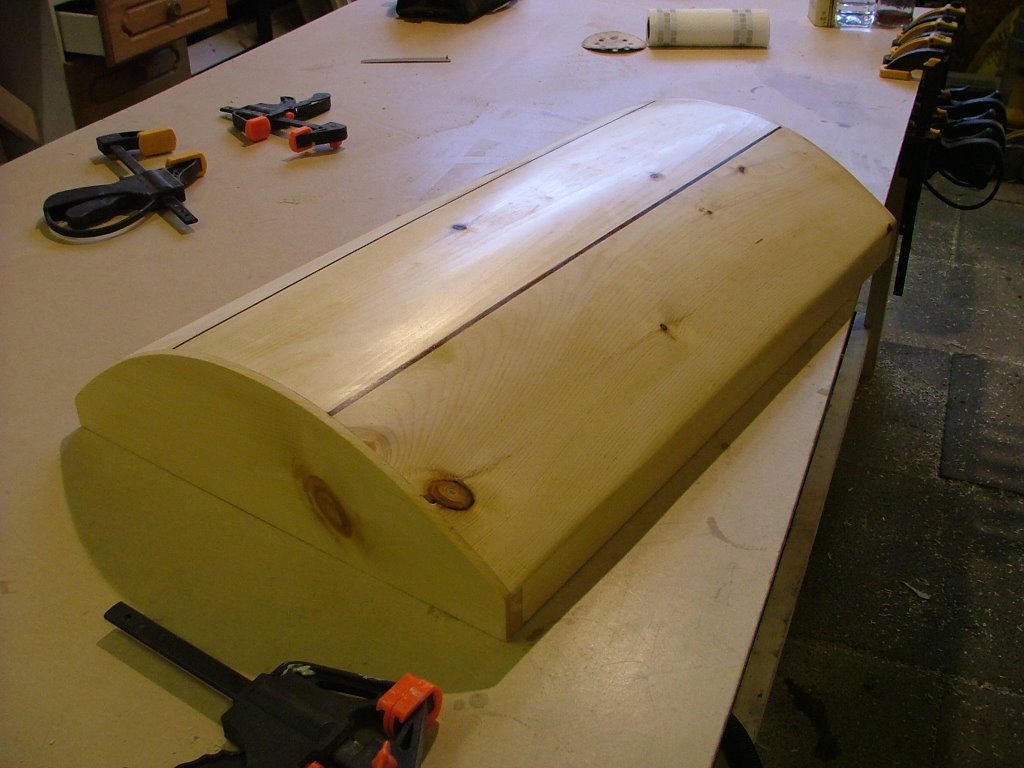
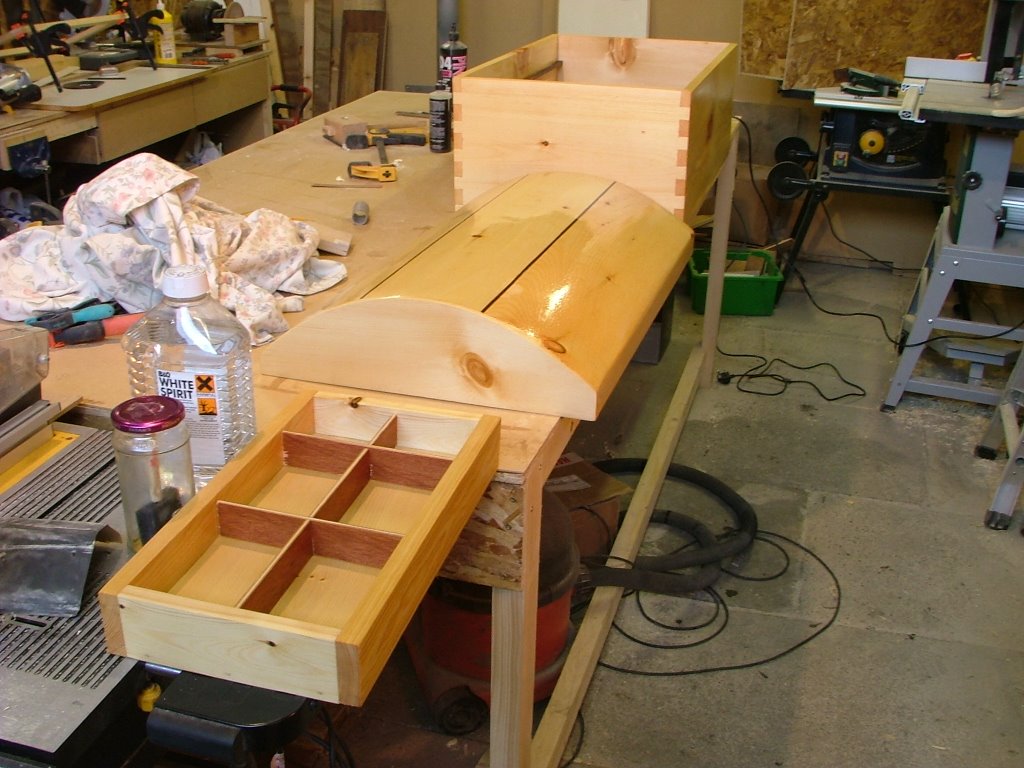
Last thing I did today was make a template for the curved lid. I made the template from a piece of 6mm MDF. I stuck a panel pin in the bench and tied some string to it with a pencil at the other end. This eventually gave me a radius for the lid of about 16" which looked ok. I cut this out on the bandsaw first. Then stuck the template to 2 pieces of the pine with tape. marked it out and used the bandsaw to cut out the pieces together. I might have a go with the router and use the template to trim the pieces tomorrow.

Have a look at my webshots site for some bigger pictures. http://community.webshots.com/album/548343579OVNEAB
Although I notice they have been having trouble, so it may not work.
Or look at my Blog http://theguitardoctor.blogspot.com/
Or failing either of them not working, try my own site http://homepage.ntlworld.com/lee_harrison944/Competition Entry/index.htm
Which is pretty reliable.
SWMBO has been nagging me for ages about making something to put George my 5YRO Scalextrics sets in. He has 2 of the large sets and there are lots of pieces and Cars/Bikes to protect. I thought if I can throw in a curve somewhere I could combine this with the comp and provide something usefull too.
I started with Sketchup -something else I need to learn and came up with a basic box, with a curved lid. Nothing too fancy, but I'm a total beginner.
I bought the Pine for the box this morning 12"x1" boards. really nice stuff, much better than the rubbish that I normally work with from B&Q. The boards have some large Knots but I quite like it and it will go with the furniture that is already in Georges' room when finished.
I used Cutlist following recommendations here to calculate the best cuts and set to work trimming the boards to length and square.
I had planned to dovetail all the pieces on my new jog from Axminster. But all this changed when I realized that the boards were too big to fit in it
However I need the practice cutting them by hand anyway, so I set about marking everything up.
I did make a mistake with one of the Pins, I cut it too narrow
I had George in the workshop with me after School and I was distracted talking to him whilst cutting. Anyway, I'm sure I can fix it with a couple of wedges before final glue up. It was a good lesson learned anyway. I now have all the Dovetails cut and test fitted. I then had to route a slot for the baseboard. I did not want the slots to be visible from the outside so I read a book that showed how to cut 'stopped dado's'. Looked pretty straight forward. I did this with a 6mm bit in the router with the fence thingy attached. Not too bad but had to look carefully for the pencil marks.
Last thing I did today was make a template for the curved lid. I made the template from a piece of 6mm MDF. I stuck a panel pin in the bench and tied some string to it with a pencil at the other end. This eventually gave me a radius for the lid of about 16" which looked ok. I cut this out on the bandsaw first. Then stuck the template to 2 pieces of the pine with tape. marked it out and used the bandsaw to cut out the pieces together. I might have a go with the router and use the template to trim the pieces tomorrow.
Have a look at my webshots site for some bigger pictures. http://community.webshots.com/album/548343579OVNEAB
Although I notice they have been having trouble, so it may not work.
Or look at my Blog http://theguitardoctor.blogspot.com/
Or failing either of them not working, try my own site http://homepage.ntlworld.com/lee_harrison944/Competition Entry/index.htm
Which is pretty reliable.