


cornucopia
Established Member
this is how i do my box's - everyone has there own way- this isn't meant to be "the only way" or "you must do it this way" just a brief guide, as always find which way/tools work for you.
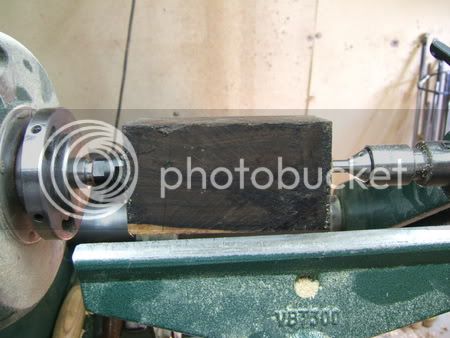
for this "how to" I used a very old piece of African blackwood which i have had in my house for several years, I would normally rough out the blank first to ensure that the fit of the lid stays as you left it but this blackwood wont move and i wanted to show the whole process.
This blank is 3" square by 5" long
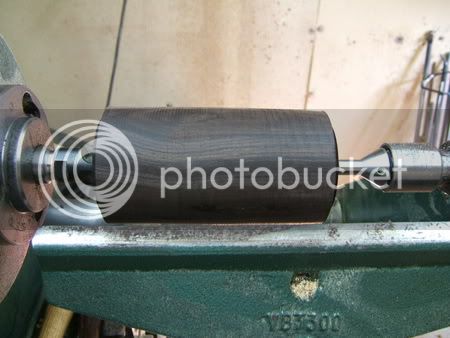
knocked into the round
I forgot to take a pic but mark out the lid from the base and part them through with a very thin parting tool
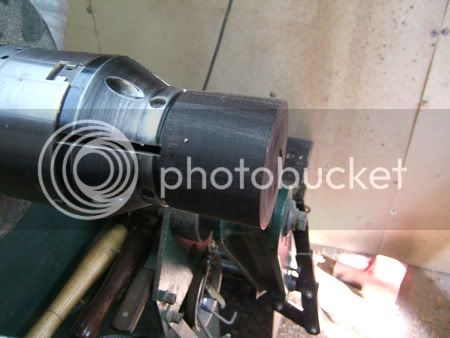
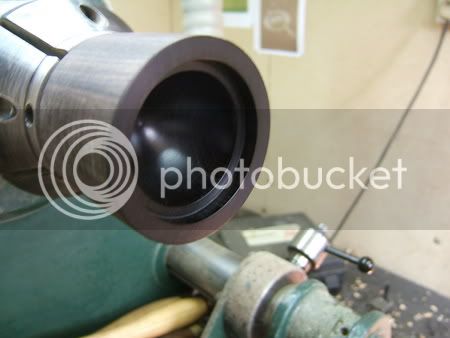
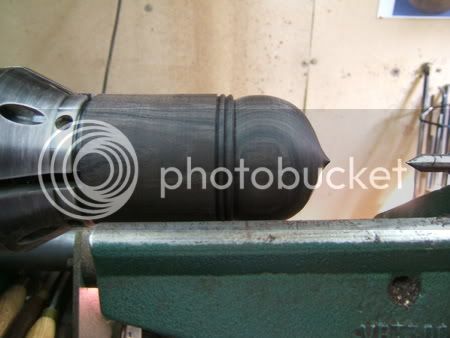
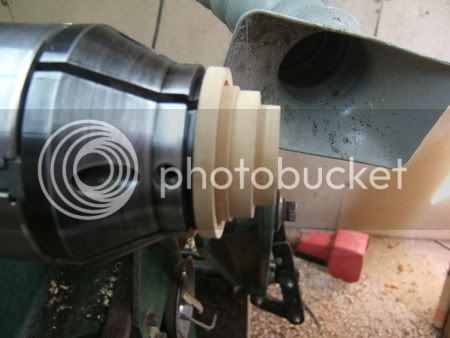
heres the lid mounted in my chuck
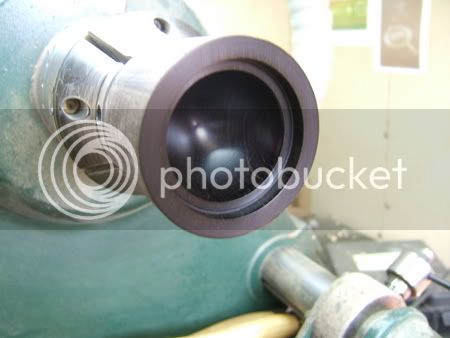
I hollowed out the inside using a spindle gouge on its side- then cut a female rebate this must have parallel sides if the lid is to make a good fit- sand a finish the inside now
mount the base in the jaws
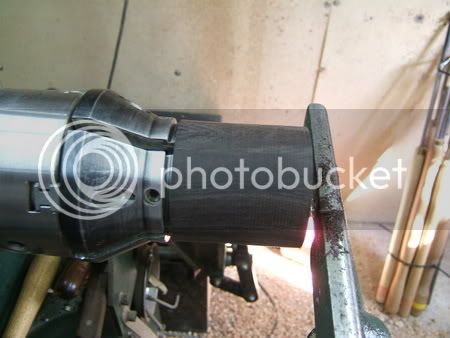
make a male tenon to fit the lid- at this stage you want to jam fit the lid onto the base to make the outside of the lid- i take a core out of the centre of the base at this point
jam the lid on but make sure its not too tight as you cant remove it once the lids sanded :roll:
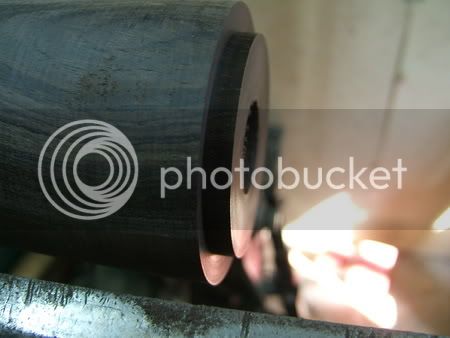
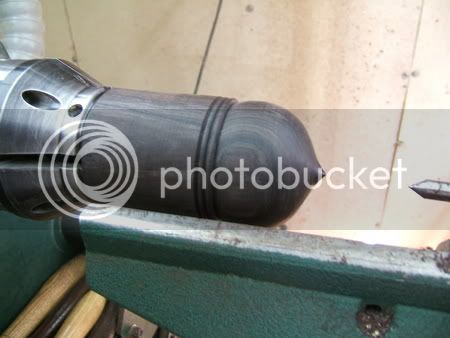
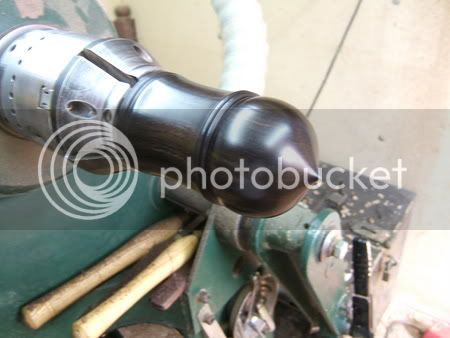
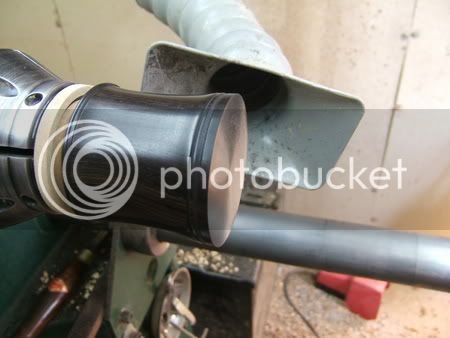
heres the lid shaped-
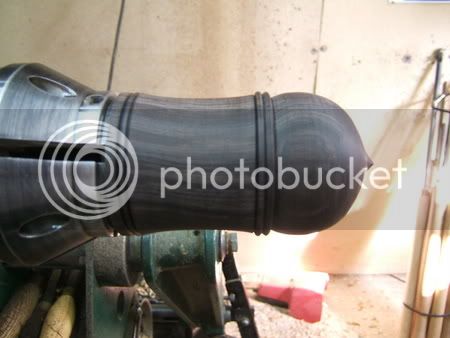
while its jammed on work on the base- at this point you can see the whole form which helps with proportions etc
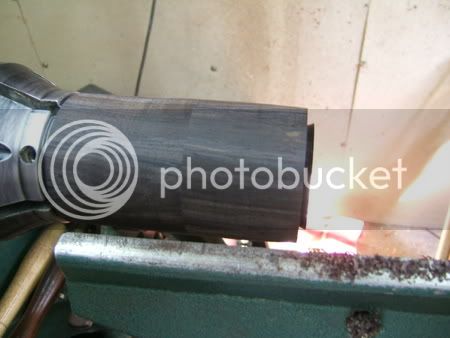
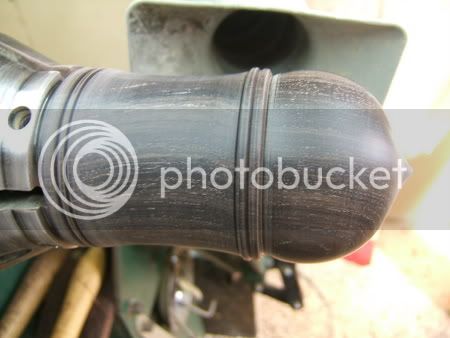
I've now sanded to 800 grit
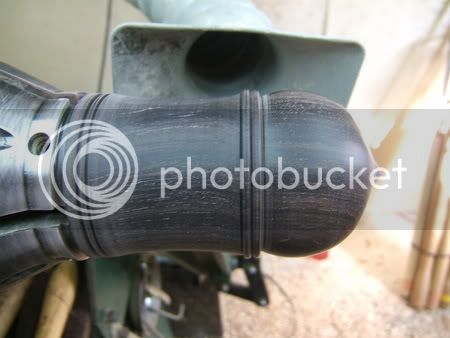
apply some lemon oil- here the oil is still wet, its such a dense wood it will stay wet for a few seconds
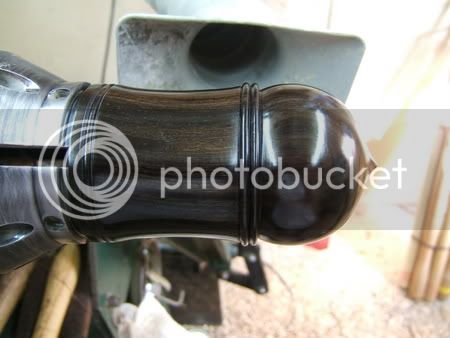
here i've applied u-beaut eee by cloth, this helps when i will buff it later- you could leave it like this if you wish but the buffing will remove the very fine radial sanding marks that a cloth wont
before you take the base out of the chuck remember to ease the fit of the lid with avery sharp skew and very fine cuts- a fraction of a shaving will make the difference between to tight and just right so take your time.
make a jam chuck from a bit of scrap wood- this is good lid fitting pratice.
jam the base on and clean away the dovetail hold- sand and finish the base at this stage.
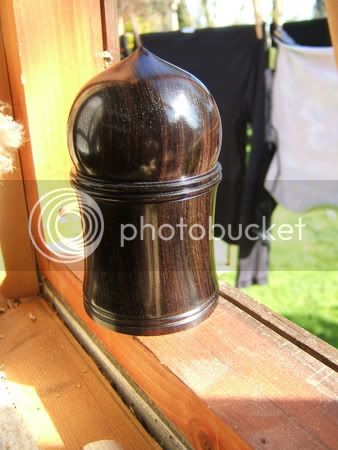
now mount a jacobs chuck in the headstock and using a 6" loose leaf mop go over the box with a tiny bit of eee applied to the mop- hang on tight and only use the bottom quarter of the mop (between 6 and 9)keep a dedicated mop for each polish you use don't mix and match
next i mount another mop in the pigtail and apply u-beaut shellwax cream-this leaves a very high hard wearing shine which i like on dark woods
I hope this is of some help- any questions just ask, if you don't want to ask here drop me a pm
for this "how to" I used a very old piece of African blackwood which i have had in my house for several years, I would normally rough out the blank first to ensure that the fit of the lid stays as you left it but this blackwood wont move and i wanted to show the whole process.
This blank is 3" square by 5" long
knocked into the round
I forgot to take a pic but mark out the lid from the base and part them through with a very thin parting tool
heres the lid mounted in my chuck
I hollowed out the inside using a spindle gouge on its side- then cut a female rebate this must have parallel sides if the lid is to make a good fit- sand a finish the inside now
mount the base in the jaws
make a male tenon to fit the lid- at this stage you want to jam fit the lid onto the base to make the outside of the lid- i take a core out of the centre of the base at this point
jam the lid on but make sure its not too tight as you cant remove it once the lids sanded :roll:
heres the lid shaped-
while its jammed on work on the base- at this point you can see the whole form which helps with proportions etc
I've now sanded to 800 grit
apply some lemon oil- here the oil is still wet, its such a dense wood it will stay wet for a few seconds
here i've applied u-beaut eee by cloth, this helps when i will buff it later- you could leave it like this if you wish but the buffing will remove the very fine radial sanding marks that a cloth wont
before you take the base out of the chuck remember to ease the fit of the lid with avery sharp skew and very fine cuts- a fraction of a shaving will make the difference between to tight and just right so take your time.
make a jam chuck from a bit of scrap wood- this is good lid fitting pratice.
jam the base on and clean away the dovetail hold- sand and finish the base at this stage.
now mount a jacobs chuck in the headstock and using a 6" loose leaf mop go over the box with a tiny bit of eee applied to the mop- hang on tight and only use the bottom quarter of the mop (between 6 and 9)keep a dedicated mop for each polish you use don't mix and match
next i mount another mop in the pigtail and apply u-beaut shellwax cream-this leaves a very high hard wearing shine which i like on dark woods
I hope this is of some help- any questions just ask, if you don't want to ask here drop me a pm