Boxes from Uluru

UKworkshop.co.uk

Help Support UKworkshop.co.uk:

This site may earn a commission from merchant affiliate links, including eBay, Amazon, and others.
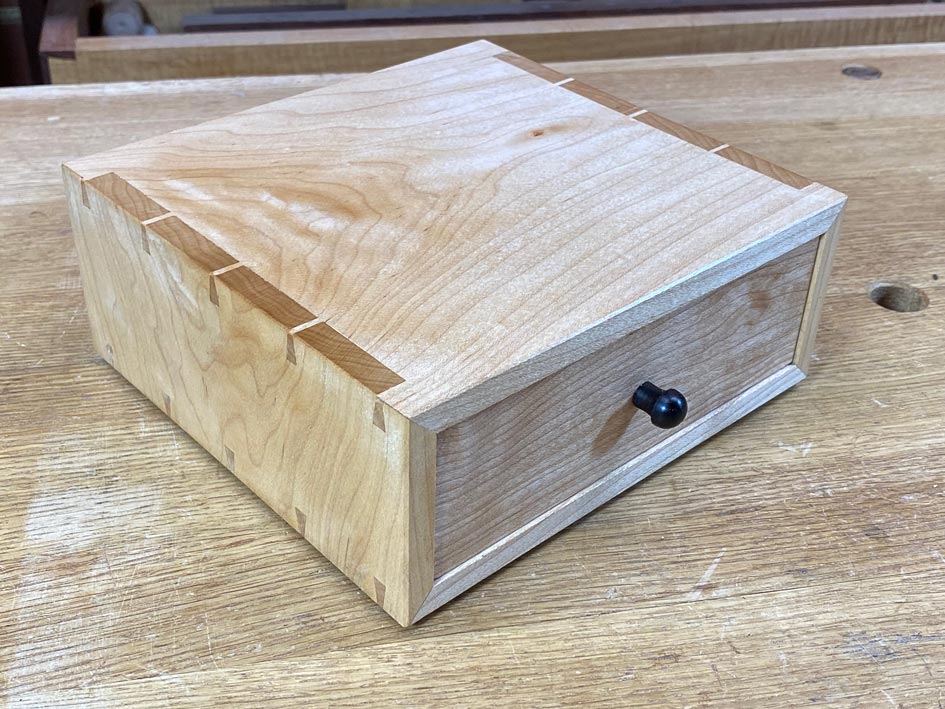
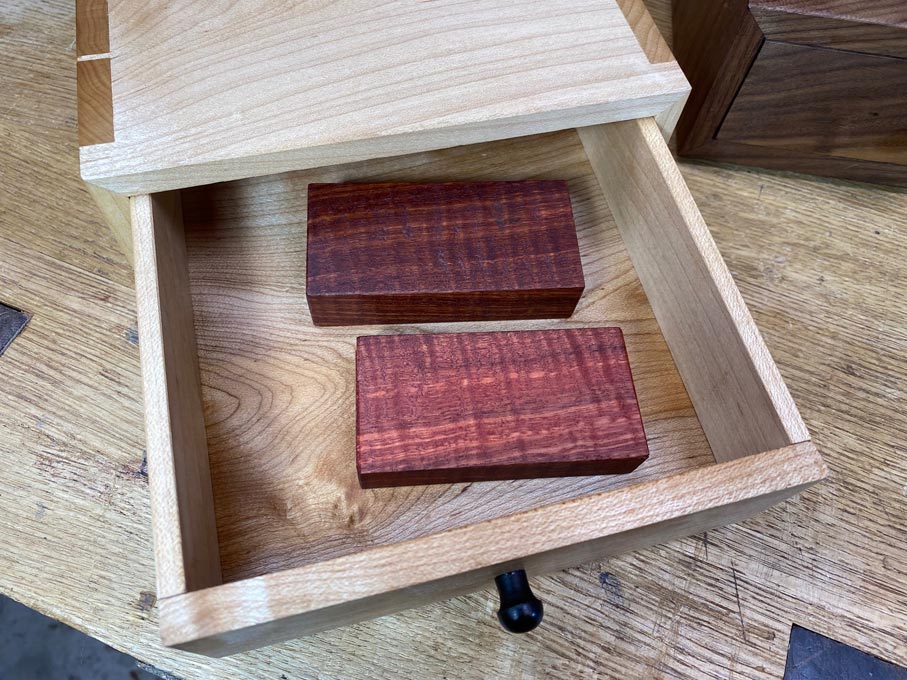
Here is the third box (replacement). It is all Hard Maple - case, all drawer parts (with the sole exception of the Ebony drawer pull). This made it a little more challenging as the wood is hard and can be brittle, and any errors will be evident immediately. There is no compression for dovetails, and all need to fix exactly. But the result is spectacular - although I was working with offcuts, I chose clear sections with just a little interesting, subtle figure. This is a box for my son's Godmother, and I was seeking a feminine touch. No adornments.

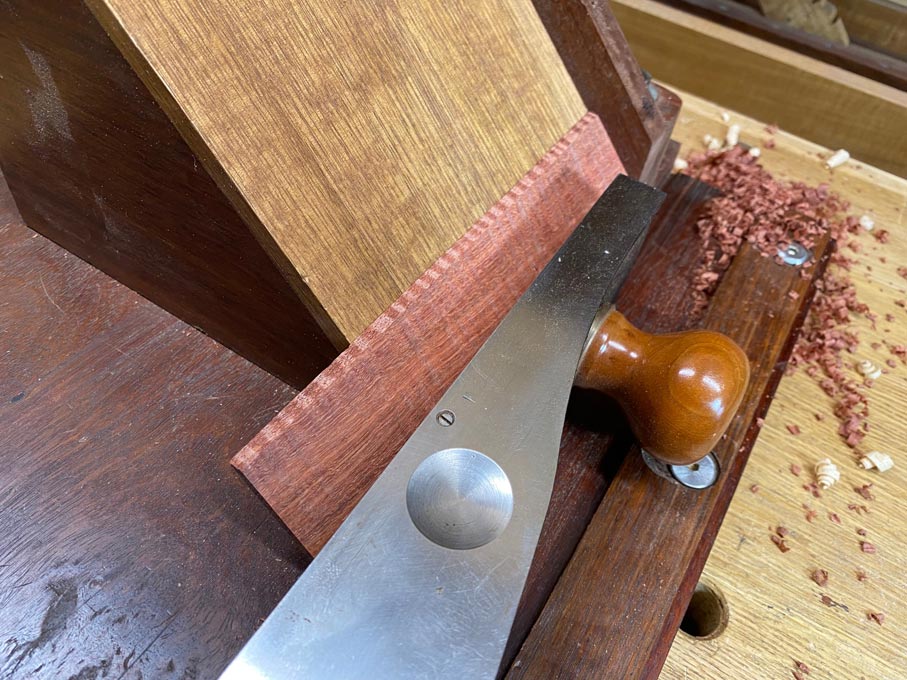
Case construction, as will the other boxes, is mitred through dovetails. The case is 175mm wide x 165mm deep x 70mm high. 10mm thick.

1.jpg


2.jpg


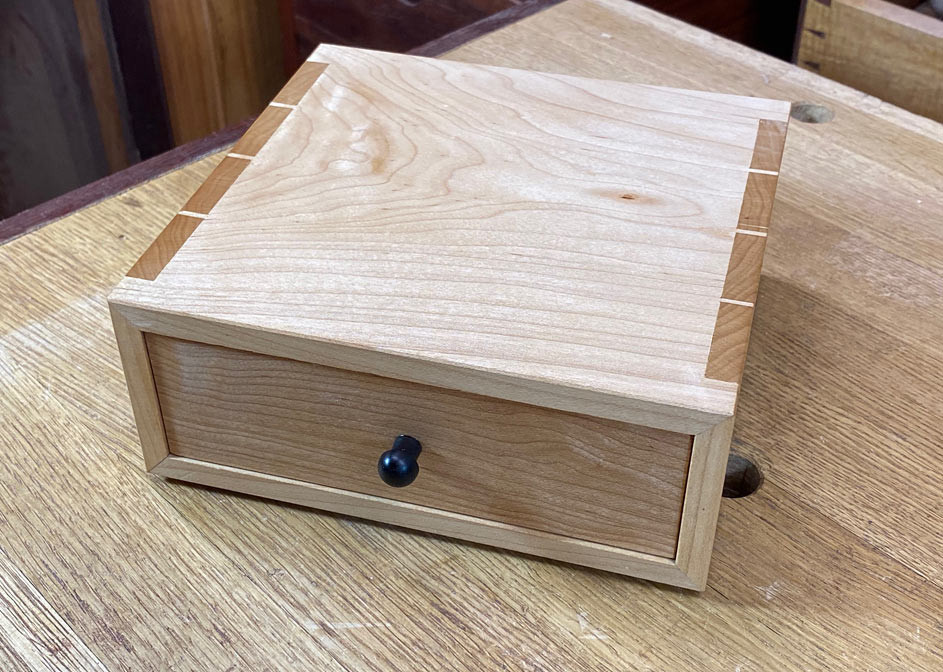
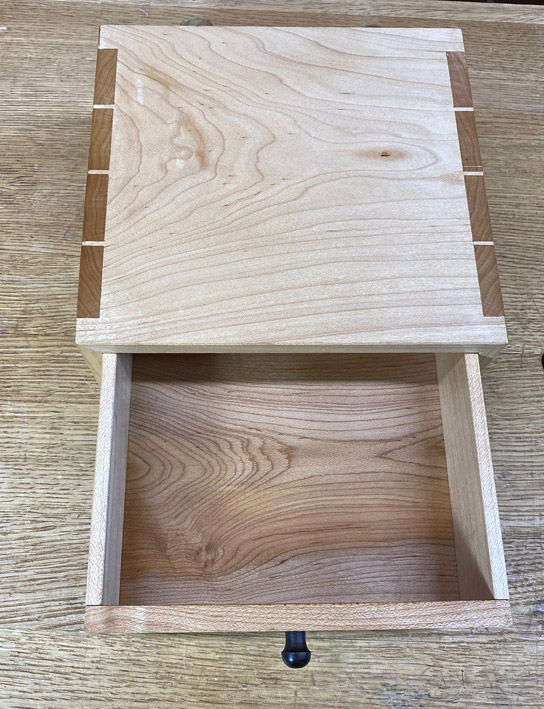
It is only when you open the drawer that you find strong figure ...

3.jpg


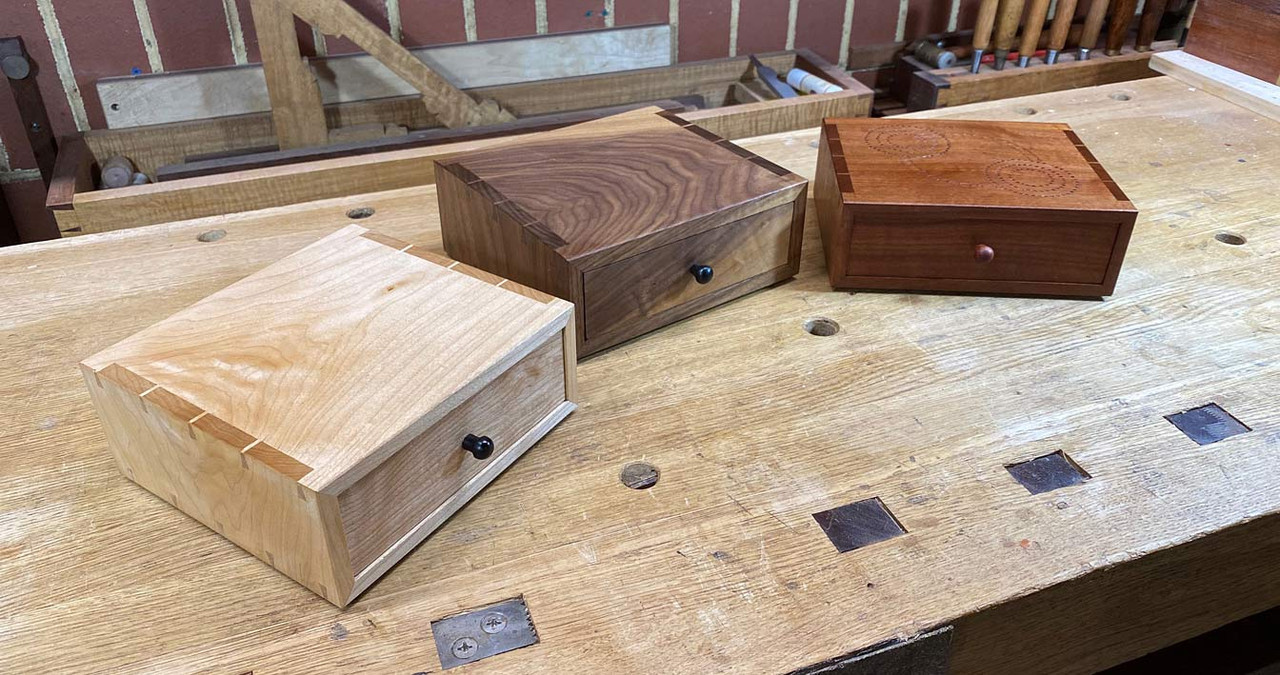
Finally, all three boxes. The Walnut box is for my son's Godfather, and the Makore box (with the Aboriginal message) is for his In-laws.

4.jpg


Regards from Perth

Derek
 
Wait, there is more! A box for the wedding bands. Here ... inside this drawer ...

1.jpg


Two boxes, both in Fiddleback Jarrah, both 80mm in length and 40mm wide. One is 20mm high and the other 15mm high. Case sides are 3mm.

Yes I know that they look like blocks of wood. That is the idea
:)


2.jpg


Open the boxes (like a matchbox), and there is a leather-covered recess for two rings/bands ...

3.jpg


The aim was to build the smallest box possible., one that can fit in a pocket without creating a bulge. I made two as I was not sure which size will be preferred.

I know that someone will ask how these were made, so I have preempted this with a pictorial ...

First, find a nice piece of wood and slice it up into 3mm thick "boards". The boards include a section for the top abd bottom, and the two sides. I kept these all in a single piece, and later cut them to length. This way the widths will remain constant.

The most difficult and most important part of the build is creating accurate mitres. This was done on a shooting board with Donkey's Ear ...

4.jpg


The Donkey's Ear is precisely 45 degrees. The Veritas LA Jack uses a 62 degree cutting angle as we are planing interlocked edges ...


5.jpg


Care is taken to ensure that the bevel is taken evenly to the side edge ...

6.jpg


... and then measure the width down the length to ensure all is perfectly parallel ...

7.jpg


Alternate sides. I was not concerned about achieving a waterfall pattern.

8.jpg


Lay packing tape across the back of the butted boards, and flip them over ...

9.jpg


Add glue ...

10.jpg


And now roll it all up and secure the last end ...

11.jpg


The drawer is simply a carefully hand planed solid section, with two round mortices made with a forstner bit. Drop in fitted leather.

Done.

Regards from Perth

Derek
 
Great thread - thanks for sharing.

I hope you don’t mind Derek but I’ve copied your idea and posted my effort in the Post a picture of the last thing you made thread.
 
Back
Top