Bench plane - Cap Iron relief?

UKworkshop.co.uk

Help Support UKworkshop.co.uk:

This site may earn a commission from merchant affiliate links, including eBay, Amazon, and others.

Bluekingfisher

Established Member
Joined
16 Mar 2009
Messages
1,524
Reaction score
8
Location
Land o' Burns.
Gents/all - after being bitten by the hand planing bug I have been fiddling and experimenting with setting up and tuning my Stanley bench planes.

I have been having decent success with the standard planes including their original parts having fettled them as much as possible. Although I have today purchased a couple of replacement cap irons for the 3, 4 and 4 1/2 planes from Workshop Heaven, a very friendly and helpful bunch they were too.

What I hope you can assist with is - what sort of relief should I be taking between the edge of the plane iron and the cap iron for the smoothing planes and similarly, how much relief and mouth opening for the #'s 5,6 and 7.

Any assistance greatly appreciated.

David
 
This is a HUGE topic which has generated a vast amount of online discussion.
Some people write about it as if they had found a way to make gold out of sunbeams; others claim to have been doing it all along. Summarising as much as I can, the consensus is that sometimes the right placement of a cap iron is VERY close to the cutting edge. Some Japanese academics provided some experimental evidence for this which was rediscovered, prompting the new discussions.

To read more, start for example at this thread https://www.ukworkshop.co.uk/forums/subtleties-of-shaving-deflection-t73781.html and then read any of the US wood forums, especially Woodcentral.
 
Thanks Andy, I'll have a look.

Very close, yep open to interpretation but I suppose it a case of more experimentation. That said, I tried it very "close" perhaps around a fraction under 1mm and was making dust rather than shavings. Taking it back a smidge further I was achieving what I consider good shavings. That said ,being a relative rookie to hand planing it's always good to take on the advice of others. Thanks again.

David
 
There seem to be two schools of thought on how close to set the cap iron of a smoothing plane. Some say set it as close as you can, other say set it back a bit. I prefer to set it back a bit. But best to try it out for yourself and see what works best. If you have it set as close as you can get it, the shape of the end of the cap iron can be crucial to it working well, particularly if you have the mouth fairly tight as well.

Cheers :wink:

Paul
 
From Planecraft, C&J Hampton, Ltd. (reprint and last impression of the book underwritten by the American firm Woodcraft):

Table of capiron settings found on page 43 of the book:

For rough work: 1/32" to 1/16" from edge
For finishing work: 1/64" from cutting edge
For hardwoods with irregular grain: 'as close as you can get it to the cutting edge'

Following the rather obvious progression in the table one could reasonable assume ~1/128" as a very fine setting; the authors are clearly calling for something closer than a 64th. For metric enthusiasts 1/128" is .1984 of a millimeter. Of course, nobody is going to actually measure this in a busy woodshop hence the "as close as you can get it to the cutting edge." In other words, there is no absolute. Move it until you find a setting that works with the species on the bench that day. It's pretty obvious that the authors believed in the efficacy of close capiron settings.

It's my understanding that this same table is found in all seven impressions of the book which was first published in 1934 with the last impression in 1972. This information had been reiterated over a period of 38 years in seven impressions of the book.

Nothing new under the sun.
 
Many thanks fellahs.

I was working at around 1/32" or thereabouts thinking that was good for my smoother when in actual fact the guidance you have uncovered is for rough work??

I guess I'll have to go back to the bench and undertake a little more experimentation.

Thanks all.

David
 
If you are obtaining dust and it's just under 1 mm something is clearly wrong. You should be able to set it much closer than that.
Sometimes you may have a problem when you tighten the cap iron screw and the whole lot moves forward, plunging over the tip of the blade.
 
CStanford":23iff9wf said:
From Planecraft, C&J Hampton, Ltd. (reprint and last impression of the book underwritten by the American firm Woodcraft):

Table of capiron settings found on page 43 of the book:

For rough work: 1/32" to 1/16" from edge
For finishing work: 1/64" from cutting edge
For hardwoods with irregular grain: 'as close as you can get it to the cutting edge'

Following the rather obvious progression in the table one could reasonable assume ~1/128" as a very fine setting; the authors are clearly calling for something closer than a 64th. For metric enthusiasts 1/128" is .1984 of a millimeter. Of course, nobody is going to actually measure this in a busy woodshop hence the "as close as you can get it to the cutting edge." In other words, there is no absolute. Move it until you find a setting that works with the species on the bench that day. It's pretty obvious that the authors believed in the efficacy of close capiron settings.

It's my understanding that this same table is found in all seven impressions of the book which was first published in 1934 with the last impression in 1972. This information had been reiterated over a period of 38 years in seven impressions of the book.

Nothing new under the sun.
It certainly is the same as in page 45 of my 1950 edition.
I don't like positioning the cap-iron too close to the edge, though. Say .5mm (about 1/64" ) minimum, as I find it all too easy to go over the edge and dammaging it. But it may just be the case I am a bit ham fisted...
 
GLFaria":20gzwcnr said:
I don't like positioning the cap-iron too close to the edge, though. Say .5mm (about 1/64" ) minimum, as I find it all too easy to go over the edge and dammaging it. But it may just be the case I am a bit ham fisted...

For these close positions to be possible, the curve of the your blade-edge and the curve of your cap iron-edge
must match to within rather less than your target distance, so some rather careful grinding/filing is involved
in fettling in preparation for this technique.

This may be (one of) the reasons(s) a scrub doesn't have a cap iron; the fitting process would be horrible,
although I have seen a forkstaff plane with a double iron!!

BugBear
 
MIGNAL":22628mbo said:
If you are obtaining dust and it's just under 1 mm something is clearly wrong. You should be able to set it much closer than that.
Sometimes you may have a problem when you tighten the cap iron screw and the whole lot moves forward, plunging over the tip of the blade.

It may well have been the case as I was having difficulty securing the cap iron to the blade when tightening the cap iron screw. I had lapped the meeting edge of the cap iron and waxed the iron and cap iron to lessen the risk from rust. the combination of the two made for a very smooth and slippery surface which I later altered by roughing the cap iron and wiping the face of the iron with white spirit to clear the wax.

In hindsight, I should have returned the cap and iron to the old position but erring on the side of safety left it at about 1mm.

I'll try it again, this time as close as I dare to see if the results improve.

Thanks again.

David
 
bugbear":js24yqvi said:
GLFaria":js24yqvi said:
I don't like positioning the cap-iron too close to the edge, though. Say .5mm (about 1/64" ) minimum, as I find it all too easy to go over the edge and dammaging it. But it may just be the case I am a bit ham fisted...

For these close positions to be possible, the curve of the your blade-edge and the curve of your cap iron-edge
must match to within rather less than your target distance, so some rather careful grinding/filing is involved
in fettling in preparation for this technique.

This may be (one of) the reasons(s) a scrub doesn't have a cap iron; the fitting process would be horrible,
although I have seen a forkstaff plane with a double iron!!

BugBear

Would the David Charlesworth method of the ruler trick affect placing the iron close to the blade edge as his method, from what i can see creates a small chamferl on the back of the blade where it meets the micro bevel edge??
David
 
Bluekingfisher":11iat7p4 said:
bugbear":11iat7p4 said:
GLFaria":11iat7p4 said:
I don't like positioning the cap-iron too close to the edge, though. Say .5mm (about 1/64" ) minimum, as I find it all too easy to go over the edge and dammaging it. But it may just be the case I am a bit ham fisted...

For these close positions to be possible, the curve of the your blade-edge and the curve of your cap iron-edge
must match to within rather less than your target distance, so some rather careful grinding/filing is involved
in fettling in preparation for this technique.

This may be (one of) the reasons(s) a scrub doesn't have a cap iron; the fitting process would be horrible,
although I have seen a forkstaff plane with a double iron!!

BugBear

Would the David Charlesworth method of the ruler trick affect placing the iron close to the blade edge as his method, from what i can see creates a small chamferl on the back of the blade where it meets the micro bevel edge??

David

No - the chamfer is at such a low angle, it will have no (significant, geometric) effect. Indeed, that's rather the point!

However, if it's possible I prefer to make a blade truly flat on the flat side; one less thing to think about. I reserve the ruler trick
for pitted s/h blades.

BugBear
 
I am not quite sure why you would get dust. Maybe the fit of caprion to the back of the blade isn't proper? When you clamp the two together, hold it up to a light and peer in between the two. When you can see any light trickling through, you have work to do.

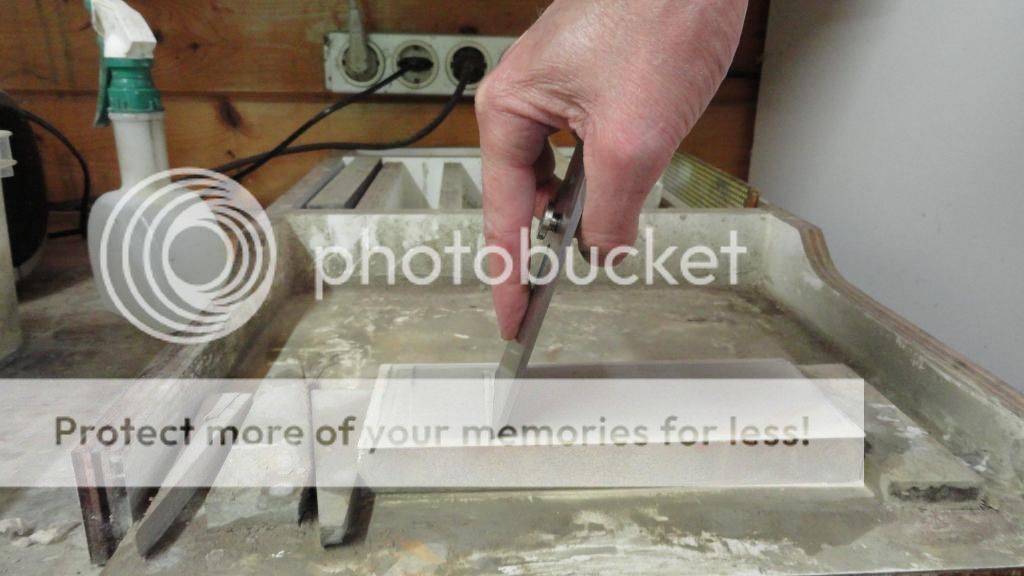
Some after market capirons have a very low "bevel" angle, like 25 degrees. It is smart to raise that angle to something like 50 degrees. Only a very small secondairy angle, about 0.5 mm wide needs to be 50 degrees. You can do that on a sharpening stone like this:

DSC04492_zpsa3734a99.jpg
[/URL][/img]

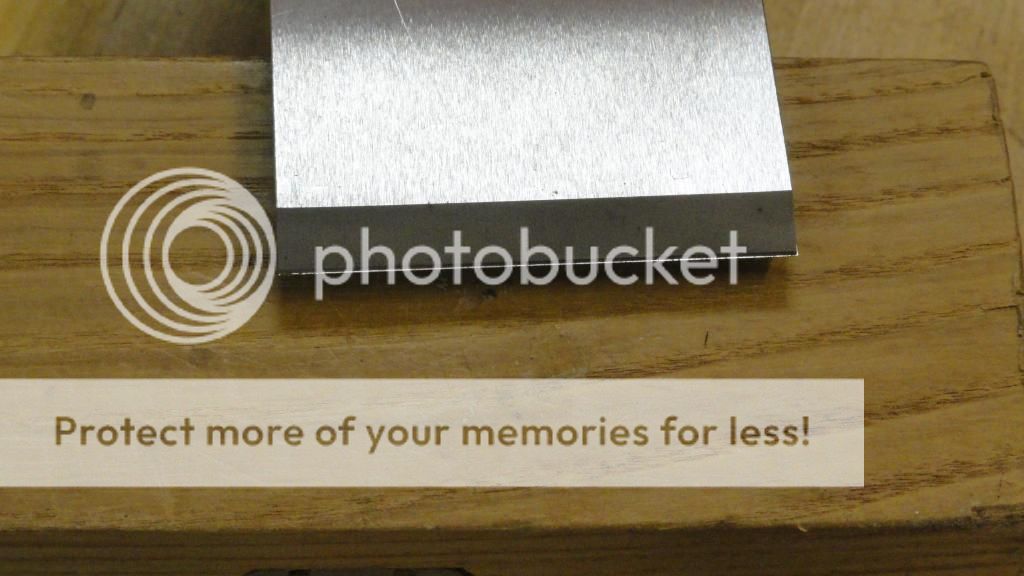
When you have everything setup perfectly, you can set the capiron very close to the edge, like this:

DSC04503_zpsa42db571.jpg


Rememeber, it only needs to be set this close when you want to repair or prevent tearout in difficult wood. Easy straight grained stuff doesn't need this.
 
In Re: The Ruler Trick

I've always wondered how such a miniscule thing is of any help with a pitted cutter. It would have to be very, very light pitting indeed. The kind that is obliterated by 100 grit sandpaper in the first place, no? Why not just be done with it altogether?
 
CStanford":3e6cq98q said:
In Re: The Ruler Trick

I've always wondered how such a miniscule thing is of any help with a pitted cutter. It would have to be very, very light pitting indeed. The kind that is obliterated by 100 grit sandpaper in the first place, no? Why not just be done with it altogether?

The pitting is indeed removed by the abrasive, but only in the area near the edge. The ruler trick doesn't help the removal of the pitting,
it (greatly) reduces the area in which the pitting is removed.

If you ever try to work a nice old rc64 blade with pitting you may yet be grateful for it.

I've only used it on two blades in my life, and I own "more" than that.

BugBear
 
Bluekingfisher":wi36nhj1 said:
Thanks Andy, I'll have a look.

Very close, yep open to interpretation but I suppose it a case of more experimentation. That said, I tried it very "close" perhaps around a fraction under 1mm and was making dust rather than shavings. Taking it back a smidge further I was achieving what I consider good shavings. That said ,being a relative rookie to hand planing it's always good to take on the advice of others. Thanks again.

David

Probably obvious, but anyway: you are not perchance planing end grain, soft wood, with a not too sharp blade besides? These are the only circumstances I can remember where I get to make something similar to dust...
 
Well, I have been advocating and using the ruler trick for more than 20 years now.

One way I like to explain it, is that the probability of correctly honing away the wire edge, is greatly increased.

Also if fine Japanese waterstones are used, say 8, 10, or even 15,000 grit, there is no need to strop.

Best wishes,
David Charlesworth
 
You're right about stropping - it's not necessary when using ultrafine media. Having used autobody sandpapers and lapping films I can attest that there is no wire edge detectable once one reaches 2,000 grit in the sandpaper for instance. It's gone and probably gone at 1,000 grit and certainly once one is finished on the 1,500 if one chooses that step between 1,000 and 2,000.

You can really go from 800 to 2000 and not suffer any consequences at all.

The paper itself deflects enough between cutter and glass to give the same effect, I'd be willing to bet, as a slight lift on the last two strokes or so when running the backs.
 
Fellahs - many thanks for all the input, I have learned a lot already from the tips and you have supplied.

I had a visit to the shop last night after work to consider the issue again. i believe I identified and rectified the problem.

Here is what I had done initially to cause the problem (if interested) - I flattened the back back using diamond stones up to 1000 grit then onto 1200 gt wet and dry paper ( it was as highest grit I had to hand) then polished the back with a cotton rotary mop with polishing compound. I believe I was ok to this point.

I then cut a micro bevel using my Veritas honing jig using the 1000 & 1200 gt as above which created a small wire burr. This is where I think I went wrong. I removed the burr polishing it with the rotary mop, which having looked at the edge last night appears I rounded the face edge over ever so slightly therefore taking the honed edge off.

Anyway, I have learned a lot just from this thread, many thanks again all who put me right.

David
 
Back
Top