Bandsaw box finishing

UKworkshop.co.uk

Help Support UKworkshop.co.uk:

This site may earn a commission from merchant affiliate links, including eBay, Amazon, and others.
You were asking about covering the inside of the box.
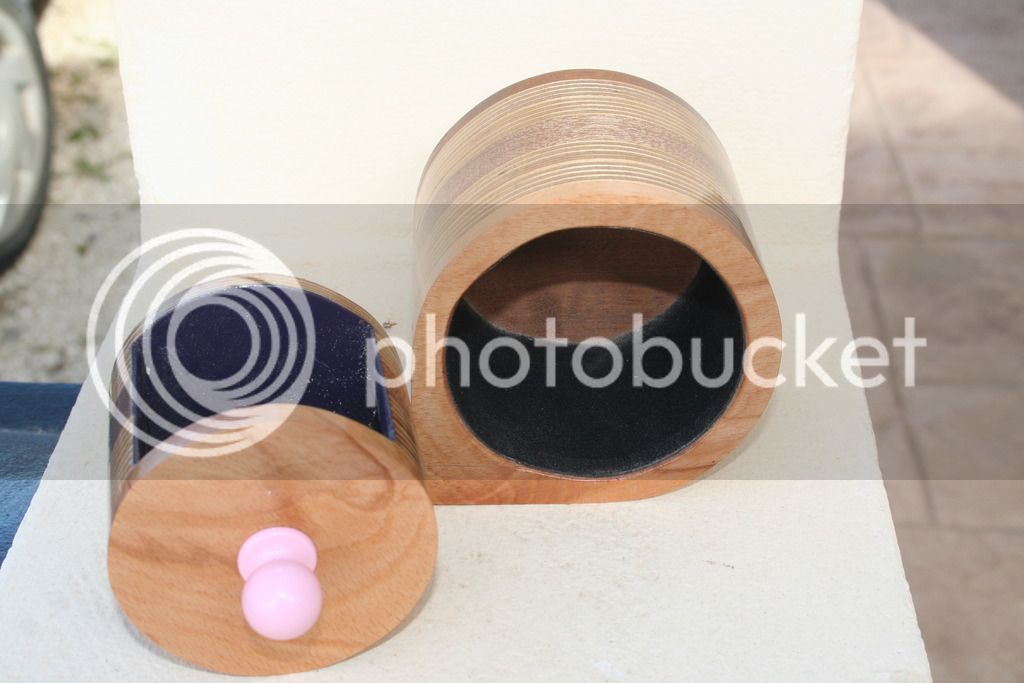
This is an early box I made before I started flocking . The pic is over exposed but I didnt bother taking a better one.
You can see the inside does not look good at all. In fact I gave this to my young grandaughter as a tooth fairy box and got a lot of schtik from my son (who is a carpenter shopfitter) over the black stick on.

He is finally admitting he likes the latest boxes, high praise indeed.

IMG_1549_zpsdtdumqjz.jpg
 
More advice please.
As I said earlier in the thread I am going to make my next box with ply and mahogany and another, not sure what yet.
Been looking at this thing about fillers for mahogany looks complicated. Surely I don't need to bother with this?
Secondly I want to make the draw fronts of a contrasting wood to the rest of the door. Is it as simple as cutting the end off and replacing with another wood?
 
You are overthinking it.
I have used all the woods I mentioned above and never used filler on any of them.

I always sand both sides of each piece to 400 grit although the birch ply is usually perfect as is, just make sure there are no saw edges sticking up. DO NOT USE CONSTRUCTION PLY, ITS rubbish!
Thoroughly brush all dust away before laying out for gluing.
And I use lots and lots of glue. Squeeze out is not an issue because you are going to cut all the way round with the bandsaw.
Over size the pieces by at least 10mm each way to allow you to cut everything clean.
Do a dry assembly run first, lay out all the pieces in the order you want them in, and make sure you have them near the big vice with lots of clamps on hand.

Be VERY generous with the glue, work fast because the ply especially dries fast. I cant remember who, but someone on here sprays with a fine water mist to slow down the drying. I dont, but you need to be hot footing it through the spreading process.
Slam them all together, get them in the big vice. just slightly squeeze, and you get your last chance to align the sides before fully clamping with as much pressure as you can using as many clamps as you can get on there.

Leave it at least 6 hours, over night is best.

Iroku is a pleasing tight grain with a nice dark brown colour. Rosewood is a good looker but I have found some pieces are very oily and need a final sanding just before glue up.

I've just found a supply of american black walnut so that will figure in my next box I think.
 
When I changed the drawer fronts on a box, I simply made a copy of that front in a different wood and used that. In one case, I had a different wood on the back of the box so managed just to swap the front with the back for the same effect.
Malcolm
 
I forgot to answer that question....
On the yin yang box pictured above I originally wanted black and white, but couldnt get any ebony (silly me, I thought it would be easy) so I went with red and white which is Padauk and Maple. Both drawer fronts are just 3mm thick pieces glued on.
The front of the frame is Beech.
I love Padauk, its a very striking wood and easy to work and finish. I hate Maple, its the most difficult wood to get a smooth finish on.
 
pops92":txiuonkn said:
Yeah got the flocking sorted, nice to know about the hammerite will give that a try when I run out of the adhesive. Still need advice on the inside of the DRAW HOLDER please anyone?

Sent from my SM-T310 using Tapatalk
You Tube.....How to Make a Bandsaw Box (Aurora Design) by the drunken woodworker...very helpful
 
.................................inside of the DRAW HOLDER please anyone?

???????? Can you explain that?
Malcolm

........ and can you add to your Profile, saying where you are located? It will help you and others.
 
This is the inside of a draw holder Malcolm. Well it's what I call it anyway. :lol:
 

Attachments

  • 20161124_220731-768x1024-1.jpg
    20161124_220731-768x1024-1.jpg
    181.8 KB · Views: 794
Clear gloss wipe on poly. Any thing else pulls the eye away from the overall box.

If your drawer fits inside the box due to removing material while making it, put a couple of very small silicone bump pads at the back. The kind you buy in strips to stop cupboard doors banging closed.
1 in the lower corner, and 1 in the upper opposite corner.

Just lay them in and try the fit first before sticking them down. if the drawer then sticks out too far, you can sand the tops of the bump pads till they are the right thickness before sticking them in.
 
But the danish oil doesnt last, it fades back to dry after a time.
I made a lazy susan from scrap mahogany pieces and used Danish. looked good for about 8 months but then went completely flat. Its covered with wipe on poly now and has a "wet look" from a distance. 'Er indoors is much better pleased now.
 
I have just purchased some Birchwood Casey tru oil 3oz bottle. Tried it out this afternoon,well impressed 5 coats and shown is the difference to sanding sealant and microcrystalline wax. So easy to apply love it.
Input please guys. :D
 

Attachments

  • 20161222_182628-1-724x802.jpg
    20161222_182628-1-724x802.jpg
    178.7 KB · Views: 723
Birchwood casey have been making gun stock finishing oils and treatments for many years. Highly respected name.
I shall be working on my shotgun stock next year and will be using that to re finish it.
Finishing has two camps, shiny gloss or understated matt. i'm mostly a shiny gloss man.
 
Those 3 Oz bottles can dry out if you are not careful, so store upside down once opened and with a new one, just prick a small hole in the alumimium sealer (cocktail stick I use) and when finished, squeeze a little and stick some tape over that hole before screwing on the top.

As I have said many times, Tru-Oil is costly, but the results are worth it.
Malcolm

Happy Christmas everyone!
 
Yeah got that from one of your earlier threads on tru oil. In addition to that I place cling film beween lid and foil top.
Merry Xmas to all members.
Thank you all for your input to my queries.


Sent from my SM-T310 using Tapatalk
 
Back
Top