Originally posted in the woodturning section but might be of interest to others 
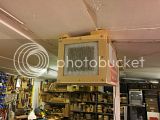
To work along side my dust extractor and to filter all the time I'm in the workshop, I have made this 3 stage, 3 speed air filter, 32" long 16" wide and 15" tall. Using scrap MDF, an old cooker hood extraction unit, some polyester wadding as a pre filter, large car air filter as big as I could purchase, pollen internal filter and some silicone.
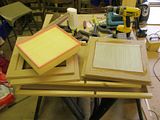
The MDF components and filters.
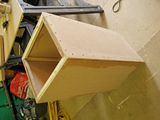
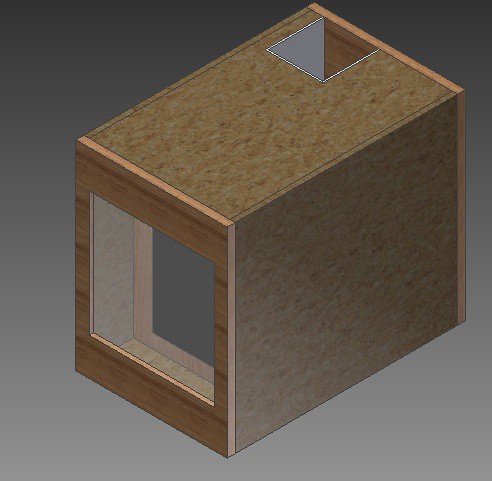
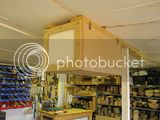
The box assembled.

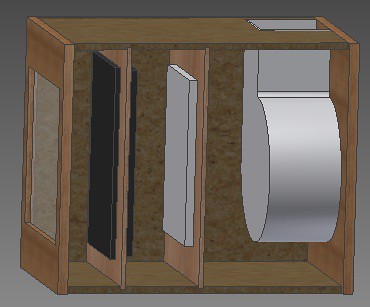
The internal filter is a car pollen filter, all silicon sealed in place to make sure it is air tight and maximise air flow.
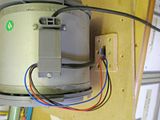
The cooker hood fan fitted to the rear plate, switch is fixed in place so its easily operated.
Rear view showing the outlet and switch placement.
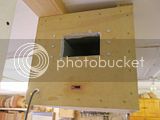
Front view showing polyester pre filter and metal fittings used to hang it from the ceiling.
After some grinding and with the filter on 2nd speed, a quick vacuum around the outside shows how it is performing.
I used materials that I had in my workshop and a motor donated from a friend, overall cost about £25 and a much more comfortable working environment.
Regards Chris.
To work along side my dust extractor and to filter all the time I'm in the workshop, I have made this 3 stage, 3 speed air filter, 32" long 16" wide and 15" tall. Using scrap MDF, an old cooker hood extraction unit, some polyester wadding as a pre filter, large car air filter as big as I could purchase, pollen internal filter and some silicone.

The MDF components and filters.

The box assembled.

The internal filter is a car pollen filter, all silicon sealed in place to make sure it is air tight and maximise air flow.

The cooker hood fan fitted to the rear plate, switch is fixed in place so its easily operated.

Rear view showing the outlet and switch placement.

Front view showing polyester pre filter and metal fittings used to hang it from the ceiling.

After some grinding and with the filter on 2nd speed, a quick vacuum around the outside shows how it is performing.
I used materials that I had in my workshop and a motor donated from a friend, overall cost about £25 and a much more comfortable working environment.
Regards Chris.