Windows - a first attempt - WIP pics

UKworkshop.co.uk

Help Support UKworkshop.co.uk:

This site may earn a commission from merchant affiliate links, including eBay, Amazon, and others.

RogerM

Established Member
Joined
4 Mar 2006
Messages
1,279
Reaction score
35
Location
Devon
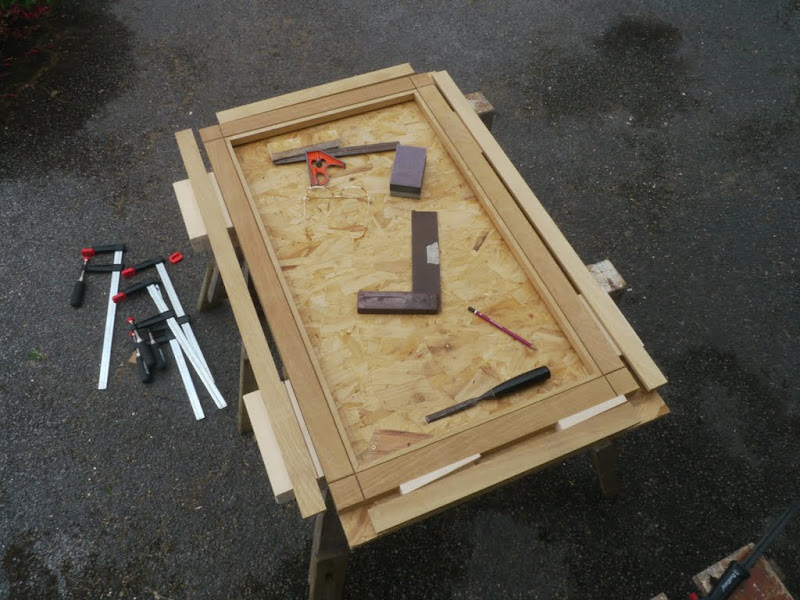
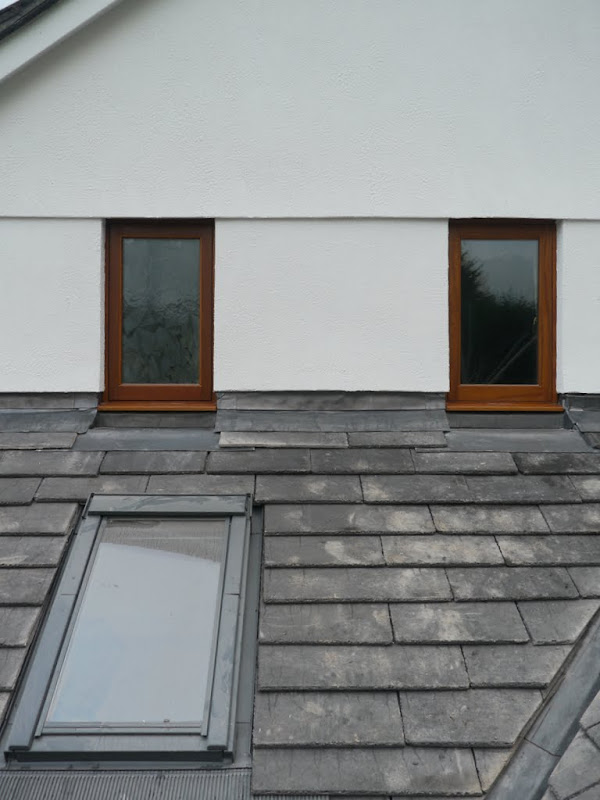
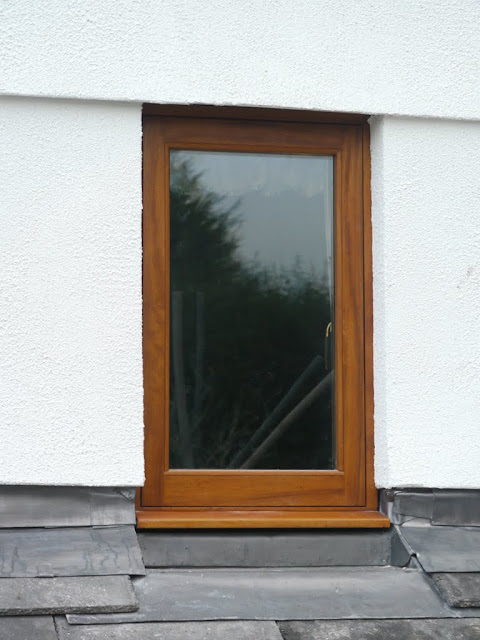
After all the feedback received here and elsewhere it is time for action rather than prevarication. I've run up a "dummy" window similar in size to the ones that require replacement just to see what problems I come across, and to try out the hardware before committing myself to oak. All I've sacrificed so far is 6m of 50mm x 100mm and some time. No criticism of "squeeze out" or general standard of finish please - this is to test the concept and will be cannabalised of it's hardware when finished! Nor have I fitted any draft seal but don't anticipate this will cause any problems on the "real thing".

I've based the section on this one rather than the hand drawn one in the original thread.

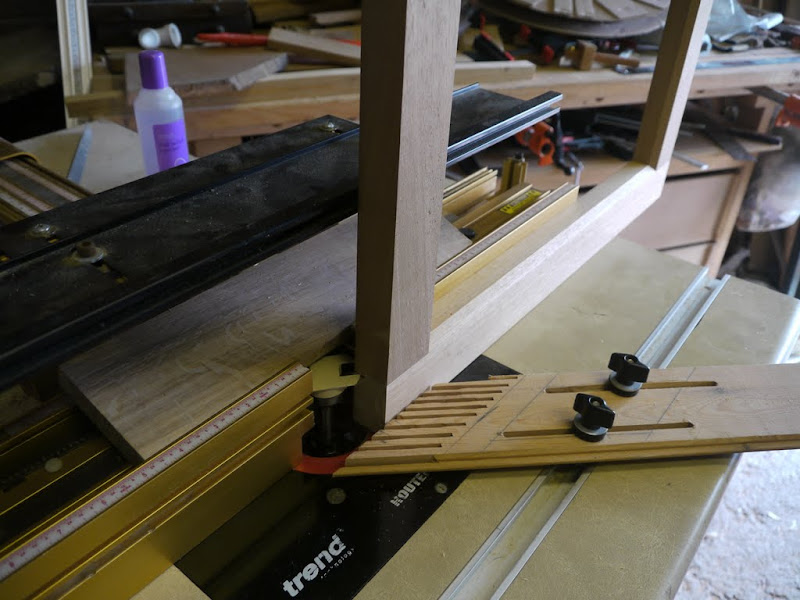
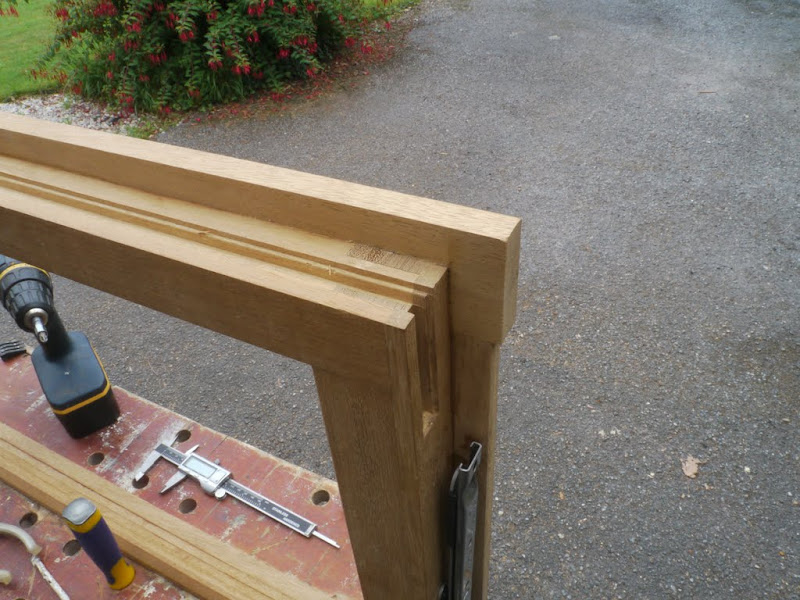
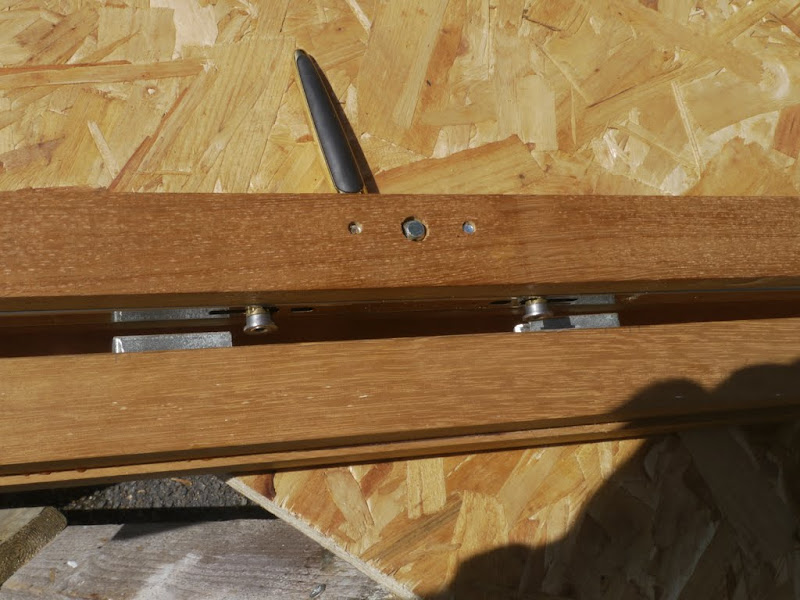
The sash was built up with 5 laminations alternating at the corners.

P1010328.JPG


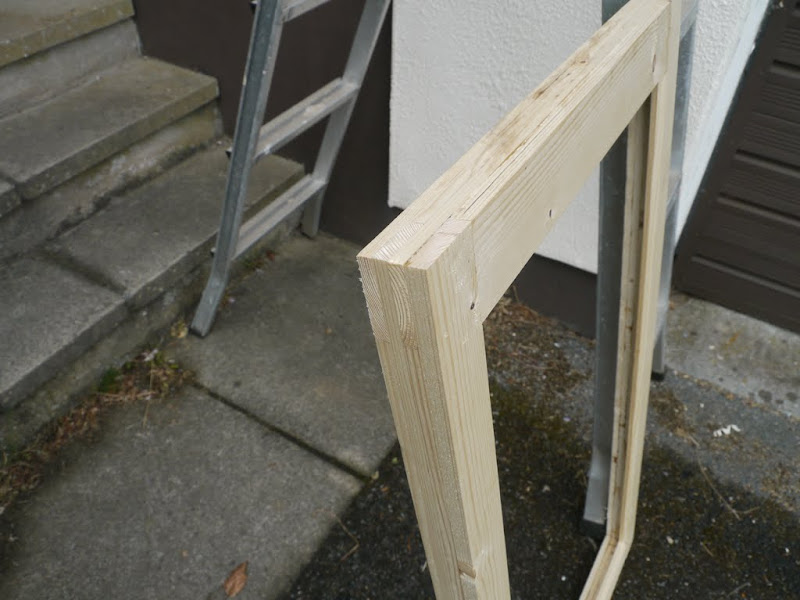
OK - I know you can only see 4 laminations, but I've left the final one that will form the "storm proof" final layer until after I've routed out the Eurogroove and fitted the lock.

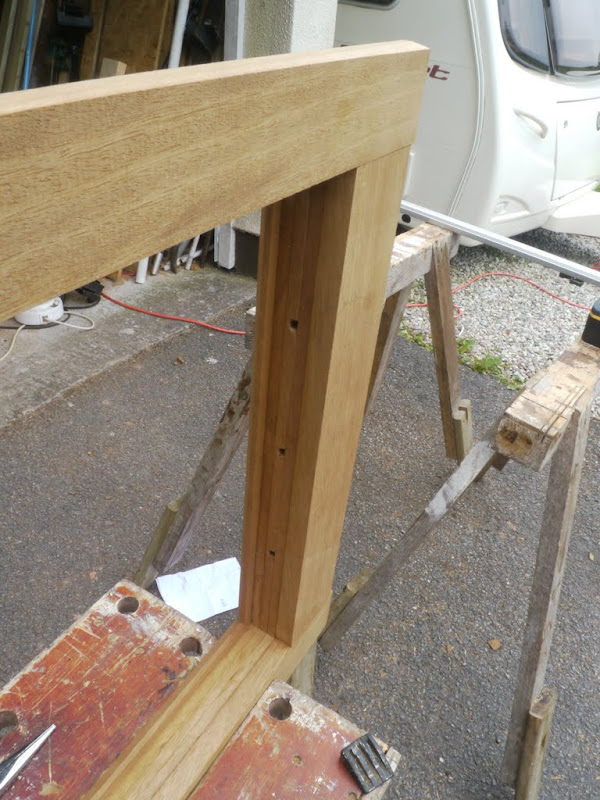
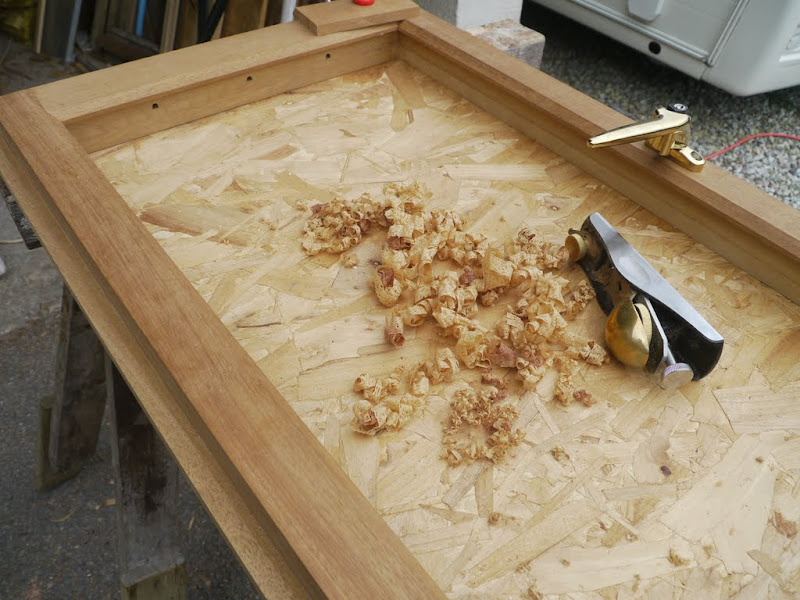
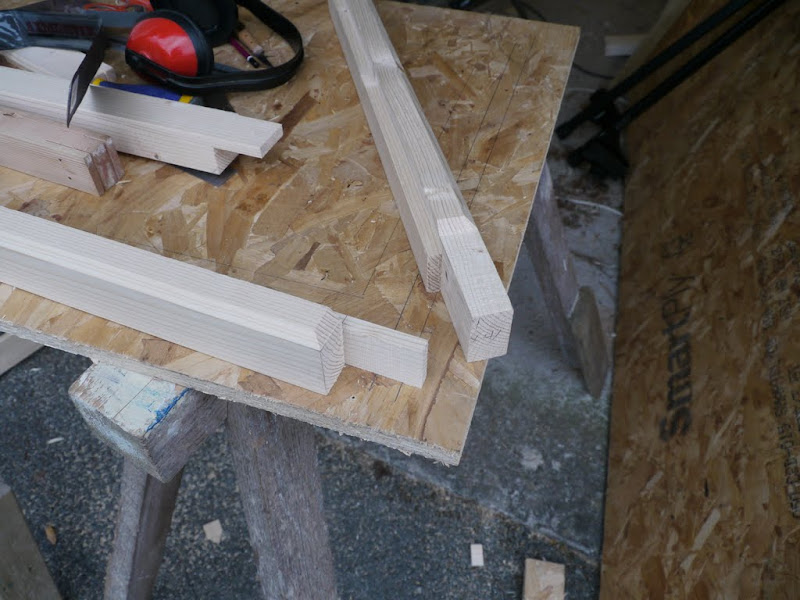
For the frame I decided to try and reduce the number of laminations from 5 down to 3 by using half lap joints at the corners. After a bit of routing I end up with this.

P1010329.JPG


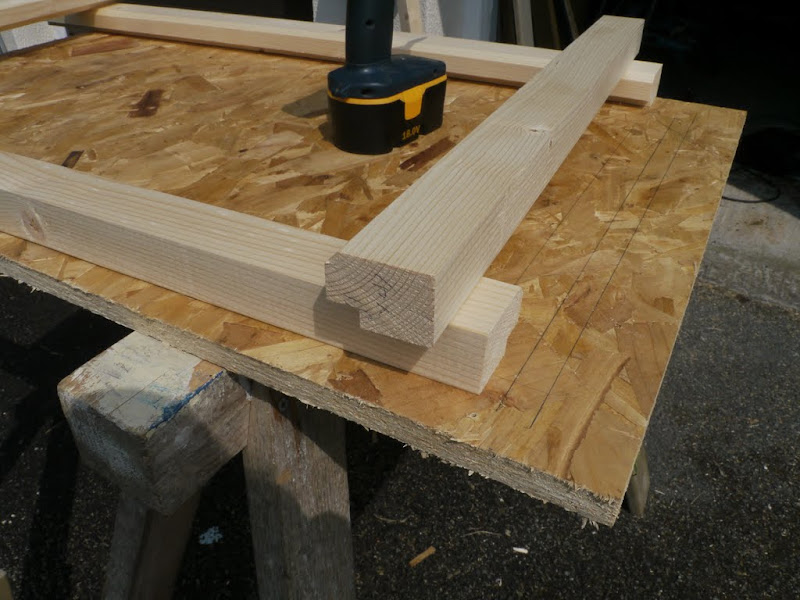
Then a couple of cuts on the band saw and I have this - looking OK so far.

P1010332.JPG


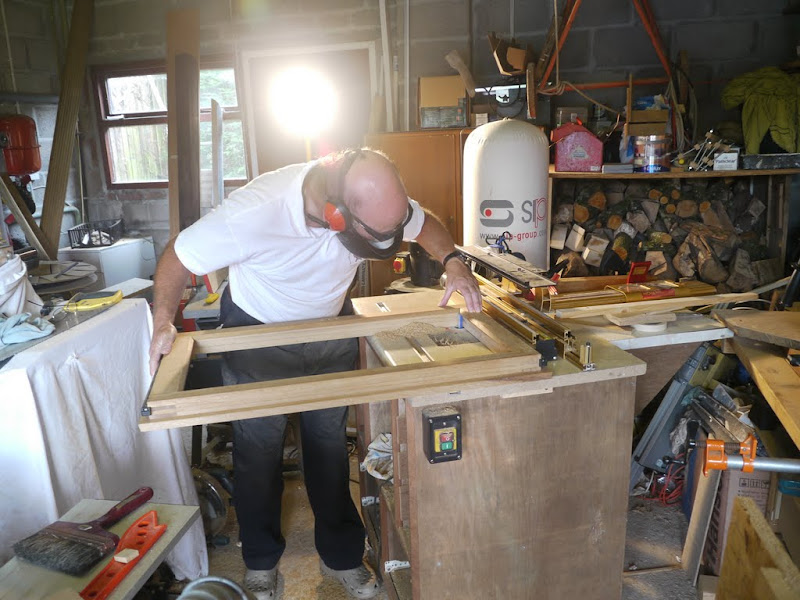
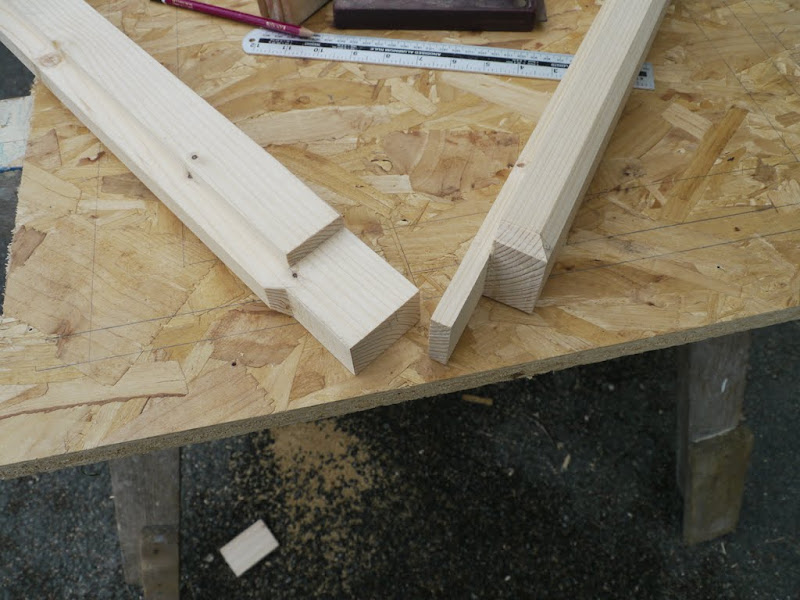
B******s! I forgot to allow for the glazing recess!

P1010331.JPG


So try again.

P1010330.JPG


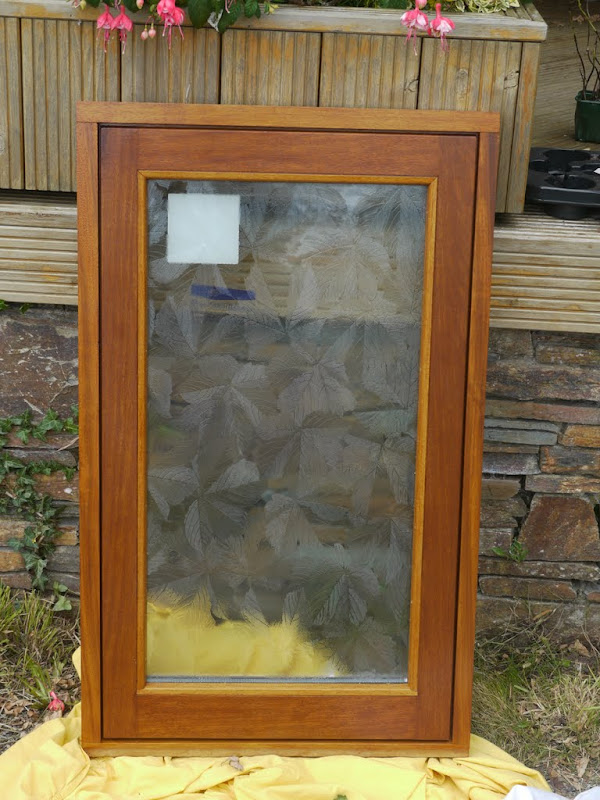
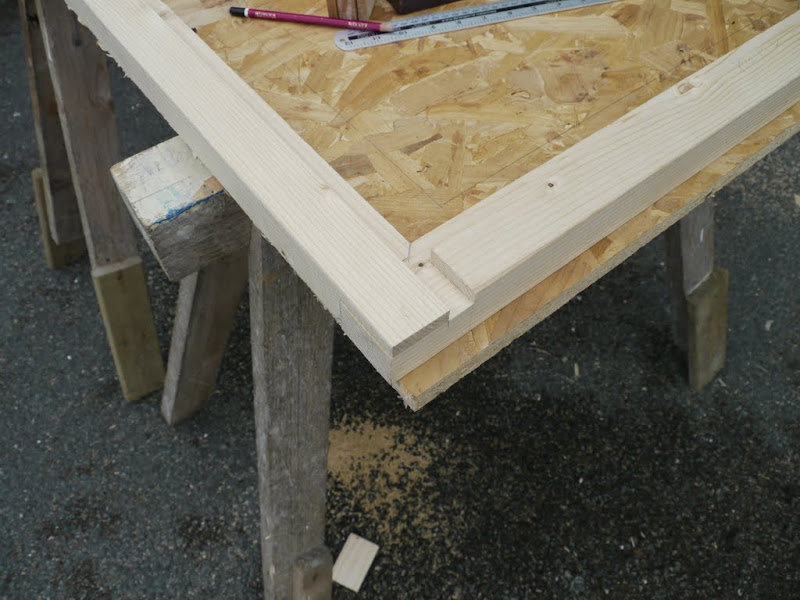
OK - that's worked out better.

P1010333.JPG


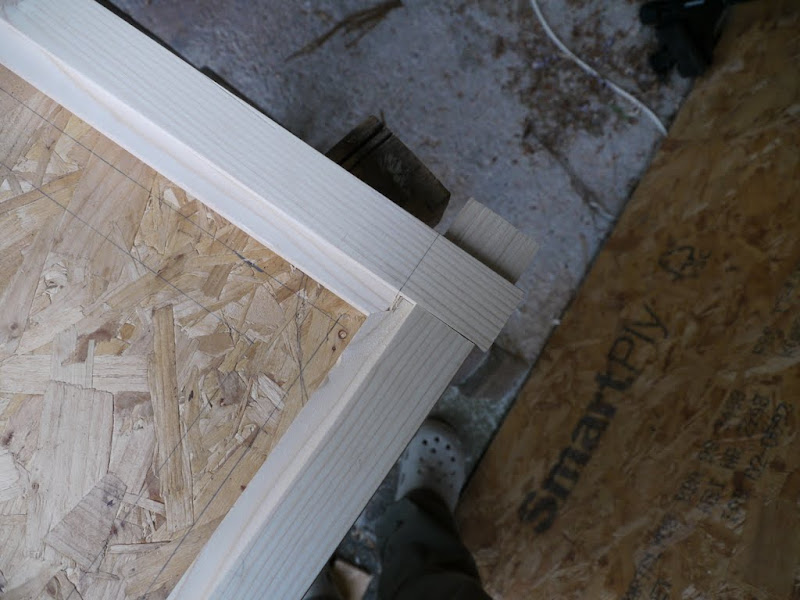
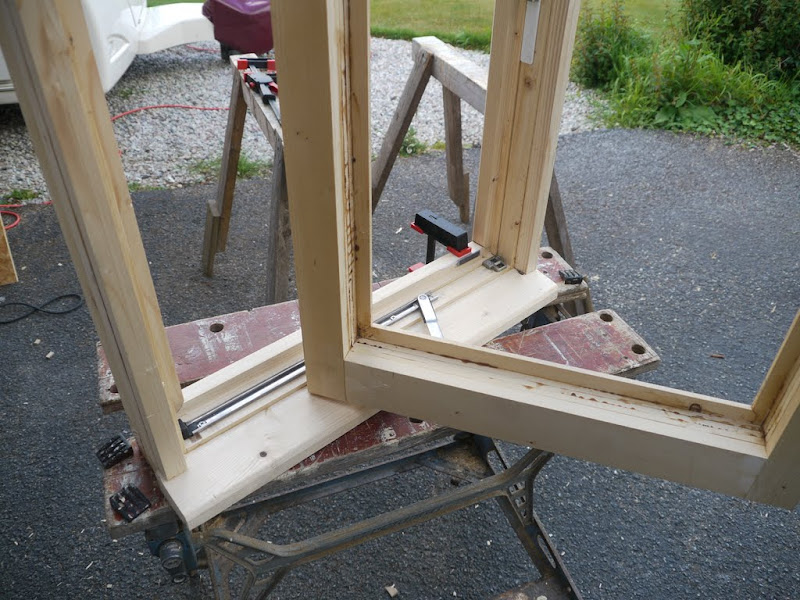
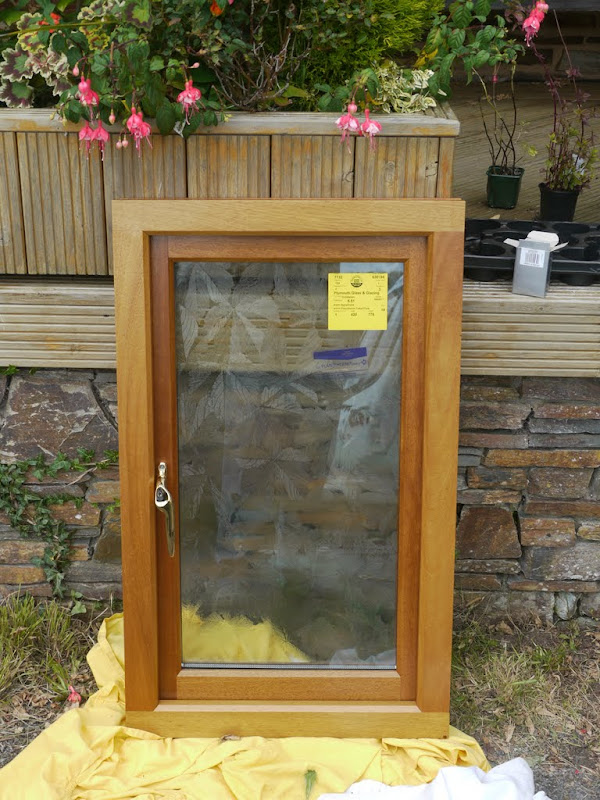
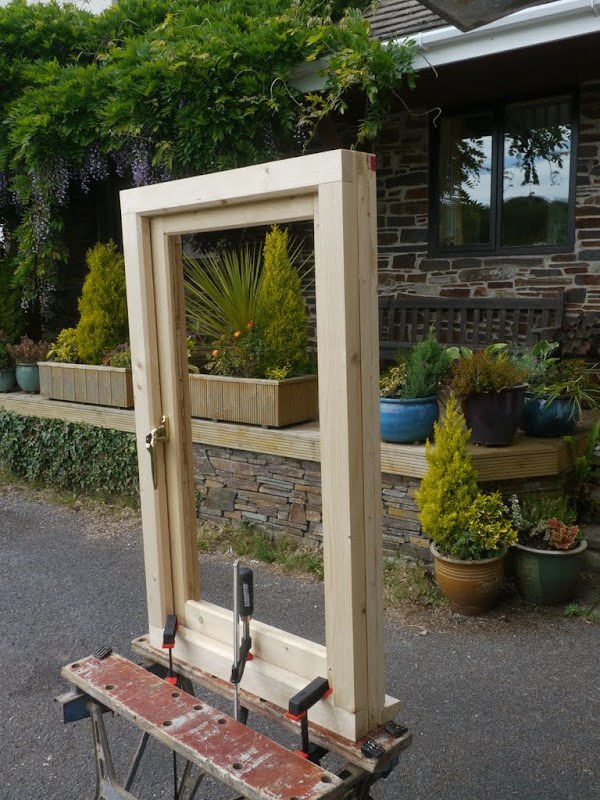
Forgot to take piccies of the rest of the process - but this is what I've ended up with.

P1010374.JPG


P1010375.JPG


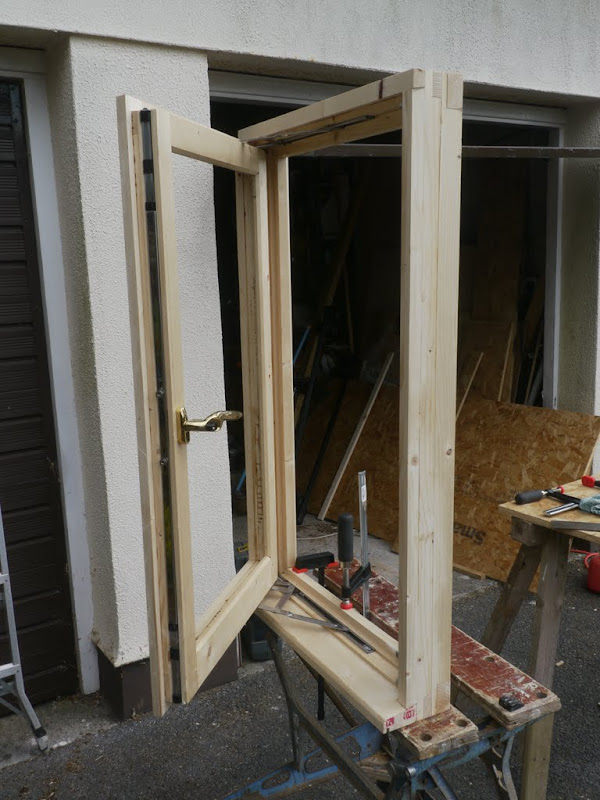
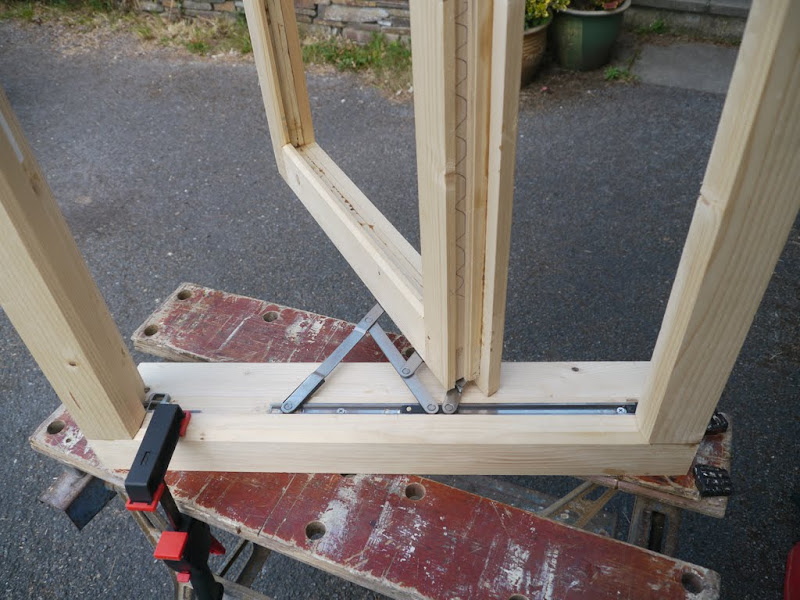
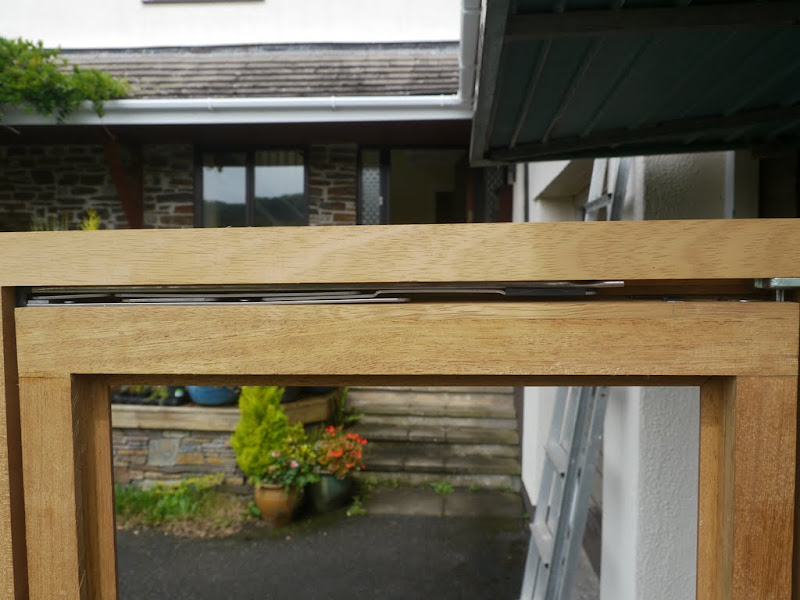
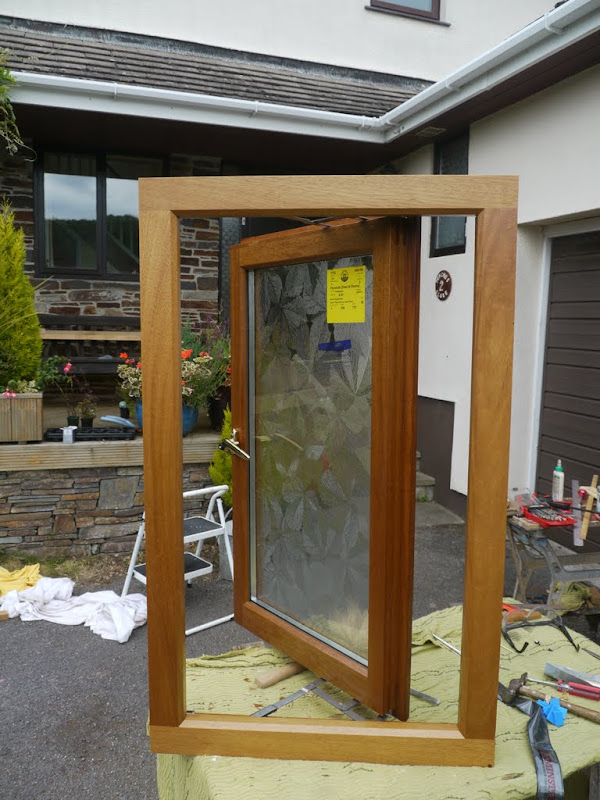
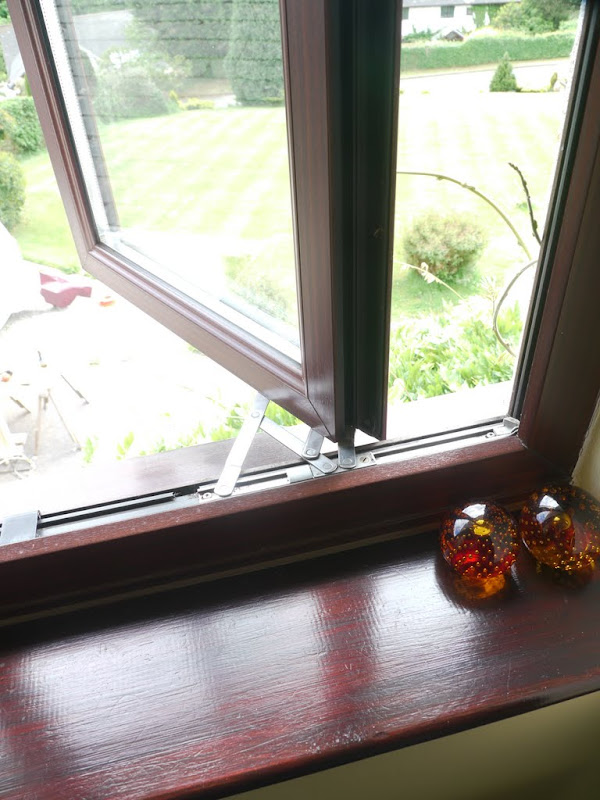
Opened up for internal cleaning, which on the face of it looks good ..........

P1010376.JPG


........... but getting both top and bottom to slide the same distance simultaneously is near impossible, and awkward to get your fingers around the RH side of the window to apply the neccesary pressure. SWMBO won't like.

P1010378.JPG"


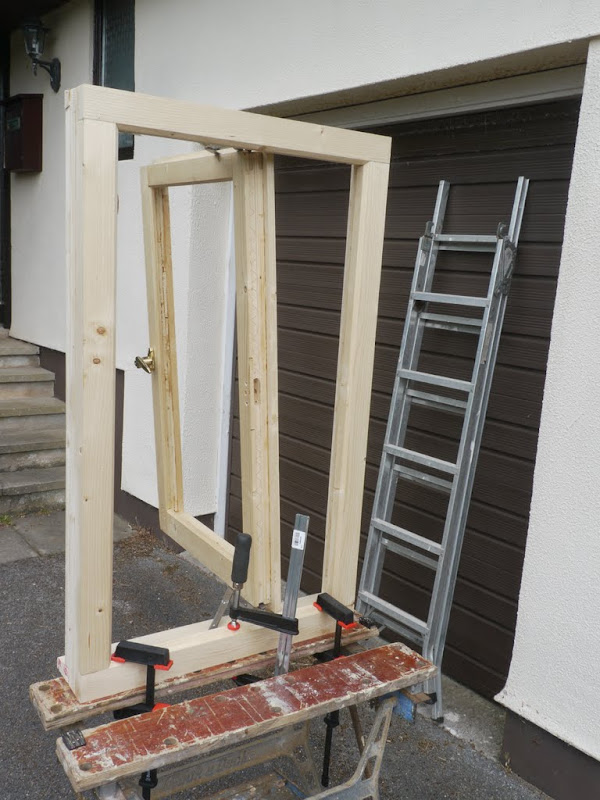
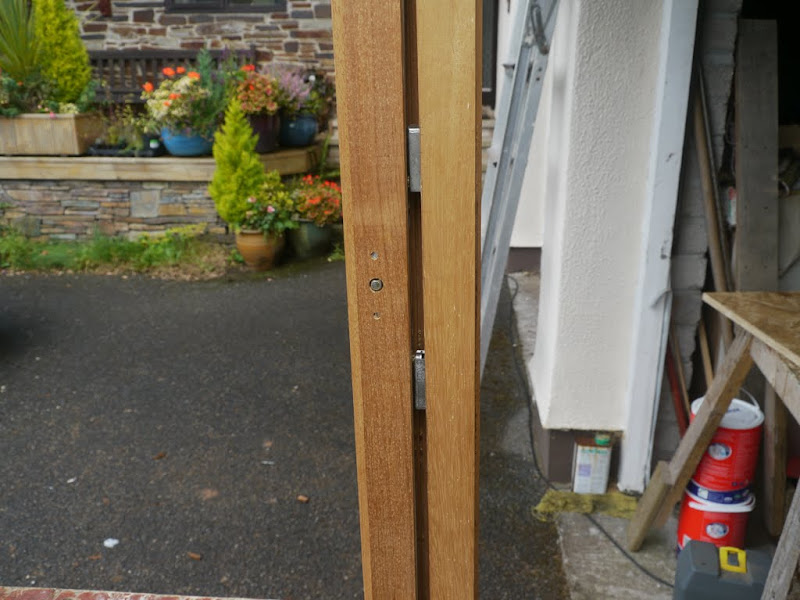
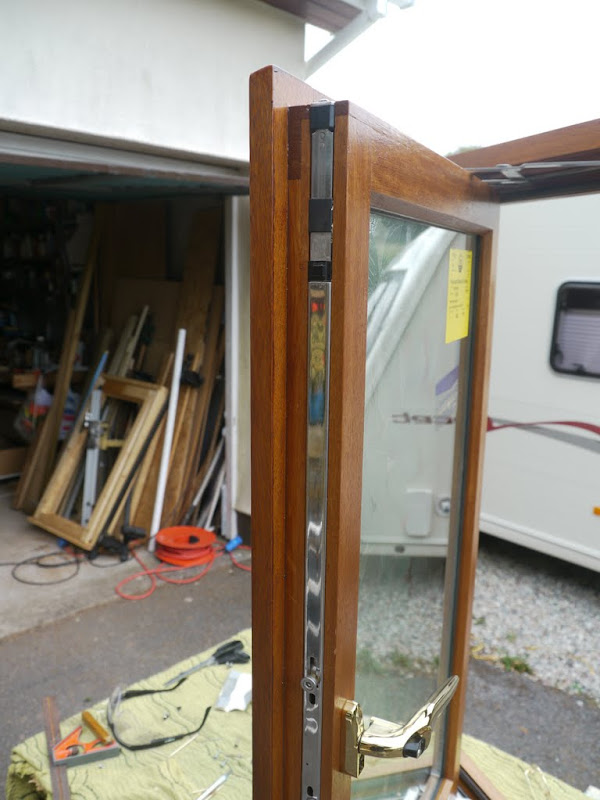
As Brian (Modernist) correctly predicted, there was insufficient room for the locking handling. This is the result of pinching 5mm from elsewhere, and the sash opens fine ..............

P1010385.JPG


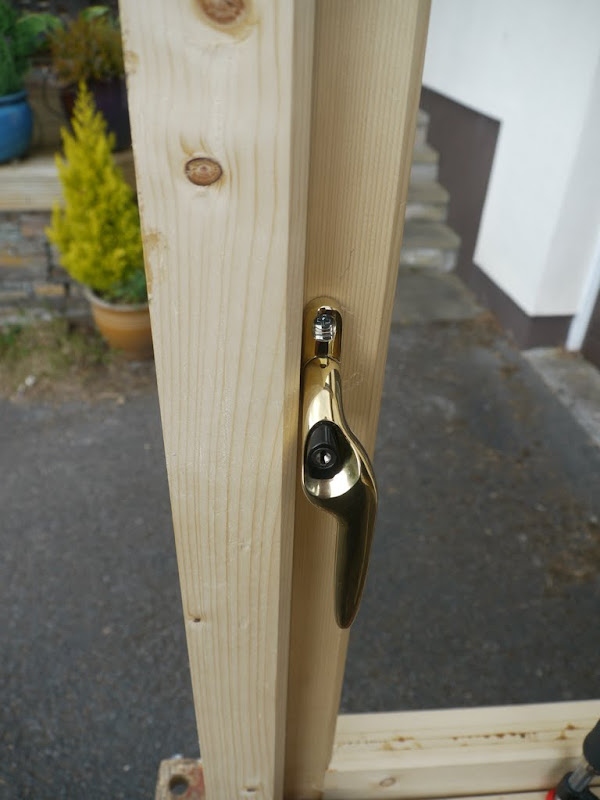
.......... but the handle still fouls the frame when locked in the "night latch" position - which is normal night time position for us.

P1010384.JPG


I'm confident that I can "find" another 3mm which will be more than enough to resolve this problem, but want to resolve the "Easy Clean" issue first. We have some UPVC windows elsewhere which are "easy clean" without having to slide the whole assembly to one side, and there is still room to climb out - I've done it several times when painting the walls, and I'm a bit on the portly side!

P1010381.JPG


This is far preferable to the Reddiseal Egress Easy Clean hinges I've used in this test piece. Anyone have any recommendations as to which of the thousands of hinges that are available offer this type of movement?

I appreciate this is all basic stuff for you professional joiners - but it's cutting edge stuff for a hobbyist like me! Thanks for the advice offered so far. I just need to resolve the handle fouling issue, and source a more suitable hinge before committing to Oak. But identifying and resolving these types of problem was what this excercise was designed to do, so not down hearted.
 
Can't offer any help as its beyond my level but very impressive window it looks good enough to paint up and use just like that.
 
:shock: , I've resisted showing SWMBO your blanket box and bookcase build Roger, will have to 'add' this to the 'do not show SWMBO' file :(
 
To sort the handle out, heres ones suggestion that may work... reduce the depth of the frame rebate.... which in turn will require the locking system to go further into casement.

As for you fitting the draft seal into your test window..... I'd really consider putting some in, as I used to find sometimes the draft seal could cause problem with the casement closing and locking.

Looking at what you have done so far, you've made a really nice window there so well done!
 
joiner_sim":1gqsm21x said:
To sort the handle out, heres ones suggestion that may work... reduce the depth of the frame rebate.... which in turn will require the locking system to go further into casement.

As for you fitting the draft seal into your test window..... I'd really consider putting some in, as I used to find sometimes the draft seal could cause problem with the casement closing and locking.

Looking at what you have done so far, you've made a really nice window there so well done!

Thanks Simon. There is probably room to shave 2mm off the width of the sash, and also to deepen the eurogroove down that side of the window by 1mm which should solve the problem, but I want to try some different hinges first for the reasons stated as that may change the geometry of the opening of the window. Deepening the eurogroove will be a pain though now that the final "storm proof" lamination has been added!
 
I think that is a really sensible investment of time and softwood. One of the hazards of being a hobby woodworker is that the projects we build could always be better next time round - I'm sure your oak windows will be spot on.
With modern glue and modern skinny section timber, lamination seems a good way to go for small runs like this.
 
This is far preferable to the Reddiseal Egress Easy Clean hinges I've used in this test piece. Anyone have any recommendations as to which of the thousands of hinges that are available offer this type of movement?

FWIW, The Egress easy clean friction slides are usually very good, never had a problem with them. I suspect although difficult to tell without being there to see etc, that somehow you have the slides under tension causing to much friction at the easy clean point of the action. I would take the sash off and remeasure the slides and then check the distance between the euro grooves on the sash as a starting point.
 
ProShop":1hwpyilv said:
This is far preferable to the Reddiseal Egress Easy Clean hinges I've used in this test piece. Anyone have any recommendations as to which of the thousands of hinges that are available offer this type of movement?

FWIW, The Egress easy clean friction slides are usually very good, never had a problem with them. I suspect although difficult to tell without being there to see etc, that somehow you have the slides under tension causing to much friction at the easy clean point of the action. I would take the sash off and remeasure the slides and then check the distance between the euro grooves on the sash as a starting point.

Thanks for the suggestion. I've measured carefully and the end result was that the hinges were in tension by 1mm. I refitted with 1mm glazing spacers under the lower hinge, but the difference wasn't noticeable. The combination of Egress and Easy Clean is OK - we could certainly live with it - but as we don't need the shower room window to be an egress window, I think I'd prefer to go down the route of Easy Clean only so that it is not necessary to slide the window aside for cleaning purposes. Any suggestions for a hinge that does that, as in the final photo above?
 
Well - I cannot even begin to to tell you how invaluable and instructive making a test piece has been!

I did a bit of trawling round the net yesterday and found these at Toolstation. Given that they are cheap enough and we have a Tool Station 6 miles from home, I bought a pair of 300mm and 400mm hinges with a 13mm stack. A bit of playing around back home showed that the 400mm ones achieve exactly what I wanted. We don't need an egress hinge in the shower room, and the action of these allows plenty of room to reach around the side to clean the outer pane from the inside. I tried the 300mm ones as well, but the gap was too tight to be able to comfortably reach around the frame to the outside, so they'll be going back.

P1010386.JPG


P1010387.JPG


Ignore the deep groove down the hinge line on the sash - that's a result of cutting the lock recess in the wrong position. It also demonstrates why the eurogroove should be cut before the outer lamination is glued on.

The white piece of plastic on the frame is a 3mm packer put under the window latch keep to reposition it correctly. In the "real thing" I'll change the dimensions of the recess in the frame to correct this.

The hinges were easy to fit. I've cut a eurogroove all around the sash which positions both the hinges and the shoot bolt lock. There is no recess cut in the frame to accommodate the hinges as this would create a water trap at the bottom of the frame. To position them I just held them up against the edge of the rebate and held the end of the hinge against the side of the frame. Simples!

I've found the Reddiseal "shoot bolt" lock very good, and easy to fit and adjust, and will happily use them again. However, it is very tight to get an adequately wide seal down the side of the frame and still leave room for the handle. Beware the mistake I made in this area. Even when I thought I had left enough room to leave a 2mm gap between the handle and the frame, it still fouled the frame when in the closed position using the "night vent" facility. Next time I will set the shootbolt assembly deeper into the eurogroove until it is flush, or even 1mm below the surface. In that way the handle will be moved further into the frame creating more clearance without having to reduce the width of the overlap of the sash against the frame. That is why I've had to use a 3mm packer under the keeps on my test piece - this adjustment threw out the gap between sash and the frame which was then outside the tolerance for the shoot bolt lock and the "keeps" into which they locate.

I was going to glaze from the inside but was warned that it would be much more difficult to ventilate and drain the space between the glazing and the frame that way. By having the glazing bead on the outside you can easily incorporate drain holes that will shed any seepage to the outside instead of on to your interior windowsill. If decent glazing tape is used it would be impossible to remove the sealed unit from the outside without breaking it - in which case glazing from the inside won't help.

Now beginning to rethink whether "real thing" should be in oak as originally planned, or whether to use iroko or Idigbo which would be a better match to the rest of the house. Decisions decisions!

If not oak - iroko or idigbo anyone. I've used iroko without any allergic reaction, but never idigbo. Any preference?

Also, this is a voyage of discovery for me, and I'm not claiming that the way I'm doing this is the "right way", or that it is not the "wrong way", so if any of you professionals can see a better way without resort to a spindle then please say.
 
Looks good Roger, looking forward to the hardwood versions. Good lesson making a prototype to iron out any unforeseen issues.
 
I've just finished making a version in iroko. I've used exactly the same method as I did for the softwood learning piece, so photos are a bit sparse. Each frame and sash combo consists of 40 pieces of wood, laminated up. I started with the frame and mitred the corners. These were just butt jointed as they will be held in place with the next layers, but if I had a domino I'd probably have used it.

P1030122.JPG


It then gets clamped up on the jig, face up at this stage as I want to see that the mitred corners have pulled together properly. Plastic above and below to ensure that the jig doesn't become an integral part of the window.

P1030123.JPG


At that point I realised that I should have routed out the groove for the aquamac before assembly, but no real matter - easily done on the router table at this stage.

P1030127.JPG


Now turn it over and put it back on the jig for the next layer to be added.

P1030131.JPG


At this stage enthusiasm took over and there are no more pics until later in the process, but briefly, each layer is added in turn as shown in the example above. When assembling the sash, it is important to cut the euro groove before the final "storm proof" external layer is added.

P1030315.JPG


I also routed drain holes in the bottom rail of the sash before assembling the middle layer.

P1030316.JPG


At this stage I realised that the depth of the reveal was insufficient to cover the spacer in the DG unit. Aaaagghhh! Problem solved by running the sash through the router to uncrease the width of the reveal, as shown here. I'm feeding the workpiece from L-R so that I don't have a "climbing cut". I practised first on the softwood trial piece before doing it on my hardwood sash. All a bit fraught, but it turned out OK. In all, I widened the reveal by about 3mm all the way round.

P1030317.JPG


When assembling, it is a great help to leave off the outer storm proof layer until fitting the hardware is complete as you can see what is going on. Here is the upper hinge.

P1030300.JPG


... and the espag lock engaging in whatever those "gubbins" are called that they locate in to.

P1030301.JPG


P1030305.JPG


The outer stormproof layer can then be added. You can see here that I've added a narrow 5mm piece along the top which prevents any free standing water that ends up on the top of the inner frame ending up on end grain. It would also be a useful method of increasing the height of the sash should anyone be so stupid as to make the sash too short. :roll: :oops: #-o

P1030315.JPG


A bit of cleaning up. Can't resist showing the lovely shavings taken off by my lovely Quangsheng V2 standard angle block plane given by my son and daughter last Xmas.

P1030318.JPG


P1030342.JPG


This is the window viewed from inside.

P1030343.JPG


P1030344.JPG


... and from the outside.

P1030345.JPG


The finish is one coat of Sikkens TLS light oak woodstain, followed by 2 coats of Sikkens Filter 7. I'm hoping that the colour will even out over time as the wood darkens. Glazing is 4/16/4 Planitherm Total + with an argon fill, to give a U value of 1.2. This window is to go in a first floor shower room above the roof line of the extension we have just started building. The builder has recommended that installation is not done until after the cavity tray has been fitted as there will be so much dust flying around at that stage. Overall cost was about £120, inc wood, glazing and hardware.

P1030346.JPG


Just started the second window which is identical in size so should be much easier.
 
Mcluma":14xpguev said:
Are you going to replace all windows, as this is not matching in with the others

Over time, yes. We have never liked the dark walnut stain on the existing windows, which are 30 years old and near the end of their useful life, and I couldn't bring myself to stain the iroko to dark walnut. The windows and doors in the extension will be finished in the same way. In the short term I may retreat the existing windows a paler colour to give a better temporary match.

The photo makes the difference look far more apparant than is the case in real life, the new one being darker and the existing being lighter!
 
Very impressive, to look at I'd have thought you'd been making windows for years!
 
I have read your post with interest and want to say that I am impressed. One question I do have. Why do you laminate the stock, is it because it is more stable, or assists with the production ?

Thanks
 
flanajb":2887i1g1 said:
I have read your post with interest and want to say that I am impressed. One question I do have. Why do you laminate the stock, is it because it is more stable, or assists with the production ?

Thanks

Thanks for your kind comments flanajb. The main reason I laminate is for ease of forming the corner joints in what is quite a complex section. Like many hobbyists I have a table-saw, router table, p/t and bandsaw but not a spindle molder. Even if I had a spindle it is debatable whether it would be worth investing in the tooling to make windows when I only have a few to make. This method allows anyone with basic machine tools to build up a complex section with considerable accuracy and form well fitting corner joints in a series of simple operations.

Also I'm using iroko which is notoriously unstable and laminating helps ensure that provided the section is laminated flat it will stay that way.

Obviously it is quite time intensive so not something that any commercial set up would do, but for a hobbyist that isn't a consideration - just the quality of the end product.
 
RogerM":20wlruby said:
flanajb":20wlruby said:
I have read your post with interest and want to say that I am impressed. One question I do have. Why do you laminate the stock, is it because it is more stable, or assists with the production ?

Thanks

Thanks for your kind comments flanajb. The main reason I laminate is for ease of forming the corner joints in what is quite a complex section. Like many hobbyists I have a table-saw, router table, p/t and bandsaw but not a spindle molder. Even if I had a spindle it is debatable whether it would be worth investing in the tooling to make windows when I only have a few to make. This method allows anyone with basic machine tools to build up a complex section with considerable accuracy and form well fitting corner joints in a series of simple operations.

Also I'm using iroko which is notoriously unstable and laminating helps ensure that provided the section is laminated flat it will stay that way.

Obviously it is quite time intensive so not something that any commercial set up would do, but for a hobbyist that isn't a consideration - just the quality of the end product.
Hi Roger, many thanks for the confirmation. I too may have a few windows to make some time soon and I also do not have a spindle moulder. I do, however, have the wealden scribed router cutters which the tenon passes over the top of. That should help making the casements.
 
Back
Top