Infill casting MkII

UKworkshop.co.uk

Help Support UKworkshop.co.uk:

This site may earn a commission from merchant affiliate links, including eBay, Amazon, and others.

HarryJ

Established Member
Joined
3 Aug 2013
Messages
71
Reaction score
2
Mr_P":2he2xhzo said:
...don't say I didn't warn you.

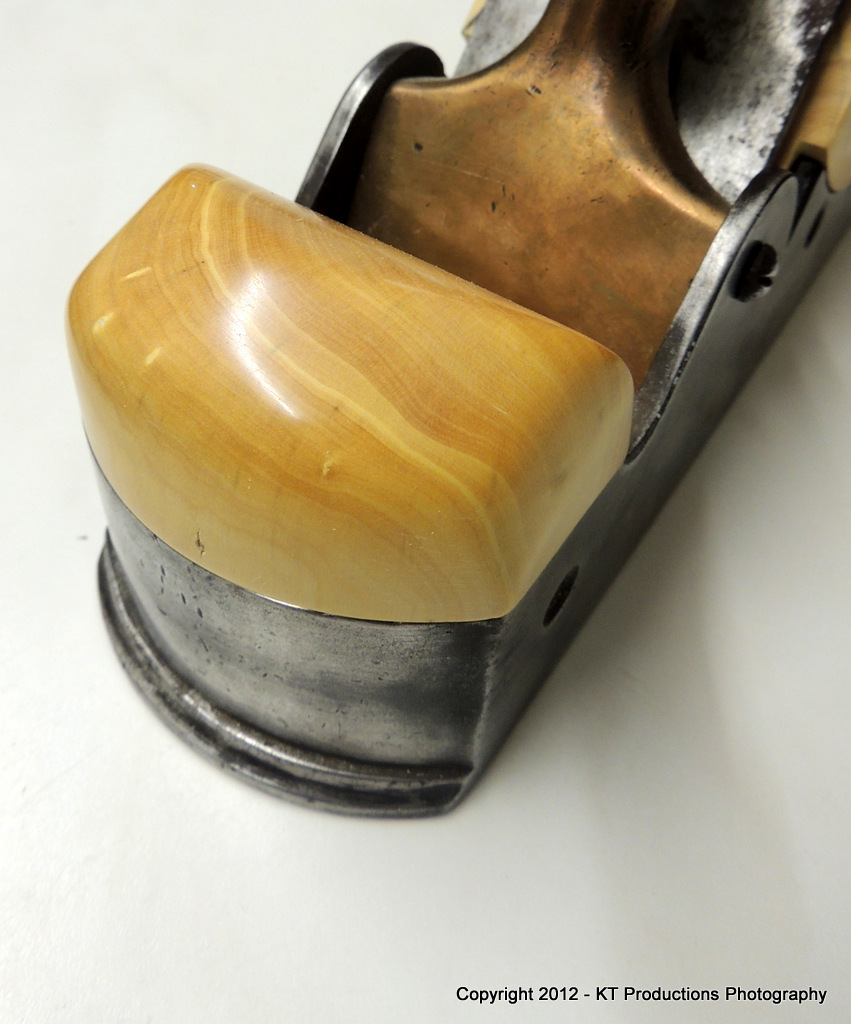
I have just bought an infill casting from Mr P and, as quoted, it is quite a bit of work to get it to be a respectable plane!

This time its cast bronze rather than cast iron, and hopefully will end up lasting a little better than last time! (http://www.ukworkshop.co.uk/forums/infill-casting-project-t81330-15.html)


Using the photos from Mr P's thread (http://www.ukworkshop.co.uk/forums/three-little-castings-less-skilled-northern-version-t79592.html this is the condition I received the casting in, (its the bottom one for anyone not familiar with the thread).
after.jpg

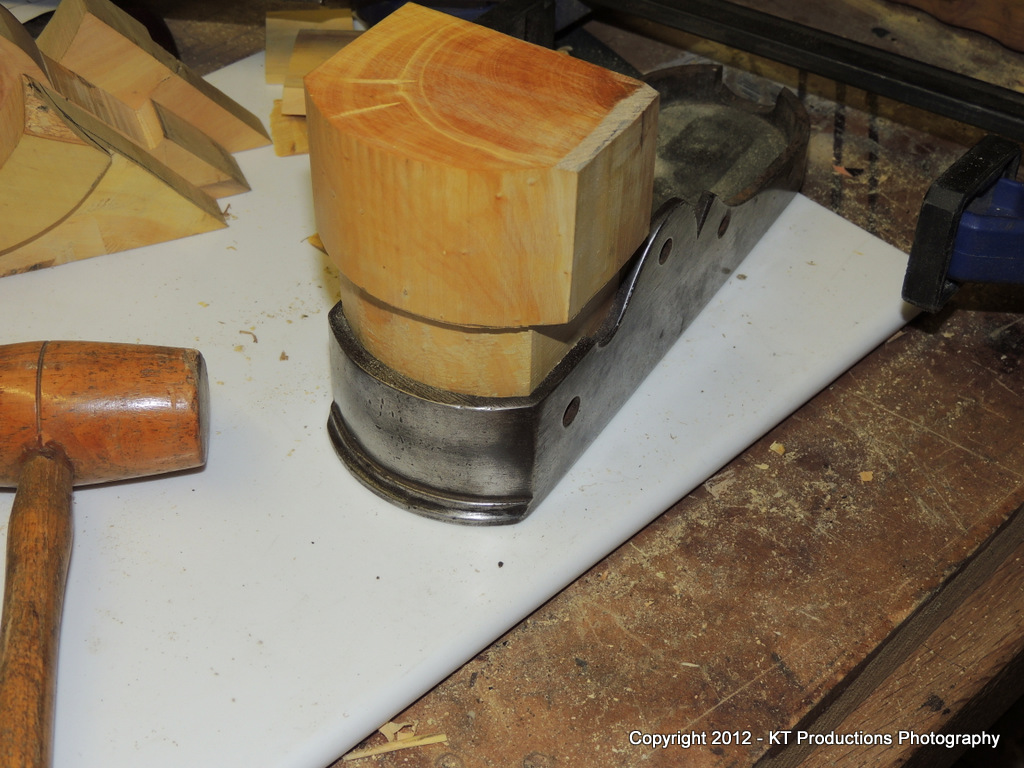
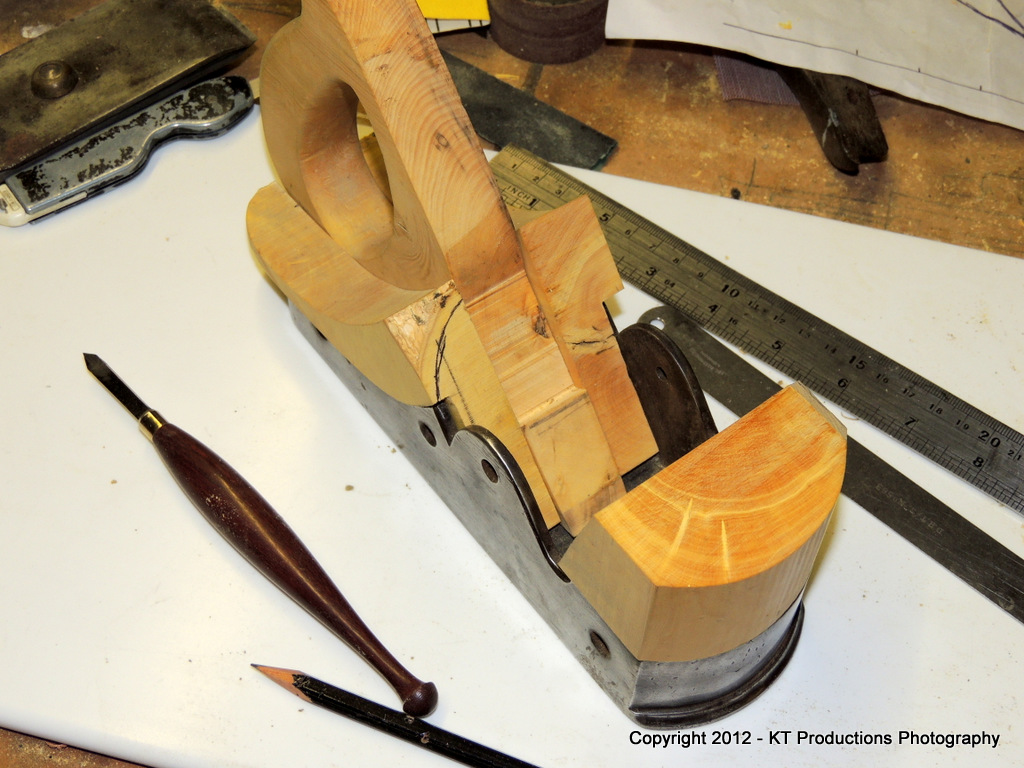
Fortunately for me, much if the work has already been done regarding flattening the sole, however there is still a fairly large void to be removed from the middle.

The sides also need flattening as currently they are looking a little out of flat :wink:
Outside of casting before.jpg


So...to the sand paper and glass plate, although I think I need a longer piece of glass!! :lol:

Thanks,
Harry
 

Attachments

  • after.jpg
    after.jpg
    12 KB · Views: 2,099
  • Outside of casting before.jpg
    Outside of casting before.jpg
    14.9 KB · Views: 2,099
Hitting that with a file first might be quicker...just to get most of the hills and dales out.

Then progressive sanding on float glass or even MDF for the first stage. I'd go 80,120,240,320,400.

You'll soon have it flat.

Looking forward to this one mate.

Cheers

Jimi
 
Good Luck Harry,

I'm sure you will make faster progress than I.

Will any of the old bits fit ?
 
Thanks Jimi,
I thought about using files too but first I need to buy some better ones as my current files are all second hand and a little blunt!

I do need to get a better piece of float glass for flattening and then I'll be away, as it is at the moment, I'm using a marble top but I would prefer glass as I don't think it should warp whereas I believe marble could?


Thank you Mr P, I do hope it is a success!

I don't think any of the old bits will fit unfortunately as the rear handle is too long and when placed where it would need to go, the cut away I made for the casting sides is in the wrong place.
The front handle also doesn't have the correct orientation either I don't think, as that the curve I put on the front of the old infill will not work with this casting which needs a flat front, and the other way around doesn't quite work either I don't think. :(
When I get the insides of the casting prepared, I'll give it a try anyway just to be sure though...


I did some work with the casting today, concentrating on the sole, which I have nearly got flat now.
I have worked the big void out...
Sole.jpg

...it's just the stubborn corners and a very narrow line right on the edge left which will need a little more work :?

Photographing the sole was quite difficult as the sheen it has seems to upset the focus a bit.


Thanks,
Harry
 

Attachments

  • Sole.jpg
    Sole.jpg
    10.1 KB · Views: 2,023
To anyone who is still interested after the long time since my last post, I have a short update.

Firstly however, I must apologise to Mr P, and to anyone else following, for the lack of progress until now with the casting...

The progress;
I assumed everyone here knows what emery cloth and a flat reference surface looks like, so I have no 'action' shots of the flattening taking place, but rather I have photos of the flattened sole and sides...

The side
Flattened Side II.JPG


The sole
Flattened Sole.JPG


For now, I have left the surface as it was straight from 80 Grit because I thought that if I take it any finer now, I'll need to do something which will undo the finer grits.

The next conundrum is a way of working the inside so the wall is uniform in thickness along the entire body
-Suggestions welcome of course!

Thanks again,
Harry
 

Attachments

  • Flattened Side II.JPG
    Flattened Side II.JPG
    145.7 KB · Views: 1,881
  • Flattened Sole.JPG
    Flattened Sole.JPG
    195.6 KB · Views: 1,881
Hi Harry...we missed you mate!

Nice start there....this is going to be a gem.

The wall of a casting will never be uniform nor does it need to be.

What you have to do for the infills is to make them overstuffed.

This basically means that you make the rough shape oversized a tiny amount for the bit going inside the casting and a lot for the bit going outside. A bit like shoving ice cream in a cone.

You then force the infill down into the casting gently (I know that sounds contradictory but you will need force but be careful not to use much...or you will...um...oh yes...you know...crack the casting! :mrgreen: )

The way I do it is to tap it in a bit...then take it out..and you will see where it's marked...shave that off with a small plane or a paring chisel and repeat.

The plan is to push the whole lot into the infill up to the transition. It doesn't matter if there are small voids between wood and metal as long as it fits in as close as possible...like this...

DSCN0388.JPG


When the fit is correct it should be like this...

DSCN0390.JPG


The inside wood fits tight and the outside front bun is hanging over the metal...on a ridge.

I then tape the casting all around with about three or four layers of masking tape to protect it and shape the bun on a disc sander...

DSCN0587.JPG


So the inside of the casting and hence the wall thickness variation need not be critical.

Hope this helps.

Jimi
 
Cheers Jimi, its appreciated

I suppose the entire wall doesn't need to be uniform, I just thought that if I was going to do it, I may as well make life easier for fitting the infill's. -although thinking about it, I guess having a rough internal surface aids gripping the wood, preventing it coming back out! (...to some degree)

Unfortunately, some of the wall does need to be uniform as both the front and back of the casting are open -in that the casting walls are only on the sides and not the rear or front as with the amazing example you have shown, so the inside walls will still be seen when the infill is in place.
I'll add a picture because I don't really think my explanation is helping much with what I am trying to get across...

Here's that picture:
Front.JPG


The key to tapping down the infill, I have decided, is to have a nicer mallet -similar to the one you have in the picture (hammer)
-or maybe it's something to do with taking the infill back out and shaving a little off...

Thanks for the help,
Harry
 

Attachments

  • Front.JPG
    Front.JPG
    210.6 KB · Views: 1,824
Glad you didn't give up after your first attempt, looks really good so far, I can't add much as jim is the man on this subject but I'm watching with great interest,
Keep it up

Thanks
TT
 
Hi Harry

The key to doing the exposed wall bits is to run a file over these to get a flat edge...it only needs to be a couple of millimeters...and make the front of the infill slightly wider so that when you tap it in..the wood deforms and makes a nice tight fit. Depending on the infill...I think you will find that wax is used to fill any micro gaps...dark wax to match the rosewoods etc...and light to match box.

To get the infill out simply put a piece of metal...a screwdriver or old chisel under it as you tap it down and lever it out slowly while tapping the metal exposed downwards...similar to removing a wedge.

It is in fact quite easy as long as you shave off as you go progressively...you are basically inching to a tight fit.

In addition...if you file the top of the metal flat and leave a sharp edge on the inside, it acts as a natural shave.

Jimi
 
HarryJ":2vfbkoxu said:
-or maybe it's something to do with taking the infill back out and shaving a little off...

<obvious>It's easier to work the outside of a piece of wood than the inside of metal casting.</obvious>

BugBear
 
Hi again,


Toby, Thanks for commenting and even if you don't add anything I like to know someone is following at least! :) -besides, did I not see some fine looking tools of your own a little while ago?! :wink:

Jim, thanks for the tip about using wax to fill any micro (or not so micro) gaps which I may have,
The natural shave of the inside of the casting is a good idea as well and I will almost certainly be using it!

BugBear, 8)


Apologies again for the delayed reply, I have been pondering how I am going to sweat on a steel sole because from lapping the sole and sides, the casting isn't a very hard material and I am concerned that it will have to be re lapped quite often?
-I also think it will look quite nice with a steel sole to be honest!

The biggest problem with this at the moment is that I don't know how I am going to generate enough heat and then keep the heat to tin both the sole and the steel...?
I also will need to get some steel plate, but have no idea where from?

Thanks again,
Harry
 
Watch out for thermal stresses on cast steel Harry.

We don't want Infill Crack MkII now do we!?

I don't think you have to worry too much about the casting being hard enough...it will be fine. I use mine all the time and I tell ya...it's the best one for finishing...I have tried this one against the Barron smoother and a Japanese smoother and there's sod all difference with the infill coming out first by a whisker. So the sole can't have gone that far out of true since I lapped it.

Jimi
 
Cast steel? but yes, that is a fair point I would imagine on any cast metal with the introduction of some heat, especially if it localised by a torch rather than an oven I suppose?!

I still like the idea of having a steel sole, but maybe I will leave it as it is. I definitely don't want infill crack MkII

Thanks Jimi,

Harry
 
HarryJ":1e6db7j5 said:
Cast steel? but yes, that is a fair point I would imagine on any cast metal with the introduction of some heat, especially if it localised by a torch rather than an oven I suppose?!

I still like the idea of having a steel sole, but maybe I will leave it as it is. I definitely don't want infill crack MkII

Thanks Jimi,

Harry

Sorry mate....I forgot it's bronze...in which case I'm not sure. :oops:

Hardness wise though...it still should be ok...I think a steel sole would spoil it.

Jimi
 
Which solder would you use to sweat on a steel sole ?
I know what I would use, just wondering which one is the norm.
 
Jim,
Maybe the hardness isn't a factor effecting the sole then?
Although I am not 100% sure, I think a thin steel sole would look good

Nolegs,
From what I have read, I think the solder I should be using has a make up of 60% tin, 39.5% Lead and 0.5% antimony.
As far as I can work out, this is commonly called 60/40 solder? (60 tin, 40 lead??) but I am not sure about that...
Which would you use?

Thanks again,
Harry
 
HarryJ":1i773t44 said:
Jim,
Nolegs,
From what I have read, I think the solder I should be using has a make up of 60% tin, 39.5% Lead and 0.5% antimony.
As far as I can work out, this is commonly called 60/40 solder? (60 tin, 40 lead??) but I am not sure about that...
Which would you use?

Thanks again,
Harry

I know that as Tinmans Solder and it is what I would use, It's got a fairly low melting point, so the heat is less of a problem with the casting and it will definitely solder the bronze to steel.
In my original trade we were also known as electrical plumbers, cable jointers they call us today. We soldered everything, lead, copper, brass, bronze, aluminium, steel, to themselves and to each other.
Tinmans solder was generally used for pre tinning but not always needed. We mainly used what I know as Plumbers metal sometimes called Plumbers H, made by Frys, it has an even lower melting point and could also be useful to you. I think it's about a 50/50 mix.
My old instructor would say "he who cleans is he who solders" and that's the best advice I ever heard when it comes to soldering.
As for a flux I would go with Templars flux, it's old school but it works.
 
I have heard of it being called Tinmans Solder and as for it being what you would use, am I gad -I seem to have made the good choice!

I will take that advice and spend a little extra time cleaning, it wont hurt that's for sure but by the sounds of it, it will definitely help!
As for the flux, I had heard Bakers fluid, although if you are suggesting Templars Flux, perhaps I should try and get some of that instead...

...speaking of getting some flux, can I ask where would you suggest getting hold of both the flux and the solder?

Harry
 
HarryJ":r4z2sk7d said:
I have heard of it being called Tinmans Solder and as for it being what you would use, am I gad -I seem to have made the good choice!

I will take that advice and spend a little extra time cleaning, it wont hurt that's for sure but by the sounds of it, it will definitely help!
As for the flux, I had heard Bakers fluid, although if you are suggesting Templars Flux, perhaps I should try and get some of that instead...

...speaking of getting some flux, can I ask where would you suggest getting hold of both the flux and the solder?

Harry

Harry, there's something about Bakers fluid and use on non ferrous metals if IIRC so I would stay away from it for this job.
A quick look for Tinmans brings up Cromwell Ind Supplies, they are nationwide. Surprise surprise Amazon also have it.
The flux is also known as Telux flux and should be available from any good plumbing supplies. There may be others that are suitable, La Co is one that comes to mind but my 1st choice would be Templars.

Not trying to teach suck eggs etc, I was taught to first give a general clean and abrade, second was to give a more thorough clean using a degreaser and "material specific medium" ( like that ?? ).
What that means is for each metal in the job we had various cleaning tools.
For brass and bronze we had a brass wire brush, copper was a copper braid/stocking, aluminium was a stainless steel wire brush, lead was a rasp or file and for steel we had a normal wire brush then emery.
The degreaser was Inhibisol , the original stuff, but it was banned due to having 1,1,1 Trichloroethane in it. Thinners or meths will do the same job though.
Keep us updated, I love these hand made tool threads. Leaves me gobsmacked at how they turn out and remember others here have set the bar way high :lol:
 
Harry - I bought a low angled mitre plane casting from Bristol 10+ years ago, bronze casting with steel sole already sweated on so some of the hard work was already done. Re your query about getting the inside walls of the casting reasonably flat, I used a drum sender in the pillar driil, running against a fence clamped to the table. Take time and don't get too ambitious = little by little. Didn't overstuff, and this came out flat enough for a good finish.
Hope to be off to the workshop this pm, with NEW camera, and will post pictures.
Mike
 
Back
Top