


SVB
Established Member
From an earlier thread I metioned my Dad and I were going on a box making course with Andrew Crawford.
Well, what a couple of days.
I cannot really hope to pass on much more in this review that a general flavour of the course but I will try to do my best.
Firstly I should explain that I took the course with my father. Both of us are keen DIY’ers and I have done a fair bit of turning. We are both completely new to what I call ‘fine’ woodwork so we approached the course with this in mind. The photos are a bit limited as Dad took most of them and I have not got them off his camera yet, however there are enough on mine to tell the story I think.
Anyway, excuses aside: The object of the couple of days was to produce a fine box with veneered and inlayed lid, veneered bottom and solid sides.
The first day started with discussion on our experience and workshops to ensure the approaches taught on the course were of practical use. This caused a bit of a problem as I get really nervous when there is not at least a 2000W motor involved , my Dad considers lighting as a power tool and unnecessary. So, with that background we effectively got two courses in one as each technique was explained twice – once for me and once (in a long winded, hard work and Dickensian fashion :roll: ) for my Dad.
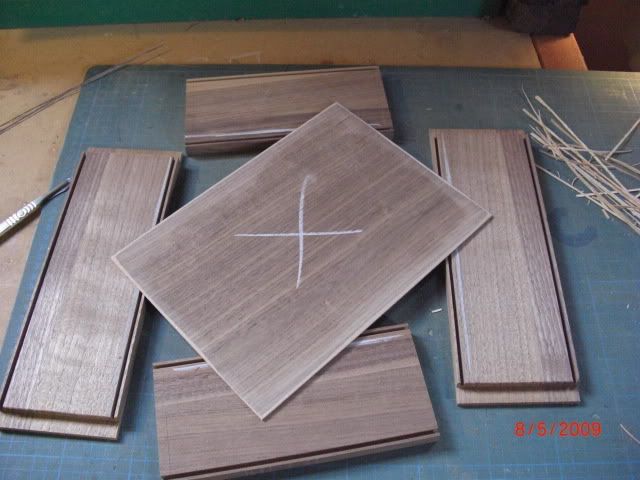
To focus on the veneering and inlay process some of the basic machining of the solid sides had been done in advance of the course. The timber (walnut) had been thicknessed, cut to length and groves machined to accommodate the top and bottom. This conversion process was discussed at length with a mind to the different preferences of the students. So we started as below.
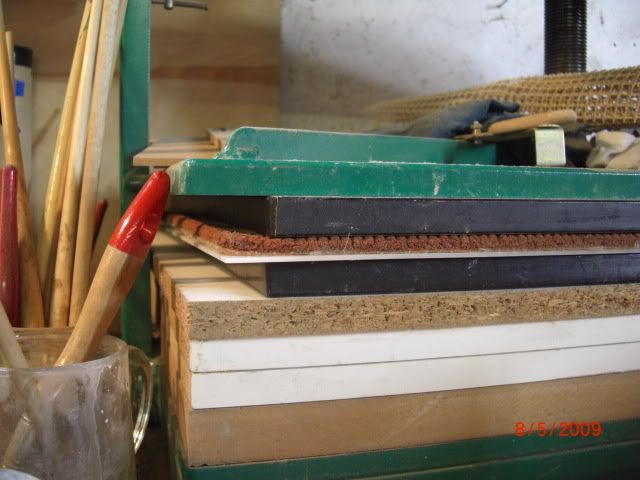
Andrew had some walnut panels veneered for tops which my Dad chose to use but I had with me some bird’s eye maple veneer that SWMBO really likes so we made up another panel for my box. Here the panel is in the press showing the ‘sandwich’ of laminate faced boards with paper / panel / paper / plastic sheet / underlay / board. This layering system Andrew told us has the effect of applying overall pressure as well as some compliance that gives a really good result.
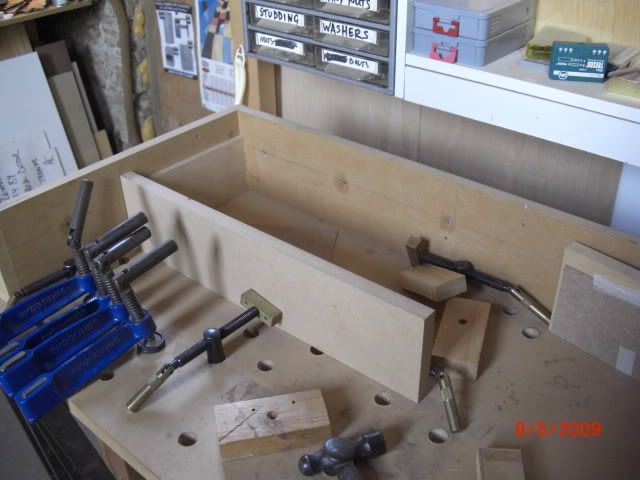
Having made the panel, the box was assembled and clamped up in a jig made for clamping boxes and left overnight. (The box has not been nicked – I forgot to take a wip shot but did take a photo of the jig for future reference.)
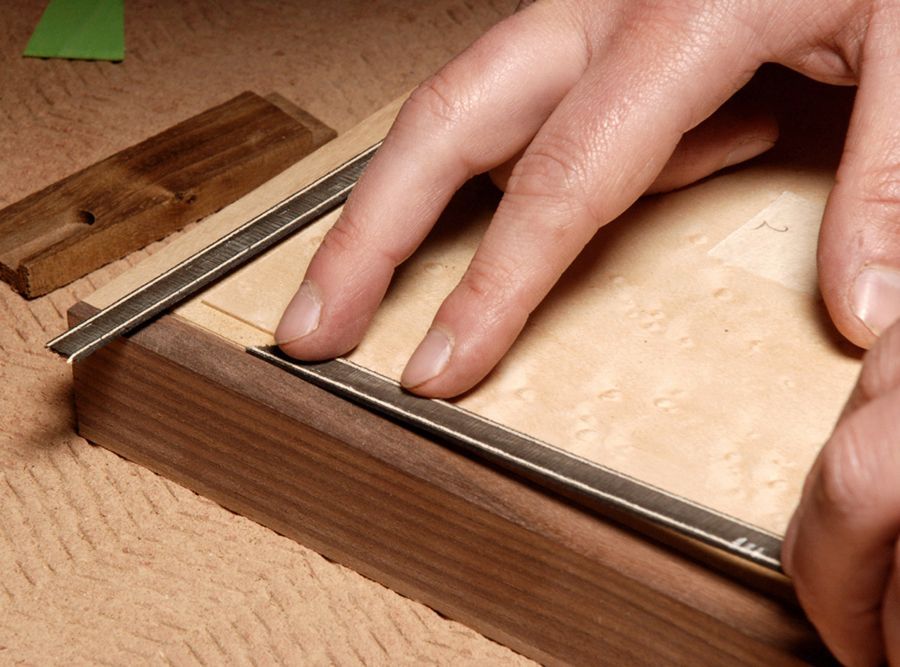
The following morning the first job was to scrape the sides down to the level of the top. This was new to both of us as neither of us had used or prepared a scraper before – what a GREAT tool!!! Quite a quick process, a really nice finish and cheap! :tool:
Anyway, following levelling the sides to the top we then cut the lids off on the bandsaw.
We next made the inlay we were going to use. My inlay was made with a sandwich of veneer thickness ebony & maple both sides of a thick ebony core. This was again glued and pressed in the veneer press before slicing circa 1.2mm thickness off the resulting sandwich on the bandsaw.
The next step, at the router table (sorry Dad), provided the groove to receive the inlay and fit / mitre the inlays.
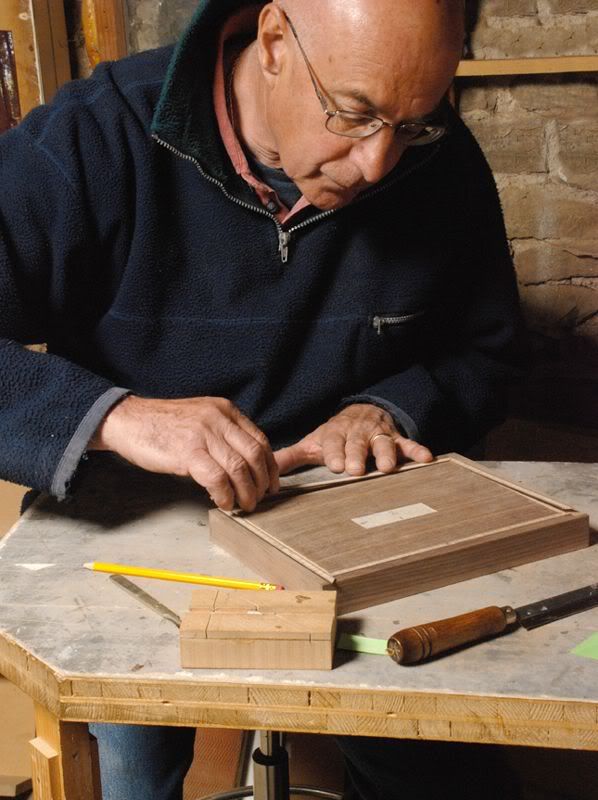
Following further scraping to bring the inlay flush with the veneered top panel and sides the box was given a general sand.
We then cut the recessed for the hardware etc (again at the router table) and had to call it a day as time had beaten us (as expected and advised at the outset). We have to finish installing the hinges, sanding and oiling at home.
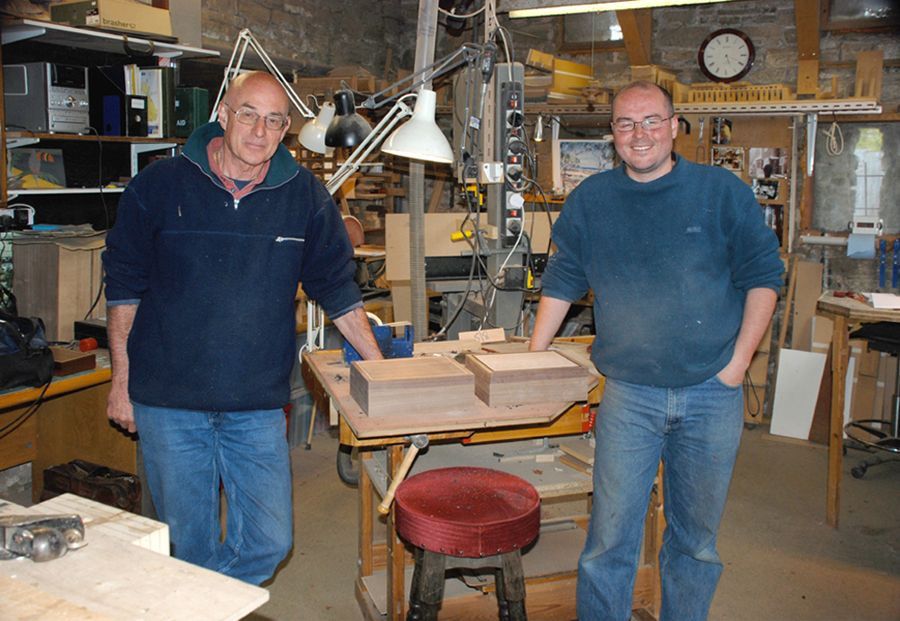
All in all this was an excellent couple of days. From a standing start with two ‘fine woodwork’ virgins to end up with boxes of this quality is astounding – we were both on a high on the way home. Also, what does not come across from the above is the tips / hints and techniques that we have picked up along the way. Hardly a process went by that either Dad or I had to ask questions about and this is probably equally as educational as the box production itself.
One of the key things I really took from this is the attention to detail that goes into boxes (in this case) of this quality from professional makers. An example was during inlaying the banding, Dad had cut a mitre that I thought looked OK and fitted nicely. Andrew donned his magnifying glasses and pointed it was ‘at least’ 0.5mm too short and would need to be re-done to look really good when scraped and finally sanded.
All in all an excellent course and one I would not hesitate to recommend to others, certainly starting out (from my experience) and I would think at all levels. Our thanks certainly go to Andrew for an excellent couple of days.
Well, what a couple of days.
I cannot really hope to pass on much more in this review that a general flavour of the course but I will try to do my best.
Firstly I should explain that I took the course with my father. Both of us are keen DIY’ers and I have done a fair bit of turning. We are both completely new to what I call ‘fine’ woodwork so we approached the course with this in mind. The photos are a bit limited as Dad took most of them and I have not got them off his camera yet, however there are enough on mine to tell the story I think.
Anyway, excuses aside: The object of the couple of days was to produce a fine box with veneered and inlayed lid, veneered bottom and solid sides.
The first day started with discussion on our experience and workshops to ensure the approaches taught on the course were of practical use. This caused a bit of a problem as I get really nervous when there is not at least a 2000W motor involved
, my Dad considers lighting as a power tool and unnecessary. So, with that background we effectively got two courses in one as each technique was explained twice – once for me and once (in a long winded, hard work and Dickensian fashion :roll: ) for my Dad.To focus on the veneering and inlay process some of the basic machining of the solid sides had been done in advance of the course. The timber (walnut) had been thicknessed, cut to length and groves machined to accommodate the top and bottom. This conversion process was discussed at length with a mind to the different preferences of the students. So we started as below.
Andrew had some walnut panels veneered for tops which my Dad chose to use but I had with me some bird’s eye maple veneer that SWMBO really likes so we made up another panel for my box. Here the panel is in the press showing the ‘sandwich’ of laminate faced boards with paper / panel / paper / plastic sheet / underlay / board. This layering system Andrew told us has the effect of applying overall pressure as well as some compliance that gives a really good result.
Having made the panel, the box was assembled and clamped up in a jig made for clamping boxes and left overnight. (The box has not been nicked – I forgot to take a wip shot but did take a photo of the jig for future reference.)
The following morning the first job was to scrape the sides down to the level of the top. This was new to both of us as neither of us had used or prepared a scraper before – what a GREAT tool!!! Quite a quick process, a really nice finish and cheap! :tool:
Anyway, following levelling the sides to the top we then cut the lids off on the bandsaw.
We next made the inlay we were going to use. My inlay was made with a sandwich of veneer thickness ebony & maple both sides of a thick ebony core. This was again glued and pressed in the veneer press before slicing circa 1.2mm thickness off the resulting sandwich on the bandsaw.
The next step, at the router table (sorry Dad), provided the groove to receive the inlay and fit / mitre the inlays.
Following further scraping to bring the inlay flush with the veneered top panel and sides the box was given a general sand.
We then cut the recessed for the hardware etc (again at the router table) and had to call it a day as time had beaten us (as expected and advised at the outset). We have to finish installing the hinges, sanding and oiling at home.
All in all this was an excellent couple of days. From a standing start with two ‘fine woodwork’ virgins to end up with boxes of this quality is astounding – we were both on a high on the way home. Also, what does not come across from the above is the tips / hints and techniques that we have picked up along the way. Hardly a process went by that either Dad or I had to ask questions about and this is probably equally as educational as the box production itself.
One of the key things I really took from this is the attention to detail that goes into boxes (in this case) of this quality from professional makers. An example was during inlaying the banding, Dad had cut a mitre that I thought looked OK and fitted nicely. Andrew donned his magnifying glasses and pointed it was ‘at least’ 0.5mm too short and would need to be re-done to look really good when scraped and finally sanded.
All in all an excellent course and one I would not hesitate to recommend to others, certainly starting out (from my experience) and I would think at all levels. Our thanks certainly go to Andrew for an excellent couple of days.