siggy_7
Full time tool collector, part time woodworker
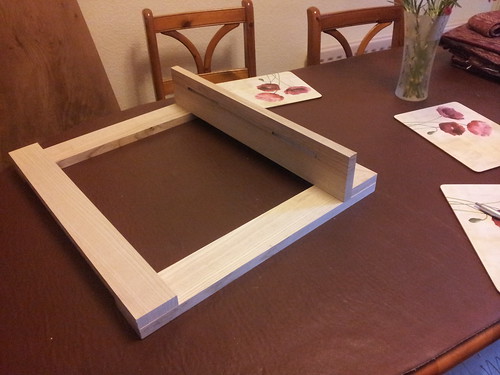
After making a few of Bill Hylton's router jigs, I decided to make a small bench-top style router table using his designs. The idea being that something small-ish and portable won't take up much room in my crowded workshop and will remain useful even when I have something bigger and better.
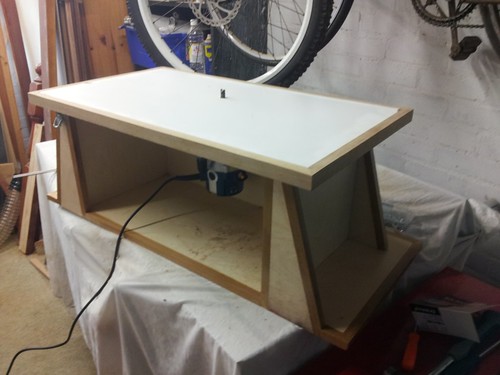
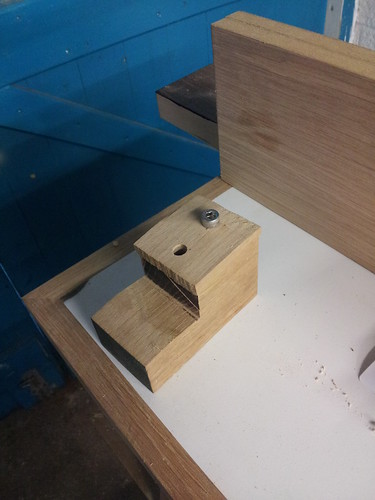
The main concept is something that can be carried around, hung on a wall and that has a hinged lid for easy access. The top is made of two pieces of 12mm ply with a hole through the bottom half, so that a fixed base router locates precisely into the underside of the top. It is secured by two toggle clamps screwed into the top, so installing the router is a 30 second job and can even be done with the perspex base plate left in. I designed it around my Draper Expect router, which I regularly use for hand held routing and jig use as well so the ability to remove it quickly is very helpful.
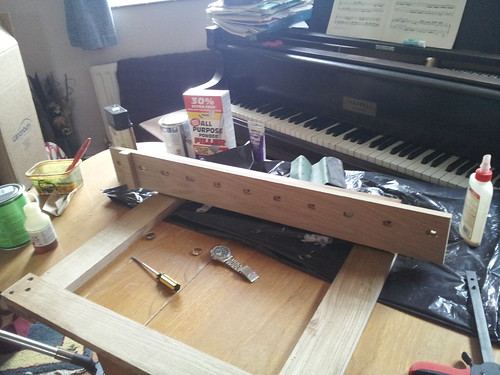
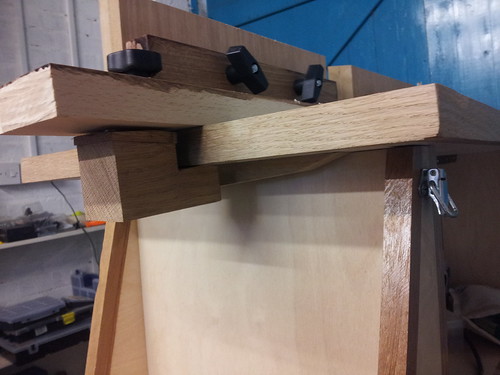
To access the router, the top hinges up and is secured via a stay. This makes height adjustment very easy.

Changing bits is also easy as you just slide the router out of the base. The main downside is that because the router just pokes up through the top, there is no way of closing down the opening once I use a big bit in it. Currently I've not used anything bigger than 16mm, if this becomes a problem I might machine out a recess in the top for an insert.
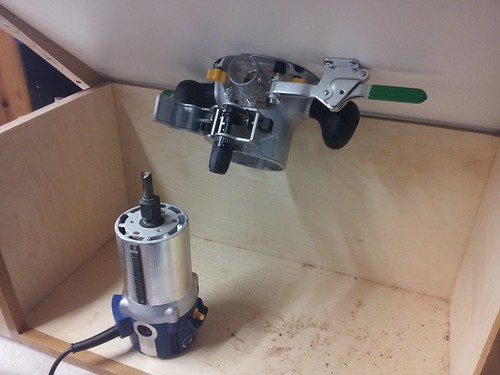
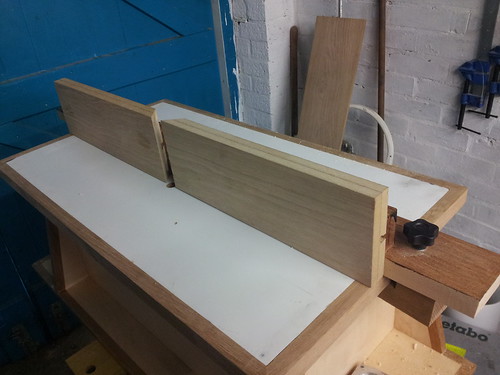
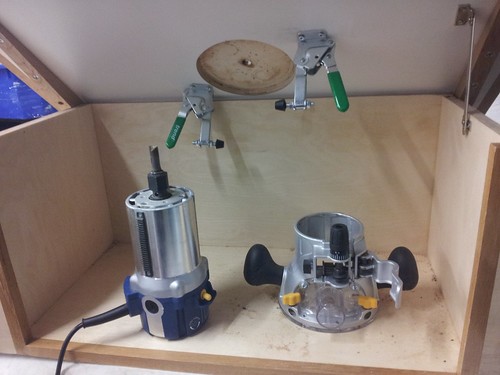
Pop open the toggle clamps, and the base is released ready for working in hand-held tasks.
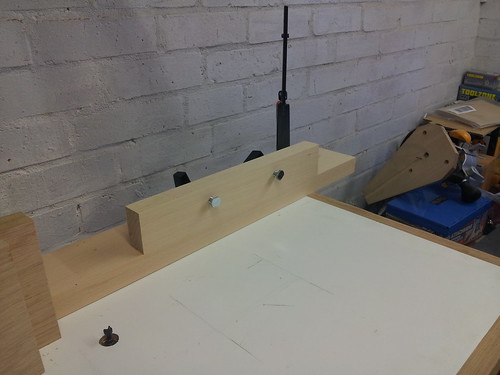
The design of the Draper router creates a completely sealed chamber under the table with a perspex dust extraction port, which is visible in the photos. In use so far this has been very effective at catching all under-table dust. I need to add some form of above-table dust collection too. It's all finished in 2 coats of clear laquer to protect it from damage.
I've still got a few more bits to do to it. I want to cut out a handle in the base, and add some latches to secure the table down when it's in use. I also will probably re-do the top at some point, because I didn't have the most success in applying the laminate the first time around and getting the edge banding level with the top. I need to make a proper fence up for it next, and a sliding fence for things like sliding dovetails in drawer fronts.
The main concept is something that can be carried around, hung on a wall and that has a hinged lid for easy access. The top is made of two pieces of 12mm ply with a hole through the bottom half, so that a fixed base router locates precisely into the underside of the top. It is secured by two toggle clamps screwed into the top, so installing the router is a 30 second job and can even be done with the perspex base plate left in. I designed it around my Draper Expect router, which I regularly use for hand held routing and jig use as well so the ability to remove it quickly is very helpful.
To access the router, the top hinges up and is secured via a stay. This makes height adjustment very easy.
Changing bits is also easy as you just slide the router out of the base. The main downside is that because the router just pokes up through the top, there is no way of closing down the opening once I use a big bit in it. Currently I've not used anything bigger than 16mm, if this becomes a problem I might machine out a recess in the top for an insert.
Pop open the toggle clamps, and the base is released ready for working in hand-held tasks.
The design of the Draper router creates a completely sealed chamber under the table with a perspex dust extraction port, which is visible in the photos. In use so far this has been very effective at catching all under-table dust. I need to add some form of above-table dust collection too. It's all finished in 2 coats of clear laquer to protect it from damage.
I've still got a few more bits to do to it. I want to cut out a handle in the base, and add some latches to secure the table down when it's in use. I also will probably re-do the top at some point, because I didn't have the most success in applying the laminate the first time around and getting the edge banding level with the top. I need to make a proper fence up for it next, and a sliding fence for things like sliding dovetails in drawer fronts.
") Sorry, is that Draper an "expect" or an "expert"? There are those who would say the former is more applicable to Draper.
Sorry, is that Draper an "expect" or an "expert"? There are those who would say the former is more applicable to Draper.