Tips on restoring this woodworking bench.

UKworkshop.co.uk

Help Support UKworkshop.co.uk:

This site may earn a commission from merchant affiliate links, including eBay, Amazon, and others.

DennisCA

Established Member
Joined
26 Apr 2014
Messages
1,058
Reaction score
211
Location
Finland
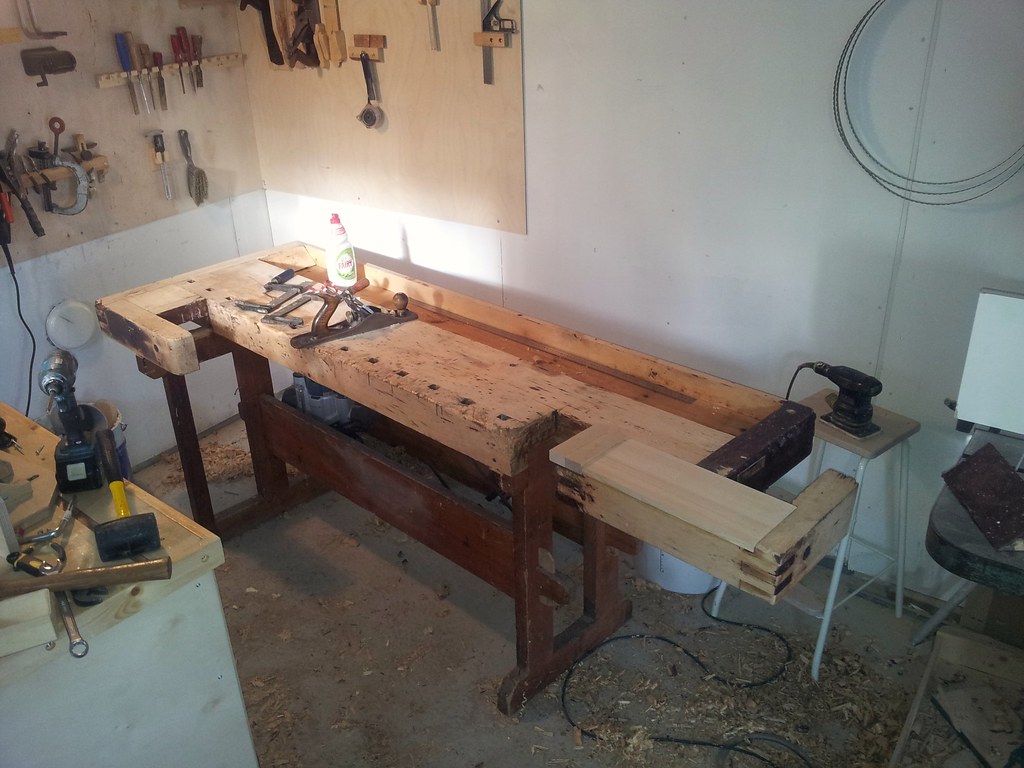
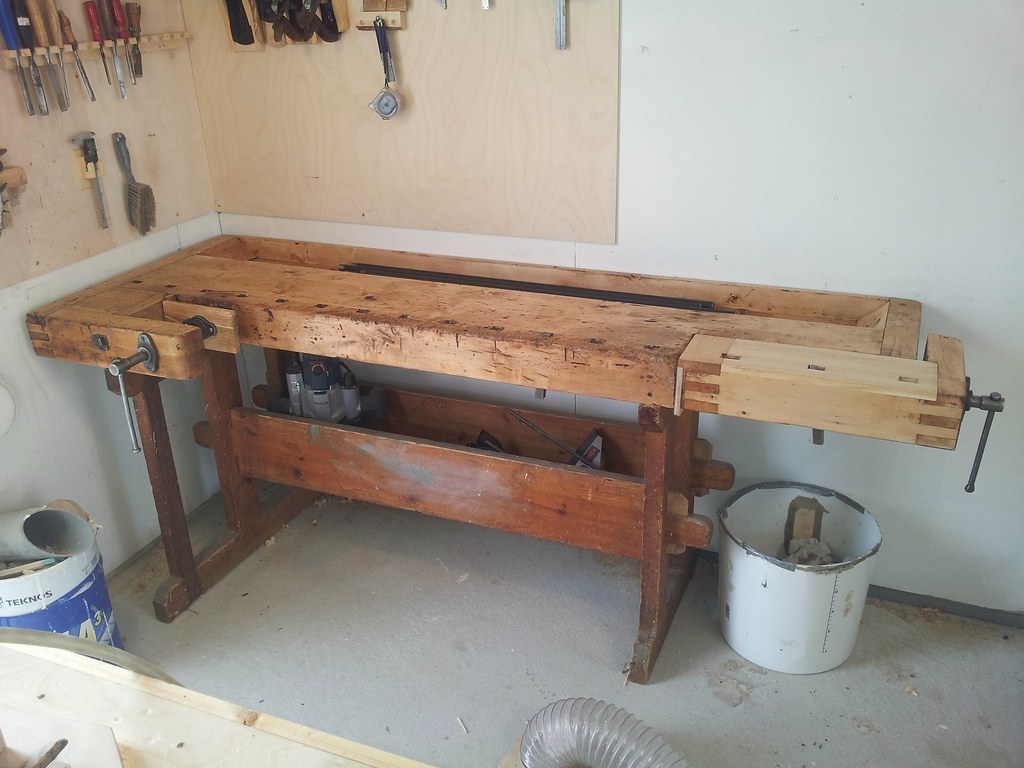
Got myself an old scandinavian type woodworking bench:
27295614956_c85025cd3b_b.jpg


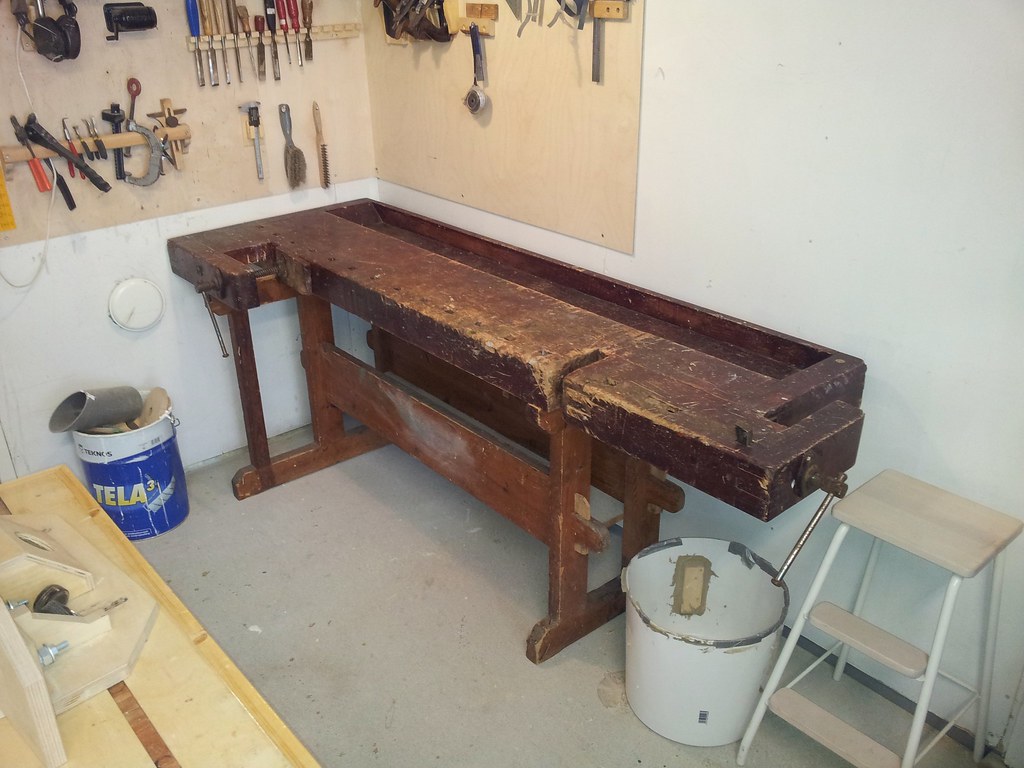
It has this dark looking (slightly translucent) paint splashed on it, I dunno what the previous owners thought but I don't like it much. Any tips on removing it?

Planing the surface will get rid of most of it but I think some kind of chemical stripper might be required to get everything from all the crevices and places that are hard to plane. Something that doesn't hurt the wood or leave it looking ugly... I would like to restore this bench as much as possible and give it a clean slate in my ownership, just some BLO for finish.

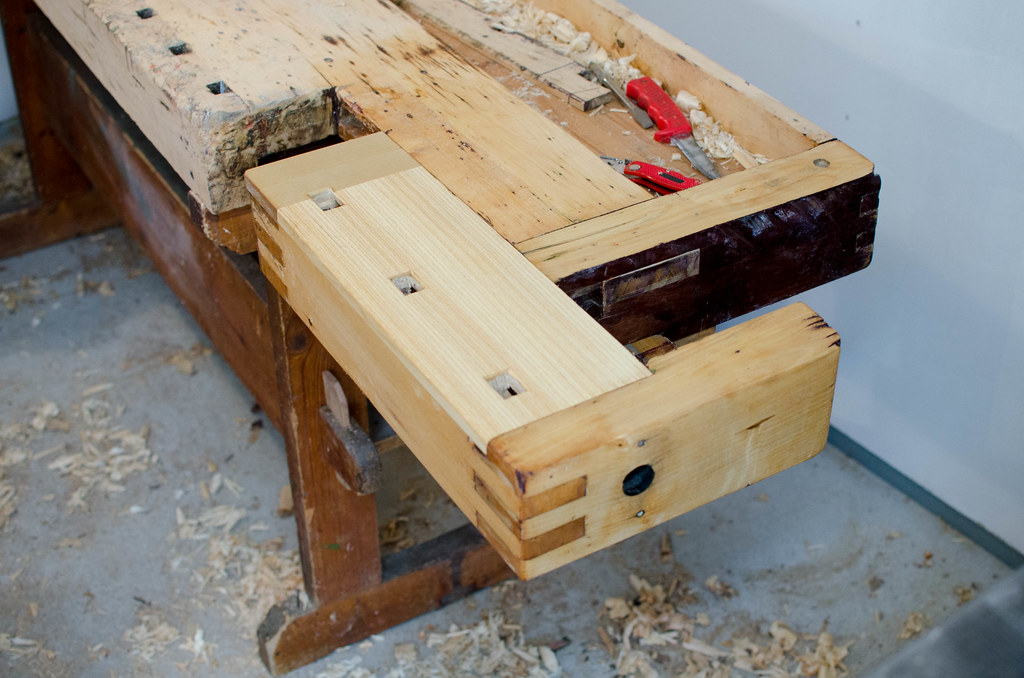
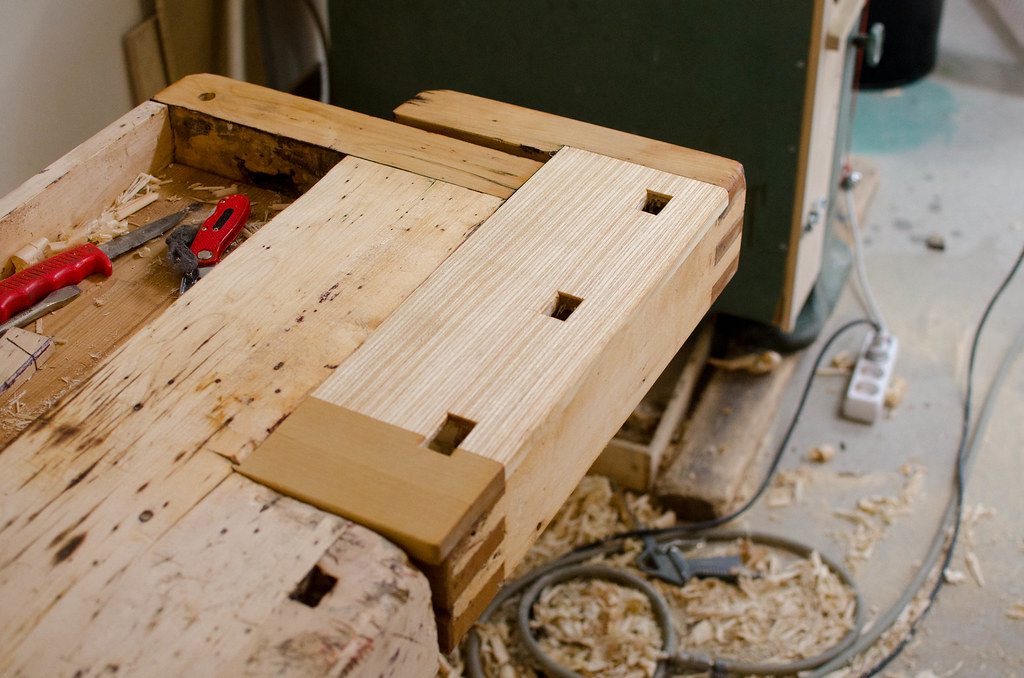
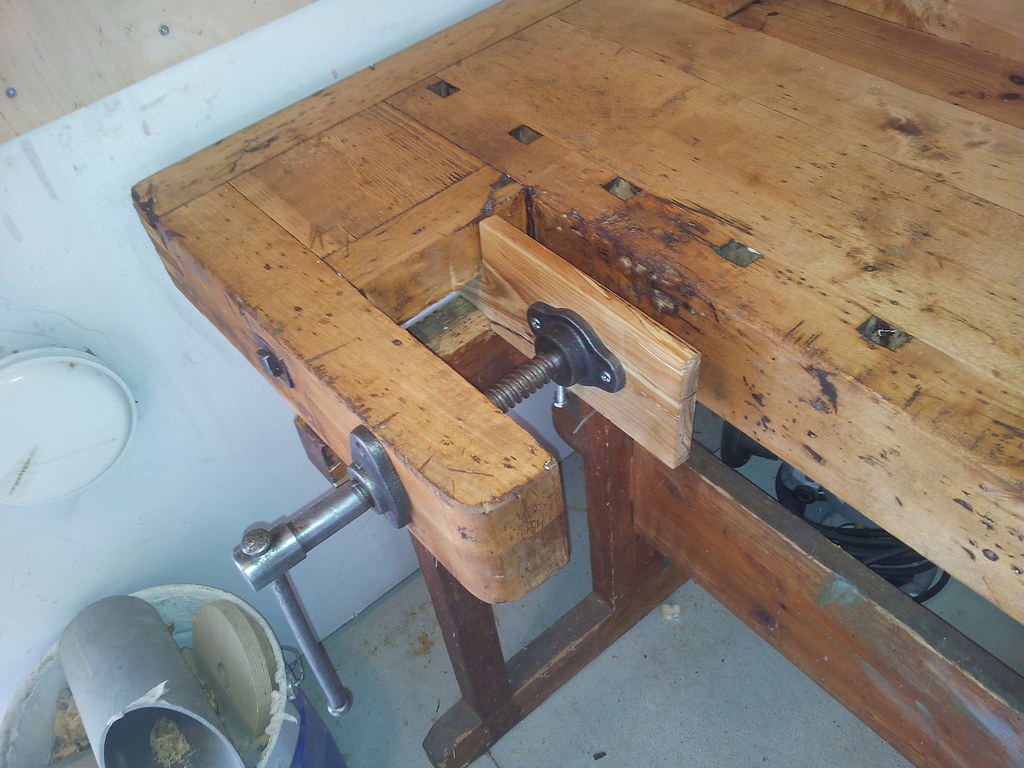
I've already taken apart the shoulder vise, the box joints keeping it together are very "gappy" and filled with crud. Taking it apart and cleaning it out and see if I can put it together without the gaps. Some parts look so worn I might need to make new parts entirely. The dog holes in the tail vise are in bad shape.
 
The tail vise is covered with an inch or so thick stock. Replacing it shouldn't be too complicated. Just drill/chisel new dog holes after that.
I'd take a few mm off the whole thing with a thicknesser. Some preparation will be needed as the thickness of the benchtop is not uniform.
Replace the badly worn parts and go from there.
I've never had great success with chemical strippers.
(This is the prevalent type of bench in my neck of the woods also.)
 
Not wishing to teach egg-sucking.:

Check for nails etc embedded in the top. You are eventually going to need to flatten the top.
Replace the cap on the tail-vice; (assume there will be a separate piece.)
Check the vices for slop. and hopefully you won't need to replace them.
Let in a new piece of hardwood along the front edge, or completely replace the dog-hole strip, if that's how it's constructed. New leather in the vice jaws.
Finally, check for racking and loose joints.
I'd try to preserve as much of the finish as possible. If you used cherry for replacement timber it will eventually darken down to a fair match.

You bought yourself a project, but it will make a solid, long lasting bench.
Best of luck.

John :D
 
I'm flattening the bench yes, and I've found nails, though not on the top. I wasn't planning on replacing the front dog hole strip yet, looks like it has life left in it, I'm not sure it's that important that the edge is crisp as long as it's flat & square.

The shoulder vise didn't have any slop that I can detect. So for now I just want to get the finish of it and then i can see about replacing the parts that need replacing.

It's built differently than you might expect, there's no inch thick stock covering the whole top of the vise, and the dog holes are integral to the piece that makes up the exterior face of the shoulder vise (not the face that clamps). I might cut off an inch and make a new top in that style.

I have two metal dogs that came with as well.
 
I wouldn't attempt to strip it back or remove old paint/varnish - if you want a new looking bench build a new one.
I'd wash it perhaps with soapy water - to make sure no dirt gets transferred to the workpieces.
I also wouldn't flatten it per se - unless it's so out of true you can't work on it.
Basic principle of good restoration is to do as little as possible.
 
Well it was too late for that, started planing the surface before your post even, smoothing it remains still. Shoulder vise is disassembled and hoo boy it's cruddy inside. In addition to the paint (it's some kinda paint, a heat gun makes it bubble and it can be scraped off, so not a stain).

Cleaning up the joints on the shoulder vise right now, will reassemble and see what if any parts need replacing, there's alot of this.... elastic rubbery gunk everywhere.... Dog holes look a lot better now with that gone.
 
I'm not so sure the principle of " good restoration is to do as little as possible " applies for a workbench you are going to use, antiques for sale or investment certainly but a working bench? - not in my opinion.

I'd do exactly what you're doing and get rid of all the crud then repair and put it back together as best you can. If the top is reasonably flat I doubt I'd skim it but would take an orbital sander over to get rid of the old finish and then oil it, doesn't really matter if you don't get all the dents and gouge marks out, just fill them, they're part of it's history.

I've got a crappy old school bench and the advice at the time from Jacob suggested that basically it's rubbish and don't bother restoring, but cleaned up, oiled and a second vice added and it's a great little bench which does exactly what I want and looks half reasonable as well. I used danish oil on mine. I could easily have made a new bench but get great satisfaction bringing and old one back into use and often think of the kids who used it to make their little projects home to proudly show off to mum and dad. :D

We're all different so do it up as much or as little as needed until you're happy with it to be a part of your workshop what anyone else thinks does't really matter, does it?

cheers
Bob
 
Yes I did not buy this bench just to have an old bench, I needed a bench and buying one was cheaper than the materials for a home built one. It was only 70 euros and the seller delivered it and even helped me lift it in place.

The vise hardware alone, being metal, is worth more than that if I would've had to buy it new. Likewise for the hardwood (arctic birch).
 
DennisCA":21gzec5i said:
It has this dark looking (slightly translucent) paint splashed on it,
...
In addition to the paint (it's some kinda paint, a heat gun makes it bubble and it can be scraped off, so not a stain).
It may be simply tinted linseed oil. Even without some colouring agent given the right conditions linseed will darken a lot over time, although it does look like there's some pigment or dye in there.

DennisCA":21gzec5i said:
It was only 70 euros and the seller delivered it and even helped me lift it in place.
Bargain!
 
Partially through restoring it, been going at it the hard way with planes and chisels and sandpaper... Had it apart quite a lot before reassembling againt last night. The top of the shoulder vise was in such bad shape I am replacing it entirely. Didn't have enough birch so I've used ash which looks similar but has a more defined growth ring texture. Need to plane the new material flush still and then consider a finish... I have BLO, I have real tung oil, I could also do an oil & wax finish, using something like black bison antique pine finish would darken the wood somewhat and reduce contrasts.

I simply flipped the tool well bottom around for a fresher face.

27421174451_b67fcd2650_b.jpg
 
That's coming along nicely.
Perhaps if you cut out a ~40x40mm rebate on the front top edge and replace it with
a strip of beech or ash, you'd get rid of the nasty dings and cuts.

"I simply flipped the tool well bottom around for a fresher face."
They did that with tablecloths in some fine restaurants I used to frequent as a student. :)
 
I think the dings that remain won't negatively interfere with function so for now I will use it as is. I don't have much hardwood in my shop except a few cut offs.

If I replace it I would like to use birch which is the material the bench is mainly made from, the traditional choice for woodworking benches above the stockholm/helsinki latitudes.
 
Personally I would avoid anything containng wax! I hate a slippery workbench surface. My bench was oiled the first time round which is allrighht, but I didn't reoil it when I planed it flat once again. In your case I would use something with a bit of color though, to make it less jaring to the eye, but it would need to be penetrating deeply, otherwise every cut or gouge in your bench opens up a light spot in a dark surface. The other choice would be to sand the bottom structure too.
 
I suppose I could try and make a pigmented oil, I have made some earlier but it's a pine-tar / oil / turpentine mixture meant for outdoors use and rot-protection. But you need very little pigment. I dunno if I have found waxed surfaces to be that problematic tbh.

I've never been satisfied with separate stains though.
 
Working on the vise, added dog holes, and tried an application of tung oil on part of the bench to see what it would look like. Those black spots are annoying but it's hard to see what can be done except color the whole thing a little to tone the contrast down. Better than purple!

27461906591_c16149fae5_b.jpg


27499962606_5e8bee0f0f_b.jpg
 
Well I'm calling this finished now. Well, still need a leather face, the face for the shoulder vise is temporary too.

26988351354_e85e9fb3ac_b.jpg


26989569653_972e7abb2d_b.jpg


Slightly pigmented oil (BLO+turp+a dash of tung oil). The front vise face was also remade because the old piece was just broken. I also re-threaded the screw holes for the bolts that are supposed to hold the threaded rod in place, they where also too broken and in bad shape. Fortunately an M6 tap worked perfectly to chase new threads with. I think the old threads might have been UNC threads. I'll have to cut the bolts short.
 
An excellent bench. I'm sure it will give you many years of good service.
All you need now is a bench jack or something similar to hold the other end of a board and you're good to go.
 
Back
Top