finally got some work in progress, the coffee table saga.

UKworkshop.co.uk

Help Support UKworkshop.co.uk:

This site may earn a commission from merchant affiliate links, including eBay, Amazon, and others.

engineer one

Established Member
Joined
25 May 2005
Messages
3,070
Reaction score
0
Location
Wembley, Middx
we had thought to make this lump of oak into an oval table ages ago.
however having not got round to it, i decided now to make it into a more rustic, and shapely sofa table which can be used for food or drinking
whilst watching tv.

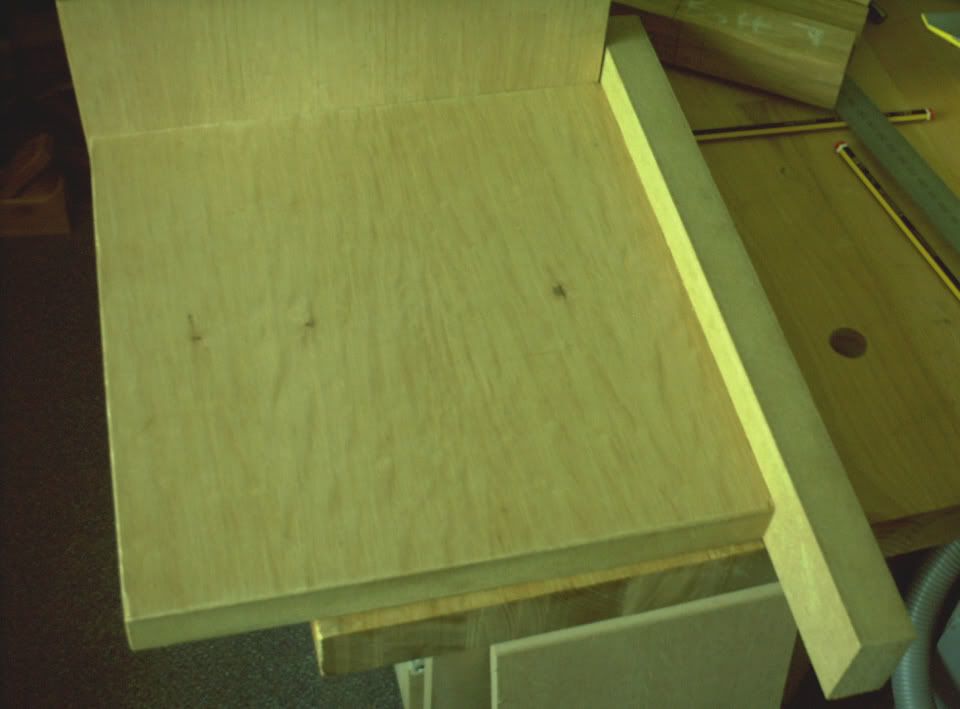
the top is about 900 x550x 35mm has one slightly curved side and the other side is not square either so it has charm.

i checked through my stock of oak offies and found enough to go where i want. so recently i spent some time hand planing this to flat face and edge, and left it to settle.

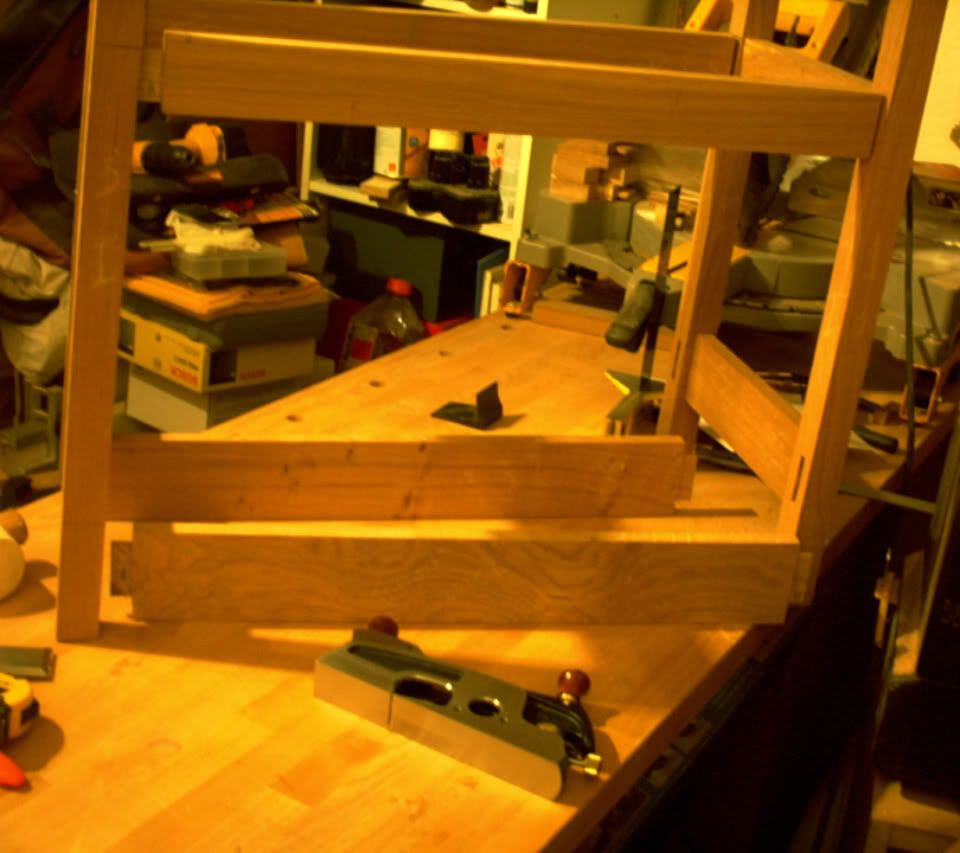
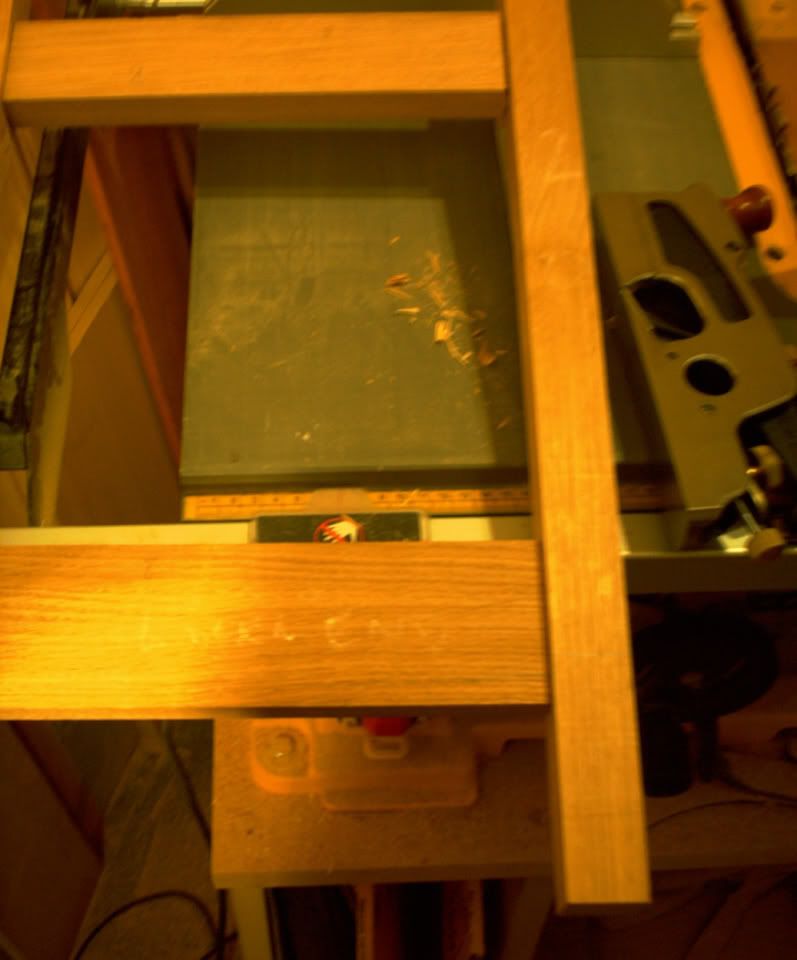
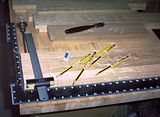
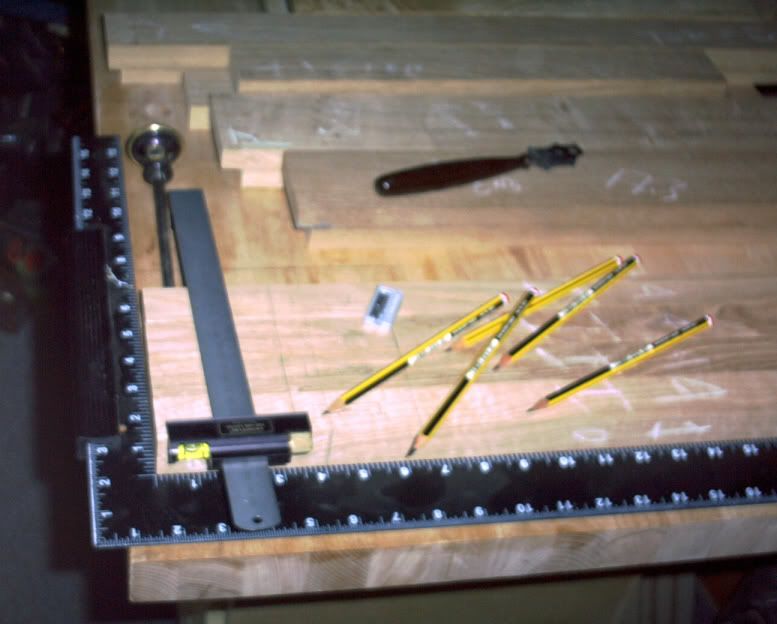
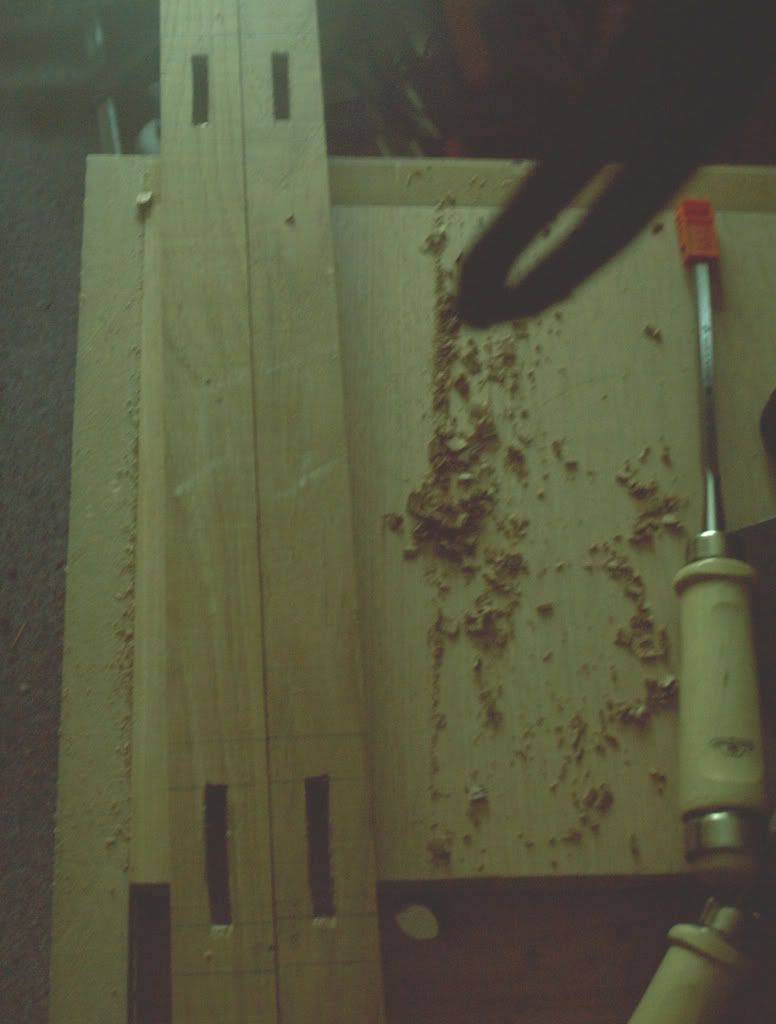
after a number of discussions here, i decided to make a jig for more accurately laying out the mortices in the legs and ensuring that i got the legs orientated properly all the times.

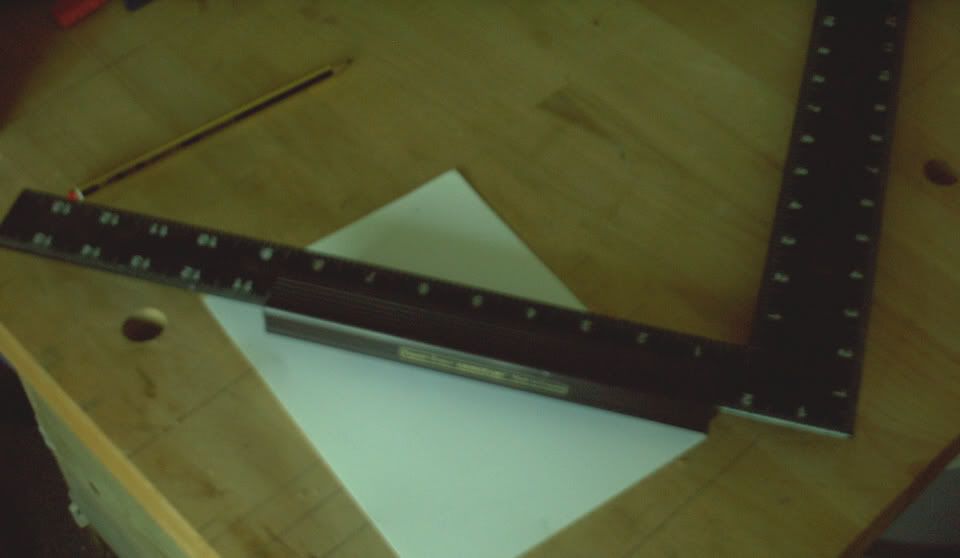
it is only a simple base with two sides at right angles to each other. the toe board is higher than the side to allow for use of the square across the sides. i just cut up some offies and screwed them together.

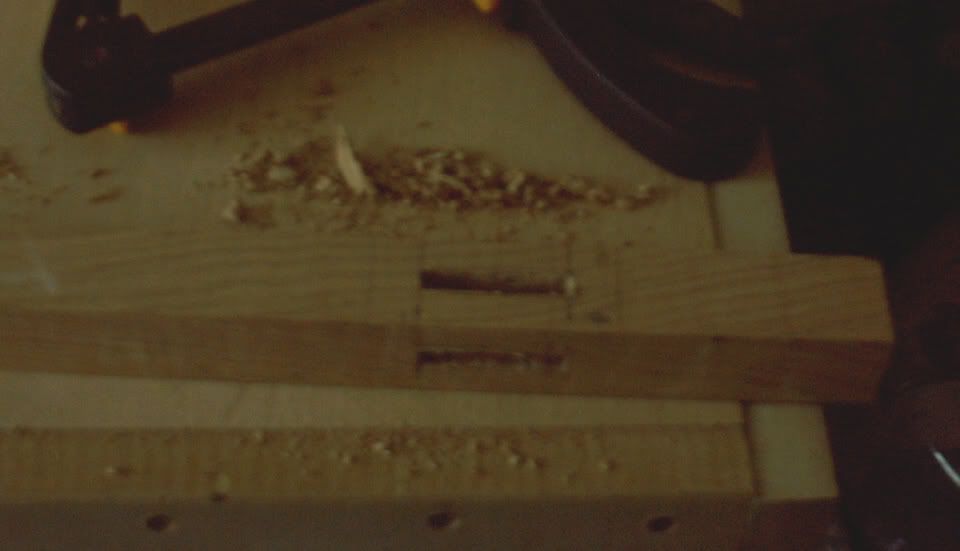
since it is not as long as the legs, i also ensured that i had spare piece of wood the thickness of the base to ensure that the legs would stay horizontal. i then clamped them in the jig, and marked out the mortice tops and bottoms and the orientation.

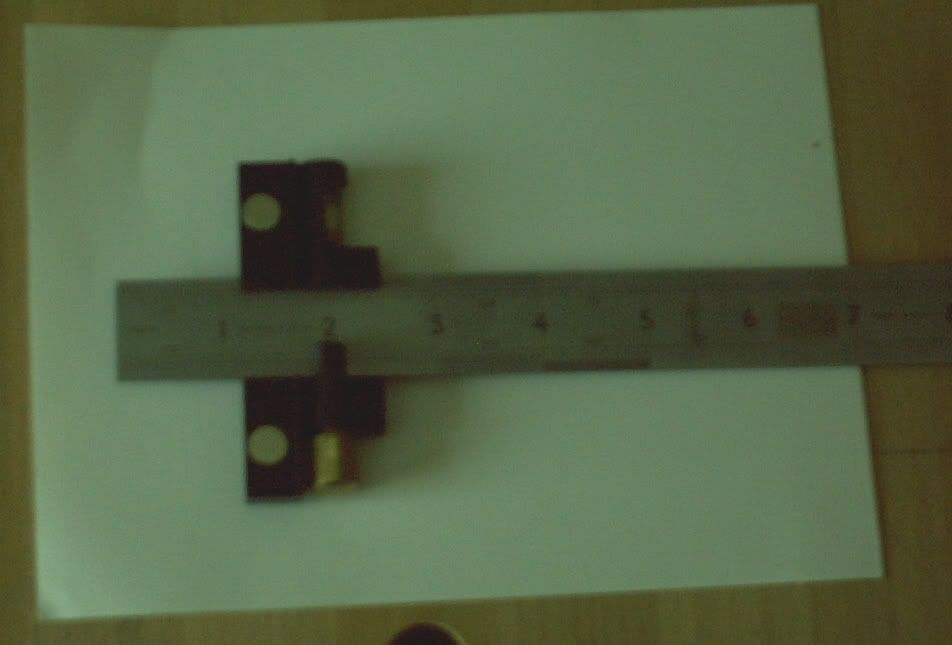
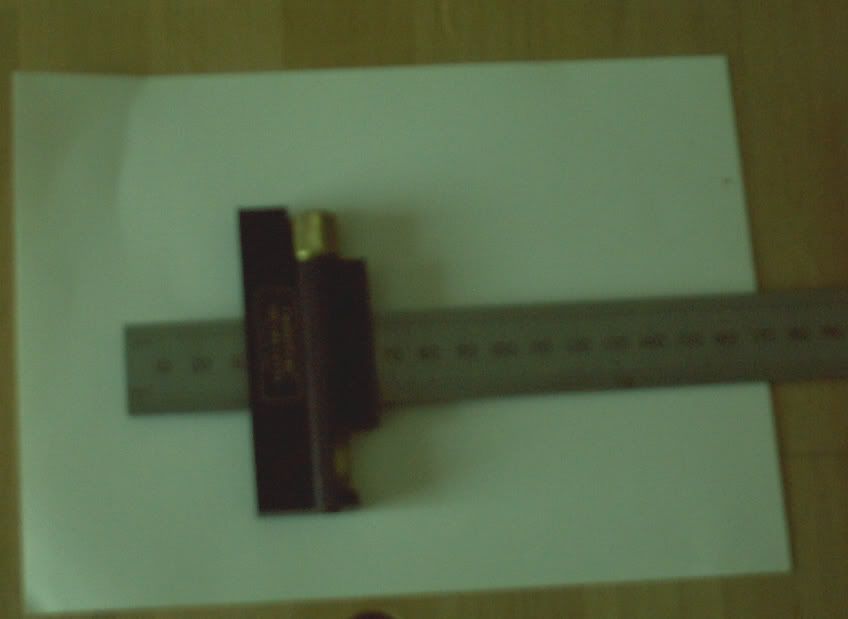
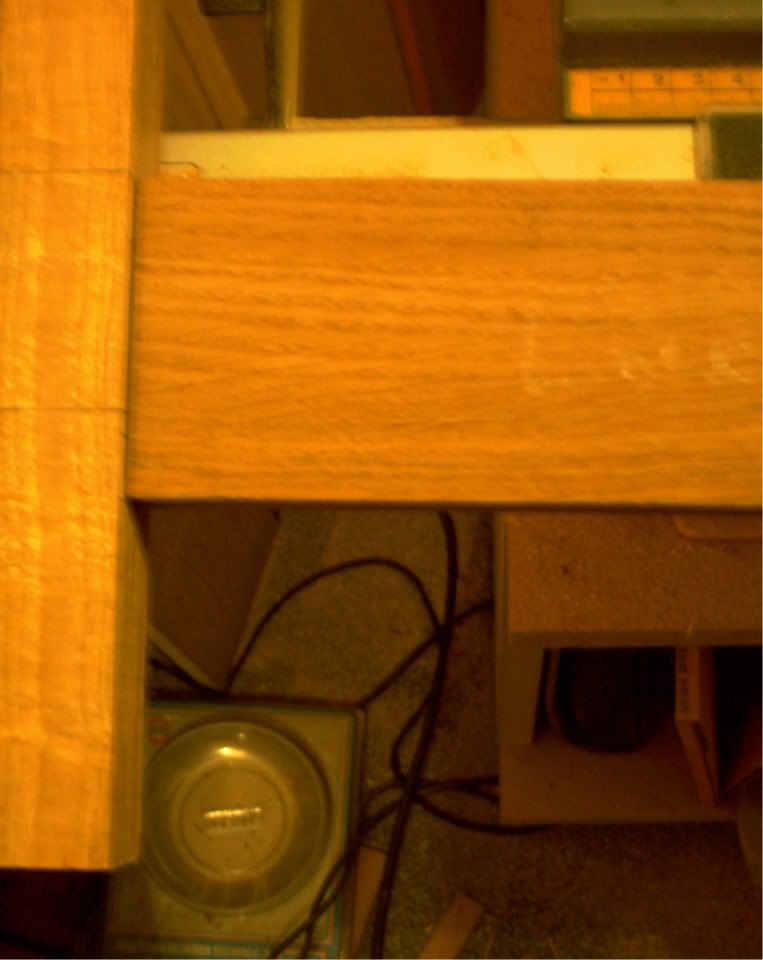
upon release i used a wheel gauge to mark the widths.

th_layoutofmortices1.jpg
[/url]


[/img]

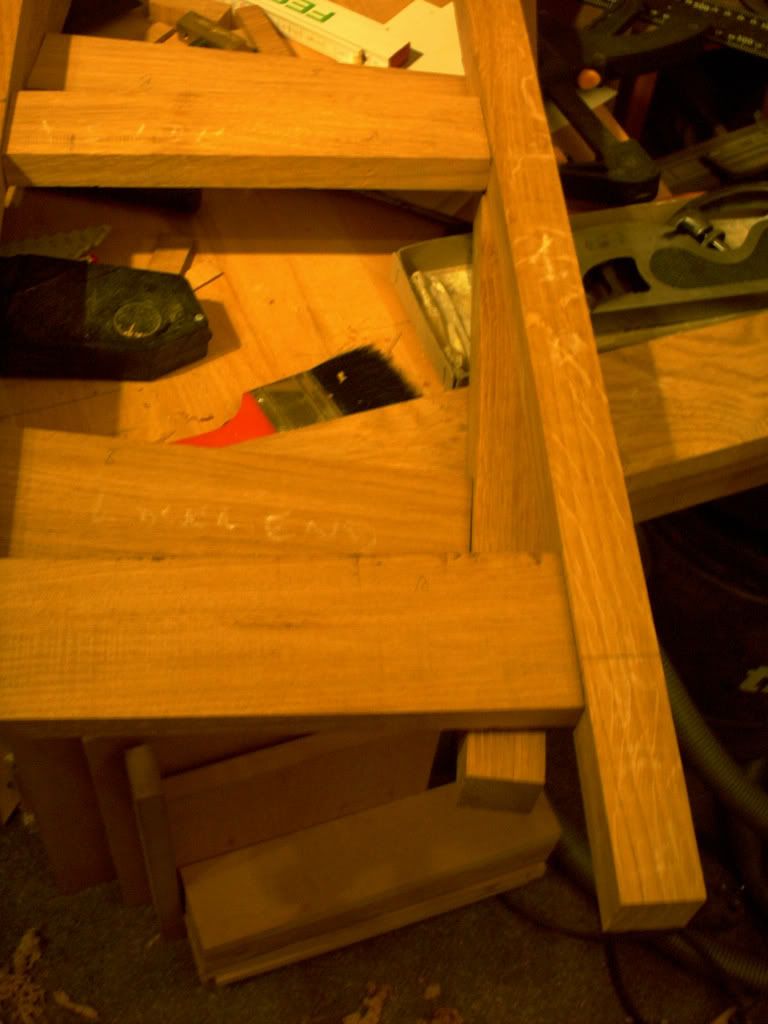
this shows the jig, the marking tools, and the wood pile before cutting :roll:

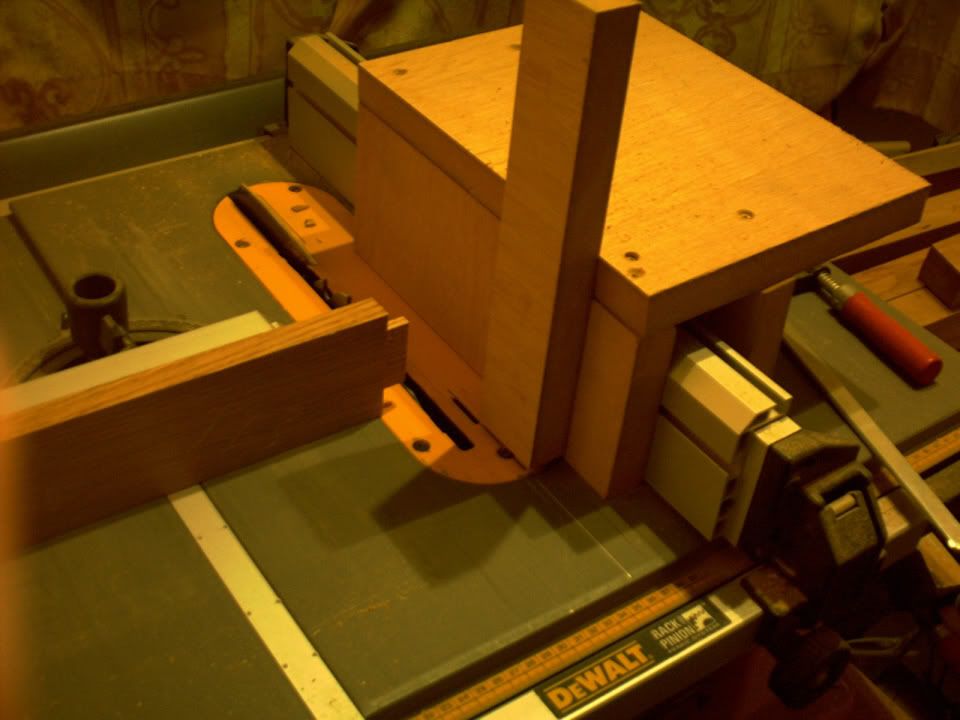
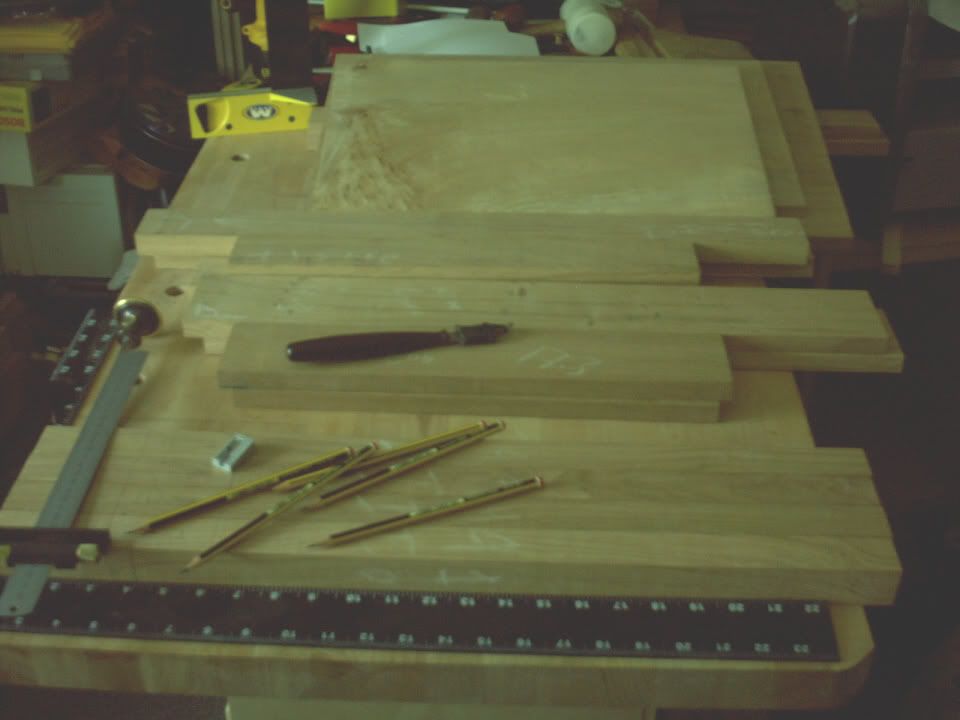
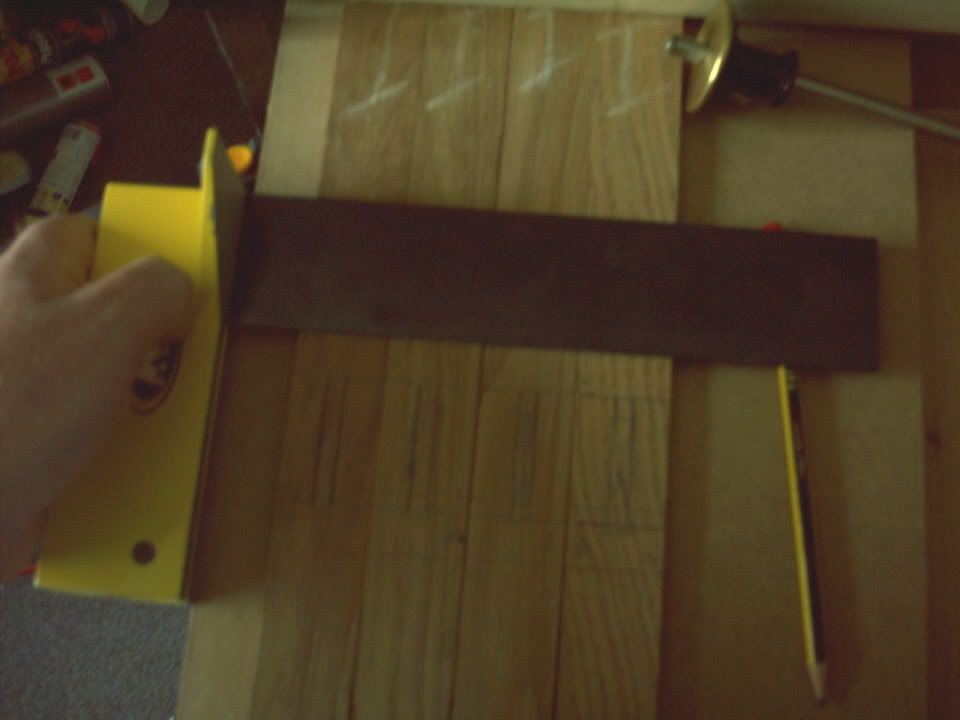
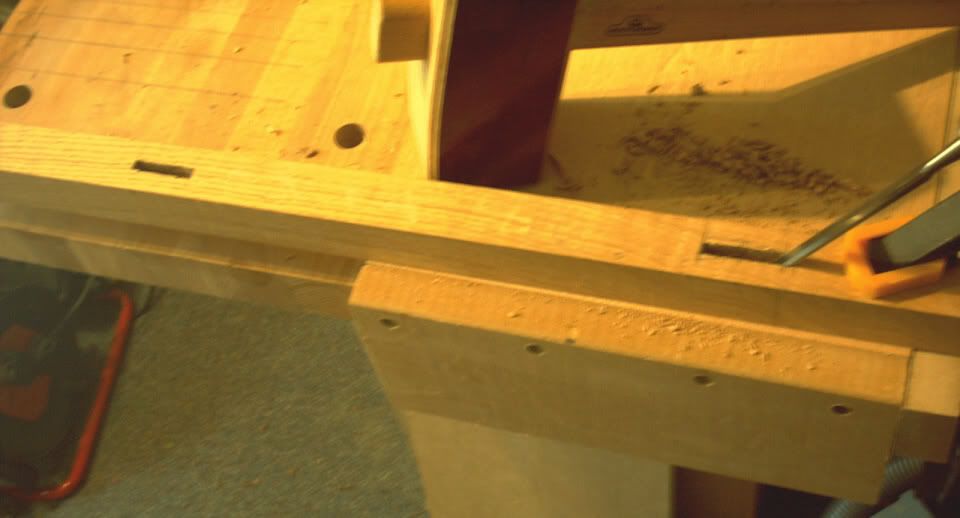
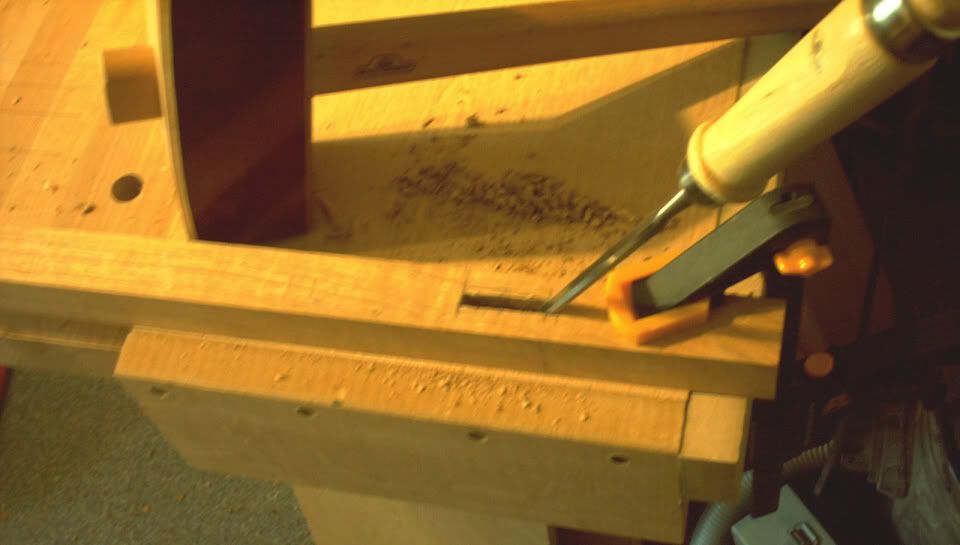
the next stage is to cut the mortices, and the jig is universal enough to be turned over and used as the cutting surface for the mortices.

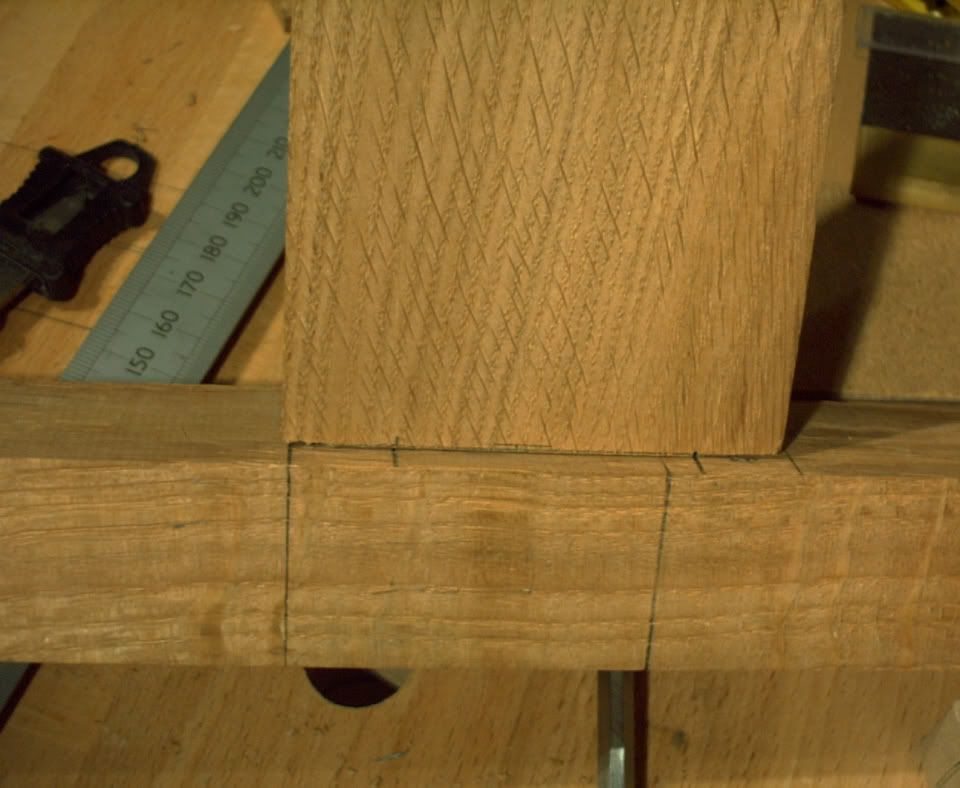
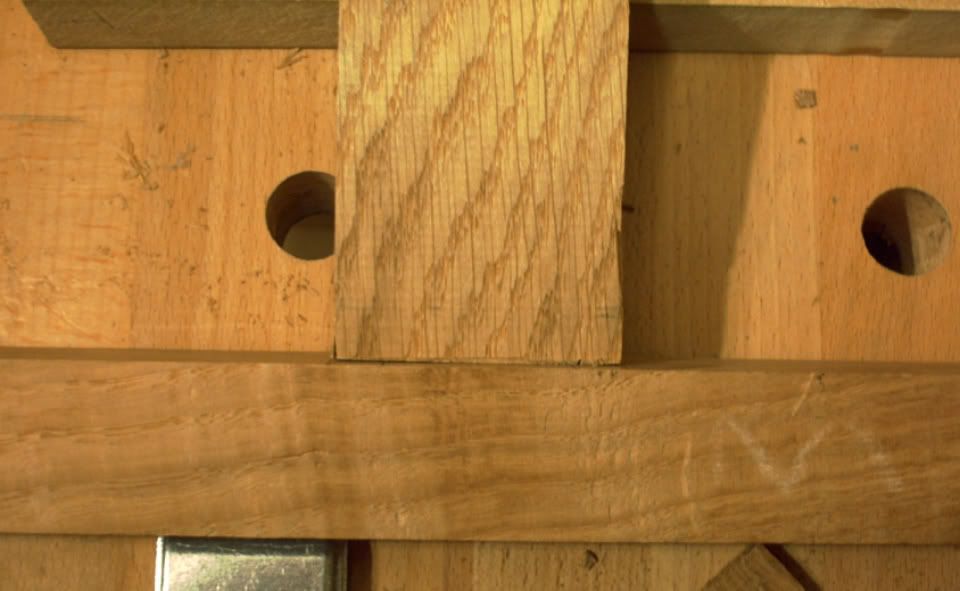
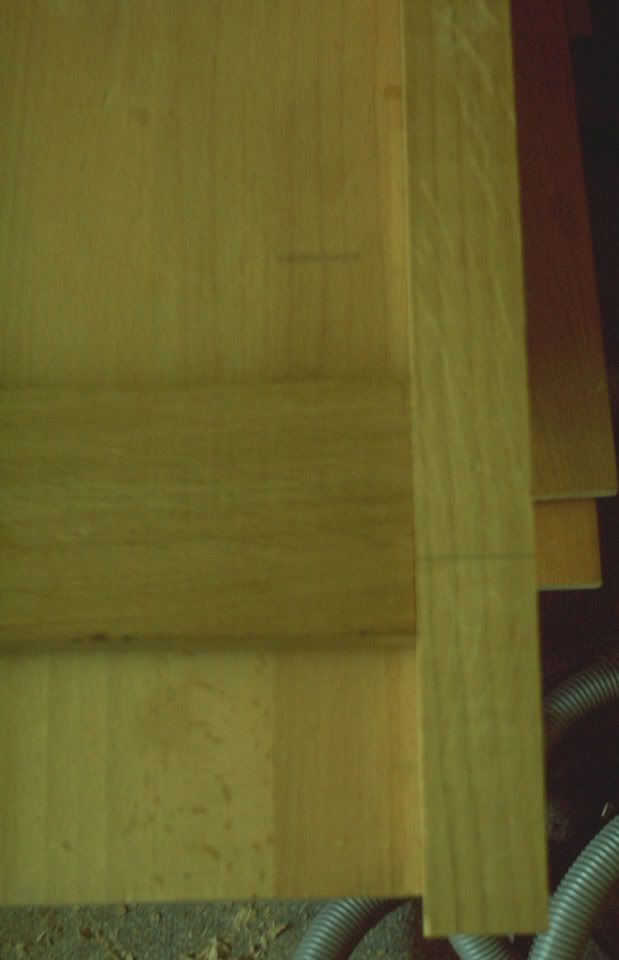
next bit is the legs with the mortices.

sorry about the different picture contrast, my workroom has very bad light, and my camera is not all it should be :?

paul :wink:
 
second stage the actual cutting

the legs are english oak about 33x33 x600 mm and there are cross rails at two levels so there are a total of 16 mortices, in 8 pairs, since they are blind but connected. so i will need to make the tenons mitred.

the mortices are 35 or 45lon 6wide and 15 deep. not quite centred in the leg, so there will be a small inset.

th_closeupother2mortices.jpg
[/url]


[/img]
once again sorry about photo quality.

however this is the first time i have cut mortices by hand for a very long time. interestingly i did it two ways since i did not do them all at the same time, i had to be careful of the noise at times.

some are cut using the mallet and an ordinary chisel, not a pig sticker, don't have any of those small enough, whilst others were cut just using the chisel.

so now we know i can sharpen chisels :lol: :twisted:

what is interesting is that the time taken to cut the mortices is about the same with either method.

i did this as suggested by others in that i started in the middle, and putting the chisel across the gap pressed down in a number of places, then levered out. took about 10 minutes per mortice.

so the real question is how this way do you ensure the mortice sides are flat and level, or does it not matter.

the basic rule is you mark the mortice width to match the chisel you are using. then you go with the chisel across the width, and you move a little at a time, so by the virtue of this action you get a kind of corrugated surface to the sides. i guess this helps with glue retention :?

the real pain is getting the bottom of the mortice flat if you do not have a swan neck chisel.

once i had done all 8 mortices for the side to side rails, i then laid the legs back into the jig, in pairs, and rotated them properly to ensure i had 4 legs with mortices in the correct place.

now i have 4 legs with 16 mortices and they face each other properly. =D>

they are not as tidy as i would have liked but much will be hidden by the tenons and their shoulders, just bope the glue will ensure it all stays together properly.

am still wondering whether to use fox wedges inside or whether that might not be too much. :?

not sure how much longer the rest will take, then i wonder whether it might be good enough to enter in the competition, if it fits a category of course :roll:

paul :wink:
 
Are you sure you have enough pencils? :lol: :D :lol:
 
:-k pencils well yes :roll:

i bought two lots from tesco at the discounted price, and thought well rather than have just one sharp one :lol:

actually the erasers are great for removing the pencil lines from the oak at least.

paul :wink:
 
Paul - mortice sides should be reasonably flat and level, helps if you have a thick mortice chisel (pig stickers are good), your method of cutting sounds about right. I assume you're standing in the correct place at the end of the bench, wood cramped to the bench disappearing away from you, with the mortice positioned over a bench leg?......very easy then to see if the chisel is dead vertical. Be very careful using a standard chisel to lever chips out of the mortice....could end up being expensive :wink: Doesn't matter if the bottom of the mortice is a bit ragged, I usually chop them longer than the tenon by about 3mm. Some bruising of the end is evident from the pics. I ususaly chop out the bulk of the mortice leaving 2mm at each end to stop this happening. The last bits at each end are chopped in one go, chisel resting on the line and the waste levered towards the mortice (ie away from you) and I then use small screwdriver to break up the chips which are then easy to eject from the hole.
BTW, you definitely need more pencils :D - Rob
 
Off topic but I'm curious about that level/stop thing on the steel rule. It looks like a normal chesterman rule - is that stop an accessory for a standard rule or did it come as a set? looks like it could be useful!
 
will take another photo later for you, but it is in fact a veritas part. :roll:

designed cleverly as usual by those clever canadians to fit all 1inch rules.
i would guess brimarc can supply if they have them in stock.

paul :wink:
 
veritas call it a square level, and it is part number 05N43.01
as you say quite useful.

rob since i did not have a pig sticker, i needed to use what i had.

of course what i talked about in relation to the sides being uneven is to do with the narrowness of the chisels i am using, a pig sticker would be better, but as i said, have only got a 12mm one. must look out for narrower ones next time i am shopping :roll:

thanks again for the interest

paul :wink:
who can't make a monks seat in a weekend :cry: :oops:
 
ok so a couple of photos of the measuring items i use which are both veritas items, and as usual, well made and very useful accessories.

one of them is specially for dom, showing how i keep my rafter square square :lol:

th_roofingsquareplusveritasedgefence2.jpg
[/url]


[/img]

the square level i find very useful especially also as a depth gauge which is what i have used on the mortices :roll:

veritas also do a number of other squares which are pretty useful and acknowledged square.

oops better stop plugging rob lee any more or i'll get slapped wrists :twisted:

hope this helps
paul :wink:
 
trying to figure out the best way for me to do the tenons.

these are the first ones i have wholly hand cut.
used my LN dovetail saw to get the shoulders and bottom lines.

but since my hand sawing is the pits i might look at another way of doing this. :cry:

this is a test cut, and i cut them slightly oversize and then cleaned them up with one of my shoulder planes, i used the clifton 420 boy is that mouth tight :roll:

th_firsthandsawntenonrear.jpg
[/url]

[/img]

top picture is the rear view. and is not so good,
but the lower picture shows the front which ain't too bad :?

part of the error is due to the shoulder join. i think if i did it on the table saw it would be much easier to sort.

anyway since i have enough waste so far, will play around a little more with hand sawing and trying to find a better way completely by hand.

actually made the tenon a little too short, so that gives more reason to be not to unhappy.

the other big problem is being sure that you have cut to the lines properly all the time :? still that is only practice isn't it??????

paul :wink:
 
so after a long afternoon walk, i thought about another way to cut the tenons by hand.

this time, i cut the shoulders at top and bottom first. to depth too.
still problems

next i marked the width and then cut the final size. so i ended up with a curve across the shoulders. now since i am using a backed saw i wonder what i am doing wrong??? :?

th_secondtenontest2.jpg
[/url]

[/img]

as you can see i can get one side right but not the other :roll:

part of the gap is due to the tenon being slightly long but since it would need mitring, then that part is manageable. what is not is the fact that i manage to get a convex curve over the width. i also managed to get the shoulders a little low at the corners too. :cry:

so the best thing that has come out of the weekend is the movement of a better task light to within my working area. amazing what a difference full light can do even in daylight. :lol:
sadly the window of my workroom, is that it seems to hide the light not
enhance my working. maybe it is my age too, but it is certainly important to have decent all round lighting/light and sunlight on its own does not always cut it :roll:

paul :wink:
 
Paul,

Have you tried marking the work with a knife, making a fairly deep cut, then chiseling (on the waste side) up to the knife mark so that you have something for the saw to run in? That would help you to get the cut straight. You might still need to clean the shoulders a little, but that could be done using a sharp chisel.

Cheers :wink:

Paul
 
thanks paul, not thought to do all that.

what concerns me is that i start out straight, and it seems to go on the pee
somewhere in the working :cry:

fortunately i have some spare wood to practice on and i know i am wanting to run before i can walk(saw :roll: )

paul :wink:
 
Paul,

I would second Paul's advise on using a knife and reliving the waste with a chisel.

Which cut did you make first? I think you cut the narrow edge and then the wider face and the two sets of cuts are not quite in line, giving the apparent curve.
 
tried another test, this time with a slightly narrower but thicker piece.

did what paul and dave suggested, and cut lines around.
still no coconut, but getting better i think.

so all it takes is practice :twisted: :roll: :lol:

still not right, but

th_thirdtenontest2.jpg
[/url]


i am still concerned that it might be easier to use the table saw or scms to cut the base line straight across, then nibble the other bits by hand.
know it ain't all handwork though :lol:

thanks again

paul :wink: [/img]
 
engineer one":1ifiuwyo said:
i am still concerned that it might be easier to use the table saw or scms to cut the base line straight across, then nibble the other bits by hand.
know it ain't all handwork though :lol:

Or, as you've mastered the shooting board, you could just plane the pieces straight and square, rout mortices with an electric router, then make up some loose tenons and glue it all together. OK, it's not all hand work but just as good as a well-made mortice and tenon joint and much better than a badly made one.

Cheers :wink:

Paul
 
as you say paul there are many ways to skin this cat :roll:

i could always go the whole hog and buy a domino :lol: :lol:

however, i will persevere a little more and see what i can come up with
as an answer that ensures i solve all the problems.

i think that what i am trying for is the simplest, most elegant solution
in relation to my skill level at this time.

having tried it now, i am unhappy at my skill level, but know that much is back to a lack of practice, so will try more tomorrow. :?

paul :wink:
 
ok so made some more progress.
mind you still not figured out how to arrange the photos in a proper order, so you will have to search.

on monday i made a tenon jig for the table saw, first one was not too accurate, so i remade it. then discovered a major problem, because of the supports against the back of the fence, it was too near the blade when the tenon wood was in place.

so i cut the various cross rails to the relevant lengths including the tenon length.

then i used the tenoning jig in a different way, i remembered the way in which norm does it. and so knowing that scrit will kill me for having an
un protected blade, i tried this way. i do not recommend it, but since the max extension is about 10mm and my hands were always at least 6inches away, and i had really good light, i felt reasonably safe. but i waited for the blade to stop every time. :roll:

basically i set the blade at the relevant height for the particular section, then set the mitre gauge properly, and then set the tenon gauge at the
correct distance so that it was the right length.

on the long sides, i started at the back, and got the straight line i wanted, then moved toward the end of the tenon in small steps until it was cut all the way. some small steps but since i had made it slightly too wide, i used my LV shoulder plane. :tool: really nice and easy to use, and because the mouth is adjustable more simple to use than the clifton 420 i have.

as you can see, i have made the deeper rails at the bottom, whilst the narrow ones are thicker, so i set all at the same depth from the front of the rail.

i then used the same nibbling method to remove the ends of the tenons, but learnt a real lesson in that you need to start at the end, and work back toward the shoulder, otherwise bits get clipped off.


so i have basically made the lower frame, i need to fettle it more to make it work properly, but so far seems square and reasonably flat so.

next time i might well use the router and my rat, but i had hoped to do it by hand so this was a reasonable compromise and ensures that i get a relatively quick and accurate result.

th_sortofassembled.jpg
[/url]


[/img]
one is an end view of the same
the next one is the first fit of all 8 cross rails. getting there :roll:

next is the tenon jig, using scraps of mdf i have around

then a number of the fits in the end rails. in principle they are better, but one problem with cutting on the table saw does mean a little tear out so i may end up using shadow lines :lol: probably a chamfer on each vertical.

anyway progress i guess. once i have got the tenons sorted and am happy with the fit, i will dry assemble and see how i can do the centre section.

i intend to have infill end panels, but not sure about the back, and whether i will have a drawer unit in the middle, have to be sure it is not overwhelming.

think i am improving
:whistle:

paul :wink:

.
 
more movement forward.

sadly i am not as quick as jason or dom, but since i am also learning :lol: :roll:

as mentioned before i cut the tenons using the table saw. however i got more break out than i wanted. in part that was because i forgot the router trick of doing the end grain first.

so i reset the saw to give me a slightly bigger nibble against the tenon. to overcome the break out.

started at the smaller side, and hence basically avoided break out.
then i had to chisel away the ridges. took note of a trick in the latest FWW which is to chisel down slightly toward the tenon so the outside of the shoulder is slightly higher than the inside against the tenon. ensure that you have as level a surface as you can get.

mitred the ends of the tenons so that the cross ones would fit properly :roll:

then massaged to get the fit. involved making them slightly shorter, and also a little more manipulation at the bottom of the mortice.

so here goes the two ends ready for glue up almost

th_shadowlinesontenon1.jpg
[/url]


[/img]

as you can see i have managed to get the two ends almost exactly the same length and placement. i also had to adjust the width, to ensure both were the same. this is mainly in the bottom of the mortices.

finally i decided to consider shadow lines, because although i was quite happy with the joins, i felt it there would be less long term break out, and also it would divert the eye.

having never used shadow lines before i can now see why they are so popular. they really do divert the eye, and make the joins look a great deal better. mine are about 3 mm down and done with my LN block plane.

most important lesson is that you need to put the two frames on top of each other to ensure they are the same width. this generally involves a small adjustment to the inside of the mortice, although shortening the tenon is also quite important, not least because i have the lengthways ones to fit.

so i have to finish off four more sets of shadow lines. then do the long rails the same way. next stage will be finishing off prior to glue up. not sure whether to scrape or sand yet.

interesting question though what do you do to mark the joints that you have so carefully matched after you have sanded?? i guess marks around the shoulders. any ideas. or what about masking tape.

i am still figuring whether to have end panels and so will consider that over the weekend. will see whether the stanley plough will work. want flat panels so, i need to figure out the best way to put a tongue on the panel. maybe table sawn again. :roll: otherwise maybe i can try a planing job.

want the panel to be as near to level with the frames as possible.
think since it is lime will look nicer that way.

anyway will get the major underframe finished by weekend.

next thing is to sort the top and the m/t's there.
question how much land do you need on the top of a 33x33 mm leg to hold the table top i am thinkin about 6-7,mm on each side. any other thoughts???

also i cannot be sure whether to taper the legs. think it needs an assymetric one. less at the outside more inside. if so how easy is it to do by hand??

thanks again

paul :wink:
 
Back
Top