wobblycogs
Established Member
Many many thanks Bob. I'll bear that in mind when deciding whether to go ahead with this particular project. I actually have three phase power to the house it's just that because of the state of the place I can't get three phase to my current workshop (a first floor bedroom).
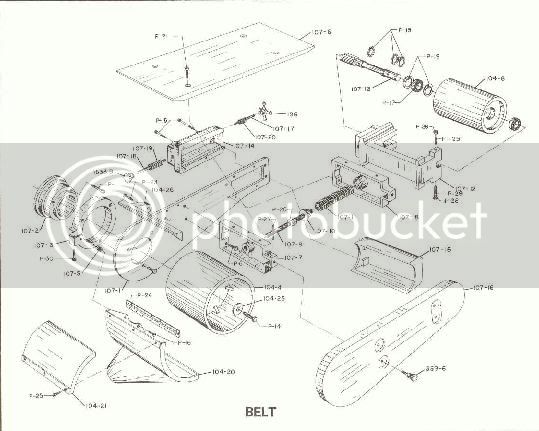
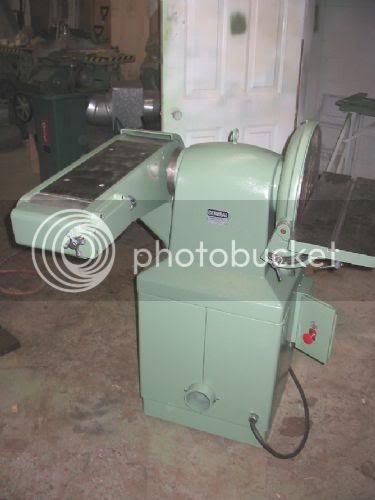
What I'm currently thinking is this: get a big inverter (3kW say) and a 0.55kW three phase motor for the belt sander project. When I move to my real workshop in the cellar I'll run in three phase power and use that directly on the belt sander freeing up the inverter for use on the bandsaw - if I understood your motor document correctly an inverter is needed for variable speed.
I think the inverter has a RS485 port which can be used to program it. I'm on much more familiar ground with programming, I wonder if I could knock something together that allowed me to switch programs at the touch of a button... project for another day I think. I hear what you are saying regarding the plug and socket though, will have a think about whether it's worth the risk.
What I lack in skill I try to make up with enthusiasm and lots of reading. I should have become an engineer rather than a programmer - it's far more exciting building things in the real world.
 . The springs I received from ebay are the wrong type (tension rather than compression) and the guy's not responding so that could cause a hold up. I also haven't got a v-belt yet as I don't know the final distance between centres for the pulleys.